Wish List

Friday, February 25, 2022

A commissioned card...

 My reputation as a cardmaker at the thrift store has led to making a couple of cards commissioned by one of the customers. This is the second of those cards.

The customer gave me the sentiment she wanted on the inside and other than that, she just said to create whatever I liked. I decided on a gatefold card with a scalloped oval on the front. "Happy Birthday" was cut with a die and adhered to the oval, which was attached to the left side of my gatefold.


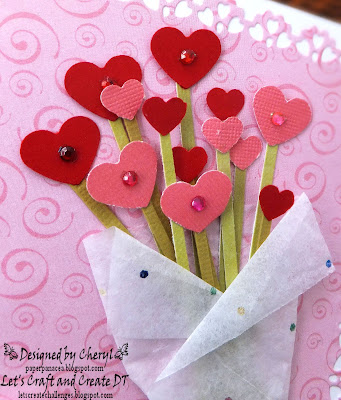
I used my favorite flower die, inking the centers a bit with white ink to lighten them and propping some of the petals up with tiny foam squares.

I added an enamel dot to the center of the yellow flower and Nuvo Drops to the centers of the blue flowers.


On the inside, I finished every panel with a piece of DSP. The same size oval as was used on the front was also used on the inside. I made sure I placed it directly under the oval on the front. I had a couple of leftover blue flowers, so I added them here.


I used my computer to print out the requested sentiment before cutting it out with the scalloped oval die.


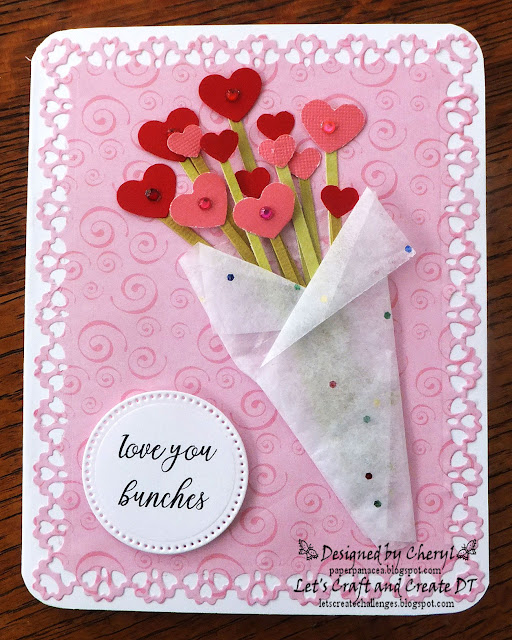
Then, because I had a few flowers and pieces of DSP still lying on my desk, I decided to make another card for my stash. I also had the chipboard scroll--which just happened to be the right shade of blue--lying on my desk, so I used them all on this card.  

The "Happy Birthday" was stamped with black Versafine ink. I think it's the very best ink for stamping sentiments.

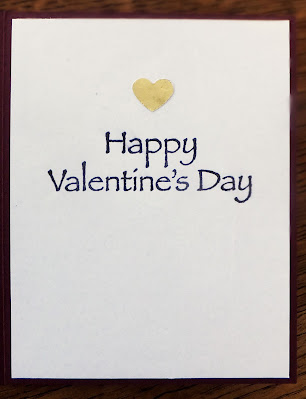
I used another white oval for the sentiment panel on the inside. Again, another stamped sentiment.

I've been having a little discomfort on the inside of my righthand thumb. A few days ago, I realized that the soreness came from tightly gripping my ATG tape dispenser when making cards. Yes, I use it a LOT. I even order 24 rolls of tape refills at a time because I go through them so fast. Now the sore spot is starting to form a callous! Who would ever have thought we could get callouses from card making?

Thanks so much for stopping by, and remember to laugh--a little or a lot--every day.

Cheryl


Tuesday, February 22, 2022

Get well card...


This was a get well card that I made for the thrift store to sell. I wanted to try this fun fold, and it actually was really fun to make!

I cut off the front of the card base at a diagonal from the upper left corner to the lower right. The cut-off piece became scrap.

Then I cut a 4" X 5 1/4" piece of double-sided DSP, cut that in half diagonally and added it to my triangular card front. The left-over piece was used on a second card like this, but flipped to show the pattern on the other side.

I cut another piece of the DSP at 4" X 5 1/4" and adhered that to the inside of my card with the opposite pattern showing.

Finally, my smaller insert card was created from a piece of blue CS that was 3" X 8" folded in half to form a 3" X 4" card base. 

A sentiment panel was added to the inside with its computer-generated sentiment.  

A butterfly die-cut was adhered to the front of the smaller card with a few gems added for sparkle. I also printed "get well soon" with my computer, cut it out with a die and popped it up on foam tape.

This is one of the easier fancy folds I have made, and I'll be making lots of these for the thrift store. The customers seem to like fancy folds, as they are not something they generally find in the card section of a drugstore.

It is snowing here again today, which means I'll be wielding a snow shovel as soon as it quits. In the meantime, however, I'll be working on a few more cards!

Thanks so much for stopping by, and remember to laugh--a little or a lot--every day.

Cheryl


Friday, February 18, 2022

A few more Valentines...

 I thought I would quickly share a few more of the Valentines I made this year. Since I made about 50 of them, there was quite a selection. Most of them were donated to the thrift store, and I'm happy to say they all sold.


This Valentine was a mini-slimline card. I was trying to use up some heart-patterned paper. The X's and O's were cut from glitter CS and each scalloped circle was popped up on dimensionals.


I had a pack of red heart doilies and used one of them on this card. The center strip is a scrap of DSP matted with red CS. The sentiment is popped up on dimensionals.

This Valentine featured a sticker in the center rectangle. The sticker just happened to fit perfectly in the pretty die-cut cover on my card. The flower and leaf flourish were also cut with dies and inked for a little added dimension. I added some Nuvo Drops to the center of my flower.

This kite card was fun to make, using a couple different die sets. The main part of the kite and the clouds were popped up on foam squares. My sentiment was computer-generated, cut with a stitched circle die and also popped up on foam squares.

For this card, I went through all the extra hearts I had in my Valentine supplies box and put a few in a pocket, which was also cut with a die. I made three of these cards, so I was able to use up quite a few of those hearts! The sentiment was printed with my computer and popped up on foam tape.

This is the last Valentine I will share with you today. Not because I have now shared them all--I haven't--but because enough is enough. I'm sure you're all as ready as I am to move on to another occasion for cards.

I actually had the pretty die-cut/stitched heart in my supplies box, left over from last year. I cut the heart shape below it, inked it a bit, and then popped the stitched heart on top of it with dimensionals. For a little sparkle, I added a tiny purple gem in the middle. The little heart border was die-cut and inked a bit before gluing directly to my card front. The sentiment was also from my supplies box and glued directly to the card front.

As you can see, I don't make very complicated cards when I have to make them quickly. I also try to use the supplies and card parts that I have on hand whenever possible. All the cards had simple stamped sentiments on the inside such as "Happy Valentine's Day" or "Be my Valentine."

I am now ready to start thinking about Easter and all those family birthdays that pop up in the Spring and Summer.

Thanks so much for stopping by, and remember to laugh--a little or a lot--every day.

Cheryl

Wednesday, February 16, 2022

Birthday card for my son...

 My son's birthday was earlier this month, and this is the card I made for him.

He is the Superintendent of the Washington State School for the Blind and wears a suit or sports jacket most days. He is also currently working on his doctorate at Washington State University, so he's a busy guy. He's always been a pretty natty dresser, and I thought this card would suit him and his lifestyle well.

I got the idea for this card from this video by France Martin. I often check out her blog, Frenchie Stamps, to see what fun ideas she happens to be sharing.


I used an argyle embossing folder to add texture to the sweater. I also did some inking around the edges of the lapels and pockets of the jacket to add some dimension. There is a tiny little foam square under each lapel, too.

The little buttons are enamel dots.


I came up with the sentiment on the inside and used my computer to print it out. I always like personalizing my cards when I can.

Masculine cards are still a struggle for me. After all these years of cardmaking, they shouldn't be so hard...but they are! Do you have a favorite masculine card that you have made? If you do, I'd love a link to your blog or Facebook site where I could see it.

Here are a couple more masculine cards I have made that I still really like:

Happy Beerthday

You're only young once

Thanks so much for stopping by, and remember to laugh--a little or a lot--every day.

Cheryl

Monday, February 14, 2022

Love you a latte...

This photo is a little dark, but I think you can still see the simple design of my card. I started with a kraft card base and embossed the front of it with a hearts EF. The sentiment on the front was computer-generated, matted with dark red cardstock and popped up on some foam tape.

I cut the base of my cup from off-white cardstock and the lid from pure white. I know it's hard to distinguish between the two in the photo, but there's a distinct difference IRL. The protective sleeve is a dark red color and the inset heart was cut from metallic gold CS.

I added some Wink of Stella to my plume of steam, but it doesn't show in the photo.


The inside of this card featured a simple, stamped sentiment and another metallic gold heart.

All of my kids are coffee drinkers (as am I), so I made this card to send to one of them.

I hope you have a lovely Valentine's Day and get to spend it with that special someone in your life, even if that someone is a beloved pet.

Thanks so much for stopping by, and remember to laugh--a little or a lot--every day.

Cheryl

Friday, February 11, 2022

Stack, cut and shuffle Valentines...

 I got an idea for making some quick Valentines from Vicki at Heartwarmers from Vicki. I love this concept and will use it for lots more cards in the future.

The instructions for making these cards were to select four different, but coordinating, patterned papers, then cut a piece from each of them that measures 3 3/4" X 5". Then, each of those pieces is cut per the diagram below.


Once all your pieces are cut, you arrange them on 4" X 5 1/4" mats, making sure you have one piece of each DSP on each mat. Once that is done, you adhere the matted designs to A2 card bases.

I unknowingly had two pieces of one DSP stuck together when I cut it, so I ended up with more of one pattern than the others. It really didn't matter, though, I just made sure I had all four patterns of DSP on each card. 

I placed a fancy, die-cut heart backed in white on the center of each card with foam squares. I thought I was placing the hearts at a "jaunty" angle, but maybe they just look crooked. LOL I added a little sparkle by placing a tiny gem in the center of the heart.

The sentiment was computer-generated, die-cut and then popped up on foam tape.

Because I double cut some of my paper, I had enough to make a couple more cards, using the same concept. Each card had a stamped sentiment on the inside that said, simply, "Happy Valentine's Day."

These were so quick and fun to make. I plan to make some Easter cards using this concept. I think they'd be pretty with some pastel papers, such as yellow, lilac, pink and aqua.

We had a bit of a snowstorm today, and now it is supposed to get really cold again. I will be so happy when winter is over. We'll be doing a bit of remodeling on our house in the spring, so that's another reason I am anxious for Old Man Winter to take a powder!!

Thanks so much for stopping by, and remember to laugh--a little or a lot--every day.

Cheryl

Tuesday, February 8, 2022

Some doggy Valentines...


 I have a die set that creates this little pooch. He is so darn cute that I can't help but make him the star of a few Valentines every year. Luckily, I can donate them. That way my grandkids don't get tired of getting the same image on their Valentines year after year.


I cut my little Valentine dogs out of light gray cardstock and then did a bit of inking on them. I think I may have gotten a little heavy-handed with the inking. It looks like they rolled around in the mud! 

"For You" was stamped on each of the hearts that they hold in their mouths.


I also used a lacy heart die to cut the heart doily behind them. I thought it added such a nice backdrop and really brings the focus to the pups.

Each dog also has a glittery strip to "ground" them, so they don't look like they're floating in mid-air.


On the inside of each card, I added a computer-generated sentiment.

Both of these cards were donated. I hope whoever bought them enjoyed giving them as much as I enjoyed making them.

I mailed out my personal Valentines yesterday--21 of them to family members. I figure I have made about 50 Valentines altogether, although there were lots of duplicate designs. I have photos of more of them that I will share with you in the coming days.

Thanks so much for stopping by, and remember to laugh--a little or a lot--every day.

Cheryl

Saturday, February 5, 2022

Let's Craft and Create Challenge #180: Anything Goes or From the Heart (Valentines, Engagement, Wedding, etc.)...

 
Today starts a new challenge over at Let's Craft and Create. I have a feeling you've been working on cards that would fit the challenge option to a tee: Valentines, anniversaries or other heart-themed cards. I hope you'll join in on the fun and post your projects here. Remember, there's a prize up for grabs!

I chose to make a Valentine that's got a LOT of hearts on it. In fact, it has an entire bouquet of hearts.

Isn't this a fun card? I first cut a prettily edged rectangle for my background. If you look closely, you'll see that the lacy edge actually has tiny heart shapes cut out of it to form each scallop. My sentiment was printed with my computer and then cut out with a pierced circle die.


I just love this little bouquet of hearts. After cutting thin strips of several different shades of green cardstock, I glued some little punched hearts onto the ends. I gathered them together into a bouquet, wrapped them with a small square of some dotted tissue paper I had on hand, and adhered them to my card. As a final touch, I placed a self-adhesive red or pink gem on each of the larger hearts.


The inside of my card has a stamped sentiment and a couple more punched hearts.

This card really didn't take long to make and it doesn't require many supplies. In fact, I had so much fun making it, I think I'll make a few more.

Now it's your turn, and I can't wait to see what you create. We've had so MANY fabulous creations posted for each challenge that it's been really hard to pick a winner.

The Design Team has lots of inspiration for you, so check it out at Let's Craft and Create,

Thanks so much for stopping by and remember to laugh--a little or a lot--every day.

Cheryl

Thursday, February 3, 2022

Owl always love you...

 I showed some felt critters in this post that I had purchased at Dollar Tree and used to make some cards for the thrift store. I mentioned that there was also a pink owl included in the pack, and here's how I used that owl:

I used a heart stencil to add some pale pink hearts in the background and also added a little shading around my main panel.  The tree branch was cut with a really old Sizzix (I think) die. The three little hearts in the upper righthand corner were punched out of glitter paper, and my sentiment was computer-generated and popped up on foam tape.

The owl, and all the other felt critters were attached to my card fronts with some really strong double-sided tape. It's sort of an industrial-type tape that I purchased at a store called Axman Surplus. It's a fun store to visit, and I always seem to find crafting supplies there for incredibly low prices. I buy a lot of my double-sided foam tape there, too.


The inside was stamped with "Happy Valentine's Day." I probably should have added a couple of those glittery hearts here, too!

I made three of these cards and donated them to the thrift store along with the other critter cards. They have all sold, as have all the other Valentines I've donated. Time to make a few more before February 14!

Thanks so much for stopping by, and remember to laugh--a little or a lot--every day.

Cheryl

Tuesday, February 1, 2022

Happy 14th birthday...

 My beautiful granddaughter Hadley turned 14 on January 30th. I simply cannot believe she is that old already! She's such a lovely, gracious, polite girl. I only wish she lived closer, rather than 1200 miles away!

Here is the card I made for her:

I used my wonky cake die set again for this card. I decided that a cake in shades of pink with chocolate frosting would be just right. The cake plate and the candles were cut from holographic cardstock.

"Happy Birthday" was cut twice from pink cardstock and glued together for dimension.


This is a wonky picture of my wonky cake, but I wanted to show you a close-up of the little pearls I put on it with Nuvo Drops. I think I'm getting a little better at applying them.


The inside of the card featured a twist and pop mechanism that opened up a four-panel strip. A few decorative dies came with the twist and pop die set, and I chose the butterfly and fancy corner dies to use on this card. The "14th" and the butterflies were cut from some yellow-gold glitter paper. 


The sentiments on each panel came from a stamp set that is supposed to look like typed sentiments. I thought they worked really well for this card.


I really do love making twist and pop cards. I think they're fun for my grandkids to receive, too. 

Today I was talking with my stepdaughter and son-in-law who live in Germany (he's a physician there). We were talking about the weather, and he told me how it is fairly common to refer to a weather professional or meteorologist as a weather frog. He said the name comes from a time in the past when people there would put a frog in a glass with a little handmade ladder. The higher the frog climbed on the ladder, the nicer the weather outlook was supposed to be. I just wonder where they got their frogs in the dead of winter!

Thanks so much for stopping by, and remember to laugh--a little or a lot--every day.
Cheryl