Wish List

Wednesday, October 31, 2012

Happy Halloween!

I hope you are all having a wonderful Halloween and enjoying all the trick or treaters. When my kids were little, I really loved to make their costumes. In1987, my twins were 10 years old, and it was one of the last years they went trick or treating. They may have gone one more year, but that would have been it. I made it a rule in our house, that when you were 12, you had to help hand out the candy.

I knew I was going to miss the creative outlet of making their costumes, so I really went all out in 1987.  I made my twins into Pierrot dolls. If you've never heard of them, click this link for some images of Pierrot dolls.

Here's a picture of my girls in their costumes:

Aren't they stinkin' gorgeous?

I bought a clown costume pattern to sew their outfits out of black and deep pink/fuschia. The ruffles around their neck were made from the same color pink satin,only that fabric had silver sparkles all over it. I also made them little black skull caps. I tied their long, dark hair up on top of their heads and pinned the little caps on.  I painted their faces white and added some of the eye makeup characteristic of Pierrot dolls. If you look closely you can see a blue tear painted on each right cheek. I did take a photo of them looking very sad, but that photo has disappeared from our album. I wonder which one of them I should blame for that! LOL

Making my kids' costumes each year was as fun for me as it was for them. I just wish I had taken more photos!!!

Now onto something a little less lovely. To decorate our door for the trick or treaters this year, I decided to stretch some webbing across it. In the center of the webbing is this little beauty:

 I made her out of 1/2 of a styrofoam oval cut lengthwise.  I painted it black, then added a coat of ModPodge and a generous amount of black glitter. Of course, I also added a couple of spooky, red eyes and some pipe cleaner legs. Here she sits in all her glory on top of the bag of webbing.
Thanks for stopping by today, and remember to laugh--a little or a lot--every day!
Cheryl

Monday, October 29, 2012

Christmas bags and Cricut cuts...

Christmas bags can really add to the cost of a gift if you buy the prettily decorated ones. I prefer to pick them up at the Dollar Store and add my own decorations.

Here are a couple of bags I picked up the other day:

 They are nice big gift bags, but definitely on the plain side.  I decided to try a few new Cricut cuts to decorate them.

For this bag I used some cuts from the Christmas Cards cartridge that my daughter gave me a couple of years ago.  The snow is just a piece of paper torn from a 12" X 12" pice of cardstock.
 
Isn't this little snowman cute? I cut him out of white glitter paper and used a little dimensional paint on the buttons, eyes and mouth.  I popped him up on some foam tape for some added dimension. You can just see in the picture on the left that I added some stickles to the snow for a little sparkle. In the photo above, you may be able to make out that I put some blue sticky-backed gems in the centers of the snowflakes.
For the red bag, I used the CTMH Art Philosophy cartridge to cut a stocking out of some pretty, glittery striped paper. I ran the heel and toe pieces through the Cuttlebug in one of my embossing folders.
 
I'm sorry for the glare and shadows on the bag, but it is made from very shiny foil! I cut the "Happy Holidays" from the Christmas Cards cart and added a few felt candy cane stickers. 
 
The holly leaves were some velour leaves I ordered from Oh My Crafts when they were on sale and the berries are Card Candi that I colored with a red ProMarker.  I also added some ribbon for a loop and a button with a little red bow.
The tags on both the bags were cut from the Art Philosophy cartridge. There are some really great tag shapes and designs on that cartridge.
 
Thanks for stopping by today. I hope you enjoyed my bag transformations. Don't forget to laugh--a little or a lot--every day.
Cheryl


Saturday, October 27, 2012

Surprises are so much fun...

The other day one of my twin daughters told me that her three small children (ages 7, nearly 6 and 3) had picked something out for me when they went with her to the store.  She packed up their purchases and sent them to me in the mail. Since she lives about 500 miles away, it takes a few days for a package to arrive.

Yesterday, the box was delivered and here is what was inside:

Do those kids know their grandma, or what? You can see in the photo they picked out some cute, Halloween card blanks with envelopes, 3 Halloween punches, 3 packages of assorted ribbons, a cute "witches legs" stamp and two glitter 4-packs. Of course, I had to try out some of these supplies and make them each a little thank you card.

Once of them even decorated the box:
It's a little hard to see in this photo, but there's a happy face drawn on one side of the box.  I'm not sure which one of them drew the face, but it sure made me smile.


Here's a picture of those three beautiful grandchildren.  They'll be coming to visit over Thanksgiving, and my daughter and I are planning a few Christmas crafts for them to enjoy. They like to craft as much as I do. My daughter has also inherited the crafting gene, so Thanksgiving will be a blast!.
Thanks for stopping by, and don't forget to laugh--a little or a lot--every day.
Cheryl
 

Wednesday, October 24, 2012

Card for a beautiful baby boy...

My niece recently gave birth to her second baby boy, and so I wanted to send her a little gift along with a card. I have had this image in my envelope of images for ages, so I'm not even sure where I got it. I had printed it on watercolor paper, so I colored it with AquaMarkers (by Letraset). You can see how intense the colors are from the AquaMarkers. I really love that about them. I also added some stickles to the stars for a little sparkle. The polka dots on the little sleeper were made with gold liquid pearls.
I stamped the banner and cut it out. Then I took my smallest "Congratulations" acryllic stamp, curved it on the block and stamped it onto the banner. It's not perfect because it wouldn't curve like I wanted it to (it's a dollar stamp, after all), but I don't think my niece will mind.

Here's a better look at it:
You can see in this photo how I've popped it up on dimensionals. The scalloped rectangle is also popped up on dimensionals.

Here's a look at the inside of the card. I used the same star-patterned paper on a yellow mat as was used on the front. The sentiment was stamped with Versamark and heat-embossed with white detail embossing powder.
Thanks for stopping by today, and remember to laugh--a little or a lot--every day.
Cheryl
 

Saturday, October 20, 2012

The last of my Halloween cards...

I have finally finished making all of my Halloween cards and have sent off those that needed to be mailed. Always such a good feeling!

Aren't these two characters fun? They are both from the Happy Hauntings cartridge. That cartridge has so many fun Halloween images on it.

I once again made pop-up cards. They're perfect for these images.


Here's a picture of the cards when they're closed.

And another photo when the tag is pulled and the images pop up to reveal the Boo! message. Did you notice that I used two googly eyes over the o's in Boo?


This next card has lots of googly eyes. I simply added them to a strip of DSP that had a cute "little monster" design on it. I matted it with some Halloween-patterned paper, added a couple of stickers and the card was done! The pictures below also show an example of the little coffin treat boxes I made for each of my grandkids. I filled them with M&Ms.


Here's Dracula, himself, with bloodshot eyes, no less!


It's hard to see but there is a spider that has been heat embossed onto the large web in the upper left hand corner.


The owl in this card was cut at 3 inches from the Hoot 'n' Holler cartridge and the leaves were punched out with a Martha Stewart punch. I scored them down the center and then did some shaping to give them a little dimension.

Don't you love the wood-grain cardstock? It looks like real veneer!


Here are the last two cards - I promise!  These are for older kids or adults

The label die cuts are chipboard pieces that came with the CTMH Art Philosophy cartridge. I inked them with some purple distress ink, stamped them with Versamark and embossed with black embossing powder. The flags on the first card were each embossed with different folders in my Cuttlebug. One of the folders was actually a Christmas folder, but because the flag was narrow enough, I could position it on a non-Christmassy portion of the folder.

Thanks for looking at so many of my Halloween cards. I promise not to share any more - not this year anyway!

I'm so glad you paid a visit to my little blog. As I like to remind everyone, don't forget to laugh--a little or a lot--everyday.
Cheryl


Thursday, October 18, 2012

Love you a latte...


My husband and I recently celebrated our wedding anniversary. I had just gotten the "Love you a Latte" cartridge, and I was itching to use it on a card.
 
One of our favorite things to do is to go to this wonderful retro movie theater in our part of the city. This particular theater was built in 1948, and they have kept it much the same over the years. They've even maintained the lobby furnishings from that era. It only costs each of us $2 for a ticket! Can you believe there are still theaters that only charge $2? Of course, that's because we're both senior citizens, but the rate for younger adults is only $3.
 
After the movie, we like to walk across the street to our favorite coffee shop. I always get a latte and my husband always gets a chai. This coffee shop has live music on the weekends, so we sip our drinks and listen to the music. It's the perfect date night for a couple of old geezers like us!
 
Hence, my anniversary card was perfect! The sentiment is computer-generated onto a Spellbinder's label die. I inked the label while it was still in the die and also colored a couple of white pearls with a ProMarker to look latte-like. The pearl flourish that I used for the steam coming from the cup is part of a full Zva Creative pearl flourish.

I kept the inside simple with just a little inking and a couple of coffee beans for decoration.


Hope you enjoyed my card today. Thanks so much for stoppoing by, and remember to laugh--a little or a lot--every day!
Cheryl

Tuesday, October 16, 2012

Paint chip embellishments...

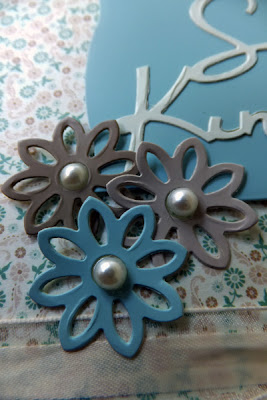
One of my sisters has been doing some fixing up around her house before the snow flies here in the northland. My brother helped her remodel her bathroom, and when she was about to throw out the paint chips she had used to select her wall colors, he told her (as I've trained him to do) that I could use them for my cardmaking obsession hobby.  My brother dutifully brought them to me, and I used them for some die-cut flowers and sentiment, as well as the label to frame the sentiment on this card:


Whenever you bring home paint chips to help with your redecorating or remodeling, don't forget that they can be used for making embellishments for your cards, once you're through with them. I don't know if they are hard on the cutting edges of your dies or punches - it's possible that they are - but I've used them with no obvious ill effects so far.


I added three pearls in the flower centers and a ribbon to finish off the card.

Paint chips are wonderful for small embellishments like this because you can get a range of color tones all on one sample. I liked that my sister had already picked out complementary colors that just happened to match some pretty paper I had in my stash.

Thanks so much for stopping by, and remember to laugh--a little or a lot--every day.
Cheryl

Sunday, October 14, 2012

Happy Birthday robot...

Our grandson Sebastian turned 8 on October 12. This was his fun birthday card - perfect for an 8-year-old, don't you think? I used the Robotz cardtridge to cut him out at 4 1/2".  The balloons were cut with a Cuttlebug die. I stamped and colored the cupcake and cut it out by hand. I thought this particular robot needed something in both hands.


Here are a couple more views of Mr. Robot. The two decorateive strips across the bottom were cut with a border punch by EK Success, I believe. I added glossy accents to the balloons, the thermometer on the robot and the cherry on top of the cupcake.


I had to come up with a sentiment for the inside of the card that matched the whole techno theme. Here's what I decided on:
I found a great font that actually looks like the old computer printouts. I sure hope he likes his card!
 
Thanks for stopping, by and remember to laugh--a little or a lot--every day!
Cheryl

Wednesday, October 10, 2012

Halloween cards to share with my book club...

I have had so much fun making Halloween cards this year, that I decided to make a few extra ones to share with my book club.  Here's what I came up with:
These first two would work nicely for teens or adults. I guess they'd be okay for younger kids, too, but not nearly as much fun as some of the others I made. 

The card made with craft card stock has an aperture that I backed with starry sky paper and added a yellow moon. The ghost and cat were stamped, heat-embossed and cut out by hand. The flourishes in each upper corner were cut with a Spellbinders die and the chevron border was stamped across the bottom.

For the card on the right, I cut the "Happy Halloween" strip from some DSP and matted it with black. The orange circle with a bat was stamped, heat-embossed and hand cut, while the other two bats were cut with Happy Hauntings and mounted on dimensionals. Don't you love the MS goo border punch for Halloween cards?
 
Here's what the inside sentiment says.


Here are two more cards - one with a little witch cut from one of my sister's cartridges - I think it was Best Images of 2007. The other card is made with a Sizzix embossing folder and Coredinations cardstock (black with white core) that has been sanded to show the creepy design.

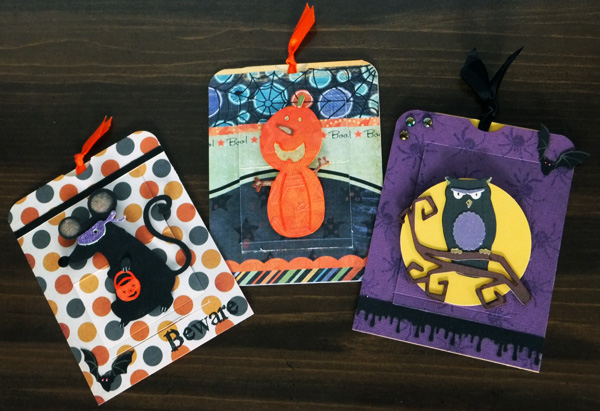
These next three cards are pop-up slider cards that were so much fun to make.  The first photo shows them closed, and the second photo shows when the slider is pulled out and the front image pops up.


And a little peek at each of the images on the front. The mouse and owl were cut from Happy Hauntings and the double pumpkin was cut from Stretch Your Imagination.


My final two cards each took about 10 minutes to make. I used a Spellbinders label die for the face and the hair (which I finished by hand cutting the "bangs") and a couple of circle punches for the eyes and nose. The circles were cut in half for the eyelids and nose. Everything was inked around the edges. The cardstock is really much greener in real life!
 
The back cardstock piece is scored about 3/4" down from the top and the front and backs are glued together above that score line. That way, the card can be opened easily, with the back bending at the score.

I hope you've enjoyed a little peek at some of the Halloween cards I've made. Altogether, I think I made 24 or 25, and I had a blast doing it.

Thanks for stopping by and remember to laugh--a little or a lot--every day!
Cheryl

Sunday, October 7, 2012

What a lovely pin cushion...

I have three of the most talented sisters in the world. I am always amazed at what they can do. The older of my two younger sisters made this lovely pin cushion for me.
Isn't it one of the prettiest pin cushions you've ever seen? And it's all one unit.  She adhered the cup to the saucer. This gives it great stability, but not only that, it provides a space to put a couple of sewing items you may be using at the time.
See  what I mean in the picture on the left?  She told me that she had to hunt and hunt to find just the right cup - one that she felt would be just right for me. Well, she hit the nail on the head with this one. I love the dramatic colors--I can be a bit of a drama queen, but don't tell anyone. I'm hoping my sisters haven't really noticed that. LOL


She also took great pains to find just the right embellishments - including the pretty trim around the edge, the little white flowers and a pretty black vintage button.  You can see that button in the next photo. Just click on any of the photos for a little closer look.


I think she pretty much used her hot glue gun to adhere everything. You can be sure, if I had done this, there would be blobs and glue strings showing all over it!


Thank you, Deb, for this beautiful gift! I will treasure it and, more importantly, use it! Do you think people would think I've gone a little nuts if I keep it on my dining room table? It just seems too pretty to put downstairs by my sewing machine!


Thanks for stopping by today, and remember to laugh--a little or a lot--every day.
Cheryl