Wish List

Friday, May 31, 2024

An upcycled card...


I received a card from my stepdaughter that had such a beautiful image on it, that I wanted someone else to enjoy it, too. Isn't this image amazing? And to think it was made by gluing down little pieces of thin, brightly colored paper! 


I carefully cut the decoupaged image from the card front.

The black thin/thick frame was part of it. I just cut a little outside of that and then matted it on some black cardstock and adhered it to a new card base. I chose a light aqua card base because that same color was included in the image.

The "Happy Birthday" sentiment was stamped, die-cut, matted and popped up on dimensionals.


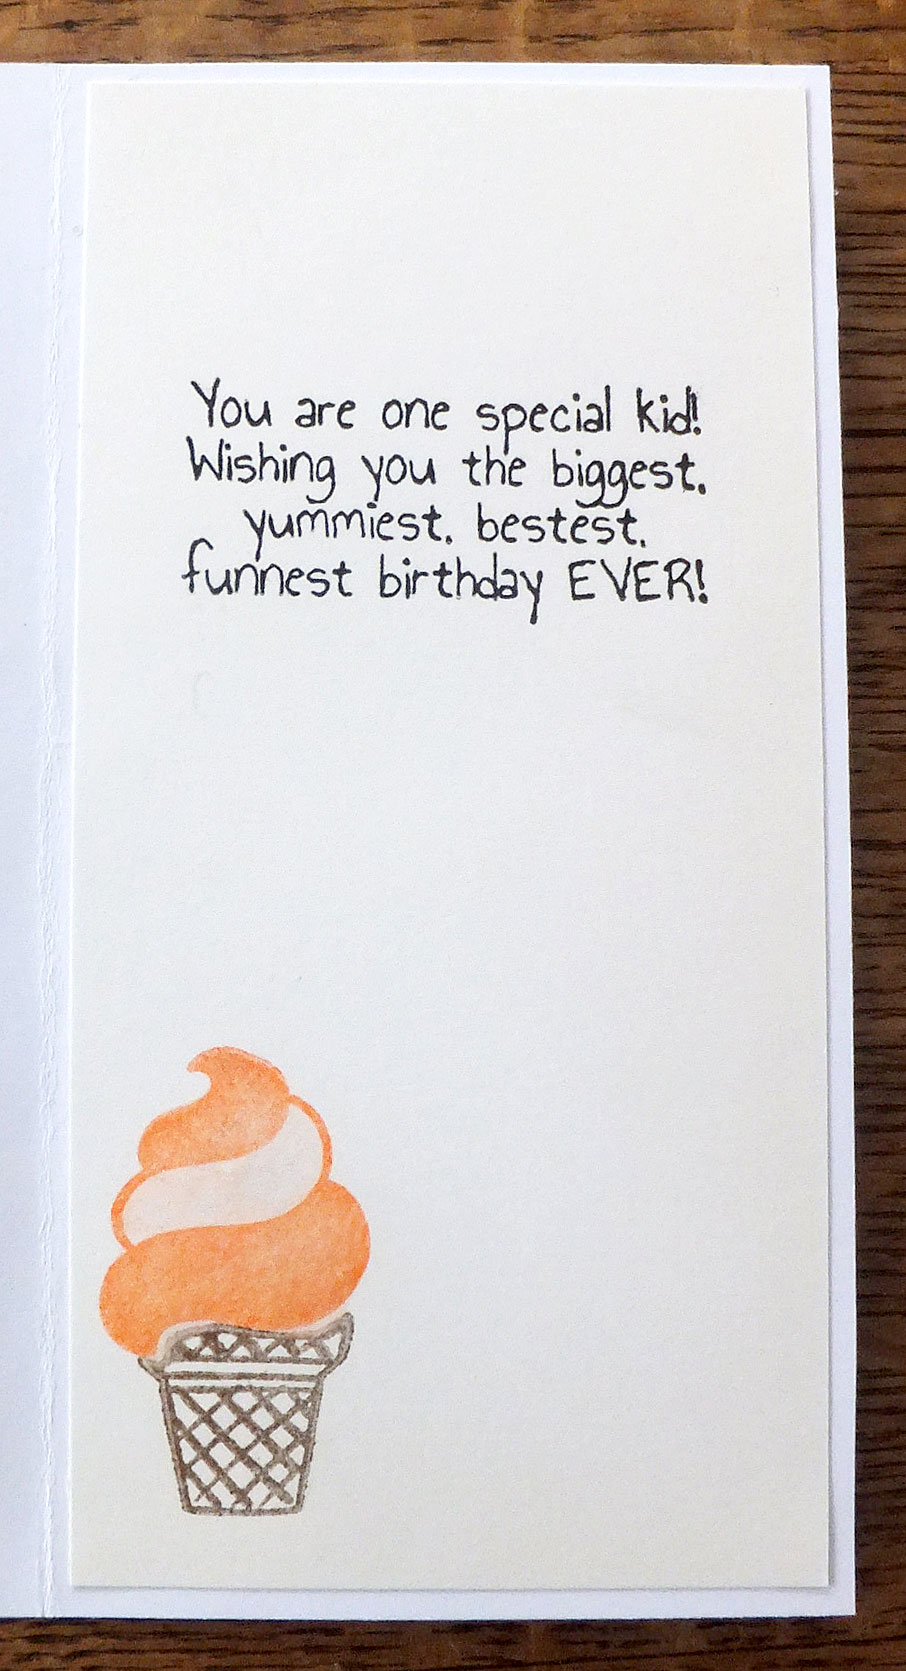
This is the sentiment that I stamped inside the card.

Do you ever recycle cards or parts of cards? As much as I love the cards I receive, I don't believe in stowing them away in a box. I often want others to enjoy them, too, so I try to recycle what I can. And since I photograph all the cards I make, I can still enjoy them forever.

*****

Today was a lovely day here in Minneapolis, but I spent most of it volunteering at the thrift store. It was gratifying to see the empty card basket when I arrived. Of course, I refilled it with a slew of newly made cards. I've begun making Father's Day cards and am nearly done making graduation cards for the store to sell. I realized, though, that I didn't have a single sympathy card left, so as soon as I got home, I prepped five card bases and top layers. Hopefully, I'll get them finished up tomorrow.

Thanks so much for stopping by, and remember to laugh--a little or a lot--every day.

Cheryl

Wednesday, May 29, 2024

Continuation of cards from one-sheet wonder...

Today, I will show you the remaining cards I made from the cutting layout pictured below. I cut two pieces of double-sided, coordinating DSP that were each 6" X 12" according to the dimensions in the layout. I actually held the two pieces of DSP together and cut them both at the same time.


In yesterday's post I shared the four cards I made with the 12 pieces (6 from each piece of DSP) that were 1 1/2" X 3".

I also shared the four cards I made using the eight 1" X 5 1/4" pieces. I had accidentally cut four pieces at 1/2", but I was still able to use them to make a card.

I then moved on to using the four pieces that were 3 1/2" X 2 1/4" along with the two pieces that were 4" X 3/4". Here's what I came up with:
\

I popped the center strip up on dimensionals and added a sentiment to it. I had the chair die-cut sitting on my desk, so decided to use it for the birthday card. Likewise, the doily die-cut was also in my stash, so I used it to dress up my thank you card.

When these two cards were done, I had only the four pieces left that were 1 3/4" X 1 1/2" to make one more card for a total of 11 cards.


This time I decided to make a new home card. I added the four rectangular pieces to a mat and then centered a vellum circle on them to showcase my house die-cut. I also added my stamped sentiment to a mat and popped it up on dimensionals.


Here's a little closer look at the house. I backed it with a piece of yellow cardstock so that it looked as though there were lights on in the house.


The inside featured a simple, stamped sentiment.

I hope you'll consider giving this cutting layout a try. It's a great way to use up some of that DSP we all have stacks and stacks of. And there's virtually no waste with this layout!

*****

It was rainy here today, so I spent most of my time in the basement making cards. By the time I was ready to quit, I had made nine cards, so it was a productive day!

Thanks so much for stopping by, and remember to laugh--a little or a lot--every day.

Cheryl


Tuesday, May 28, 2024

One sheet wonder cards...

Recently, I watched this video by Karen Titus to make 11 cards using two different, but coordinating, double-sided 6" X 12" pieces of DSP. Karen used this template for cutting both sheets at the same time, so I did the same.


Because this layout makes so many cards, I will share them in a couple posts.

This is the first card I made using three of the pieces that measured 1 1/2" X 3". My husband needed a get well card to send to a friend, so I quickly put this one together for him.

Here are three more cards I made with those same size strips. You can see how I spread them out a bit more on the top card to give me more room for my foliage-filled vases.

When I finished the above cards, I moved on to using the 1" X 5 1/4" strips.

Here are three of the cards I made with those strips, and the process went well. The front of the card is scored at 1 1/4" from the right side and this flap is then folded back towards the center of the card and glued down. A piece of DSP is added to this flap and to the exposesd portion of the card back.

But then I made an incorrect cut, and I had to decide what to do.


You'll see on this card that the strips are narrower. I accidentally cut them 1/2" wide instead of 1" wide. I just decided to use them anyway.


Here's a peek at the inside of this card. The picture is a bit blurry, but you can see how the DSP adds to the design when the card is opened.This cutting layout is a fun exercise in creativity. I'll show you the rest of the cards I made from it in my next post.

*****

We had a very quiet Memorial weekend. We prepared a nice brunch and brought flowers to my brother-in-law (a Viet Nam Army vet), and had my brother (who served as a Navy Corpsman/Medic) over for dinner. 

Thanks so much for stopping by, and remember to laugh--a little or a lot--every day.

Cheryl

Friday, May 24, 2024

Cards for the littles...

I thought I would share some cards I've made for children. I relly do enjoy making them. I don't think children notice if my stamping is a little crooked or my cuts are slightly off. LOL

I have this sweet baby carriage die set, and I was itching to use it. In fact, since it is NBUS (Never Before Used Schtuff), I am entering this card into this month's challenge on the NBUS Challenge Blog.

I decided to cut the carriage out of white cardstock - all of it. Then I used a silver metallic marker to color the wheels, undercarriage and top rim. The yellow dotty paper made a nice backdrop. It wasn't too busy or too dark, so I was able to stamp the sentiment directly onto it.


I used a gold Viva Decor pen to add some color to the center of each wheel. 

I love the simple design for this pram and the larger size of it. It makes a great focal point and nicely fills the top half of my yellow panel.


I stamped a simple sentiment on the inside. It was short and sweet and left lots of room for a handwritten note.


I've shown carads made with this dinosaur die set before, but he's so cute, I thought I'd show him again. The background papers are from an old 6" X 6" paper stack that I'm trying to use up. The happy birthday die-cut was cut from some very thick, somewhat glossy cardstock. I think it had actually been packaging material at one time.


I love cutting these little guys out of all different colors of cardstock. And, of course, I have to add a tiny googly eye!


The inside sentiment was computer-generated. I usually print up three or four of these sentiments at a time so that I have them on hand for whenever I'm in the mood for dinosaur cards.


These baby cards were made with parts from a card kit, including the card bases with their square and circular apertures. Only the frames around the apertures were made with dies from my supplies.


The green dinosaur and stars were translucent stickers.


I thought this little giraffe looked so cute peeking out of the circular opening.


When opened, you can see the images in their entirety. I added a scripty, die-cut "congratulations" to each card.


Because the giraffe was a little taller image, I glued the "congratulations" right over its feet (er, hooves, I guess).

I really enjoyed the process of making each of these cards. I miss the days when my grandchildren were small and I could make cards for them. I still make cards for them, of course, but it's not quite the same as when they were babes.

Thanks so much for stopping by, and remember to laugh--a little or a lot--every day.

Cheryl

Wednesday, May 22, 2024

Sympathy cards...

I created a peaceful scene in pastel colors on www.bing.com/create. I printed the scene out twice to use on a couple of sympathy cards.

I cut out the scene with one of my favorite fancy panel dies and stamped a sympathy sentiment at the top.  I adhered a wide strip of dark blue CS down the mmiddle of my card base before adhering the die-cut panel. I thought the blue strip would anchor my top panel, but after seeing the photos, I'm not sure it was necessary.

I cut off the four corners of my card base to better reflect the corners of my die-cut.


I added a panel to the inside that featured a stamped sentiment.


For my second card, I cut my 6" X 6" scene into three 2" pieces that were 5 1/4" high. I scored my cardfront in the middle so that I could fold the righthand section back, making a Z-fold. 

I adhered the three panels side-by-side so as to maintain the integrity of the scene.  The sentiment panel was adhered on the far right. This means that whoever sends this card will sign it on the right-hand panel, which will show when the card is closed. Will they mind that? 

We're used to having our signatures hidden inside a card, or sometimes on the backside. I don't know why the signature couldn't be visible from the front, so I just went with it. I guess I'll see if this one sells at the thrift store.

*****

My DH and I attended our Tai Chi class today. We really like the group of people in the class and the instructor. They are all basically our age, and there are quite a few men in the class, which made my DH feel much more at ease. We definitely have to find a video that will help us learn the moves, though. We oftentimes look like a couple of chickens flapping our wings aimlessly, not knowing which way to go.

Thanks so much for stopping by, and remember to laugh--a little or a lot--every day.

Cheryl

Monday, May 20, 2024

More graduation cards...

I've been working on lots of graduation cards, as they sell quickly at the thrift store where I donate them. Here are a few I have made:

This one was fairly quick to create    , and I think I'll make a few more of them. I first cut a white panel that was 4" X 5 1/4". I stamped it with the large sentiment slightly closer to the bottom of the panel. Then I used a pinpoint background die to add the rays extending out from the center of the sentiment. 


I die-cut a mortarboard with a red tassel and added it above the sentiment, and finally, I used a glitter pen to add a little sparkle to the stars.


I stamped another sentiment on the inside, as well as an image of a diploma.


These are another example of quick-to-make graduation cards.

I started with three A2 card bases in black, red and blue. I added a white panel to each one that had been embossed with a mortarboard embossing folder.


I pulled out my graduation dies and cut a mortarboard and tassel for each card, and a "You did it!" sentiment and its shadow.

Both the sentiment and the mortarboard were popped up on foam tape.


I stamped a sentiment on the inside of each of these cards.


This is a fun fold graduation card. It's called a "double decker pop up card," and I learned how to make it from Patti Dolan's video.


I used my mortarboard embossing folder and a couple of stamps on the front. I also added one "gem" star for the button on the mortarboard and a few tiny holographic stars.


I added a stamped sentiment to the pop up panel on the inside. Isn't that sentiment just perfect for this "starry" card?

The star-patterned panel that you see was created with some layering stencils. I love having a selection of stencils to help me create special backgrounds.


Here's what the card looks like when it is on display and you look down at it. You can see the pop up mechanism for the center panel.

I made one of these for the thrift store and one for my brother to give to his daughter. He thought it was a really cool card, so I'm going to keep this card design in mind and use it again.

Do you have any favorite fun folds that you use regularly? I'd love to know what they are, and if you have a link to a tutorial, I'd REALLY love that!

Thanks so much for stopping by, and remember to laugh--a little or a lot--every day.

Cheryl

Friday, May 17, 2024

Fun-to-make graduation card...

I found some wonderful instructions for making a fun graduation card here. Dawn of DO Stamping posted a video (way back in 2010!) showing the process and a link to a pdf that has all the information you need to make this card.

Here's the card I made following her very clear and detailed instructions:


I used some gold embrooidery thread to make the tassel and an enamel dot for the button in the center. Did you know that the mortarboard is also called an Oxford cap? We have a grandson attending Oxford University in London right now, and I wonder if he'll wear one when he graduates in a couple of years.


I have a die that cuts a row of celebratory graduates. I cut one away that would have been partially covered by the point of the mortarboard, which left two on each side.


Here's what this one looks like when the card is fully opened. I made several of these and stamped something a little different on the inside of each one.

If you want to make some quick graduation cards, this is the one for you. What seems to take me the longest is creating the tassel. There are lots of videos on YouTube that show how to make one. I like how they're made in this video

*****

This week, my DH and I started attending a Tai Chi class on Wednesday afternoon. We were both hopelessly out of step with the rest of the class, but I'm hoping we'll learn it eventually. It's really relaxing and the fluid movements have a calming affect. Have you ever tried Tai Chi? If so, I'd love to know your thoughts about it.

Thanks so much for stopping by, and remember to laugh--a little or a lot--every day.

Cheryl

Wednesday, May 15, 2024

A few random cards...


I had a single piece of this glittery, striped cardstock sitting in my stash for ages. I decided to get out my ice cream cone die and use the colors of the stripes for the colors of my ice cream. I don't often make slimline cards, but it's always fun, when I do.

I cut the happy birthday sentiment out of three different colors of CS and then offset them slightly when I stacked them. If you enlarge the photo, you can see the different layers.


As I was cutting out the "scoops," I was imagining what flavors they would be: pistachio, orange creme, blueberry, lime and vanilla.


I stamped a sentiment on the inside and also an ice cream cone. This one looks a bit more like a Dairy Queen cone with its flat bottom and curlicue at the top.


This card came about because I had the vase die-cut laying on my desk. The leaf die, which is from Dollar Tree, was also laying there begging me to use it--so I did. I did a little bit of inking around the edges of the leaves before gluing them down.

The sentiment was stamped, die-cut and then popped up on foam tape.


For some reason, I really love making card bases where the front is cut 1" less in width than the back. I think it's because the decorative strip that is invariably added to the right side decorates not only the front when the card is closed, but also the inside.

I added a stamped sentiment to finish the card.


Quite some time ago, when I wanted to make a card with a rainbow on it, I decided to cut the rainbow out of five different colors of cardstock and use the resulting arcs of color to create five different rainbows. The colors are in the traditional order on only one of them--and this is not that one. ha ha

The sentiment was heat embossed onto the DSP.


The clouds were die-cut and popped up on foam squares.


Once a sentiment was stamped on the inside, this card was done.

I like the simplicity of this card, and I think it might brings some comfort to someone who is ill.


Our bleeding heart is quite lovely this year. I not only like the blossoms, but I also like the shape of the leaves. 

Thanks so much for stopping by, and remember to laugh--a little or a lot--every day.

Cheryl