Wish List

Wednesday, February 28, 2024

Playing with oil pastels...

 Not long ago I got a set of oil pastel crayons. I really wasn't sure how to use them, but thought I'd give it a try anyway.

I created the colored background (behind the rectangular sailboat die-cut) with the pastels. I scribbled on the colors I wanted in the area where I wanted them and then used a small sponge, dipped in odorless mineral spirits to smooth out the colors. 


I like the way the colors blended and softened. 

Once I had the background the way I wanted it, I glued on the white die-cut. Then I popped up both the rectangle and the sentiment on foam tape.


I printed an inside sentiment with my computer to finish the card.


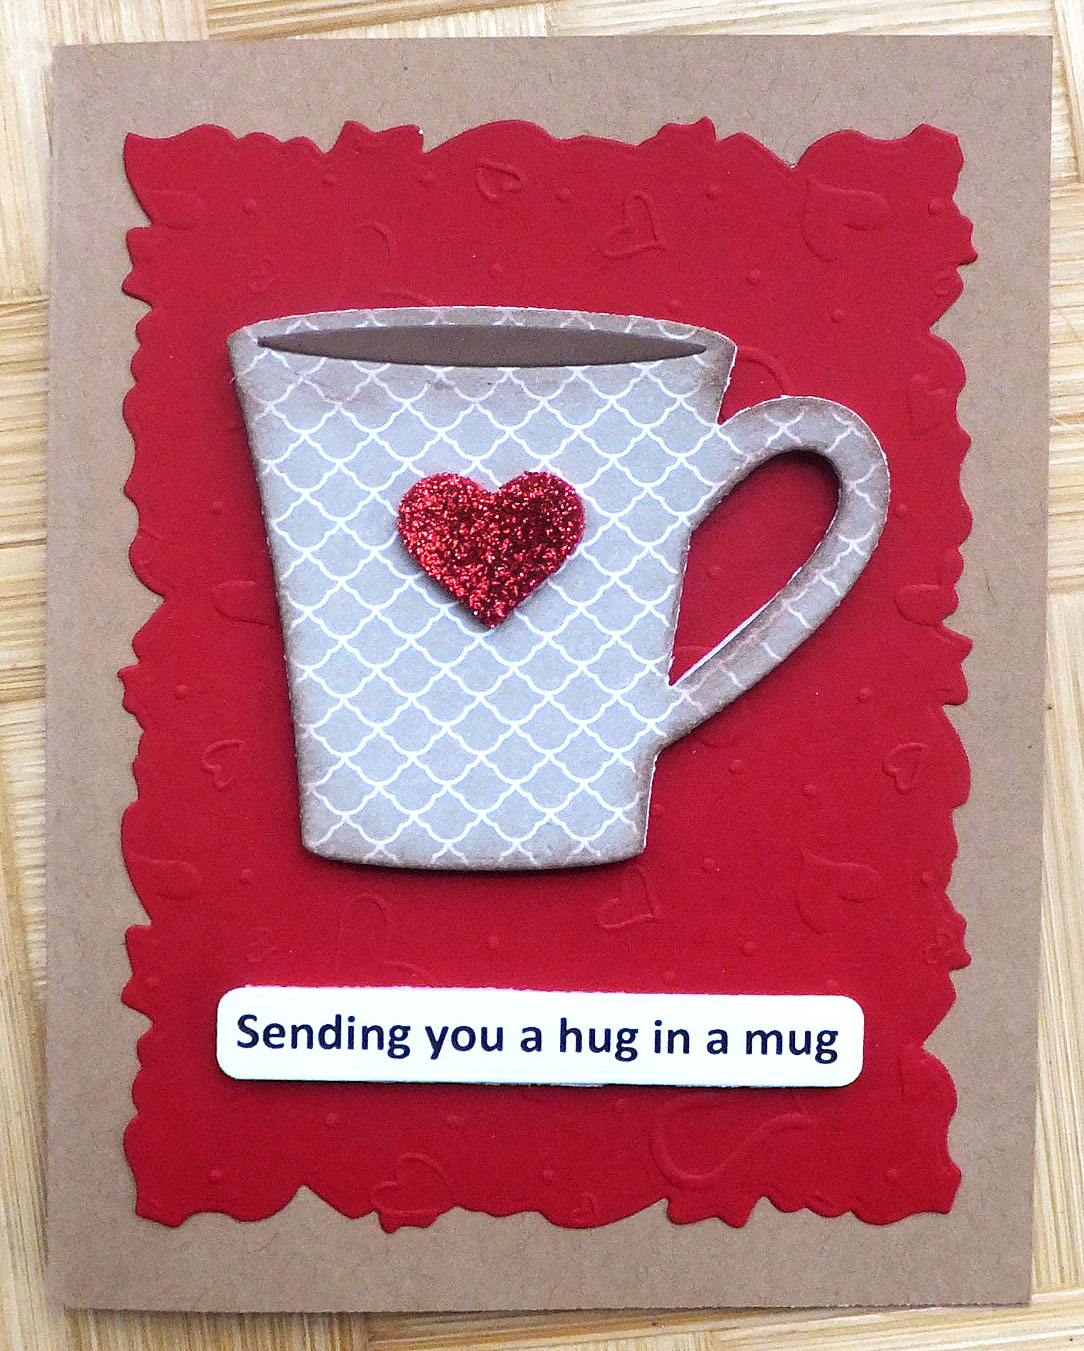
For this card, I created the background with the pastels and then stamped my image on top of it with
black ink.


I matted my rectangle before popping it up on some foam tape.

The sentiment was stamped with Versafine black ink and then heat-embossed with black embossing powder.


I used a stamp for the sentiment on the inside of this card.


Finally, I want to share the handmade Valentine my husband made for me. It was the first time he ever made one. I guess all my card making has inspired him, lol.

His crafty skills are pretty nonexistent, but it's the thought that counts, right? Besides that, he made it the morning of February 14th, so he (obviously) didn't take much time with it.


This was the front. all hand cut, hand drawn, hand written.


And here"s the sweet message on the inside.

I asked him why he used a green marker (it looked a little Christmas-y to me). He said, "Because it's the marker that was on my desk." I thought, "Yup, that's what I do, too. If it's on my desk and in sight, I tend to use it."

He is such a sweet, caring man. I'm lucky to have him!

Thanks so much for stopping by, and remember to laugh--a little or a lot--every day.

Cheryl


Monday, February 26, 2024

Pretty butterflies...


I used a Spellbinder's curved border die to cut my two pieces of DSP.  The die adds a nice scalloped and stitched edge. 


I die-cut three lavendar butterflies that also had some stitched detail on them. 

I added a gem to each butterfly and lifted their wings with a bit of foam tape underneath each one.


A simple stamped sentiment on the inside finished my card.

I have found that die-cut butterflies help a card to sell quickly at the thrift store. People really seem to like them.

*****

Last Friday, we attended a "Pops" concert put on by the Edina High School Concert Band. My granddaughter Polly plays trombone in the band and performed a solo during the concert. She was also part of a couple of dance numbers. That girl definitely has some great moves!!

On Sunday afternoon we attended a performance of Cantus & the Canadian Brass (the tickets were a Christmas gift from my daughter). Both groups were so talented and put on an outstanding show. If you ever get the chance to see them, don't hesitate to go!

Thanks so much for stopping by, and remember to laugh--a little or a lot--every day.

Cheryl

Friday, February 23, 2024

Balloons and the Blackout technique...


I saw somewhere online (I forget where) how a cardmaker glued balloons to a background, and I wanted to give it a try. 

I started by punching out a bunch of balloons from different colored scraps. Then I cut a 4" X 5 1/4" panel, and I began randomly adhering the balloons. When I was done, I trimmed off any balloons that were hanging over the edges of my panel.

For my first card, I put a piece of vellum across the center front of the card to subdue the brightness of the balloons. Then I adhered a sentiment that had been die-cut from glitter cardstock.


For the second card, I die-cut a different sentiment from white glitter cardstock and backed it with some plain red cardstock. I then popped it up on dimensionals.


On the inside of each card I stamped a sentiment and added a couple more of the balloons, drawing on some strings with a black pen.

I still have some punched balloons left on my desk, so I may be making yet another one of these cards very soon. I've got some other ideas, too, like adding metallic silver or gold balloons to a black panel, or maybe even using pink or blue balloons and creating a "Welcome Baby" card.


This card was made after I was inspired by mt friend Lynette's cards that she shared in this post She sent the card with the bird on it to me for my birthday in January. I loved it so much that I just had to give it a try.


I die-cut a white panel of cardstock and embossed it with a 3D embossing folder. Then on the debossed (back) side, I added some colors of ink to the flowers and leaves, using my smallest blending brushes.

After I had the colors to my liking, I dragged a black ink pad lightly across the top of the panel several times and in different directions to get the desired result. 

After tying a ribbon around my panel, I adhered it to a pale pink cardbase and die-cut a stamped sentiment and popped it up on dimensionals.


I used the same die set that I used for the embossed panel on the front to cut a couple of panels for the inside.

This sentiment stamp was one I had not used before, and I wondered if anyone would buy this card (at the thrift store) with that sentiment. It must have fit someone's needs, because I checked yesterday during my volunteer shift and it had sold.

I hope you'll give one or both of these techniques a try. They were great fun!

Thanks so much for stopping by, and remember to laugh--a little or a lot--every day.

Cheryl

Wednesday, February 21, 2024

Cards inspired by a friend...

 My friend Lynette (My Stamping Addiction) made a couple of lovely cards and shared them in this post. I knew that I had some pretty flower stickers that I had picked up at the Dollar Tree, so I followed her lead and made these cards:

These were pretty quick and easy to make, and I really like how they turned out.


If you look closely at this picture, you can see that I used a pinpoint design plate on the background panel.

The flowers heads and the sentiment are popped up on dimensionals.


Both cards had the same stamped sentiment on the inside.

Thank you, Lynette, for inspiring me! I'll continue to check out your blog for more ideas.

*****

We are back in the 40s and 50s, temperature-wise, here in Minneapolis. It's downright springlike outside and I'm loving it. I imagine we'll still get a little more snow, but the bulk of the winter is over and we can all start thinking about planting flowers around our homes. Yay!

Thanks so much for stopping by, and remember to laugh--a little or a lot--every day.

Cheryl

Monday, February 19, 2024

Dollar Tree stamp set...

Not long ago I was in a local Dollar Tree store, and, of course, I had to check out the craft section. I found a stamp set that was really quite nice that I was sure I would use.

Here's the first card I made with the set:

The flower, leaves and sentiment that you see here were all part of the stamp set. The flower has been popped up on dimensionals.


This flower was the largest stamp in the set. There were also a couple of smaller flowers, some leafy sprigs and a couple more sentiments.

The flower was colored with colored pencils and odorless mineral spirits.


This card is a special top fold. You can see the opening that has been die-cut into the card front.

The inside has a panel that is 6" X 5 1/4", scored at 4" on the 6" side.

The fancy cut out (from the card front) has been glued on one side to the 2" side of the inside panel. I was careful to make sure it perfectly matched the opening in the front of the card before gluing it down.


I stamped one of the smaller flowers and a few leaves, colored them and fussy cut them so I could glue them onto the inside of the card.

This second sentiment is from the same stamp set.

I thought this was such a nice little stamp set for $1.25! If you have a Dollar Tree in your area, be sure to check them out from time to time to see if they have any of these sets in their craft section.

Thanks so much for stopping by, and remember to laugh--a little or a lot--every day.

Cheryl


Friday, February 16, 2024

Beautiful borders can make a card...


I was gifted a package of beautiful 12" long borders a few years ago and haven't really used them much. Every once in a while, when I run out of ideas, I pull them out and use one of them. And that's how these cards came to be.

The row of daisies on the rust-colored background is the border I used. I put it at the bottom of a panel of DSP, then added a die-cut sentiment and some gold dots with a Viva Decor pen.


The inside of the card was stamped with a nice sentiment verse.


This card was made in exactly the same way. Only the gold dots were applied in different positions.


And a different sentiment was stamped on the inside.


Finally, here's a fun card I made a few weeks ago but hadn't shared yet.

The digital image is "Gus" from Bugaboo Stamps. I colored him up with alcohol markers, cut him out with a wonky-stitched square, and popped the square up on foam tape.

The sentinent was printed with my computer, then die-cut and also popped up on foam tape.


I added some Glossy Accents to his glasses and some sparkle to the candle flames.


I decorated the inside of the card just a bit and added a computer-generated sentiment.

*****

I am happy to report that all the Valentines I made for the thrift store--about 30 of them--sold by Valentine's Day. I worked hard this past week to make 23 more cards to refill the "Handmade Card Basket" at the store. 

We had about 7 inches of snow Wednesday night. It was the first real snow we had since Halloween! I don't think it will last long, though, as the weatherperson is predicting temps in the mid-40s in a couple of days.

Thanks so much for stopping by, and remember to laugh--a little or a lot--every day.

Cheryl

Wednesday, February 14, 2024

Happy Valentine's Day...

 I promise, these are the last Valentines I will share this year (even though there are still more that I have made).

This card was made using the "fractured" card technique. I have a die set that cuts different widths of stitched strips, so I decided to try using the 1/8" wide strips for this card. I liked the look of the narrower strips.

The hearts were also die-cut, backed with a pale pink, and one of them was popped up on a dimensional.

The cute little bee was stamped, colored with markers and die-cut. Those tiny yellow hearts were from a package of heart confetti that I had in my stash.

I printed the sentiment with my computer and popped it up on dimensionals.

This card is super simple. I die-cut the pretty heart. I backed the openings with double-sided tape and adhered the whole panel to a red cardstock panel. Then I sprinkled the heart openings with some red glitter. The exposed tape grabbed onto the glitter and all I had to do was burnish it in a bit with my finger.

The sentiment was heat-embossed and popped up on foam tape.

I love the simplicity of this Valentine. I only made three of these, but I plan to make lots more of them next year.


Here's the computer-generated sentiment I added to the inside.


This card was made with supplies from a card kit. I wasn't crazy about the outside designs, but I did like the fun addition to the inside.


Each card interior had a spiral with one end connected to the bottom and the other end to the top of the card. Once the spiral was glued in place, I was able to open the card and decorate it with hearts.

Whew! That concludes my 2024 Valentine posts. I hope you didn't grow too weary of looking at them.

Thanks so much for stopping by, and remember to laugh--a little or a lot--every day.

Cheryl

Monday, February 12, 2024

Still more Valentines...

This card design was a great way to use up some scraps. The glittery double heart was a foam sticker from Dollar Tree. I liked this one so much that I made another one with still more scraps. 

The inside of this card says, "You are so special to me."


I made eight of these Valentines using different papers. They're quick, easy and fun to put together.


For this card, I first cut a blue panel and then inked around the edges with a darker blue. When I was done inking, I used a starry sky background die to cut out all the stars.

Finally, I added the moon (cut from matte metallic cardstock with a circle die) and a heart hanging by a thread. The moon, heart and sentiment strips were all popped up on foam tape. 

I added just a few more holographic stars for some extra sparkle.


I also made several of these cards using different papers.. I really didn't have a coordinating paper to go with the plaid, so I chose a piece of variegated pink paper and used a splatter stamp to add some red dots to it.

I think the folded down corner adds so much interest to this card, and it's so easy to do!

The last three cards were stamped with "Happy Valentine's Day" on the inside.

If you haven't finished making your Valentines yet, I hope these cards give you a few ideas for some quick makes.

Thanks so much for stopping by, and remember to laugh--a little or a lot--every day.

Cheryl

Friday, February 9, 2024

A few Valentines...

 I made dozens of Valentines this year, so here are a few I thought you might enjoy seeing:

For these two cards, I used a couple of my trusty vase dies. It's been fun to add different "plants" inside the vases, like these little heart blooms.

Each vase was die-cut/embossed, inked a little and then popped up on foam tape. The sentiments were stamped, die-cut and popped up, as well.

For these cards, I used a couple of free images from the Hungry JPEG (hungryjpeg.com). They always have free images available, and I've used a number of them over the years.

I added some Glossy Accents to the heart that each hamster is holding and I've popped up the sentiment.

For these two cards, I used a couple of curved border dies and then layered the papers. The scalloped heart on each card was popped up on foam tape. The sentiment was printed with my computer.

I still have a number of Valentines to share with you, but I'll save them for another post.

My DH and I are struggling to recover from our bad colds. Mine is on the way out, but poor DH is still suffering. A little sunshine around here would definmitely help us both to feel better!

Thanks so much for stopping by, and remember to laugh--a little or alot--every day.

Cheryl

Wednesday, February 7, 2024

Masculine Valentines...


A mug of steaming coffee (or hot chocolate) for a guy works, right? I used kraft for the card base, which I think is geat for masculine themes, and popped the mug up on foam tape. 


The only non-male thing I added was the glitzy heart on the mug, but that's the giver's love shining through. ha ha

I thought this card would work great if someone wanted to include a gift card to a coffee shop.

The sentiment was printed with my computer, die-cut and popped up.


The inside featured a stamped sentiment and three more glitzy hearts.

On the advice of crafty friend, Donna, I am entering this card into challenge #340 at the Cardz 4 Guys Challenge Blog.


Now this one is definitely masculine. I had a sheet of  dsp that had a big part of the world map on it, so I cut that up to use as my background panel. I purposely die-cut the world in muted colors and then added a deep red, punched heart in the center, which was covered with Glossy Accents.


The world was popped up on foam squares, as was my sentiment circle.

I kept all these cards really simple. It seems our masculine counterparts like them that way. At least I hope so!


Another stamped sentiment was inside this one with a couple additional hearts.


I know, I know, this one looks pink. But it really was more of a peachy color than pink. The center piece of DSP with the banners printed on it has been popped up on foam squares.


I die-cut the XOXO from gold metallic catdstock and adhered it to the DSP.


This one has a humorous sentiment on the inside that I printed out with my computer.

All of these Valentines were donated to the thrift store and sold quickly, so I think there were customers that found them to their liking.

I finally finished enough Valentines for my own personal use and I'm trying to get them addressed and in the mail. I've had a bad cold the last few days, so I haven't spent as much time as I would have liked in my crafting space. But I'm on the mend, so I'll get it all done...eventually.

Thanks so much for stopping by, and remember to laugh--a little or a lot--every day.

Cheryl