Wish List

Friday, January 28, 2022

You're my favorite critter...

 I needed to make some Valentines to donate to the thrift store, and I was trying to think of something that kids would like to receive from grandparents, aunts and uncles or others. I found a package of little critters made from felt at Dollar Tree and thought they would make some really fun cards.

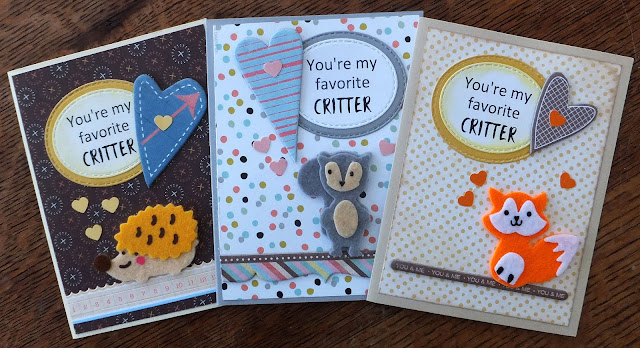
The package contained four "critters." I've used three of them on today's cards--a hedgehog, a squirrel and a fox. There was also an owl, which I used on a somewhat different card. I'll share that one in another post.

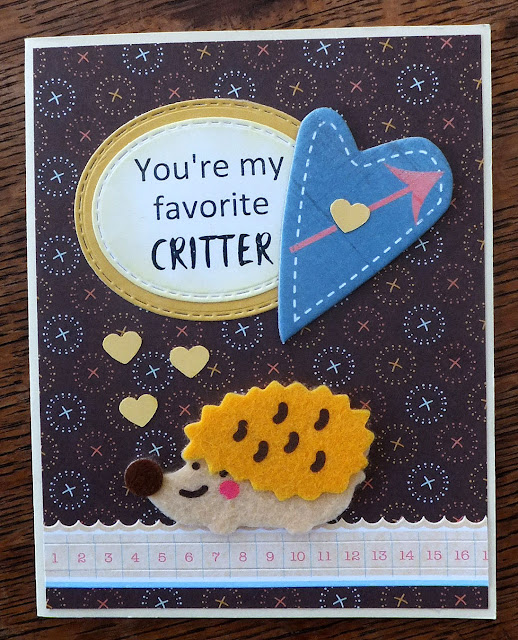
This card features the hedgehog. The largest hearts and the borders at the bottom of each card are all stickers that were given to me by the thrift store, so it was appropriate to use them on these cards. I punched out and adhered the small hearts you see.

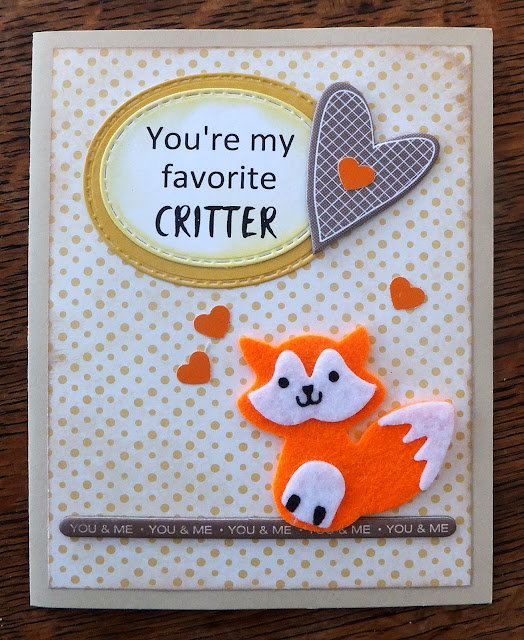
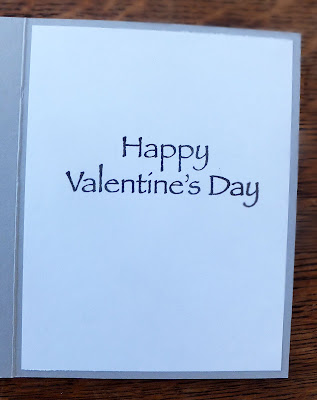
My sentiments on these card fronts were computer generated. This one was inked a little around the edges.

These Valentines were so much fun to make. I always feel good when I can use up some of the supplies the thrift store gives me and donate them back in the form of cards that they can then sell.

The inside of each card was stamped with a simple "Happy Valentine's Day." This left lots of room to write a personal note.

Yesterday I celebrated my birthday by volunteering at the thrift store. I took in these Valentines, along with other Valentines and all-occasion cards. On my way out of the store at the end of my shift, I noticed that several had already sold. Each week I donate 12-24 cards, depending on how much time I have to make them. I do make lots of duplicates, so once I have the "recipe" for a card figured out, I can make several of them in an afternoon. It's too bad I can't seem to give that kind of focus to house cleaning and cooking!!

Thanks so much for stopping by, and remember to laugh--a little or a lot--every day.
Cheryl

Monday, January 24, 2022

You make my heart happy...


 For this card I reached into my large plastic envelopes filled to the brim with paper scraps and pulled out leftover pieces of blue, red, orange, yellow and green. I cut a full rainbow from each color. Then I made five cards like this one, with the rainbow starting with a different color at the top for each one. 

Because I've used so many snippets for this card, I'm entering it into the Snippets Playground Challenge #420 - Ruby's Memory.


In this photo, I think you can see that I have popped up my die-cut clouds with foam squares.

My computer-generated sentiment is also popped up on a strip of foam tape.


The inside of my card has another computer-generated sentiment with an additional red heart. All the little hearts on this card were punched out from snippets of red CS, of course! So much fun.

It is so terribly cold here that I am loathe to even go outside. I need to take some books to the Little Free Library on our block, but I don't even want to walk half a block outside in order to do that. It will not get above 0 degrees tomorrow and the weather people have warned us that the windchills will be dangerous; they may reach a -40 degrees! I think the Little Free Library donations will have to wait a day or two.

Thanks so much for stopping by, and remember to laugh--a little or a lot--every day.

Cheryl

Friday, January 21, 2022

I'd spend nine lives with you...


I have this pretty scroll-y frame die, as well as the die for the pair of cats. I thought that together they would make a cute Valentine.

After adhering my DSP (Stampin' Up) to the card base, I carefully glued down my little frame. 


The cats were popped up on foam squares, which I think you can see in the photo at left.

The sentiment (computer-generated) was matted and also popped up on foam tape.

The little hearts were made with a punch and glued directly onto the DSP above the cats.


Inside, I stamped "Happy Valentine's Day" and added one more slightly larger punched heart.

The most difficult part of making this card was getting the delicate frame out of the die. I had to take great care so as not to tear one of the little curliques.

We are gritting our teeth (when they stop chattering, that is) to get through a really cold spell that has descended on us from Canada. Our lovely Canadian neighbors like to send us these cold fronts every now and then. I only wish we could return the favor. LOL

Thanks so much for stopping by and remember to laugh-- a little or a lot--every day.
Cheryl


Tuesday, January 18, 2022

Gray and white sympathy card...


During my craft space clean-up, I found a half sheet of this pretty gray and white DSP. I set it aside so I could make some cards out of it as soon as I was done cleaning.

I cut three gray card bases. The thrift store had given me a partial package of the white flowers--there were three of them left in the package, and I had just enough of the DSP for three card fronts. It was kismet!


The flowers already had the clear gem in their centers. I simply cut a couple of leaves for each of them from silver metallic cardstock.


I die-cut the sentiment from the same silver cardstock. This cardstock is more of a brushed silver, rather than a bright chrome. I really like it for applications like this.


For the inside, I printed a sentiment with my computer. I really liked the understated colors of these cards and their simple design. Two of them will be donated to the thrift store, but I will keep one of them for my stash.

Last night we went over to my daughter's house for dinner. She made Knöpfle Soup. This is a popular soup in North and South Dakota and parts of Minnesota. It is usually made with chicken and its broth, cream, potatoes and a few other vegetables, as well as the knöphle, which are little "button" dumplings similar to German spätzleI brought a crusty loaf of bread that we warmed in the oven and some apple crisp with ice cream for dessert. It was a very satisfying meal on a chilly night!


Thanks so much for stopping by, and remember to laugh--a little or a lot--every day.
Cheryl


Friday, January 14, 2022

As I was organizing and putting away...

 ...all of my Christmas card supplies, I came across a die-cut cluster of snowflakes and some die-cut words. So in the middle of my mess, I stopped and made a card.

The snowflake cluster and words had been in my stash since last year! I just couldn't bring myself to store them for another year or throw them away. The background paper was a portion of a 12" X 12" sheet that was begging to be used, as well.


I searched through my gems to find some blue ones of different sizes and added them to the centers of the snowflakes.


The inside of the card was stamped with a simple Christmas greeting. Finally, a card for Christmas 2022 is done! Now I just need to make about 100-125 more of them for my personal needs and for the thrift store to sell. Thank goodness I have 11 1/2 months to get them done.


Last night we attended a jazz band concert in which our granddaughter Polly played trombone. It was such a fun concert and the kids played so well! There is so much talent in the group. Our feet were tapping the floor in rhythm to the music during every song. Jazz is my DH's favorite music genre, so he really enjoyed every second of it. I hope she continues with the jazz band for her two remaining years of high school. The concerts are such a treat!

Thanks so much for stopping by, and remember to laugh--a little or a lot--every day.

Cheryl

Tuesday, January 11, 2022

Creating tiny pearls with Nuvo Drops...

I have seen handmade cards online that featured lines of tiny pearls that the crafter made with either Perfect Pearls or Nuvo Drops. I thought they looked so pretty, so I gave it a try with some of my Nuvo Drops. I didn't really succeed, as mine aren't nearly as perfectly shaped as the ones I saw...but it was fun.

I added a vellum oval to some pretty paper from Stampin' Up. The vellum was adhered along its edge and underneath the die-cut flower and sentiment. 

It took some time to add all my tiny pearls. I also had to wait until they were fully dried before I finished the inside of my card.


This flower was made with one of my favorite die sets. The petals are a good size so that I can place a small piece of foam tape under some of them for added dimension.

I tried to match my die-cuts to the colors in the DSP.


While I waited for my pearls to dry, I made another card.


This card was put together with bits and pieces from my card parts. I know my doily looks like it has been adhered at an angle, but it really is straight. Really! I'm just a very bad photographer.

ETA: On the advice of master cardmaker, Darnell, I am entering this card into challenge #419 on the Snippets Playground blog. My card, after all, was made entirely from snippets (except for the base).


On the inside of the card, I added a stamped sentiment. I also added a stamped sentiment to the inside of my first card, but I forgot to take a photo of it.

I am currently making some thank you cards for the thrift store. I have misplaced one of my favorite "Thank You" dies. I sure hope I didn't accidentally throw it out with all my paper scraps when I was cleaning and organizing my craft space.

Thanks so much for stopping by, and remember to laugh--a little or a lot--every day.
Cheryl

Friday, January 7, 2022

Balloon cut-out...

 I had a small piece of balloon patterned cardstock and thought I'd use it to make a quick birthday card.

To add something just a bit special to my card, I carefully cut out one of the balloons and made it into a shaker. Then I added a die-cut of the word "Happy" and a "BIRTHDAY" word banner. So quick, so easy!


On the inside, I added some more die-cut balloons and four different sentiments, stamped at different angles.

Now I wish I had more of this balloon paper to make a few more of these!

I have succeeded in putting away all of the Christmas decorations and also cleaning up the Christmas card-making chaos in my craft space. Isn't that a mouthful? 

We will give the house a thorough cleaning this weekend. Maybe THEN I can really concentrate on getting some cards made for the thrift store and for some upcoming family birthdays.  

Thanks so much for stopping by, and remember to laugh--a little or a lot--every day.

Cheryl

Wednesday, January 5, 2022

Let's Craft and Create Challenge #179: Anything Goes with an option of Something New (new home, new baby, New Year, etc.)...


Oh, my gosh, it's 2022! Can you believe it? The older I get, the quicker time flies. 

It is time once again for a new challenge at Let's Craft and Create. We hope you'll join us with your creation. Remember, you can choose "Anything Goes" or "Something New" for inspiration.


I decided to to make a card to send congratulations on a new house. Because I enjoy making slimline cards, that is the format I chose.


I started with a pale blue panel and matted it with a pale yellow panel.

I heat embossed my sentiment, "Congratulations on your new house," onto the blue panel.


My streetscape was cut twice from white cardstock and adhered together for more dimension before it was glued to the blue panel. The special house, which was backed with some of the yellow cardstock, was popped up on dimensionals.


Since I like to make more than one card when I settle on a design, I made the same card again using gold metallic cardstock instead of the yellow.


I really like the way the metallic cardstock is so reflective in the windows of the house.


I kept the inside of each card very simple with just a stamped sentiment.


Here's a peek at both cards together.

Now it's your turn. Be sure to hop over to Let's Craft and Create to see what the Design Team has made to inspire you. There is a prize for this month's winner, too!

Thanks so much for stopping by, and remember to laugh--a little or a lot--every day.
Cheryl


Monday, January 3, 2022

Happy Beerthday...

Quite a while ago I purchased a package of random small dies, and this beer mug die was one of them. It came with three pieces--the mug shape, the inside piece (for the beer) and the foam.

The mugs were cut from white, translucent vellum. I know it looks blue in the photo, but that's just my blue circle of cardstock showing through.

The beer pieces were cut from gold cardstock, covered with double-sided tape and adhered to the backsides of the mugs.

The foam was cut from poster board, giving it lots of dimension.

The sentiment on the front of the card was computer-generated, and the inside sentiment is an old wood stamp that I got from the thrift store.

This slimline card was very quick (and fun) to make. I think it works great as a masculine card (if the guy likes beer, that is).  I have a few males in my family who enjoy having a beer, so I think this card design will get some more use.

I hope your new year has started well. We've had a brief spate of cold weather, but it is supposed to warm to 30 degrees today, so that will feel almost balmy! 

 I have begun putting away the Christmas decorations. It usually takes me a couple of days to get it all done. When do you put yours away? Soon after the holiday, or weeks later?

Thanks so much for stopping by, and remember to laugh--a little or a lot--every day.

Cheryl