Wish List

Tuesday, December 29, 2015

A simple, masculine birthday card...

Whenever I need to make a masculine birthday card, I think "simple design" and "graphic."

So this is my take on a simply designed, graphic card.

To start, I pulled out my Die-Versions birthday banner die and some white cardstock. I also used my Elizabeth Craft "Happy Birthday" word die for the word "Happy." I found a paper pad that had some rather masculine looking designs in it. Not sure who the manufacturer is, and since it's nearly 11:30 p.m. as I write this, I'm too tired to go search for it!

Here you can see how I curled up the tails of my banners to add a little dimension. I added a few glittery stars (there are even two stars holding up the ends of my banner) because even guys need a little sparkle in their lives.

I also added a few stars on the inside to dress it up a little.

Well, that's my simple card for today. It's been a little hard to get back into "normal" card-making after all the Christmas cards and tags I made. Hopefully, my next cards will have a little more pizzaz.

We got about 4.5" of snow last night, so there was a bit of shoveling to be done today. It wasn't terribly cold out, so it was pleasant enough to be out in the fresh air. I don't mind shoveling if it's under 6".

Today I started a big kettle of turkey noodle soup, which I will finish up tomorrow. I'm using the leftover turkey from Christmas. My family loves homemade soup, and I love making it, so it's a win-win!

Stay warm wherever you are, and don't forget to laugh--a little or a lot--every day.
Cheryl

Thursday, December 24, 2015

Merry Christmas to all...

We are ready for Christmas at our house. Our family members will gather here this afternoon and we will have some fun playing board games for a couple of hours. We had hoped to be able to go sledding, but the weather will just not cooperate! We had a bit of slushy snow yesterday, but not nearly enough to allow for sledding or even building a snowman. Once it gets dark, we will take a tour of our city to look at some of the beautiful light displays. Then, after a casual meal of hearty homemade soups (Chili, Cheesy Corn Chowder and Chicken Wild Rice), we will exchange gifts. That is the part that the grandchildren can hardly wait for!!

But before we do all that, I thought I'd share one more Christmas card.
For this card, I used an embossing folder that came free with the last issue of Cardmaking & Papercraft. I simply embossed the design and then added a little chalk to the leaves and vines and some tiny dots from my red and gold Viva Décor pens. The "Merry Christmas" die-cut is by Dee's Distinctively.


Here's a little closer look at the embossing.


I added a stamped Christmas sentiment on the inside to finish my card.


I hope that you have completed all your holiday preparations, wherever you are, and can now sit back and enjoy your own family's celebrations. I wish each of you a very merry Christmas and a happy, healthy and prosperous New Year!

Thanks so much for stopping by, and remember to laugh--a little or a lot--every day.
Cheryl

Tuesday, December 22, 2015

Wrapping things up...

I had these little boxes of Pirouline cookies that I wanted to give as little gifts. These boxes are only about 1 1/2" X 3" X 7". Because they are such small gifts in both size and cost (I found them in the dollar bins at Target), I wanted to make them special by dressing them up in a fun way.

First, I wrapped them in a couple layers of white tissue paper. Then I grabbed some scraps of fleece fabric I have had for years and cut a rectangle for a hat and a long narrow piece for the scarf. I used my sewing machine to quickly sew the two narrow ends of the rectangle together for the hat. Then I simply cut a fringe around one end, slipped the other end over my box and tied the top with some embroidery thread to make a sort of pompom. I also cut a little fringe on both ends of my scarf.


I used some black puffy paint for the eyes, mouth and buttons down the front. My nose was cut by hand out of a scrap of orange cardstock.

This was honestly SUPER QUICK to do, especially since my sewing machine and fabric scraps are always at hand in my little craft room.

I wrote the names of the recipients on the back and set them on the branches of my Christmas tree. They're very light weight so they sit quite nicely, nestled in the branches. And they look cute, too. My husband even noticed them!


I'm nearly done making cookies. Once they're done, I'll start working on the soups for Christmas Eve. We have a tradition of having hearty, homemade soups for our evening meal on that day. We like to go sledding in the afternoon on a nearby hill (IF there's enough snow - it doesn't look good this year!) and then come back for soup before we open gifts. This year I'll be making Chicken Wild Rice, Cheesy Corn Cheddar and Beef Chili. The wild rice soup is my family's favorite, so that is a "must-have." The other two soups vary from year to year, although I always tend to make Chili. On Christmas Day we will have a big meal of roast turkey and dressing with all the fixings. I will also need to make the pies (Cherry, Pumpkin and Apple) for our dessert on Christmas Day. I don't think I'll have to cook for a month after the holidays, as there should be lots of leftovers, which I love!

Do you have special foods that you only make during the holidays? I'd LOVE it if you'd leave a comment and let me know what they are.

Thank you so much for stopping by, and remember to laugh--a little or a lot--every day.
Cheryl

Sunday, December 20, 2015

Oh, "deer," it's nearly Christmas...


This card was inspired by one that I received last year from a fabulous lady in Germany who makes amazing cards. In fact, I shared her card on my blog in this 2014 post.

I cut an aperture in my DSP with a reverse scallop circle die (Spellbinders) and then a small aperture in the white mat underneath.

I used some 2" wide glitter tape by Heidi Swapp to create my background scene. I cut it out with a Tree Line die by Marianne Creatables. You can see that I've got a couple of layers that have been inked around the edges with some teal-colored ink. The cardstock that was used for the "sky" behind my trees is actually a very, very pale teal color, even though it looks white in the photo.

My pretty deer was cut with an Impression Obsession die.

I cut a second aperture in my card for my sentiment. I decided to add some clear flat-backed gems on either side of it for a little more sparkle.


Finally, the inside of my card was adorned with a few snowflakes punched from the same DSP that is on the front. I think I went a little overboard with the snowflakes. Looks like there's a blizzard happening there!! They were all firmly stuck down, though, so no changing it after the fact.

I can finally say I have "some" of my Christmas cookies made. I won't get any done today, but Monday and Tuesday I'll be chained to my kitchen to finish them up.

This afternoon we are going to a play with friends and then to their house for dinner. I'm really looking forward to it! I love live theater productions and spending time with good friends.

Thanks so much for stopping by, and remember to laugh--a little or a lot--every day.
Cheryl

Friday, December 18, 2015

Snowflake Christmas card...

Here's a card I made with a large Darice snowflake die. It's nice to have a few dies this size, because they can really serve as the focal point of a card and not much else is needed.
 
I cut my snowflake from navy blue cardstock and then "sugared" it with a thin coating of clear glitter. Finally, I adhered a clear flat-backed gem to the center.
 
The sentiment on the front of my card was stamped with navy blue ink and then some sparkle was added to the little center star with a glitter pen.
 
The inside of my card was fairly unadorned, but I did add some glitter pen sparkle to the words "Peace" and "Joy." It just doesn't show up in my photo.
 
I'm entering this card in Freshly Made Sketches Challenge #217. Here is the fabulous sketch they provided for inspiration:
 
I finally got my wrapping and card-making messes cleaned up today. It took SO LONG - nearly all afternoon! I still have one little pile of paper scraps to sort out and put away, but it looks so much better. I can finally walk through my craft area without taking my life in my hands. I even found one of the two bone folders I had lost somewhere in all my craft stuff. My favorite one is still missing. I simply have no idea what I did with it or where I may have dropped it! Maybe after the holidays I can methodically go through ALL my stuff and, hopefully, find it.
 
It's bake, bake, bake now until the big day comes. That also means lots of taste tests. ha ha
 
Have a great weekend, and thanks so much for stopping by. Remember to laugh--a little or a lot--every day.
Cheryl

Thursday, December 17, 2015

Vellum poinsettias...

My three sisters are VIPs in my life, so I wanted to send them some special Christmas cards. I first made an all-white card, which I featured in this post, and then decided to make two more cards based on this one. But instead of using white vellum for the poinsettia, I used a fairly deep pink vellum, which I happened to have on hand.


I cut the petals of my poinsettia (5 large, 10 medium, 5 small) using a Cheery Lynn Holly Leaves die. After they were cut, I took each petal and dipped its edges in liquid glue and then in glitter to give it a frosted look.

Add caption


When they were dry, I assembled my petals onto a 1" circle of double-sided adhesive with the backing paper removed from only one side of it. I didn't remove the other side until I was ready to adhere the entire flower to my card front.

The sentiment (a $1.50 stamp from Michaels) was heat-embossed with some silver embossing powder onto a strip of white vellum.


The dry embossing was done with a freebie embossing border from a past issue of Cardmaking & Papercraft. I enhanced it a bit by using my glitter pen on the holly berries and flower centers.


The inside of my card is pretty simple with more embossing across the top, a narrow strip of glitter tape and a heat-embossed sentiment.

I'm entering this card into Die Cuttin' Divas' Christmas Anything Goes challenge #246.


Here's a look at both cards together.

I apologize for the poor photos in this post. Our days have been so dark and gloomy that it has been impossible to get good photos.

I was in such a hurry to mail these cards that after I dropped them in the mailbox across the street, I realized that I had forgotten to sign them! Sheesh! I told my sisters to simply hang on to them and send them to someone else next year (after signing them, of course!). I'm a firm believer in Reduce, Reuse, Recycle. You wouldn't know it by looking at my craft area and the piles of stuff there, but a fair amount of it these days comes from a local thrift shop that sells used craft supplies.

Thank you so much for stopping by, and remember to laugh--a little or a lot--every day.
Cheryl

Tuesday, December 15, 2015

Not a creature was stirring, not even a mouse...

I have this sweet little House Mouse stamp that I wanted to use for a few Christmas cards this year. I stamped it eight times and had fun coloring the images with my ProMarkers. The cards I made all had the same layout, but different background papers.


It's very difficult to see, but I added some sparkle to the bows with a Wink of Stella pen. I also "spritzed" some faint color onto the background from a ProMarker with a Perfect Paper Crafting Airbrush tool.

Here are two of the cards....

...and a couple more. My corner die is by Cheery Lynn and the lacy border across the center was cut with a Marianne Designs die called "border stitch lace."


For the inside of my cards, I added a strip of the same cardstock that was used on the front.

I'm entering these cards into the  House Mouse & Friends Monday Challenge #209 Rainbow Colours. I'm not sure my different colored bows will meet the "rainbow colours" criterion, but they also offer an "anything goes" option for each challenge, as long as you use a House Mouse image. This particular challenge runs until January 2, so why don't you join in?

I am continuing to barrel through my holiday preparations. I will (hopefully) finish up my wrapping today and start my baking. That means extra pounds are on the way! All I have to do to gain weight is just look at all those Christmas cookies. Why is that???

Thanks so much for stopping by, and remember to laugh--a little or a lot--every day.
Cheryl

Sunday, December 13, 2015

A 10-minute Christmas card...

Really! This card only took about 10 minutes to put together.

I cut a white mat for the front of my card. Then I stabilized it on my cutting mat with washi tape so that I could use the grid lines on the mat to position my strips of glitter tape. If you don't have glitter tape, you could use strips of glitter cardstock or even just double-sided tape and loose glitter.

Once the stripes were done, I stamped "JOY" with Versamark ink and heat-embossed it with some gold embossing powder.

Next, I cut out my little poinsettia with a Marianne Creatables die and my pine branches with a Martha Stewart punch.

I added some Wink of Stella to the petals and used a gold Viva Décor pen for the center of my poinsettia,.

I used some Gem-Tack glue to adhere my poinsettia and branches to make sure they stuck to the glitter tape.


Finally, I used a stamp I picked up at a thrift store for my inside sentiment. It's an older wooden stamp - not sure of the maker. I stamped it with Versamark and used some more of my gold embossing powder.

That's it. My card was done!

Honestly, if you have all your supplies on hand, it truly comes together quicker than any other card I have made this year. And it looks so sparkly and pretty IRL.

I actually got all 85 of my Christmas cards in the mail yesterday. It's such a relief to have that job done. Now I've got to move on to baking, cleaning, decorating and finishing up my wrapping. No time to sit around. There's still a lot to do!

Thanks so much for stopping by, and remember to laugh--a little or a lot--every day.
Cheryl

Thursday, December 10, 2015

Well, Merry Christmas to me!!!

This morning my doorbell rang as I was downstairs in my craft area finishing up a card. I thought to myself, who could be ringing my doorbell at this time of day? When I went to answer it, this is what I found on my front step:

I thought it might be a package from one of my kids, but when I looked a little closer at the address label, I could see it was not from them.
Yup, that's right. It was from Silhouette!!

On November 30, I found out that I had been selected to win a Silhouette Cameo on Linda Kaiser's blog, the Paper Boutique. I was over-the-moon excited to win such a fantastic giveaway. THANK YOU, LINDA AND SILHOUETTE!


Linda said it would take about three weeks to arrive, so I was not expecting it to arrive today.

I was excited to open the box.

I took out all the components that came with the machine. I have yet to download the software or plug it in. All in due time... First, I want to study the manual, watch some YouTube videos and maybe do a little research on line for advice for Cameo beginners. I wish there was a book called Silhouette Cameo for Dummies! That's me! A Silhouette Dummy!

If you own and/or know anything about successfully using a Silhouette Cameo, please leave me a comment with your best advice. I'm a little apprehensive, but also anxious to get started.

Once again, I just want to say a BIG, HUGE THANK YOU to LINDA AND SILHOUETTE! This is already a fantastic Christmas for me.

Thanks so much for stopping by, and remember to laugh--a little or a lot--every day. I know I've got a big grin on my face as I write this post.
Cheryl

Tuesday, December 8, 2015

It's beginning to look a lot like Christmas...

We finally purchased our Christmas tree, and it is in the stand and decorated! Now I've got to finish getting those gifts wrapped and get them under the tree. The grandkids love to see the gifts under the tree whenever they stop by. I've only got one gift yet to buy and I. AM. DONE! It always feels like such an accomplishment to be done with my shopping.

I will also finish up my cards today and then finish the decorating and bake some cookies. The cookie baking is not as onerous as it used to be, since we don't have as many people around to eat them. I will only bake enough to have plates to share with a few neighbors and family members with some left to eat over Christmas.

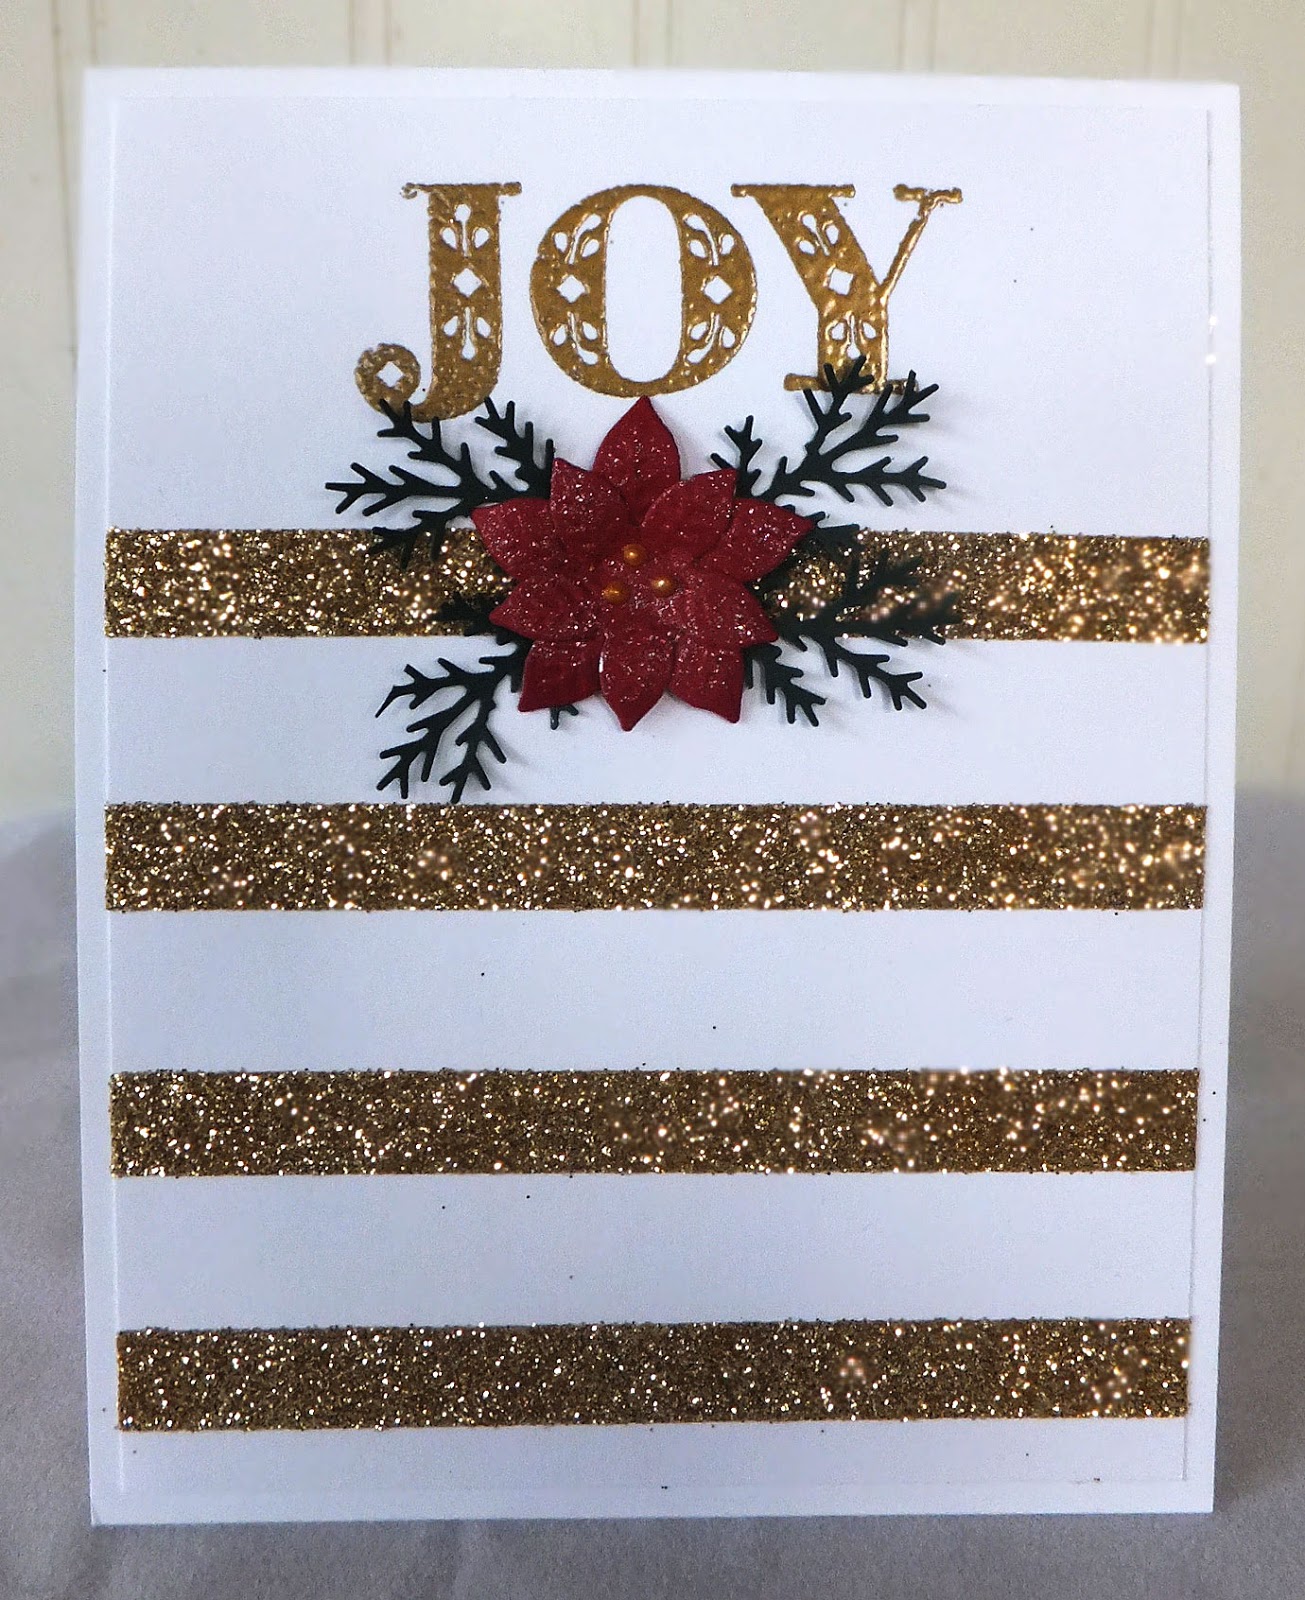
I have a couple of Christmas cards to share with you today.

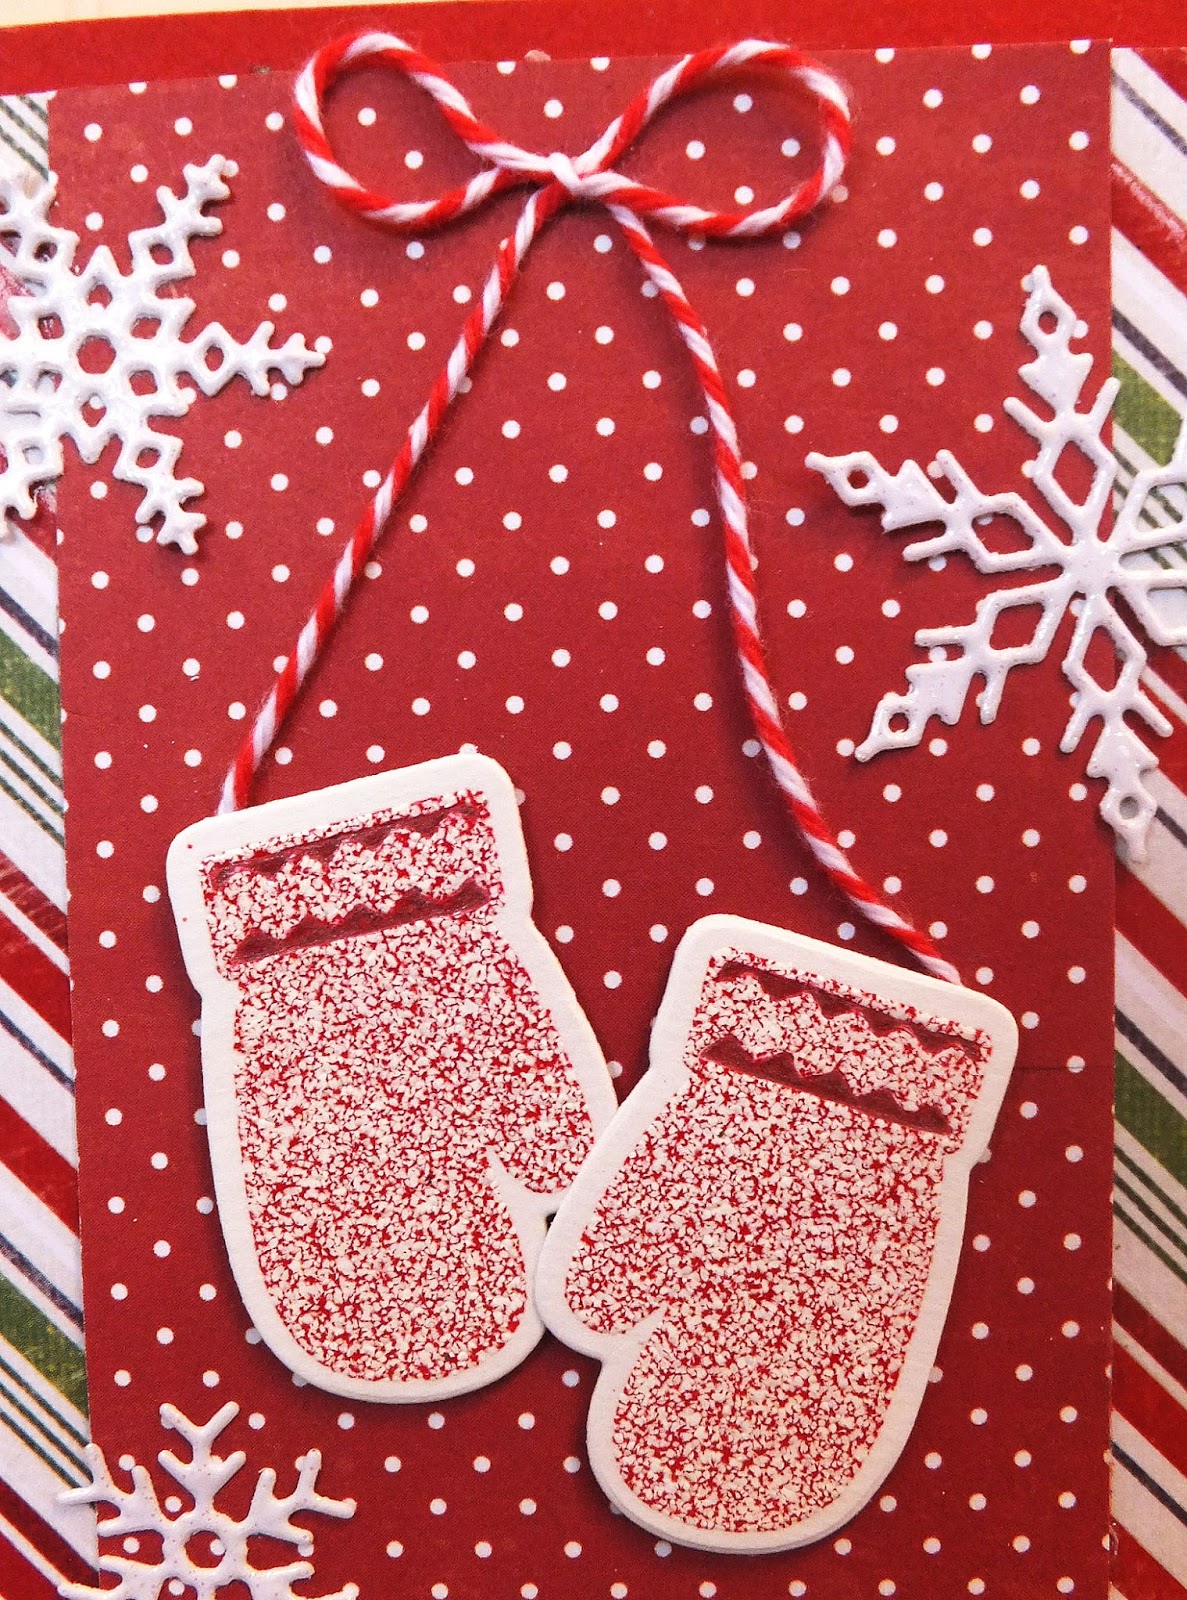
I have this Marianne Creatables snowman die that I really love. He is such a happy, friendly-looking fellow! My little lace edge under my strip of red cardstock was made with another Marianne die called "Border Stitch Lace," and my two little snowflakes were made with a small punch (I think it's by Recollections).


I cut my snowman out of white cardstock and then used a combination of chalk and ProMarkers to color a few areas. Once that was done, I covered the entire die-cut with spray adhesive and sprinkled on some clear glitter. He looks sparkly and snowy!

To create my snowy background, I put some white craft paint onto an old toothbrush and flicked it onto my DSP. Note, that I masked off the bottom 2 inches or so before I did that. I love how this turned out. It looks so...so...well, snowy!


I added a couple of layers and a few snowflakes to showcase my sentiment on the inside of my card. My sentiment label was die-cut with a Spellbinders Label 8 die.


Here's my second snowman card. For this one, I did a little light inking on my white CS before dry-embossing it with a "Falling Snow" embossing folder.by Sizzix. The "flakes" that were a little too blue were touched up with a tiny bit of white craft paint. My snowman on this card received the same treatment as the one on my first card.

The inside of this card is very simple. But one thing I did that I LOVE was to run a glue stick along all the edges of my sentiment panel and then dip those edges in clear glitter before adhering it to the inside of my card. If you look closely, you'll see the glittery edges. It adds such a finishing touch and a nice sparkle to the inside. Give it a try. I think you'll love the effect, and it is so quick and easy.

How are your holiday preparations coming along? Nearly there? Or a long ways to go yet?

Thanks so much for stopping by, and remember to laugh--a little or a lot--every day.
Cheryl

Saturday, December 5, 2015

Let's Craft & Create Challenge #108 - Christmas...

The new challenge over at Let's Craft & Create is "Christmas." It's the perfect challenge for this time of year as most of us are frantically trying to finish up our cards.

As a member of the LCC design team, I decided to try my hand at a pop-up card. And to make it just a bit more interesting, I chose to use kraft card stock for my card base. Not the usual Christmas choice, right? Here's how it turned out:
I used my Sizzix "Elegant Edge" card die to create my card base and to also create a liner with a pop-up mechanism.


I used some Impression Obsession snowflake dies and one Spellbinders snowflake die to cut my snowflakes and inlay them into the same die-cuts in my card front.

Each snowflake was sprayed with adhesive and colored with clear glitter before it was inlaid. I tried and tried to get a picture of the pretty sparkle, but no luck! Maybe if you click on the picture to look at a larger version, you can see just a bit of it.


The inside of my card features more snowflakes (not inlaid this time) and a cute little snowglobe stamp, also by Sizzix. The sentiment is a stamp by Hero Arts.


My little snowglobe was covered with clear glitter to make it look as though someone has just shaken it. It looks so sparkly and fun in real life!

I apologize for the funky lighting on this photo. I tried to remove a yellowish colorcast, and now it's bluish! I think I just made it worse. Oh well, you get the idea.


Now please take a little time to check out the Christmas creations the rest of the Design Team has made to inspire you.

Aren't they a fantastic team of crafters? Now, it's your turn. Why not make something for the Christmas holiday. Then upload it here. There's a prize to win!
 
Thanks so much for stopping by, and remember to laugh--a little or a lot--every day.
Cheryl 

Thursday, December 3, 2015

I promised you pink mittens...

In my last post, I mentioned that I had also made a mitten Christmas card in pink and teal. Well here it is:

This time I mixed light pink and medium pink embossing powders for my mittens. I also used the light pink embossing powder for my sentiment, which was heat-embossed on a strip of vellum. In retrospect, I wish I had used the darker pink for this. But hindsight is 20/20, right?

My white piece of cardstock was embossed with a falling snow embossing folder, and my little snowflakes were made with a Recollections punch (except for the larger one, which is an Impression Obsession die).


Here's a little closer look at those mittens. I really love how the mix of two different embossing powders adds so much texture.

I also love that the Sizzix Mittens & Snow Globe set has dies for all the stamps. It really speeds things up and they look so much better when cut with a die!


The inside of my card is pretty plain, but I did add a little sparkle to the two little snowflakes and the word "Christmas" in the sentiment, which is a Recollections stamp.

We are having some unusually warm weather here today. We've only gotten a couple of inches of snow so far, and it will be gone in the next few days with temps in the 40s. I won't be surprised if I see people outside without jackets and maybe even with shorts on this weekend. Minnesotans are like that. Whenever it's unseasonably warm - even though it's only in the 40s - they seem to think that summer clothing is in order!

I hope you're having wonderful weather wherever you are. Thanks so much for stopping by, and remember to laugh--a little or a lot--every day.
Cheryl

Tuesday, December 1, 2015

Wooly mittens...

I recently made this Christmas card using a mitten stamp with matching die by Sizzix. They are from a set called "Mittens & Snow Globe," which includes some really cute images besides these mittens.

Don't those mittens look absolutely wooly?

I achieved this look by stamping them with Versamark and then sprinkling them with a mixture of red and white embossing powders. When I first tried it, I didn't know if the colors would remain separated or if they would mix to a greater degree when melted. They clearly stayed separate and created a very textured look. I love it! I colored the little zigzag areas with a red pen to add some contrast.

My snowflakes were cut with some Impression Obsession dies and my "Warm Wishes" sentiment stamp was one from the $1.50 bin at Michaels.


My inside sentiment is from a Recollections set called Christmas/Noel. I added some sparkle to the snowflakes and the word "Christmas" with a glitter pen. It doesn't show in the photo, but adds a nice sparkle.

I'm entering this card into the Dies R Us Challenge #38: Christmas.

This card was so much fun that I also tried it in pink and teal, which I'll share with you at a later time.

I hope your Christmas shopping, wrapping, decorating, cookie-baking and partying is going well. Mine own efforts are plugging along. Hope to get the Christmas tree up and decorated this coming weekend. I've got to get some cookie-baking done, too. Where does the time go?

Thanks so much for stopping by, and remember to laugh--a little or a lot--every day.
Cheryl

Friday, November 27, 2015

Happy birthday silhouette...

One of my beautiful granddaughters turned 9 recently, and I made this card for her. I used a freebie silhouette stamp that came with my last issue of Cardmaking & Papercraft magazine. I heat-embossed the stamped image with black embossing powder and then cut it out with a Spellbinder's Floral Ovals die.

It's difficult to see in either off these photos, but the black strip of cardstock across the center is embossed with a border embossing folder that also came with the magazine. My sentiment is framed with a Spellbinder's Fancy Tags die.


I love this little Silhouette stamp, and I can see myself using it again - especially for those girly cards I will need for my other four granddaughters. Yup - I've got 5 granddaughters and 5 grandsons. It's so nice that they're evenly split like that!


I used a larger oval die from the same Spellbinder's set for my inside. It's such a pretty die and nicely dresses up my card's interior.

If you live in the U.S., did you go out shopping today to catch some of the Black Friday sales? I'm writing this post ahead of time, but as I write this, I am planning on going for a couple of hours with my daughter and her husband. My husband will definitely NOT be going. That is so not his idea of a good time. lol

I enjoy sharing this U.S. tradition with my kids, but I never go out if it's just me. I just wish that none of the stores would open until 5:00 a.m. Friday morning. Some of them are now open on Thanksgiving Day, and I always feel bad for those who have to work instead of spending the day with their families.

Thanks so much for stopping by, and remember to laugh--a little or a lot--every day.
Cheryl