Wish List

Tuesday, August 31, 2021

Cutting at an angle = two cards...

I was inspired by an online video to give this idea a try: cut a square piece of  DSP that measures 4 1/4" on each side. Cut that square piece in two at an angle, using each piece on the front of a card base.

Here are my first two cards. The green DSP started out as the 4 1/4" square piece. After cutting it an angle, each piece was adhered to the top of a white card base.


I added a strip of gold cardstock to finish the edge of my cut piece. I then stamped my sentiment using black and green ink. As a final embellishment, I added a few holographic stars that I had in my stash.


The sentiment on the inside of my card was also stamped with both green and black inks. One more of those holographic stars was added to the center of the largest circle. It's really not blue, but must be reflecting something blue in the room where I took the photo.


For this card, I used a "speckle" stamp to add some interest to the white card base below my DSP. Then I adhered the layered die-cut sentiment and three enamel dots.


I stamped a simple sentiment on the inside of this one.


These two cards were done in a similar fashion to the ones above. 


I die-cut the "Happy Birthday" out of blue and white cardstock. I tried to offset them a bit when I glued them together, but it really doesn't show except for a little on the last letter that dips down onto the blue DSP.

My corner dots were created with Nuvo Drops.


I used some blue ink to stamp the sentiment on the inside of this card.


The "hello" was stamped onto the card front. "My friend" was heat-embossed onto navy blue cardstock and then popped up on dimensionals. Nuvo Drops were used once again for some added embellishment.


Another stamped sentiment finishes off the inside.

This was a quick way to make four cards, all donated to the thrift store. They were quick to make, too--probably only about an hour for all four cards!


Today we are going to see the Immersive Van Gogh Exhibit here in Minneapolis. We've had so few special activities over the past 18 months, so I'm very excited about this one. We plan to spend at least a couple of hours "immersing" ourselves in Van Gogh art, music and special effects. I'm not exactly sure what to expect from the experience, but I'll give you a little report in my next post later this week.

Thanks so much for stopping by, and remember to laugh--a little or a lot--every day.

Cheryl

Friday, August 27, 2021

So many mini-slimlines...

 I had a hankering to make some mini-slimline cards. I grabbed eight sheets of 8" X 8" patterned cardstock and cut them into 3 1/2" X 6" card bases. That left a couple strips of cardstock from each sheet to deal with later.

Here is what I did with those card bases:

These are the first four cards. The cardstock was in shades of purple and blue with a few other colors added in the designs. 

You can see in the photos the different embellishments I added--doilies (cut in half), enamel dots, ribbon, and die-cuts. The umbrellas and dresses were paper-pieced so as to coordinate with the cardstock patterns.

Each card had an inside sentiment, but to keep from boring you all to death, I've opted not to share them here.

And then there was the issue of what to do with the left-over strips of cardstock. I couldn't just throw them away. Horrors! And so I used most of them to create another card:

I spaced the strips of cardstock evenly on a piece of white paper. Then cut a rectangle to fit an A2 card base. It makes a pretty busy background, but I think someone will like it (this card, along with all the others, has been donated to the thrift shop to sell).


I cut a couple of flowers out of watercolor paper and colored them up with ProMarkers.

The sentiment was created with a new stamp set. I simply stamped it and then fussy-cut it out, adding it to my card with dimensionals.


I used another leftover strip of cardstock on the inside of my card, along with a stamped sentiment.

All in all, I felt pretty good about using up as much of the cardstock as I could. There were just a few small scraps left that went into the recycling bin.

We had a lovely time tonight helping my niece celebrate her recent marriage. She and her new husband held a gathering at their home. Luckily, the weather cooperated so we could all sit outside and enjoy some live music and each other's company. It warms my heart to see her so happy!

Thanks so much for stopping by, and remember to laugh--a little or a lot--every day.

Cheryl


Tuesday, August 24, 2021

Pretty peacock...


I've had this peacock die for a while and didn't quite know what to do with it. Finally, I decided to cut it out of some gold metallic cardstock and use it as the focal point on a card. I began by cutting my A2 cardbase from some patterned cardstock and rounding the upper right corner. Then I adhered a narrow strip of black CS across the top as a base for my peacock to stand on. Finally, I used some foam tape to adhere a sentiment that I had printed using the Impact Label font.


I added a few colored gems to the tail of my peacock for a bit more sparkle.


The inside of my card was pretty plain, with just a computer-generated sentiment.

This card actually sold quickly at the thrift store, so I think I'll have to make a few more. It's quick and easy to make, but the gold metallic cardstock and gems give it lots of pizzazz.

I am enjoying a rainy day inside, today. It's been a very long time since we've had a rainy day, so it's definitely a nice change of pace.

Thanks so much for stopping by, and remember to laugh--a little or a lot--every day.

Cheryl

Friday, August 20, 2021

Christmas isn't all that far away...

 ...and I have finally gotten a decent start on cards for the occasion.

I decided to use a blue/silver/white color combo. The diagonal-stripe frame and sentiment panel were cut from white CS, the poinsettia petals from pale blue and the leaves and sentiment frame from silver.


I added somed darker blue ink to the centers of each set of petals, and, after shaping them, adhered a sparkly enamel dot to the center.

I really liked how these cards (I made 10 of them) turned out, and now I'd like to try some other colors--purple? pink? 


The poinsettia die set came with four separate layers of petals. I used the first three on my main flower and then added the fourth and smallest layer to the inside of my card. Both sentiments on this card were stamped with older stamps that I've had in my stash for a long time.

We walked to a local restaurant--just 3 blocks from our house--for dinner last night. The restaurant--called "Heather's"--has wonderful food, based on organic, seasonal produce. I had a Cajun shrimp salad that was delicious! The restaurant has a large tented area outside. The sides of the tent can be rolled up for good air flow and that's where their main dining area is these days. They use the tent well into the winter months, heating it with outdoor patio heaters. It's so nice to have a good restaurant that is a walkable distance from our home.

Thanks so much for stopping by, and remember to laugh--a little or a lot--every day.

Cheryl

Wednesday, August 18, 2021

Sweet baby cards...


I decided I needed to make some baby cards to donate to the thrift store. I found a card similar to this one on Pinterest, so I decided to give it a try.

I found a heart die in my Valentine supplies and cut it out of the top of a white panel; then I used an embossing folder to add some texture to the panel.


I looked through my scraps to find some DSP in soft colors.

I also used a die to cut out some little giraffes. I inked their spots through the holes in the die, added pink cardstock to their inner ears and some dark gray cardstock to their eyes.

My little giraffe's  head was popped up, as was the coordinating heart. I also popped up my white embossed panel to give the whole front of my card lots of dimension.


I stamped the front sentiment with an acrylic stamp and the inside sentiment with a really old wood-mounted stamp.


I had so much fun making this card that I decided to make three more. I thought they all turned out pretty cute.

We had to turn our AC on again today. The heat and humidity are back. They are predicting some rain on Friday, though, and that is good news! We are so dry, that I haven't had to mow the lawn in weeks.

Thanks so much for stopping by, and remember to laugh--a little or a lot--every day.

Cheryl

Monday, August 16, 2021

Final Twofer Card Challenge #41...


Sadly, this is the final month for the Twofer Card Challenge. I have enjoyed this challenge so much over the last few years, that I simply had to play along for this final one. Since the theme was Dog/Cat, I pulled out my cat-themed stamps and dies. I would have pulled out some dog stamps--but I don't have any!

Here's what I came up with:

The stamp I used is the cat inside the terracotta flower pot. 

For this card I stamped my "cat in a pot" onto a piece of white card and then colored in the pot. The stamp colors almost all of the cat except his paws, nose and the inside of his ears, so I used my ProMarkers to add some color to those areas. Because his face needed defining, I used a black pen to add some whiskers and to darken a few areas.


When I was done coloring my cat, I cut a mask to cover him while I used a stencil to add some interest to the wall behind him. I applied a narrow strip of lace (a sticker) to the top of a piece of aqua cardstock. I cut along the bottom of the pot so that I could slip the lace-edged cardstock underneath it just a tiny bit.

The sentiment was from the same stamp set as the cat. It was cut out with a fancy oval die.

See all those little star cut-outs on the oval? I used them on the second card.


I added another stamped sentiment on the inside, along with a few stamped pawprints.


For my second card, I decided to cut the sleeping cat away from the flower pot and put him in a Christmas stocking. The only trouble was I didn't have a stamp or die for the stocking that was the right size, so I decided to just free-hand it.  I think it turned out okay.


I added a baker's twine loop to one side of my stocking and "hung" it from a silver brad.

See all those tiny stars that came from the fancy oval die-cut on the first card?


I stamped a sentiment on the inside of this card and added a red strip of CS and a tiny die-cut cat.


I want to thank Darnell and her team for creating and managing the fabulous Twofer Challenge Blog. I am sorry to see it end, but I fully understand that sometimes life has a way of re-adjusting our priorities for us. 

Challenge blogs are a lot of work, and I appreciate all these creative ladies have done. They've left such kind comments and always inspired me to think of new ways to use my crafting supplies. I am truly grateful.

Thanks so much for stopping by, and remember to laugh--a little or a lot--every day.

Cheryl


Friday, August 13, 2021

Happy birthday robots...

 I found a package of dimensional stickers at Dollar Tree--for $1, of course. They were so cute, and I thought they'd be perfect for making a few children's cards to donate to the thrift store. Here are three of them:

For this card, all I did was apply the top mat of DSP, then add the robot sticker, a few shiny stars and a computer-printed sentiment.


I love this three eyes and all the other details.


I added another simple, computer-generated sentiment on the inside.


This robot is a very happy guy. He looks like he's dancing, doesn't he? I gave him a green landscape to anchor him and a yellow balloon to hold.


I also added a die-cut "Happy Birthday" in the upper right-hand corner.


On the inside of this card, I stamped a large "Enjoy." Just below it, I adhered a heat-embossed sentiment strip with foam tape.


This card is a mini-slimline size--perfect for two robots. Once again I added some stars. I even glued one on the left-hand robot. Do you see it on his "belly?" I also adhered a sentiment strip on the upper right with some foam tape. It was created on the computer using the Impact Label font.


The inside sentiment for this card was computer-generated. I added a couple of tiny gifts in colors that coordinated with the robots. The gifts came from a Martha Stewart border punch.

Do you ever look for crafting supplies at Dollar Tree? Other items I have purchased there include double-sided tape, foam tape, foam squares, Jot glue, stencils, metallic markers, glitter paper and glitter markers. They have greatly expanded their "craft" display, so it's always worth a look!

Thanks so much for stopping by, and remember to laugh--a little or a lot--every day.
Cheryl


Tuesday, August 10, 2021

Masculine birthday card...


I've had this retro car die for quite a long time and haven't used it nearly enough. I like it because it's a very simple die to cut out--only the headlights are cut separately and added to it.


I created the two tone look by first placing my die (with the cut shape still inside it) on an embossing pad, adjusting my sandwich and running it through my Big Shot again. Once that was done, I swiped  a white ink pad over the parts of the car that were exposed in the open areas of the die.


After the ink had dried, I glued on the headlights (cut from silver metallic CS) and added a silver center to each wheel with a Viva Decor pen.

To embellish my card, I added a colorful banner and three small, silver, self-adhesive metal squares to my upper righthand corner. Each flag on the banner is popped up with a foam square.

The inside was pretty plain with just a stamped sentiment. I may go back and add another of those banners to spice it up a bit.

Did you celebrate National Night Out on August 3? We closed off our block to traffic and asked families to bring their own drinks and a treat to share. We set up a table and lawn chairs in the street so that neighbors could visit. I brought a big jug of lemonade for the kids. They loved having the street blocked off so they could play games and ride their bikes and scooters with no vehicles driving through.

Thanks so much for stopping by, and remember to laugh--a little or a lot--every day.
Cheryl

Thursday, August 5, 2021

Let's Craft and Create Challenge #174: Anything Goes with an option of Polka Dots and/or Stripes...


It's the beginning of August...can you believe it? The summer seems to be whizzing by, and before we know it, the leaves will turn their beautiful reds and golds and the air will be crisp and cool.

The beginning of a new month means it's time for a new challenge at Let's Craft and Create. This month, the option is Polka Dots and/or Stripes. I happen to love polka dots, so that's what I chose to use.


My first card features gold metallic polka dots--so pretty! I couldn't resist using a "fabulous flamingo" on a lacy rectangle to coordinate with the glitzy polka dots.


My flamingo was cut from pink cardstock. I added some black marker to his beak, along with some white gel pen above it. His eye was created with a Viva Decor pen.

To make the legs a lighter pink, I added a light layer of white ink with a blending brush.

The sentiment was computer-generated, using the Impact Label font. I've popped it up on foam tape. I also added three dots with a gold Viva Decor pen.


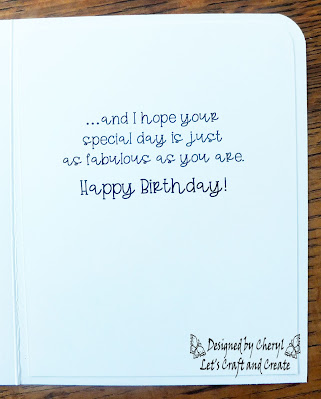
The sentiment on the inside was also computer-generated.


This was another fun card to make. The flowers were meant to have a single layer of petals, but I decided to make them double layers. There are three graduated sizes of flowers in the die set. I layered the medium petals over the large ones for my biggest flower and the small petals over the medium ones for my smaller flower. Then I added the yellow centers. The stems came from another flower die, and my sentiment was die-cut from some glitter cardstock. Three yellow enamel dots anchor my upper right hand corner.


Here you can get a little closer look at my layered petals. I really love how they turned out, and I think I'll do them this way from now on.


There is another computer-generated sentiment on the inside of this card. Sorry for the blurry photo. I must have jiggled my camera when I took the picture. I would retake it, but this card has already been donated!

I hope you'll come join the fun at Let's Craft and Create. If you're not into either stripes or polka dots, you can always create something with the "Anything Goes" option.

Thanks so much for stopping by, and remember to laugh--a little or a lot--every day.

Cheryl