Wish List

Wednesday, August 31, 2016

Have a MONSTROUS birthday...

My youngest grandchild had a birthday in August (he turned 7), and this was the card I made for him:

I purchased the cut file for this card in the Silhouette Design Store (#77366), but I didn't put it together exactly as the file suggested.  For one thing, there was only one monster included, and it was for the inside of the card. I decided that a smaller one should be put on the outside, along with some enamel dots. I also stamped "Have a," which was just part of a Christmas sentiment.

This is the card laying on its side - a little easier to read this way, but not nearly as fun. :)

Here's a peek at the inside of my card. You can see here that I've got the larger monster (this was the one suggested for this spot) and another smaller one. I also added a couple of punched balloons and actually tied them with thread to the little monster's hand. Oh yes, I also dry-embossed the top layers of all my monsters. I think that may be a Darice EF, but I'm not sure.

I made up my inside sentiment and printed it out on the computer.

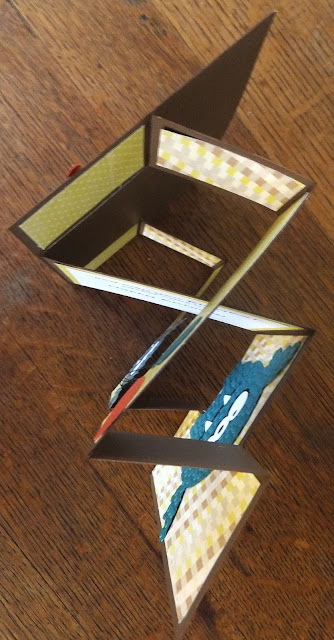
This is a view of this tri-fold card from the top, looking down at it. I think these make such interesting and fun cards, and they're easy, too, when you've got a Silhouette to cut them out for you.

We still have company, plus I am trying to get things ready for a 7-week (yup, I said s.e.v.e.n.-week) trip in our RV. It's a big job to get it loaded for that length of time. I have to think about meals, all our personal grooming stuff, clothes, shoes, jackets, boots, etc., etc. I will, of course, forget several items and have to go to a store to purchase them. THAT is always a given. After all, I'm a senior citizen! I have the right to be forgetful. :)

I still have to get a bunch of blog posts written and scheduled for the time we are traveling. I'll be taking my computer with me so that I can check in from time to time.

Luckily, we have someone to watch our house for us, cut our grass and water the plants, so nothing to worry about on the home front. We did a similar trip a couple of years ago and had a blast. I'm really looking forward to this one, too.


Thanks so much for stopping by, and remember to laugh--a little or a lot--every day.
Cheryl

Friday, August 26, 2016

Multi-layer stamping with Altenew stamps...

A while back I purchased a set of multi-layer stamps from Altenew. The name of the set is Vintage Roses, and last month I shared this sympathy card that I made with them.

I also stamped up a few lacey rectangles to have on hand to use whenever I needed a quick card. It seems I need one of those "quick cards" every month, so here's one that I put together recently:

I dry-embossed my background panel--not sure of the brand of EF--and then highlighted the raised part of the design by lightly dragging an ink pad in the same color across it.


My butterfly was cut from some metallic gold cardstock with an Ellentina die, and my Happy Birthday was cut from the same CS with an Elizabeth Crafts die.


I added a few flat-backed gems as my butterfly's body and also nestled some in the leaves of my rose.

I still have a few of these scalloped panels that I've stamped with this rose and leaves. It was easy to set up a mini-production line to get them stamped and have them ready for future cards, so you may be seeing similar cards in the future!


For the inside of my card, I simply cut another lacey rectangle, stamped it with a birthday sentiment and adhered it to a turquois mat, which wasn't embossed this time.

I think that next time I make a birthday card with one of these panels, I might use the inlay method for the birthday sentiment on the front. I love the look of inlaid die-cuts!


We are already beginning to get some cooler fall-like weather here in the Northland. It was down into the 50s (Fahrenheit) last night. No air conditioning needed when it cools off like that!!

Today will be a catch-up sort of day. My house and yard are both in need of some attention!

Thanks so much for stopping by, and remember to laugh--a little or a lot--every day.
Cheryl

Wednesday, August 24, 2016

Masculine card for lots of occasions...

When my sister came for a visit a few months ago, she let me use her Spellbinders Die D-Lites "Rowhouses" die. Since I live in a metro area of approximately 3.8 million people, this die is reminiscent of where we live. I made several die-cuts from black CS and set them aside until I needed them in June to make some quick Father's Day cards. Below is one of the cards I made but didn't share with you until today. I think this card would work for lots of occasions by just switching out the sentiment.

This photo is a little dark, but I think you can get the gist of my card. I backed the die-cut with some gray cardstock. I thought this looked better than seeing my background mat through the windows.

The stamp that I used for my sentiment--which is heat embossed using black embossing powder--is an oldie from Northwoods Rubber Stamps. I liked the spattering of dots around it. I thought these dots added some interest and could be thought of as either stars in the sky--or maybe something else not quite so pleasant, since I live in a big city. Ha ha

My inside sentiment was computer-generated. This card went to one of my uncles, so I needed to keep it a bit generic.

We still have lots of company--and they'll be staying another 2 1/2 weeks--so my posting schedule has become somewhat erratic. Hopefully, it will be more regular in 3 weeks or so. Of course, then we'll be doing some traveling ourselves, so who knows. This may become my "new normal."

Thank you so much for hanging in there with me! I know you understand how life has a mind of her own and doesn't always take notice of how we'd like things to go.

Thanks, as well, for stopping by today, and remember to laugh--a little or a lot--every day.
Cheryl

Monday, August 15, 2016

A fairy birthday card...

One of my granddaughters celebrated her 11th birthday just a few days ago. Happy birthday, Polly! This is the card I made for her:
I used a stamp that came as a free gift with a recent issue of Cardmaking & Papercraft.  In fact, the pretty DSP in the background also came with the magazine.

I colored my image with ProMarkers, trying to match the colors in my DSP. I added some sparkle to her wings with a clear Wink of Stella pen.  My flowers were made with a set of three different sizes of the same flower die, but I can't recall what the brand is now. My leafy flourish underneath my flowers is by Cheery Lynn. The fancy oval die-cut is by Spellbinders and the stitched oval is from My Favorite Things.

I used an Elizabeth Craft Designs die to cut the "Happy Birthday" out of the same CS that I used for the leafy flourish.

On the inside of my card, I used a computer-generated sentiment and a portion of a large Spellbinders fancy oval die-cut for embellishment. I love the way it added a feminine touch to the inside of my card.

We've got lots of company right now, so finding time to write posts and visit blogs is difficult. Please forgive me if I don't get around to your blog for a while. I'll get there eventually, I promise!

Thanks so much for stopping by, and remember to laugh--a little or a lot--every day.
Cheryl

Friday, August 12, 2016

Let's Craft and Create Design Team call...

As a member of the Let's Craft and Create Design Team, I wanted to share this call for new team members with all of you. I've been part of the team for more than a year now and really enjoy working with a fantastically talented group of crafters who are so supportive of each other. If you have any desire to be on a design team, I urge you to give LCC a try!


Grab Our Badge

We are looking for new Design Team Members to join our very friendly Design Team.

This callout will end on August 27, 2016.
You will be informed by August 30, 2016, if you have been selected.
You will join the DT for our next challenge on September 5, 2016.

The DT Call will be an open call, so applicants from anywhere around the world are most welcome to apply.

If you wish to apply, or have questions before you do, please send an email, with DT CALL in the subject line, to this email address:
ameeracrafts@gmail.com

If you would like to join our DT, the commitment is one (1) project per month. The challenges go live on the 5th of each month with a reminder posted on the 19th. You will also need to have an active Facebook account to join our DT members private group.
We have very few rules, but we do like our DT to abide by them:
~ We have 2 teams: One team will post on the 5th of each month, the other team on the 19th.

~ You must have your own active BLOG which is to be kept up to date when the latest challenge goes live (not before).

~ Your post should include the card or project you have made and a little about it, which may describe which embossing folders, dies, embellishments, etc., you have used.

~ You must be reliable and on time with your creations and be able to work to a deadline. Your card or project should be made in plenty of time before the challenge goes live. Let us know if you are unable to make something for a challenge, for whatever reason.

~ We do not use sponsor images for our DT projects.

~ Please do not post your DT work on your blog until the challenge goes live. Once live, please promote the challenge. Entering your project in other challenges is a good way of advertising the challenge. Please include any appropriate prize details.

~ Our challenges go live at 9.00AM (UK time) on the 5th & 19th of each month and you should post on your own blog to coincide with this. Team 1 will post on the 5th, Team 2 will post on the 19th.

~ You must participate in making comments on the challenge entries per your assigned numbers. This is very important! Our followers are why we are here, and they deserve our support!

~ This is an open-ended term, but should you wish to leave, two challenge notices would be appreciated in advance before you resign from the DT. Please do not just disappear. We would wonder what happened to you.

Tuesday, August 9, 2016

There's a teenager in the house...

Our grandson turned 13 today (Happy Birthday, Tiernan!), and you know how most 13-year-old boys are:  unsure of themselves, not wanting to be put on the spot, no frills when it comes to...well, anything, including cards.

Here's the no-frills card I made for him:
I designed this card on my Silhouette - all except for the word "Awesome." That was actually a stamp, which I heat embossed and then fussy-cut around. It's popped up on some foam squares for a little added dimension. Please excuse the nail in the wall to the left of my card. I took this photo out on my back porch, and had I seen that darn nail, I would have taken my photo in a different spot! I usually have a little vase hanging on it, so it isn't always that visible.

I printed the inside sentiment with a Silhouette sketch pen and, again, used the Silhouette to cut out the card base. It was so easy to make sure that my "13" covered my entire card base in the Silhouette software. Love using it and learning new tricks and techniques.

August is a BIG birthday month for our family. I've still got several cards to share with you as the month moves along. In fact, I may even have to share some of them next month, after the fact.

Thanks so much for stopping by, and remember to laugh--a little or a lot--every day.
Cheryl
Friday, August 5, 2016

Let's Craft and Create Challenge #116: Wedding/Wedding Anniversary...

Today is the start of another great challenge over on Let's Craft and Create. Wedding and anniversary cards are so much fun to make, as they can be elegant, amusing, shabby chic, CAS, or anything in between. The occasion is a happy one, so I always try to build in some "happy" when I'm making one of these cards.

The LCC Design Team has created some amazing cards to inspire you, so I hope you'll jump over to Let's Craft and Create and click on all the wonderful examples to get the details on how to make them. For my part, I created this card, using lots of flourish and sparkle (that's MY definition of "happy"):

I actually won a number of gem flourishes a loooooong time ago, so I was happy to have the perfect occasion to use one of them. I've had the sparkly cardstock in my stash for ages, too, so I was also thrilled to be able to use it.


If you look closely, you'll also see that I used a gem to dot the "j" in my heat-embossed sentiment. There's no such thing as too much sparkle, right?


Here's another view, trying to catch some of the pretty sparkle with my camera.

I tried to really dress up the inside of my card for this one. I used my sewing machine to attach to the left side a small square of the same gray cardstock that was used for my card base. The sewing was done before I added anything to the front of my card so that the stitches wouldn't show.


Then I added a Spellbinders Marvelous Squares die-cut to frame my pocket and cover the stitches. I added a couple of die-cut hearts (from the same CS that was used on the front) and some gems and my gift card pocket was done.


My inside sentiment was computer-generated and the four corner decorations were also cut with one of the dies from the Marvelous Squares set. 

That's it for my card today. Now I hope you'll visit Let's Craft and Create, visit all the other team members' blogs and enter a wedding or anniversary card into the challenge. Your card could be the winning entry!

Thanks so much for stopping by, and remember to laugh--a little or a lot--every day.
Cheryl

Wednesday, August 3, 2016

A set of notecards and some new butterfly dies...

I couple of weeks ago I purchased some new butterfly dies, and I was anxious to use them.


These dies are a very nice size - about 1 1/2" - 2" wide by 1 1/4" - 1 3/4" high. They are lovely, intricate dies and cut well.

I got them online, but I honestly don't remember from which site. I'm sure they're available in multiple places online, though

What I liked about the set is that there were nine different dies.


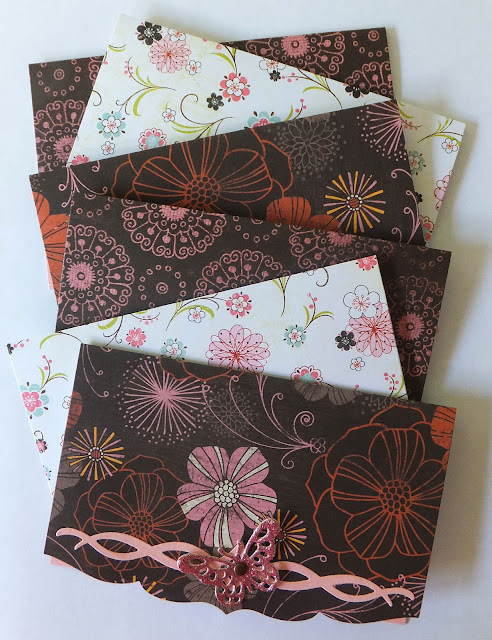
One of the first times I used them, I made a little set of notecards as a hostess gift.

These papers all came from the same paper pack, so the colors coordinated nicely.


I used a different butterfly on each card.


I also made a box with my envelope punch board to put them all in.
I used a punch for the smaller butterfly on the box. I wrote the names of the recipients on the oval on the front of my box, and the flower you see was simply fussy-cut from one of my scraps of DSP.


Here's a little peek at the box from the back, so you can see how all the cards and envelopes fit into it.

To close the box, I simply slipped the flap underneath the belly band.

It is hot and steamy here today. I sometimes sit inside on days like this and think about how grateful I am for modern conveniences like air conditioning. A century ago, people must have really suffered when it was 90 degrees Fahrenheit and 70% humidity!

Thanks so much for stopping by, and remember to laugh--a little or a lot--every day.
Cheryl