Wish List

Monday, May 31, 2021

Amazing pop-up cards from In Love Art Shop...

As part of my most recent order from In Love Art Shop, I received two cards with fabulous ready-made pop up designs. The first card was a gorgeous peony card that could be used for a number of different occasions. You can find the peony card here, and you'll enjoy a 20% discount by using code G-45217.

 
It's quite simple on the front, with just a cut-out of the peony.

I decided I wanted to use this as a birthday card, so I added a die-cut "Happy Birthday," cut from off-white glitter cardstock.

When you open the card, this fantastic peony pops up. It is so delicate and pretty.


There's plenty of room to add a stamped or strip sentiment on the inside (I may do that later) and to sign your name.

It's such a beautiful surprise to open this card; I just love it!


The second card in my order was a graduation card. Once again, there is plenty of room on the front of the card to add your own special touches. You definitely don't have to do this; I just wanted to personalize it a bit. You will find this card here on the In Love Art Shop site.


I added a mortarboard sticker that I had in my stash. I also used some large number dies to cut out 2021 and adhered those to the card front, too.


On the inside of this card is another great pop-up. There is also a sentiment on the right hand side that says, "we are so proud of you."


This is what the pop-up mechanism looks like from the top looking directly down at the card.


And one more peek at the pop-up. So fun! I am giving this card to my granddaughter who will graduate from high school next week.

In Love Art Shop has a number of other pop-up cards, and you might want to check them out. But don't forget to use the discount code G-45217.


We were lucky to enjoy the company of my niece, her husband and their four young children on Memorial Day. They had traveled from Florida to Minnesota to visit family and friends. We all gathered at my daughter's house who doesn't live far from us, so younger cousins got to meet older cousins and have some fun in the back yard on a beautiful perfect-weather day.

I hope you had a great weekend, where ever you are, and a nice Memorial Day if you live in the U.S. My sympathies to all those who are missing their loved ones who died while serving this country as members of the armed forces.

Thanks so much for stopping by, and remember to laugh--a little or a lot--every day.

Cheryl


Thursday, May 27, 2021

Turtle-y awesome die set from In Love Art Shop...

 I have three cards to share with you today that feature a die set from In Love Art Shop. The "Cute Tortoise Decor" dies can be found here. You can use discount code G-45217 

Here's the first card I made with this set:

Isn't this turtle cute? And it's so easy to cut out and assemble. I love the little headband--reminiscent of the Teenage Mutant Ninja Turtles. It's also nice that there are no embossed lines on the turtle's head to show where the headband goes, so you don't have to include it on the image if you don't want to.


I also like that the colored spots on the turtle's shell are cut separately. There are embossed lines on the shell to guide you in their placement.

My turtle was popped up on dimensionals.


The interior of my card is simple. The sentiment was computer-generated.


On this card, you can see that I have chosen not to use the headband. I did add some enhancement to the turtle's toenails with a marker, though. 

On all three cards I have used a black pen to highlight the eye, nose, mouth and the lines around each leg. I also used a white gel pen to add a white dot to the eye.

I added a few punched butterflies to this cardfront, one of them on the turtle's nose. I just wish I had put it a little more towards the top of its head, because it looks like he might be trying to eat it!


Here's a closer look at this little guy. He's such a happy turtle, even though he's flat on his back!


I added another computer-generated sentiment to the inside of this card, along with one of those tiny butterflies.


Here's my third and final card. I really had fun with this one, cutting the headband and spots on the shell out of different colors of glitter cardstock. Once again, I "painted" the toenails. 


I think you can see the glittery goodness of those spots a little better in this photo. 

The grass was cut with a Fiskars border punch and inked along the tips of the blades. I have a couple of small cloud dies that I also used on this card.

Once again my turtle is popped up on dimensionals.


Another computer-generated sentiment is on the inside of this card.

I loved playing with this die set. It's a great addition to my die collection, and I know it will get lots of use. 

Once again, here's the link to the die set, and the discount code is G-45217 

It is COLD here today, and it has been raining nonstop. I volunteered at the thrift store today (I took 19 cards to add to those that are being sold there), and the wind just about took my umbrella on a wild flight before I could get inside the store. Believe it or not, when I got home in the afternoon, I turned the heat on in our house to take the chill out of the air.

Thanks so much for stopping by, and remember to laugh--a little or a lot--every day.

Cheryl

Tuesday, May 25, 2021

Graduation 2021...

 I have made a slew of graduation cards, most of them going to the thrift store to be sold. Here are two that I made using a free SVG cutting file from Printable Cuttable Creatables:

These are both mini-slimline cards. I think they measured 6" X 3 1/2". The cutting file showed the mortarboard positioned over the first number 2, like you see on the card with the red numbers. I tried it over the number 0, though, and I liked it there much better.


The first thing I did when making these cards was to use my Silhouette to cut out all the pieces for the image and assemble them before I lost any. If you saw the disarray in my crafting space, you would understand why this is so important.

In the photo above, you can see that I have cut the shadow out of gold metallic cardstock. I also used an off-white for the 0 and the diploma (1) to set them apart a bit from the white in the background pattern and card base.


Here you can see that I have again cut the 0 and the diploma out of off-white CS. It was doubly important on this card because the shadow was cut in white.

The "button" on the top of the mortarboard is a drop of gold from a Viva Decor pen.


The interiors of both cards were the same--just a simple stamped sentiment on a die-cut, matted panel.

I still have two more of these SVG cuts to put onto cards--one in blue and one in green and gold. I will use those on cards for two of my grandchildren who are graduating this year.

When I cut out an image like this for cards, I always try to cut multiples. It's especially important now when I take so many cards to the thrift store to sell. Between yesterday afternoon and noon today, I made six cards, most of them for the thrift store. This hobby definitely keeps me busy (and out of trouble!).

Thanks so much for stopping by, and remember to laugh--a little or a lot--every day.
Cheryl

Friday, May 21, 2021

We all scream...Happy Birthday!


I created this card just for the fun of it. I saw a triple fold card on Pinterest and thought it would be a fun way to use up some scraps of DSP.

I started with a 5 1/2" X 12" piece of solid color cardstock and scored it at 4 1/4", 7 1/4" and 10 1/4". I folded it with alternating mountain and valley folds. The narrowest panel (1 3/4") became the first panel on the left of my card front.


I decided that I was going to use my ice cream cone die to create some embellishments. 

I ended up making four ice cream cones--chocolate, vanilla, strawberry and mint.


I chose to decorate only the panels that are exposed when the card is closed. You certainly could decorate all of them, if you wanted. I thought the largest plain panel would be a good place to write a personal note and sign the card.


All the cones were popped up on dimensionals except the vanilla cone that you see on the left in this photo.

The sentiments in the white ovals were computer-generated.


"Happy Birthday" was cut out with a die and adhered to a white circle to make it more visible on this panel. 

To keep my card closed I used a length of elastic string. It works really well because it doesn't have to be untied to take it off and on, and it doesn't cover up any of the card. I found a package of several colors of elastic string at the Dollar Tree. I believe there are four colors in the package, and, of course, it cost only $1.00. I think I'll be using it a lot on cards like this in place of belly bands.

I finally went to the doctor today for a check-up. It was the first time since before the start of the pandemic. The nurse who took my blood pressure told me it was "fantastic!" Always good news. Now if I can just shed those COVID pounds...


Thanks so much for stopping by, and remember to laugh--a little or a lot--every day.

Cheryl

Tuesday, May 18, 2021

I don't make many baby cards anymore...

 Almost all my grandchildren have reached their teenage years, and I don't think there's much chance of more babies in our family--not until there are some great grandchildren, that is. So in the meantime, when I do make baby cards, I donate them to the thrift store to be sold there. Here are a couple I made recently:

I had some cute baby-patterned cardstock, and used that for my card bases. I also had some premade fancy framed sentiments. I wasn't able to use the original sentiments, so I simply cut a strip of cardstock, stamped my own sentiment, and then popped it up with foam tape on top of the original sentiment.

As you can see in the photo above, I also inked around the edges of the frame for a little added dimension.


My little bear was cut with a die and then the open spaces in the die were embossed with an embossing tool and colored with a deep gold ink and a finger dauber.

Since my sentiment panel was already popped up on foam tape, my bear was glued directly to this panel.


I have just one set of baby stamps, and this was one from that set.  I think it's a great sentiment, though.


I tried to coordinate my bear and sentiment frame colors with the colors in the patterned cardstock. Since it contains a lot of pastel hues, it was pretty easy to find something to match.


Here you can see that I used the same sentiment on the inside of this card as I had used on the front of the first card. I bought this stamp set years ago from Cardz TV.

We've been having some perfect summer weather, for a change, so I've managed to get all the annuals planted and the lawn mowed for the first time this year. We've had very little rain lately, so I need to be diligent about keeping it all watered.


Thanks so much for stopping by, and remember to laugh--a little or a lot--every day.

Cheryl

Friday, May 14, 2021

A few more Mother's Day cards...

 I know the holiday has come and gone, but I still have a few Mother's Day cards to share with you. These card designs could definitely be used for other occasions, so I thought it would still be worthwhile to show them here.

I like this rose border die for quick cards. I simply added a few gems and a sentiment, and my card front was done.


On the inside I added a computer-generated sentiment. To coordinate with the card front, I used the border die to cut one of the flowers out of the light blue cardstock and added it below the sentiment.


This card features my favorite flower die set. I just love the detail that is cut into the flower petals and the fact that it is three different layers of petals. 

I tried to coordinate my flower with the colors in the patterned paper by using the same green for the leaves and a deep aqua gem for my flower center.


I added another computer-generated sentiment on the inside and a strip of pink cardstock.


I had just a small piece of hydrangea paper left over from a previous card I made. I love this paper so much that I just had to use it on a card. I made a couple of these drapery fold cards. and they sold quickly at the thrift store.

I hemmed and hawed over what to put in the bottom right hand corner. It looked too bare with nothing. At first I thought maybe I should stamp my sentiment there, but then decided a flower would be better. 


I created another sentiment on the computer for the inside. When I'm making cards to sell at the thrift store, I often create four sentiment panels on a single 8 1/2" X 11" sheet of cardstock. I have a document formatted just for that purpose, so that makes it pretty quick and easy. 

In the photo at left, you can see I even used a scrap strip of that hydrangea paper here. I squeezed everything I could out of that 12" X 12" sheet!

Today, I am finally planting some annuals. I love getting my flowers planted and "dressing up" the yard with some bright colored flowers.

Thanks so much for stopping by, and remember to laugh--a little or a lot--every day.
Cheryl


Tuesday, May 11, 2021

A little humor never hurts...

 My sons-in-law have great senses of humor. I enjoy them immensely and love to see the crazy things they come up with. While I can't match their creative comedy, I try, on occasion, to make them smile with my handmade birthday cards. Here's an example of a card I sent to two of them whose birthdays are this month:

When you want a little humor, Tim Holtz's animal images are perfect. I used one of his Crazy Birds on this card and added part of a blue feather to the top of his head.

To create my background, I first printed my sentiment (found on Pinterest) with the computer on an off-white panel, then inked around the edges with a blending brush. This panel was then added to a navy blue card base.


My silly bird was colored with Promarkers, cut out with the matching die, and popped up on foam squares.

Besides his goofy hair, I added some glossy accents to his eyeballs.


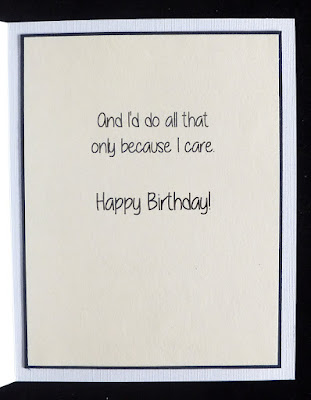
I was a little unsure of how to finish off the inside, so I settled for what you see on the right--my own words, also computer-generated.

Do you ever try to make funny cards? I know there is at least one stamp company--Riley and Company--that makes humorous stamps. I don't have any of them, but I am definitely thinking about ordering some in the future. Recommendations for other shops/sites that offer humorous stamps would be much appreciated.

Thanks so much for stopping by, and remember to laugh--a little or a lot--every day.

Cheryl


Friday, May 7, 2021

Multi-layer die set from In Love Art Shop...

I have long admired the multi-layer die sets that are popular right now, so when the opportunity came from In Love Art Shop to use their Blooming Flower die set, I jumped at the chance. 

In Love Art Shop is offering a 20% discount to all my readers if they use discount code  G-40248.

I am also entering these cards into the Just Us Girls Challenge #583: Layer it up. My crafty online friend Donna alerted me to this fun challenge. You may want to check them out, too, and can do so here.

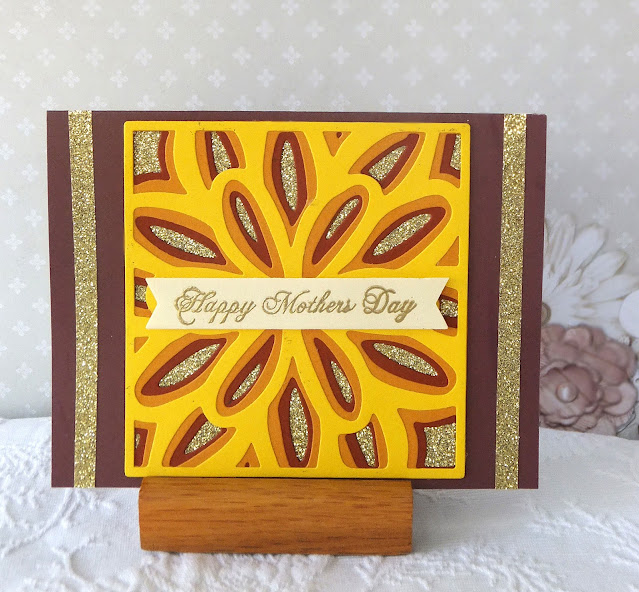
There are three dies in the set, and I've used them for the yellow, deep yellow and rust-brown pieces of cardstock. To add a little more pizzazz, I backed the layered dies with glitter cardstock.


My sentiment was heat-embossed with gold EP and then popped up on dimensionals.


For this card, I also backed my layered dies with glitter cardstock and added my Blooming Flower square to the top of an A2 card base. Three sequins surround the popped-up sentiment.


I love the look of the glitter sparkling behind the die-cuts.


I also wanted to see how it would look with patterned paper behind the die-cuts. Once again, I liked the look of it. It's a little quicker to make a card this way, yet it still looks pretty impressive.


To add a little sparkle to this card, I placed a gemstone in the center of the flower and three small gemstones beneath my sentiment.


For my last card, I decided to throw caution to the wind and use three completely different colors of cardstock. It gives the die-cut (and the card) a fun, playful look. 

This time, I used a large sentiment die to cut the word "hugs" several times and layer them together. I also added the word "sending" which was computer generated, along with some green enamel dots. I guess I went a little wild with those. :)

These dies were so much fun to use and made quick work of making cards for several different occasions. I brought all but one of these cards to the thrift store, and they were sold almost immediately. I think these layered dies offer a look that is just not available in manufactured cards. If it were available, you'd surely pay a premium price for it. 

 Remember, if you'd like to order this pretty die set,  In Love Art Shop is offering a 20% discount to all my readers if they use discount code  G-40248.

We're looking forward to a nice Mother's Day weekend. We will be going to my daughter's home to eat and spend some time with her and her family. The weather will be cool, but hopefully sunny.

Thanks so much for stopping by, and remember to laugh--a little or a lot--every day.

Cheryl