Wish List

Tuesday, April 30, 2013

Yoda's birthday wisdom...

Did you know that Yoda once offered a real "pearl" of wisdom regarding birthdays? When I discovered this, I decided I needed to make a birthday card using an image of Yoda and his wise birthday words.
 As only Yoda can, he offers words that are very blunt and matter-of-fact. But it is true, you know--none of us will look as good when we're 900 years old. LOL

I found the line image of Yoda online and colored it with my ProMarkers. I had a bit of difficulty with Yoda's skin color as I have such a limited selection of markers. I ended up using a blend of spring green and a beige markers.

This card will be used by my grandson Max when he attends a birthday party for one of his friends. I think he'll be okay with the less-than-stellar coloring - as long as the card has a Star Wars theme!

I think some company ought to make a stamp of this quote, don't you? It makes me smile everytime I read it. I'm a communications person in my work life, so I have to do a lot of writing, and the syntax of this sentence really amuses me.


Once again, I kept the inside of the card very simple. I did add another well-known Star Wars line, however: "And may the force be with you!"

It is so much fun creating cards for my grandkids to use. I don't feel they have to be perfect, and I can try out lots of techniques and materials.
Thanks for stopping by, and remember to laugh--a little or a lot--every day!
Cheryl

Monday, April 29, 2013

Happy Birthday sundae...

The weather was glorious in Minnesota this past weekend. I hope you had warmth and sunshine wherever you were, as well. We have been waiting a very long time to experience 70+ degrees again in this state, and we finally got a taste of it. It was delicious!

Today's card is another for my daughter's supply of birthday cards. The sundae image was cut from the Birthday Bash cartridge. I believe I cut it at 3.5 inches.
When the image is cut, the spoon ends up being the same color cardstock as the dish. To give the spoon it's silver appearance, I simply colored it with a silver metallic ProMarker. These markers have great coverage and a wonderful metallic sheen.

I added some diamond glaze to the cherry and then sprinkled it with red glitter. I like to add a little bling whenever I can. I also embossed the whipped cream with the D'vine Swirls Cuttlebug folder.

The entire image was popped up on foam tape for a little added dimension.


I kept the inside very simple, with just a red mat and a simple sentiment.


While there's nothing spectacular about this card, I think it'll be a good one for my daughter to have on hand for 6-year-old Lucy to give to one of her friends.

Thanks for stopping by, and remember to laugh--a little or a lot--every day.
Cheryl

Saturday, April 27, 2013

May the force be with you...

Continuing with the cards I made for my daughter's children to give to their little friends, here's one featuring Darth Vader. My grandson is crazy about Star Wars, so I simply had to include a couple with that theme:
Of course, I didn't have a stamp of good old Darth, so I had to search the internet for a line drawing that I could color with my ProMarkers. I found this one, which is a little cartoon-y, but not so much so as to be silly.

I had to research what color his light saber should be - turns out it should be red. Yay! I've got some red glitter glue (that my grandson actually picked out for me) that worked perfectly.


In the close up of  Darth, you can see that I added some Diamond Glaze to his helmet, eye shields (they're not really glasses, are they?) and boots and used a silver metallic ProMarker on his buckle, saber hilt, etc.

I also had some black faux brads that worked perfectly in the corners.


I kept the inside of the card pretty simple, using some more of the black and white chevron paper to dress it up a bit.

For the shape of this card, I folded my cardstock in half and then cut it with a LifeStyle Crafts shaped die. I did manage to nick the fold a bit on one side (oops!), but since I didn't notice it until I had the mats already adhered to the front, I left it. I don't think my grandson or the recipient of this card will mind.


I hope you enjoyed my card today. Thanks for stopping by, and remember to laugh--a little or a lot--every day.
Cheryl

Wednesday, April 24, 2013

A couple of aliens say happy birthday...

One of my daughters asked me recently if I would make her some kid-focused birthday cards for my grandkids to give to their friends when they are invited to birthday parties. Well, I LOVE it whenever she asks me because I have so much fun making those kinds of cards.

I finished making most of them today, but haven't mailed them off yet. I've got to finish up taking some photos of the last few cards so I can share them here on the blog. I do have pictures of the first few, however, so I'll share one of them with you today.

I found this image on the internet a very long time ago. It made me laugh when I first saw it and still makes me laugh now. Don't you think these two look like their names should be "Garth and Wayne" (from SNL's Wayne's World)?


I have colored them with ProMarkers and added the balloon, which was cut out of some red cardstock with a Cuttlebug die. I simply drew the string on and made it look like it was tied to his thumb. I also added a little white glare mark to the balloon with a white gel pen. I applied some Diamond Glaze to their eyes and used some Reflection alphabet stickers for "Hey, Dude!"

If you look closely you'll see a sort of sky/cloud background behind these two funny guys. I added that with the use of some chalk and a torn piece of paper to help shape the clouds. When I was satisfied with the result, I applied a finishing spray so it would not rub off.

For the inside, I added some more "clouds" with the blue chalk and stamped "Happy Birthday."


I hope you enjoyed this fun birthday card. I had a blast making it.

I hope the balloon counts as a round embellishment, as I am entering this card into the following challenge:
I ♥ Promarkers Challenge #165: A square card with something round on it.

Thanks for stopping by, and remember to laugh--a little or a lot--every day.
Cheryl

Monday, April 22, 2013

A quick birthday card from scraps...

As a happy papercrafter--working on cards nearly every week of the year--I accumulate a LOT of scrap paper. I hate wasting anything so I diligently file these scraps away with a plan to cull through them from time to time and make a few cards. This weekend, I dove into my scraps and came up with supplies for this quick card:

I had stamped and colored the image a long time ago. It was hanging out in my "colored and cut images" file.

Here's a little closer look at the image. I'm still learning what works and what doesn't with alcohol markers. If you look closely you'll see that I outlined the bear in a very pale blue to help define it a bit more.

For the inside of the card, I simply added a little border cut from the striped paper at the top and bottom and left it blank so that I can write a little message.

This is one for my stash of cards, and it has helped make my scrap pile a tiny bit lighter! I'm going to try and challenge myself to come up with a card from my paper scraps a little more often.


Thanks for stopping by, and remember to laugh--a little or a lot--every day.
Cheryl

Thursday, April 18, 2013

A sweet happy birthday card...

I've had a couple of Saturated Canary digi stamps on my computer for awhile, but never felt confident enough with my ProMarkers to color them until now. I decided it was time to try out some shading and color-layering techniques. Here's the result:

Isn't this image pretty in these soft, pastel colors? I kept the card simple in design, so as to keep the focus on the image. I had never colored blonde hair before, but I'm pretty pleased with the results.
 
I don't have a lot of ProMarkers - just a basic 12-marker set, a 6-marker set of skin tones, a 6-marker set of pastels and a 6-marker set of jewel tones. I would really like to get more of them as I am really enjoying coloring pretty images like this.
 
The sentiment on the front of the card is from Fiskars, and while you can't tell from this photo, it has been colored over with a glitter pen so that it sparkles. Even the two dotted lines have some added sparkle on each little dot! It looks so pretty IRL.
 
Here's a close-up of the image. I'm definitely going to print out a few more of this one and try some different color combinations.
I kept the inside very simple with another pink mat and a coordinating Fiskars stamp.
 
I'm entering this card in the following challenges:
 
Edited to add: If you'd like to win some ProMarkers, check out the Letraset blog here!
 
Thanks for stopping by today, and remember to laugh--a little or a lot--every day!
Cheryl


Tuesday, April 16, 2013

Wishing you a day filled with joy...

There is so much sadness in Boston and across the country today after yesterday's horrific bombing. My heart goes out to all those who lost loved ones, had friends or family members among the injured or who were present and forced to witness this evil thing.

I felt compelled to make a card that wished people joy, and I know that so many of you will join me in that wish.

I chose some pretty pastel papers and decided to use some flower embellishments that one of my daughters had given me for Christmas.


I stamped the stems and leaves, cut the top of the grass with a decorative edge scissors (haven't used those in a long time!) and heat-embossed the sentiment (a CTMH stamp) with a pale pink embossing powder. I inked the edges of the blue paper and the "grass." I also sponged a little ink across the sentiment and then wiped it off the embossing to highlight it a bit more.

CTMH has fabulous quality stamps.  This was a clear stamp with several choices as to how to end the sentiment

Here's a peek at the inside of the card. I used another of the flower embellishments and cut some more grass.

I heat-embossed the final word of the sentiment, and once again I highlighted it by sponging a little of the green ink around it.

The pretty pale papers are light enough to allow a hand-written note and signature.


Please hold all the people touched by the Boston bombing in your hearts and your prayers. Wish them healing from their emotional or physical wounds and also wish them joy.

Thanks so much for stopping by today, and remember to laugh--a little or a lot--every day.
Cheryl

Thursday, April 11, 2013

Happy retirement...

My daughter's mother-in-law retired recently, and I am so happy for her. I decided to make her a card to let her know. Here's what I came up with:
 
I bought the dancing lady stamp at my local second-hand craft store, ArtScraps, so I have no idea who made it. In fact, it was one that someone had mounted onto a wood block made from some sort of moulding. I thought it was a fun stamp, one I would actually use, and it cost me a mere 75 cents!
 
Please excuse the poor quality photos. It's been dark, gloomy, cold and SNOWY here lately, so the light has been horrible for any sort of photography. One day, I'm going to get some lights and set up a little light box where I can take photos properly.
 
I colored the image with ProMarkers and printed the circle sentiments on my computer. You can see in this  photo how the sentiments are popped up on pop dots.
I kept the inside pretty simple, just adding a border of the patterned paper at the bottom.
I truly hope she enjoys this card and lives life to the fullest during her retirement.
 
Thanks for stopping by, and remember to laugh--a little or a lot--every day.
Cheryl

Tuesday, April 9, 2013

More of Michelle's Easter cards...

My sister recently shared some photos of a few more of her Easter cards, and I just had to post them here. I love sharing her cards. That way I have a record of them and can go back to them anytime for inspiration.

This first one is such a cute card. Don't you love that little bunny? I'm pretty certain it's a type of brad held on by the eyes, nose and bow which are tiny brads that fit through holes in the bunny.

This next one has a vintage image in the center. The angle of the photo makes it a little difficult to see the image clearly, and I'm just not very good at enhancing photos in PhotoShop. It's still a very pretty card.

I love the bright and springy look of these two cards. Aren't those flowers pretty?

Here's the last of my sister's Easter cards. She made soooo many of them - more than I did, I'm sure!

Thanks, Michelle, for sharing your cards with me. They're beautiful, and I'll be you got lots of nice comments from the recipients.

Thanks for stopping by, and remember to laugh--a little or a lot--every day.
Cheryl

Sunday, April 7, 2013

Some pretty paper from GCD Studios...


At the beginning of the year I won the 12" X 12" paper pad "Indian Summer" by GCD Studios.

It has some really beautiul papers in trendy designs. I love the soft colors of this pad and have found them to be a great addition to my paper supply.

I am so grateful to GCD Studios for picking my name to receive this prize.


I took just one 12" X 12" sheet and decided to make cards for two very different occasions. Here's what I came up with.
First, I needed a sympathy card because a colleague's husband had passed away and I had no sympathy cards in my stash. Now you wouldn't necessarily think of using a chevron pattern for a sympathy card, but the soft colors of the "Indian Summer" collection make it a perfect reflection of gentle, heartfelt thoughts.

The yellow polka-dot paper in the bottom scalloped mat is from the same stack, so it coordinates beautifully with the chevron paper.


A pearl cluster on the ribbon and single pearls on the sentiment's scalloped square added the right touch of elegance and formality, I think.


The inside was kept simple, with just the sentiment and plenty of room to add a personal note.


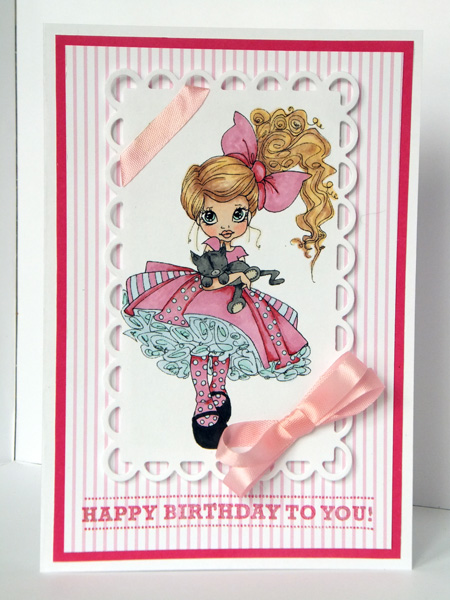
With the rest of this pretty 12" X 12" sheet, I decided to also make a birthday card.
This time, I cut away one of the white chevrons. This needed to be done carefully with a craft knife. If you try using a scissors, your risk tearing the paper when you turn the scissors to aim your cutting line up or down. Believe me, I know!! I then backed this open space with the yellow pattern that is on the opposite side of the sheet.

I also cut a fancy butterfly and a plain yellow butterfly using the CTMH Art Philosophy cartridge. I wanted the fancy butterfly to be a sparkly focal point, so I applied a thin layer of spray adhesive and then covered it with some clear glitter. I think it turned out really pretty.

The "happy birthday!" greeting was stamped directly onto the yellow-patterned paper.


 Once again the inside of the card was kept simple, using the yellow patterned side of the paper as a mat.


I hope you liked seeing two cards for very different purposes from the same patterened paper.

Thanks for stopping by, and remember to laugh--a little or a lot--every day!
Cheryl

Saturday, April 6, 2013

Quick and easy thank you cards...


These two thank you cards began with some black and white patterned paper. I like black and white patterns, but I also like to add a little color to them on occasion.

Here you can see how I've used some pearlescent chalk on the white flowers, added some glitter dots with a glitter pen and some pink liquid pearls to the centers of the flowers.

For some of the other flowers I used a blue pearlescent chalk and white liquid pearls.

I love using chalk in situations like this. It adds such a soft touch of color.

I adhered the pink doily with some foam adhesive for a little added dimension.

The sentiment was stamped and then cut out with a circle die and adhered to the doily.

These thank you cards were so quick and easy to make to make. I could definitely use this idea and layout for almost any occasion.

Thanks for stopping by, and remember to laugh--a little or a lot--every day.
Cheryl

Thursday, April 4, 2013

Ice cream cone gift tags...

I remember the days when my kids were small and I didn't hardly have time to think, much less make special gift tags for their gifts. I would take a small rectangular piece of wrapping paper, fold it in half and--voila!--a gift tag that was hastily taped to their packages.

Times have changed, my kids are grown, and now its fun to make gift tags that are a bit more interesting for my grandchildren's packages.

Here are some I made from the "Stretch Your Imagination" cartridge:
I used my Gypsy to weld two 4" ice cream cones at the top. If you make them, be sure to flip one of the cones horizontally before joining them as they are not absolutely symmetrical. You can guess how I know that!

I used the Cuttlebug Divine Swirls embossing folder on the ice cream and the Cuttlebug Argyle embossing folder on the cones. A little inking and some glossy accents on the cherry added just the right touches to finish the outside.

For the inside, I found a circle die that fit perfectly for my "to: and from:" stamp.

I told you they were easy! I simply use a little double-stick tape on the back to add them to the package.

I need to make some more of these, as I am currently completely out of gift tags, other than a few left over Christmas ones.

Thanks for stopping by, and remember to laugh--a little or a lot--every day!
Cheryl

Tuesday, April 2, 2013

An old dresser card...

I found this picture of a card I made a couple of years ago that I've never shared, so I thought I would share it now. The picture is not a good one, but I think you can see how it's made.
This is a sidestep card that was made by following one of the tutorials I found online. While I don't recall whose tutorial I used at the time, there are a lot of good ones online. In a quick Google search for "dresser side-step card tutorial," I found one here. The legs of the dresser were formed by cutting them out using the end of a Spellbinders Label 8 die.

The cardstock that I used looks very much like real wood veneer. I scored a rectangle on each of the drawers and then inked them for a bit more dimension. The drawer pulls are adhesive-backed faux brads.

The mirror was cut from the Forever Young cartridge, and I cut some metal tape in an oval to form the shiny surface. I didn't realize that I had attached the mirror at a slight angle when I made the card, but I guess pictures don't lie!!

The sentiment is a rub-on one, and with a little lace and some flat-backed pearls and gems, it was done.

I really need to make another one of these cards - maybe one in pastel colors to welcome a new baby.

Thanks for stopping by, and remember to laugh--a little or a lot--every day.
Cheryl