Wish List

Friday, April 27, 2018

A favorite Mother's Day card...


This was a super simple Mother's Day card, but I really liked it. The background is some DSP that I found in my stash. I thought it looked like a cloudy sky.

The dies I used for the tree and sitting/reading children are unbranded. I love these images of children reading. We all want our children and grandchildren to be good readers, don't we? It makes life so much easier for them.

I heat-embossed my sentiment onto the charcoal-colored cardstock.


My inside sentiment was computer-generated. Like I said, this card was easy peasy! It was donated to the thrift store for them to sell.

One little anecdote from the thrift store: I was busy displaying some of my handmade Mother's Day cards in the jewelry case there. As I was doing this, a lady walked by and began watching me. Thinking that the cards had been donated by someone other than me, she said, "Some people sure make beautiful cards, don't they!" I just replied "they sure do" and continued with my task. She made my day.

Today is a gorgeous day outside. Our snow is now all gone. It's time to get outside and get to work on my plants! First, though, I'm actually going to wash my car. I can't wait to get it all cleaned up from winter driving. They salt the streets (it helps de-ice them) so heavily here in the wintertime and it ends up on our cars.

I hope you are enjoying some sunshine wherever you are. Thanks so much for stopping by, and remember to laugh--a little or a lot--every day.
Cheryl

Tuesday, April 24, 2018

Twofer Card Challenge #4: Pets...


Whew! As you can see in the graphic on the right, I am just getting this post done under the wire. Today is the last day to enter the "Pets" challenge over at the Twofer Card Challenge Blog


Here are my entries:


I've been wanting to use this cat stamp set (unbranded) for some time now, and I decided this was the perfect opportunity.


As I am still in Mother's Day cardmaking mode, I decided that one of my cards should be for the stack I am working on for the thrift store where I volunteer. The cards I have donated to the store are selling quickly, and I need to make more!

For this card I stamped my image on a My Creative Time stitched oval die-cut and colored it with my ProMarkers. I added a little flower (unbranded die) and part of a Cheery Lynn leafy branch die-cut.

The "love you" was actually cut from a sheet of designer paper. It's a very handy sheet as it is completely covered with little sentiments like this one. I popped it up on foam tape just over my die-cut MOM (unbranded alphabet dies). A ribbon and a few enamel dots from my stash finished it off.


The inside of my card has a computer-generated sentiment and a cat silhouette from the same stamp set that I used for the front of my card. I used a couple different colors of ink to stamp the silhouette so that it looked a bit like it might be the cat on the front of my card.


This card is very CAS. Once again I colored the image with my ProMarkers and chalked around it with blue chalk. Once the coloring was done, I used my craft knife to cut around the bottom of the flower pot so that I could slip a piece of DSP and a little white border (unbranded die) up underneath it.

The stamped and heat-embossed sentiment came from the same stamp set as my cat image.

I just couldn't figure out if any embellishments like enamel dots or gems would look good, so I opted for just a tiny twine bow beneath my sentiment.


The inside of this card is very similar to the previous one--a computer-generated sentiment and a stamped cat silhouette.

That's it for me today. If you have a spare hour or two and haven't yet entered the Twofer Challenge, you really should! It is a lot of fun to make two different cards, using the same stamp or die-cut.

Thanks so much for stopping by, and remember to laugh--a little or a lot--every day.
Cheryl

Saturday, April 21, 2018

Three more Mother's Day cards...

I have been very busy making Mother's Day cards to sell at the thrift store. Here are three of them:


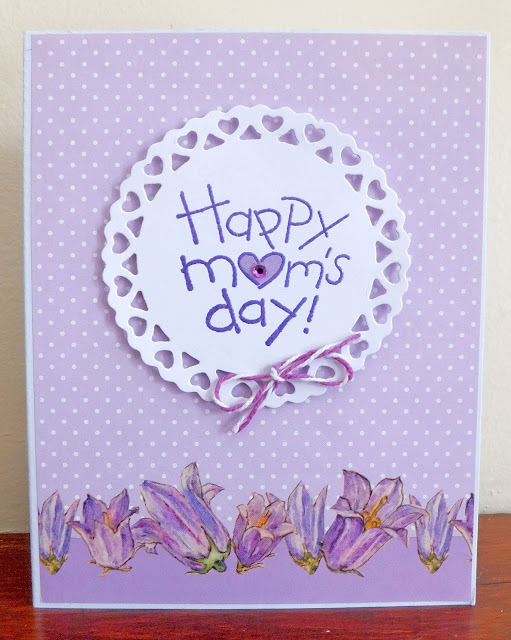
This one was super easy because I let the pretty paper stand for itself. It came from a cardmaking magazine and worked really well for this card.


This stamp is an old one that I bought used. It's one of only a couple of Mother's Day stamps that I have, so I tend to use it over and over. I heat-embossed the sentiment, colored in the little heart with a ProMarker and added a flat-backed gem and a little twine.

The circle die is by Spellbinders.


The inside is pretty plain with just a computer-generated sentiment.


For this card, I cut the letters (unbranded dies) out of some pretty cardstock and then out of black foam. I glued the cardstock letters onto the foam and then onto my background CS.

I inked the premade flower (by Recollections) a little in the center. Actually, it's two flowers glued together with a pale pink enamel dot in the center. Then I cut a couple of leaves (unbranded die) and adhered it all to my card.


Once again, a plain interior with a computer-generated sentiment.


 Finally, I made this card using another piece of cardstock from a magazine as my background. I thought it was such pretty paper and perfect for Mother's Day.


My little die-cut bouquet was created from an unbranded stamp and die set. All it needed was a little bow of purple ribbon to finish it off.


And another computer-generated sentiment on the inside.

The Mother's Day cards seem to be selling really well at the thrift store. I guess pretty much every one gives their mother a card for Mother's Day, and I price them pretty low ($2.00). It is a thrift store, after all. But the low price is another reason I keep them pretty simple and quick to make.

Thanks so much for stopping by, and remember to laugh--a little or a lot--every day.
Cheryl

Wednesday, April 18, 2018

A get well card for a broken leg...

Recently, my daughter slipped on ice in a friend's driveway and fell, breaking multiple bones in her leg. She even had to have surgery to pin and plate the bones together so they would heal properly. I only wish I didn't live so far away so I could be more helpful, although she says she's getting along well. Her family, including her children who are 12, 11 and 9, have been very helpful.

This is the card I made for her:


I cut the turtle with my Cricut, using the Walk in My Garden cartridge.  The sun, clouds and rain were cut with an unbranded die set and my grass was made with a Fiskars punch.

I added the cast on my turtle with some double-sided adhesive and fun flock. It's been ages since I've used that stuff! However, after I put it on the turtle, it didn't look white enough, so I dabbed at it with a white marker. That seemed to do the trick.


Here's a little closer look at my turtle. It even looks like it's in pain, don't you agree?


The inside of my card features the same turtle, but now it's upright and smiling. It's also popped out (as is the grass) to make the card just a little more fun.


I should have taken a picture from the side so you could see the pop-out mechanism. It's just the basic rectangle cut into the card liner and inverted so that it pops out. I cut two more pop-outs on either side of the turtle to support the grass. If you look carefully, you can just make out the one on the left.

I don't often cut images with my Cricut anymore (since getting the Silhouette Cameo), so it was kind of fun to break it out and use it for this card. While I was at it, I cut a couple extra turtles to use on future cards.

And speaking of Cricuts, the thrift store where I volunteer, received a donation today of a Cricut Expression and four image cartridges. I was charged with taking it home and testing it out to make sure it works properly before we put it up for sale in the store. It cuts great and even has two cutting mats and an extra blade in addition to the four cartridges.

Well, that's it for me today. Thanks so much for stopping by, and remember to laugh--a little or a lot--every day.
Cheryl

Monday, April 16, 2018

Vellum flowers on an oval wreath...


This card looks rather blah here, but I do like it IRL. The navy cardstock has a nice sheen to it and the pink vellum flowers look translucent. I guess my lighting was not ideal when I took this photo.

Both my wreath and my flowers are unbranded dies. My sentiment, which I heat embossed, is by Jillibean Soup.


I created the inside sentiment with my computer. While it's a Mother's Day card, it is for someone who is not a biological mom. I've had a couple of women in my life that I could have given this card to, so I'm hoping it appeals to someone else. It will be one of those cards that is for sale at the thrift store where I volunteer.

We have (mostly) shoveled out from our "Snowmageddon" this past weekend. The official snow totals in my area were between 15" and 19". We have shoveled everything clear except the entrance to the street from the sidewalk in front of our house. When the snowplows came through last night, they piled a massive ridge of snow down each side of our street. It's about 4 ft. high and 3 ft. deep. My arms were sore from yesterday's shoveling, and by the time I got the walks shoveled today, I didn't have the energy to try to clear a path to the street. It will have to wait. Maybe tomorrow...

Thanks so much for stopping by, and remember to laugh--a little or a lot--every day.
Cheryl

Thursday, April 12, 2018

Lacy card for Mother's Day...

I've been seeing "lacy" cards all over the  internet lately, so I just had to try one for myself.

I had a lacy, leafy background die (unbranded) that I thought might just work. I decided to create a pretty hinge at the top by folding a thinner card stock in half and then cutting both halves with an edge die (also unbranded). I actually did this twice so that I would have a hinge on the inside, as well. I needed to use thinner cardstock so that it would not be too bulky and would lay flat.


I cut a piece of white cardstock for the center, stamped it and added a leaf die-cut which nicely mirrors those in the pattern of my background die.


This is the inside of my card. You can see that the hinge treatment is exactly the same. I opted for a very simple sentiment (Penny Black) and a small foliage stamp (Technique Tuesday).

I took a stack of Mother's Day cards to the thrift store today, and this was the one the staff oohed and aahed over.

The cards were already selling before I left for the day, so I think there is a good chance I'll have to refill the display with cards next week. I've already got four more made, and I'll be making 6-8 more.

We are expecting another storm to begin tomorrow. We're not sure if we will get rain, snow or both. I'm crossing my fingers for rain only!

Thanks so much for stopping by, and remember to laugh--a little or a lot--every day.
Cheryl

Monday, April 9, 2018

One paper--two different cards...

A while back, I received several designer papers in a magazine that I subscribed to. I find it a little hard to use these papers, as they often have a glossy finish that I'm not fond of. While making some Mother's Day cards to sell at the thrift store, I was determined to use some of them. Here's what I did with one of the sheets.


For this card, I used an unbranded edge die to cut the fancy edge at the bottom of my DSP. My bow was also made with an unbranded die.

The sentiment was from a Hampton Art layered flower stamp set. Because I have only two Mother's Day stamps (both say simply "Happy Mother's Day"), I have to find other sentiments that can also work.

For a little bit of sparkle, I added some sequins. They made this rather plain card just a bit more special.


The inside was stamped with one of my two Mother's Day stamps, plus I added a little heart stamp in pink.


My second card is a drapery/curtain/pleated fold card. This card actually looks prettier in person. I've left the "pleats" hanging free to give the sense of a real drapery. I embossed my band of pink cardstock with a Cuttlebug embossing folder and cut the bow with an unbranded die.

My inside sentiment was taken from a stamp set that I've had for years.. I no longer have the packaging, so I have no idea what brand it is.

I have quite a few more Mother's Day cards made that I will share with you in future posts. It will be interesting to see how well these sell. I plan to make a little display of them in the jewelry section along with some fancy little boxes and pretty pieces of jewelry that will also be for sale. 

They call me the "jewelry lady" at the thrift store, as I clean, price and display all the jewelry. It's fun to see the interesting pieces that are donated and think of ways to enticingly display them. I like to add little curios, fancy purses, pretty silk scarves and other items among the pieces of jewelry. It just makes for a more interesting display.

I also help them sell men's jewelry. You'd be surprised at how many cuff links and tie tacs are sold each week! We occasionally sell men's rings, too.

Thanks so much for stopping by, and remember to laugh--a little or a lot--every day.
Cheryl

Saturday, April 7, 2018

Another floral wreath card...

I have so much fun making these wreath cards that I just can't help myself!! I created another stencil with my Silhouette that works for squares that are 3 3/4". The first stencil I made was for squares that are 4". You can see a picture of it here. The reason I wanted the smaller stencil is it will be easier to use for A2 size cards.

Most of the cards I make measure 4 1/2" X 6". The reason I make them that size is because I have hundreds (yes, hundreds!) of envelopes that fit that size of card. When I make cards for the thrift store, however, I like to make the A2 size so that I can get two card bases out of one piece of 8 1/2" X 11" cardstock.


While this card is my usual 4 1/2" X 6" card, I still used my stencil for 3 3/4" squares (I needed to test it out). Because it's a little smaller, I was able to mat it with a little turquoise cardstock to bring it to 4".

It's fun to search through my stamps and find small flowers, leaves, twigs, etc., that can be used to build these wreaths.


As you can see this wreath became a very full wreath...too full, as a matter of fact. I guess I got a little carried away! That is why I cut a scalloped circle and another white circle for my sentiment and popped it up in the middle. I like the way this looks, though, and I'm sure I'll be doing this again.


Here, you can see how I've popped up my matted panel and my center circle. My little butterflies (a Fiskars punch) also add some dimension with their free-flying wings and a gem on each one.


The inside of my card was dressed up a tiny bit with another butterfly and a scalloped edge along the bottom.

I have some other ideas on how to use my wreath stencils, and I'll be sharing those with you, too. I even made a set of the stencils for my sister, so I hope she shares some of her makes with me. If she does, I will (with her permission) share them here on the blog.

We have a beautiful, sunny day here today. I just wish it was a bit warmer. Mother Nature has quarantined Spring for a while and won't let her come out and play. Perhaps she's contracted something contagious like Spring Fever!!!

Thanks so much for stopping by, and remember to laugh--a little or a lot--every day.
Cheryl

Thursday, April 5, 2018

Let's Craft and Create Challenge #136: Through a Window or Anything Goes...

Let's Craft and Create


April is here and its time for another challenge at Let's Craft and Create. This month we've been asked to create a project based on the theme "Through a Window" (or you can always take advantage of the "Anything Goes" option).


I created a window-themed card, and because we have had a couple of April snowstorms already, I decided to go with a Christmas theme.


I did not have a window die, so I created this window and curtain with my Silhouette Cameo. It is so nice to be able to go to the Silhouette software and create what I don't have.

The sentiment on the front is a Hero Arts stamp. I stamped it with Versamark, then heat-embossed it in white.


I also didn't have any wood-patterned cardstock, so I used an unbranded stamp to create my own. My snowman is a Fiskars stamp and the trees are a Deep Red cling stamp. You can't see it, but I've added some sparkle to my trees with a glitter pen. I also used some white craft paint, diluted with a little water, to spatter on my "snow."


The inside of my card is pretty plain. There is a wee bit of embossing at the bottom, but my camera couldn't pick it up. Or maybe it's the lack of skills on the part of the photographer!

The inside sentiment is a Recollections stamp. I believe it was one of a set that I picked up at Michael's after the holidays. I try to get a few new stamps each year for use on the following year's cards.


Here's what it looked like outside as I was creating my card--and we've had more than half a foot of new snow since this picture was taken!! Sheesh! Mother Nature is sleeping on the job of bringing Spring to Minnesota.

I hope you'll all join in the fun of taking part in our latest challenge at Let's Craft and Create.  Remember that you can always choose the "Anything Goes" option.

Thanks so much for stopping by, and remember to laugh--a little or a lot--every day.
Cheryl
Sunday, April 1, 2018

Our Easter celebration...

We had a quiet Easter Sunday--for most of the day. We went to church in the morning and then came home to prepare an evening meal for family. Here are a few photos to let you know how we celebrated.


I like to make things look a bit festive. You can see the bunny centerpiece in this photo, as well as the paper bunny napkin rings I made for each place setting.


Here's a little closer look at my bunny napkin ring. The bunny is cut with a Darice die. The bow die is unbranded. The bunny was adhered to a 6" X 1" strip of cardstock that was adhered in a circle.

Our gathering is very casual, so I don't usually pull out the cloth napkins, but opt for a pretty package of paper napkins. We had four children at our Easter meal, and I think they like that it is rather casual.


Here's a look at the table, long before the meal was ready.  If you look closely, you can see that there is a tiny Easter basket at each place. I got these tiny baskets years ago and decorated them with some cardstock and a very tiny butterfly on each handle. They each hold 3 little candy Easter eggs. I use them each year, but they're getting a little worn. I think I might need to think about making some new ones. There are so many cute little basket designs out there that can be made from cardstock.


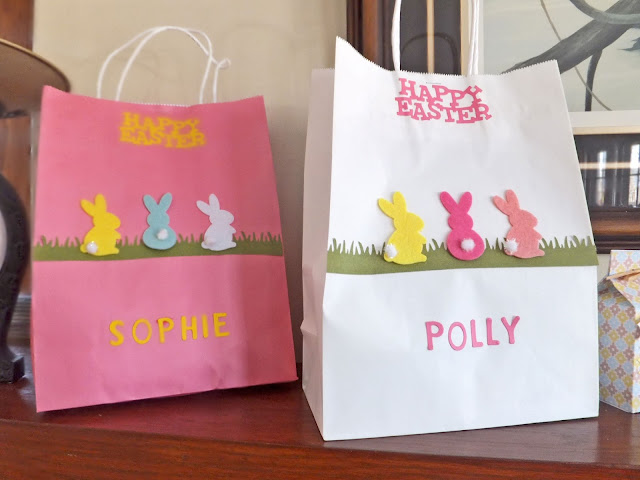
The grandchildren get some small gifts and candy from us. I put them in bags that I decorate with stickers (the felt bunnies) and die-cuts. The "Happy Easter" was cut with a Cheery Lynn die, the grass with a Fiskars border punch, and the names with an unbranded alphabet die set.


More Easter bags.


Please excuse the blurriness of this pic. I didn't realize it was so bad until I began to work on this post. By then it was too late to take another photo. I made these milk carton type treat bags for the adults and filled them with some candies they would like.


Finally, I want to share the pretty card that my sister made and sent to me. Isn't it gorgeous? She is a wonderful card maker and we have so much fun sharing ideas, supplies and tools. I only wish she was closer so that we could get together on a regular basis to make cards.


Here is the inside of her pretty card.

I hope you enjoyed your Easter, Passover or Spring celebration. We had a lovely day, even though it was quite cold--barely reaching the freezing point for a high. At least the sun was shining!

Thanks so much for stopping by, and remember to laugh--a little for a lot--every day.
Cheryl