Wish List

Friday, November 27, 2020

Season of thanks...


I know Thanksgiving is past, but I thought I'd share another card I made for the occasion anyway. The photos really don't do this one credit. It looks so much better IRL.


The leaves were die-cut and inked around the edges.  I added a little gold twine bow where their stems crossed.

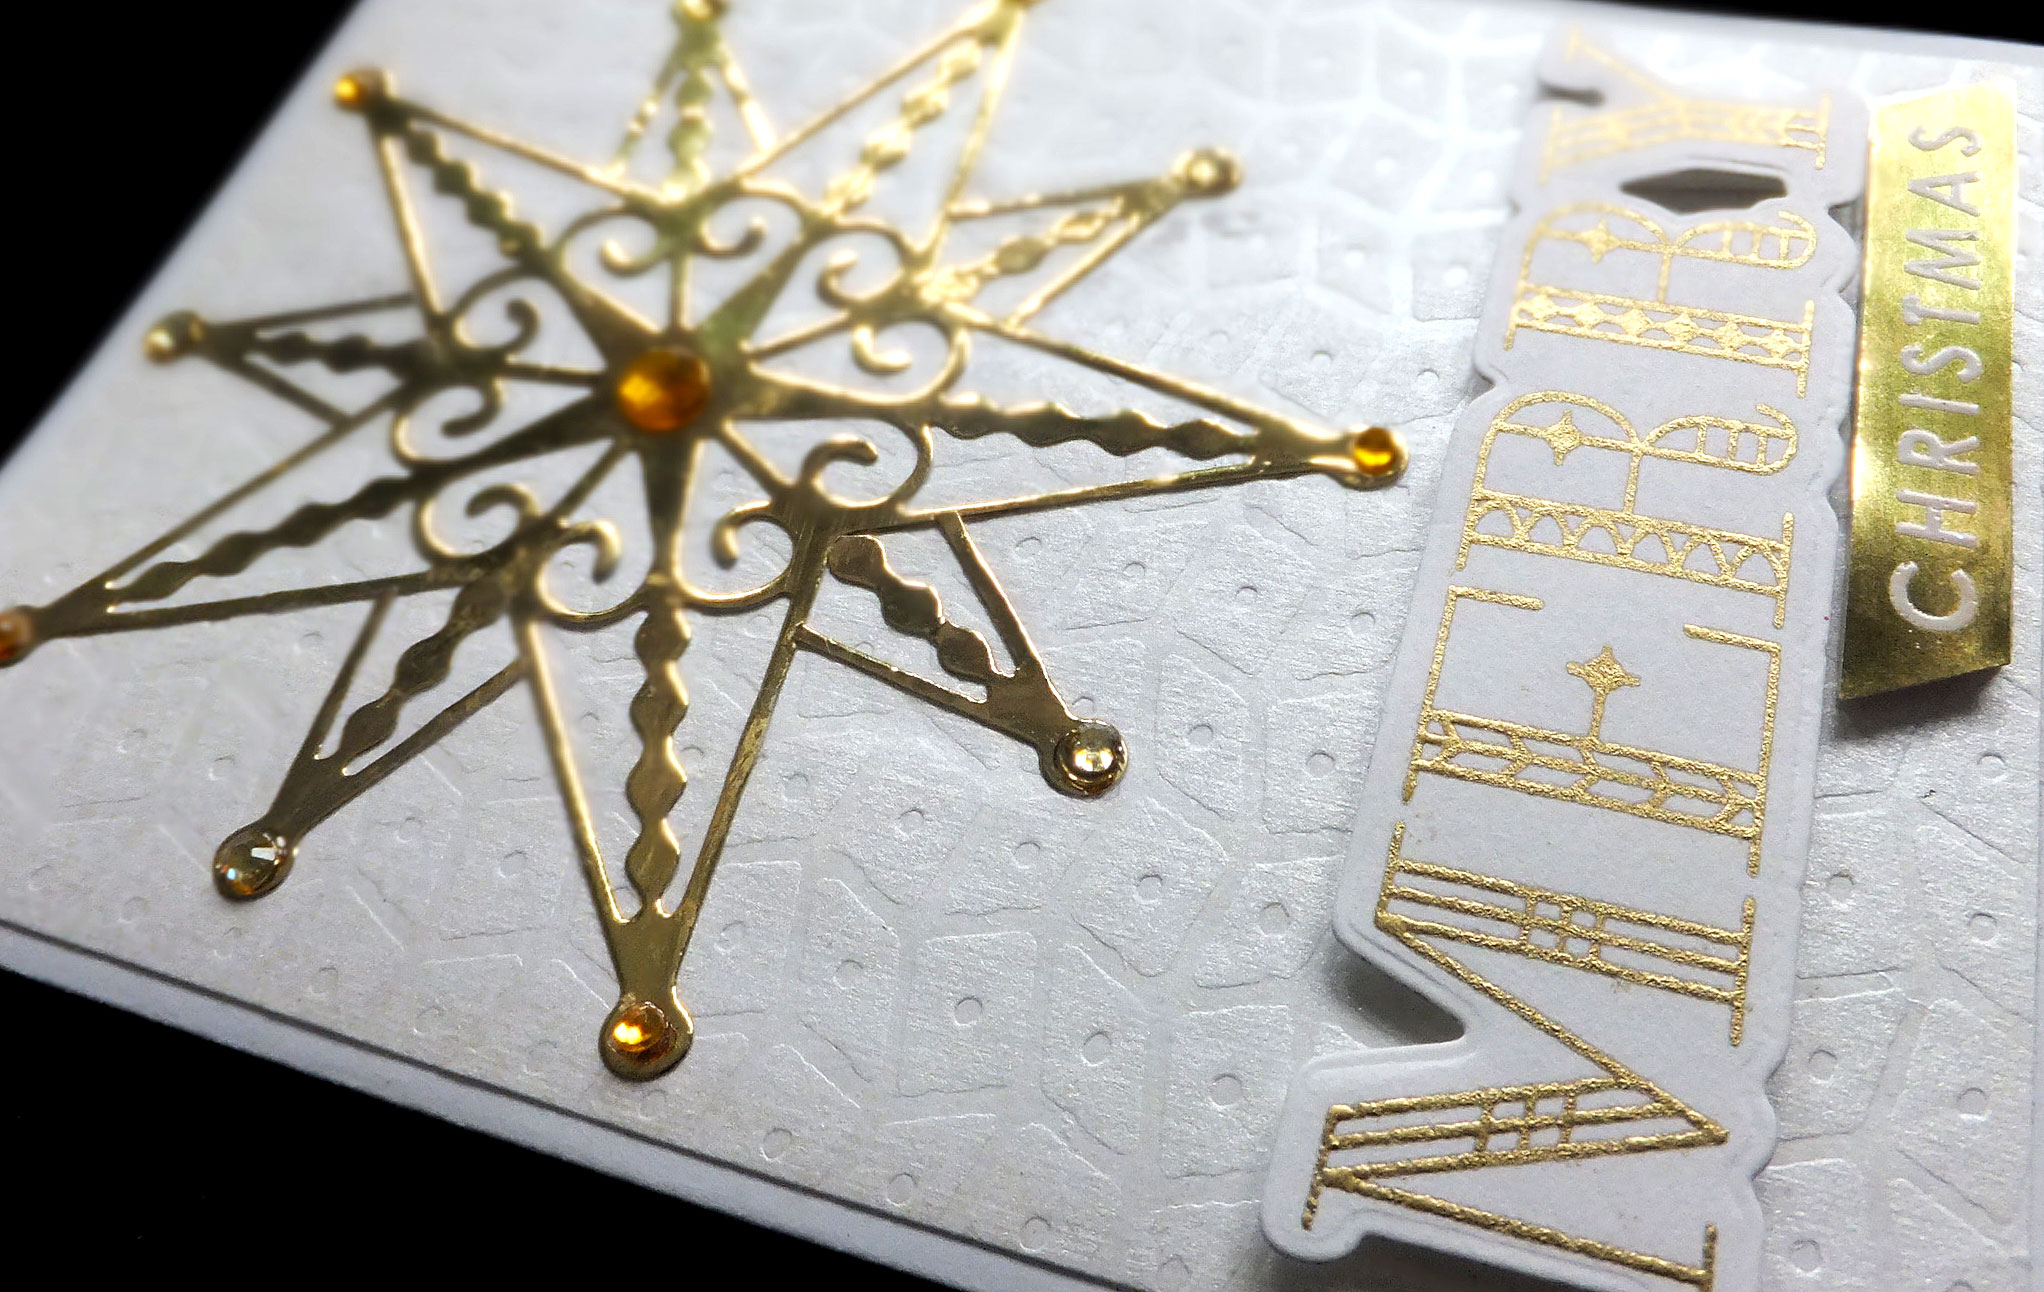
"Season" was die-cut from gold metallic cardstock. "Of Thanks" was cut from a strip of white CS. I then backed the strip with some of the gold CS.


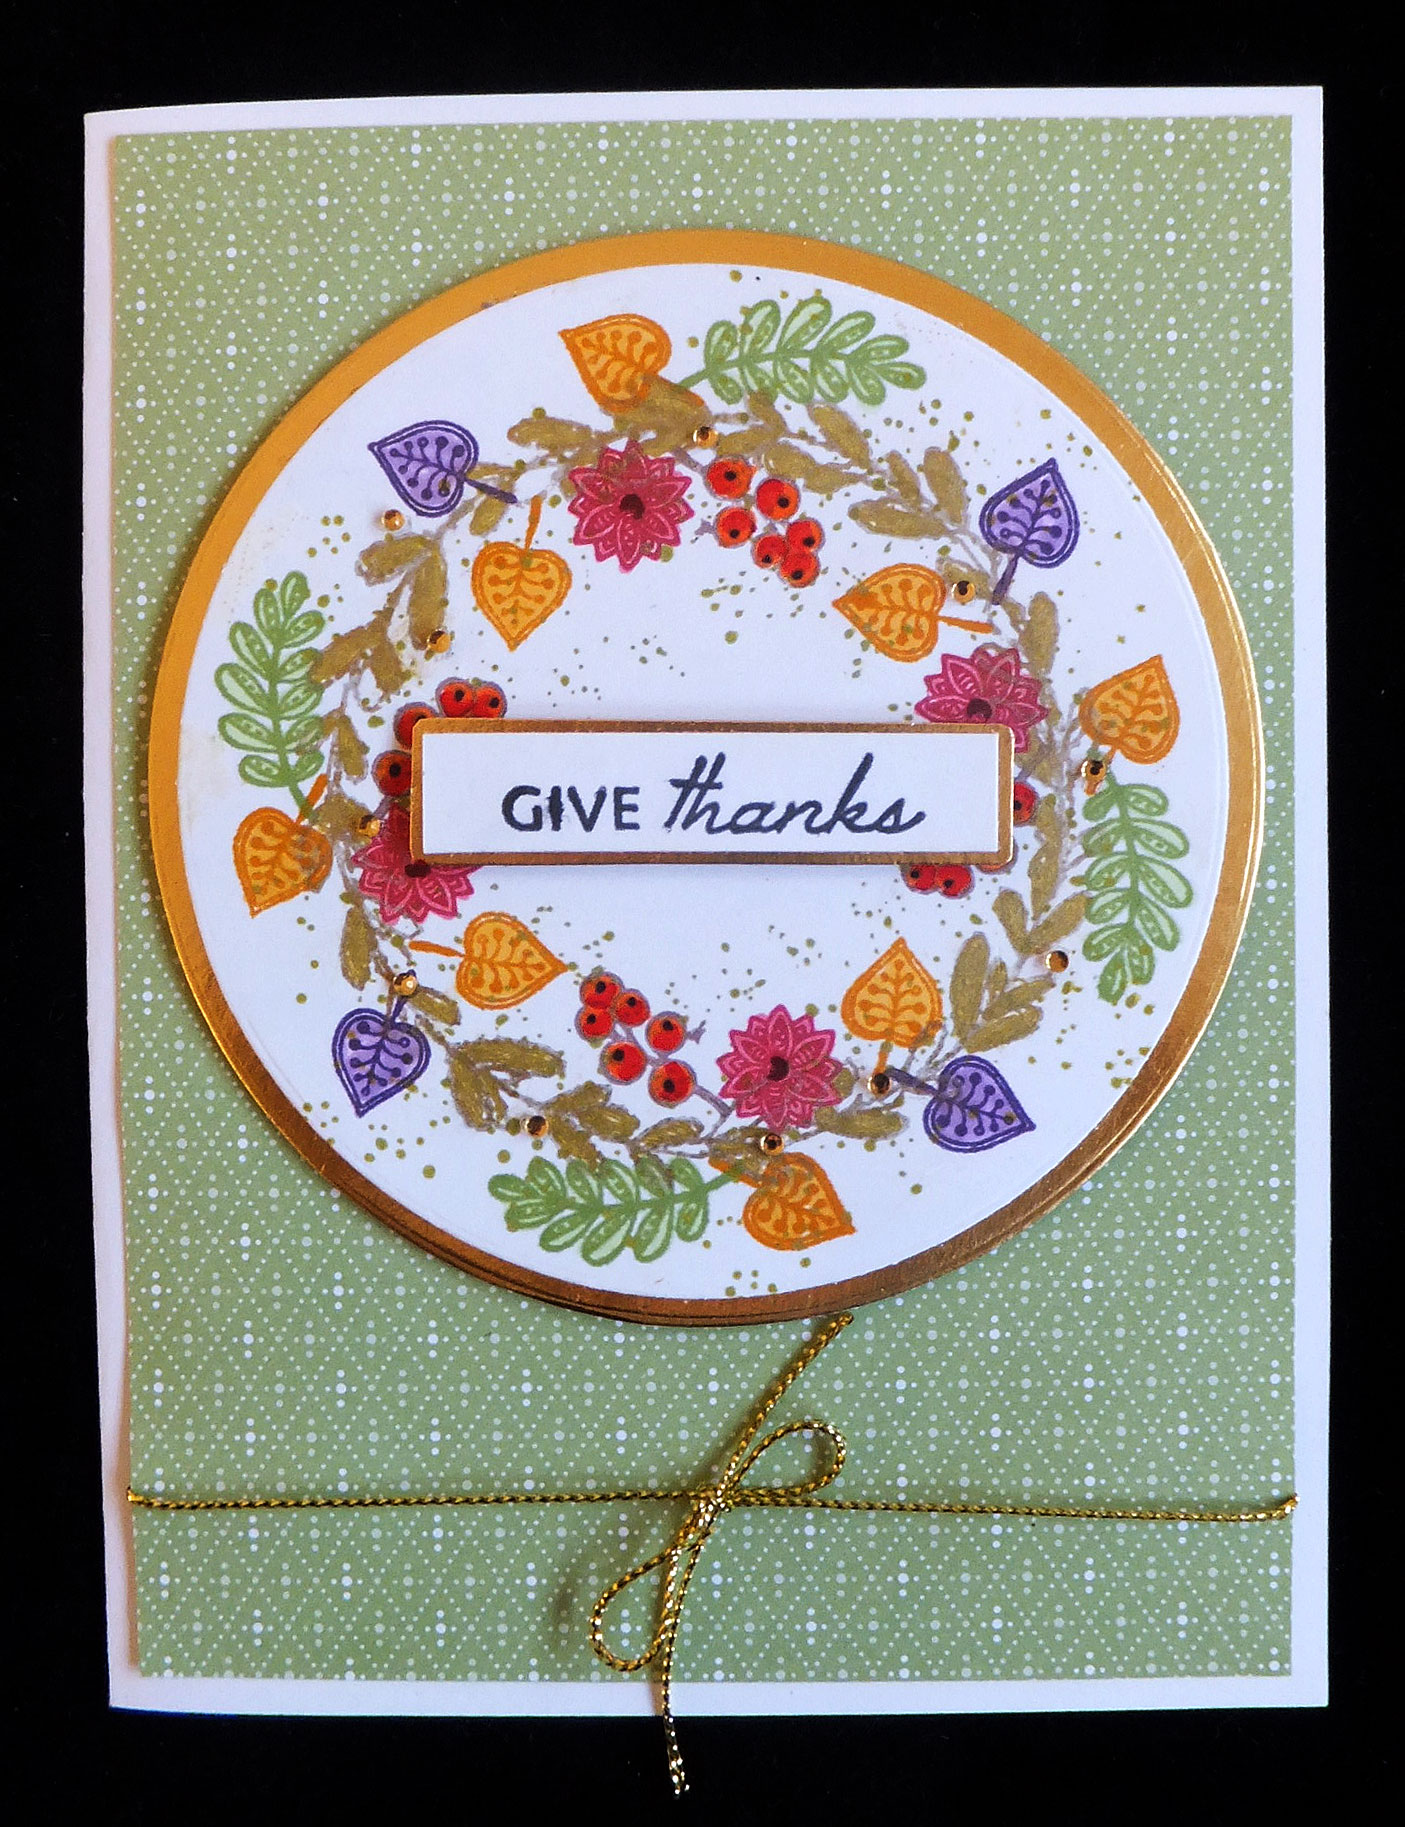
I used some of the same DSP on the inside as I had used on the front. My sentiment was computer-generated.


Finally, here's a photo of our tiny Thanksgiving celebration--just my husband, my brother and me. No extra leaves in the table and chairs crammed together to accommodate all our family members. I cooked much less than usual, yet it was enough so that I could send several meals' worth home with my brother. We will use the turkey bones to make the broth for our annual tradition of having turkey wild rice soup on Christmas Eve.

We had a lively Zoom call with the kids and grandkids shortly after we were done eating. It was so much fun to see them all at once and to interact with each other in real time. 

The 2020 holidays are definitely different--and a little lonely--but this, too, shall pass. I am just so thankful for my big family and look forward to "in person" celebrations sometime in 2021.

Thanks so much for stopping by, and remember to laugh--a little or a lot--every day.
Cheryl

Tuesday, November 24, 2020

Shimmery pumpkin...


For this card, I cut my wreath out of kraft cardstock and used some distress inks to blend some color onto the leaves. I also added some dots using a gold Viva Decor pen and the word "thankful" cut from olive green glitter cardstock.

My pumpkin was cut out of a deep orange cardstock. I colored the stem dark brown with an alcohol marker. 

To add some shimmer to the pumpkin itself, I laid my Versamark ink pad directly on it. Once I could see it had a nice coating of the ink, I added some coppery colored Perfect Pearls. Finally, I spritzed it with a fine mist of water to set the Perfect Pearls. It's so pretty IRL!


My sister gave me a set of dies (Thanks, Michelle!) that cuts strip sentiments for all sorts of occasions. One of them says "Happy Thanksgiving," so I used it for this card. I also included a computer-generated sentiment.

I have started preparing our Thanksgiving dinner. Today I made the cranberry relish, which my family loves. I will drop some off at my daughter's home, as they love it, too. On Wednesday, I will make the dinner rolls and pies. I have a 12-13 lb. turkey (a lot, I know), but will share the leftovers with my brother. He is always so appreciative when I give him leftovers, since he really doesn't cook much for himself.

We plan on joining other family members on Thursday via Zoom. It will be fun to talk and laugh with them and see their smiling faces.


Thanks so much for stopping by, and remember to laugh--a little or a lot--every day.

Cheryl

Friday, November 20, 2020

Wreath builder Thanksgiving cards...

 I decided to use my homemade wreath builder template to make a few cards for Thanksgiving.

The hardest part about making these cards is picking out the small stamps to use for my wreaths. I wanted them to each be a little different, so quite a number of stamps had to be selected.

After my stamping was done, I added some coloring with ProMarkers. I also used a "speckle" stamp to add a little more "texture."


Once my wreath was created, I die-cut it with a circle die and matted it with gold metallic cardstock. You can see in the photo at right that I've popped the entire circle up on foam tape. I stamped a sentiment, matted it with the same metallic cardstock and also popped it up on foam tape.

I also scattered a few gold gems on my wreath.


My computer-generated sentiment on the inside was matted with the gold cardstock. I also added a stamped frond, using one of the stamps that had also been used on my card front.


While this card does not really use traditional autumn colors, I really loved how it turned out.


This time I stamped my sentiment and cut it out with a circle die, popping it up on the center of my wreath. I also added three little purple gems for some sparkle.


For the inside of this card I used the same sentiment and the same stamped image. Instead of matting with foil cardstock, I used the same purple striped cardstock that had been used on the front.


Here's my final card where I've left the wreath on its 4" X 4" piece of CS.  I used black CS as a mat for the front panel, wreath panel and the sentiment. 


I used some different colors on this one and included some purple Nuvo Drops on the berry clusters.


On the inside, I used some of the same DSP as was used on the front and matted it with black CS. The sentiment was computer-generated and a berry cluster was stamped and given dimension with some Nuvo Drops.

I hope you've enjoyed seeing these wreath-builder cards. It's loads of fun to create them. They don't always turn out the way I envision, but that just keeps it interesting!

Thanks so much for stopping by, and remember to laugh--a little or a lot--every day.
Cheryl


Tuesday, November 17, 2020

Twofer Card Challenge #33: Stars...


You may have noticed that I love taking part in the monthly Twofer Challenge. This month's challenge is to create two different cards using a star(s) image.

I have a large star die that I had not yet used, so I decided to give it a go.


My first card features two die-cuts of this pretty star, and even though it has some fancy swirls, I thought it would still work on a card for one of my grandsons. I added some red stars, red enamel dots and a computer-generated sentiment, and my card front was done.


The inside of my card featured the rest of my computer-generated sentiment and one more of those red stars.


I think this star die was created for use during the Christmas season--for cards, ornaments, etc. I cut one out of gold foil and put it on a panel of pre-embossed paper, but decided it just wasn't "enough." So I cut another one, which I then cut apart so I could add five more points to my star. It was pretty fiddly to get them to fit snugly against the existing star, but I really like how it turned out.


I added some gems to the center and points of my star. 

For my sentiment I stamped and then heat embossed "Merry" with gold EP and cut it out with the coordinating die. "Christmas" was heat embossed on a strip of gold CS. Both were popped up on foam squares.


On the inside of my card, I heat-embossed a stamped sentiment and a group of stamped stars.

This was such a fun challenge, and I hope you'll join in, too. I love getting two very different cards done at once using at least some of the same supplies.

Thanks so much for stopping by, and remember to laugh--a little or a lot--every day.
Cheryl

Friday, November 13, 2020

Simple Christmas card...


I first used a background die to cut my Fa La La background. Then I added my stitched oval, which had also been embossed using the Swiss Dots EF.


A ribbon bow and a couple of pine sprigs decorated the top of my oval. Since I already had a lot of Fa La La's on my background, I didn't think a sentiment was necessary.

My two carolers were die cut from black cardstock and then backed with dark gray. The female caroler was popped up on foam squares so that she could overlap her male counterpart just a bit.

ETA: I am entering this card into Challenge #42 at Let's Squash It!: Use a Christmas embossing folder and a stamp. 


The inside was stamped with a really old wooden stamp that I got at the thrift store. I enjoy using these stamps every once in a while. I generally use Versafine ink when I do, as it seems to give the best impression.

As you can see, I added some red to the little heart for a pop of color.

These cards are simple enough that I think I will make a few to sell at the thrift store. I'll just set up a little production line and get them all done at once. 

Thanks so much for stopping by, and remember to laugh--a little or a lot--every day.

Cheryl

Tuesday, November 10, 2020

Black flowers?...

 I had a few black flowers in my box of pre-made flowers and wondered what I should do with them. I had used a couple of them to decorate small gift boxes, but I wanted to see if I could also use them on a card.

This is what I came up with--a card and an envelope. The envelope was made with a coordinating piece of DSP. I used my envelope punch board to make it, turning the patterned side of the paper inward. I added some double-sided tape on the flap. 

For my card, I first stenciled a bright yellow pattern onto a panel of off-white/ecru cardstock. Then I added some extra yellow shading around the edges of my panel.

I glued this panel to a 4" X 8" black card base and adhered three of my black flowers.

The "Happy Birthday" stamp is an old one. It was stamped with some black Versafine ink.

Finally, I added some black sequins for a little sparkle.


On the inside, I stamped a sentiment and used some more of my yellow ink to add some color around the edges. This helped to highlight my sentiment and add some interest without adding any additional stamping or embellishments.


Some of you asked that I share a photo of my Habitat for Humanity t-shirt quilt once I got it back from Project Repat, the organization that made it. So, here it is:

The quilt is big enough to easily cover a double-size bed. I sent in enough t-shirt sides for thirty 15-inch squares. It is so nice and cozy with its fleece backing that I've been keeping it near to snuggle under while I watch TV at night. The different squares bring up lots of memories of my work and volunteer experiences with Habitat for Humanity. 

Thanks so much for stopping by, and remember to laugh--a little or a lot--every day.

Cheryl

Thursday, November 5, 2020

Let's Craft and Create Challenge #165: A sketch (with the option of anything goes)...

 I don't often use sketches, even though I have collected enough of them to fill a little photo book. But I really should use them more often, so I am SO grateful for our latest challenge at Let's Craft and Create suggesting we all use a sketch.

A lot of the sketches I have collected are from Cardz TV. Each sketch has all the sizes listed, and they are incredibly easy to put together. Here's a photo of the one that I used for today's card.

I made my center square a little larger than the one in the sketch to accommodate my image, but otherwise followed it pretty closely.


This is my card. My cute little toad is an image from Miss Kate Cuttables that I cut out with my Silhouette (you can also see him on this card). I've given him some googly eyes to add to his expression and inked around the edges. All the rectangles that decorate the front of my card were cut from scraps of Stampin' Up cardstock. Even my toad was cut from scraps!

My sentiment was computer-generated and adhered to a Spellbinder's label die-cut with a sparkly enamel dot on each end.

On the inside, I added another party hat and birthday gift that came from the same Miss Kate Cuttables file

The sentiment was, again, computer-generated.

I hope you'll join in on the fun and make a card from a sketch. If you haven't collected any sketches, you'll find thousands of them on Pinterest.

The Design Team has provided lots of inspiration on the Let's Craft and Create Challenge Blog. Be sure to take a peek at all the awesome cards they've made. 

We're looking forward to seeing your entries.

Thanks so much for stopping by, and remember to laugh--a little or a lot--every day.

Cheryl

Tuesday, November 3, 2020

Hello, Pumpkin...

 As we head toward the next holiday, it's time to get those Thanksgiving cards made. To get my mojo in gear, I decided to make a couple for the thrift shop card sales using a pumpkin image that I cut with my Silhouette.

I'm so thankful to have the option of cutting out larger layered images with an electronic cutting machine. I have an original small Cricut and the Silhouette Cameo, but I don't use the Cricut much anymore. Once I got used to cutting on a 12" wide Silhouette mat, it was hard to go back to using a 6" Cricut mat.

This card is really simple. I added some shading to the pumpkin after it was cut out and adhered a little die-cut banner across the top of the card.


My pumpkin is popped up on foam squares to give it some dimension. I glued down the little tendril so that it doesn't get caught on something and tear off.


Because I envisioned someone giving this to a young person, I decided it would be nice to let the receiver know how much they are loved and appreciated. My inside sentiment was computer-generated, and I added a little die-cut pumpkin.

I hope you were all able to vote today or prior to today. I'm so glad this election will be over soon. I have grown weary of all the TV ads and the sniping back and forth between the candidates.

Thanks so much for stopping by, and remember to laugh--a little or a lot--every day.

Cheryl