Wish List

Wednesday, January 31, 2018

Pastel Christmas...

Just before Christmas I received some pretty pastel Christmas papers with an issue of a cardmaking magazine. I decided to set them aside until after the holidays. Once I had some time, I took them out and made a few cards for my 2018 stash. This is one of them.


This lacy pattern on a pink background could definitely have been used for other occasions, but since it was included in the holiday pack, I decided to use it. It looks so pretty paired with a soft gray. My pictures really don't do it justice.

The sentiment was also included in the paper pack, along with several others.


The mittens were cut with an unbranded die out of white glitter paper. I was able to ink the ribbing on the cuff and thumbs right through the openings in the die.

I cut the mittens again out of silver glitter paper, and used the snowflake cuts to replace those that were cut out of my white mittens.

The little "dots" on either side of the smallest snowflake were little holes that were cut by the die, which I filled with Nuvo Crystal drops.


I used some of the white snowflakes that had been cut from my mittens to decorate the inside of my card.  Two strips of DSP on each side of my sentiment panel finished it off.

I'd like to tell you who made this sentiment stamp, but I'm afraid I have no idea. I really like it, though, and I think I'll use it a lot more.

I'm entering this card into Merry Monday's latest challenge: MM #275 Pastel Colors.

I'll be sharing a few more of my pastel Christmas cards with you in later posts.

Thanks so much for stopping by, and remember to laugh--a little or a lot--every day.
Cheryl

Saturday, January 27, 2018

Sweet treat birthday...

When I make cards for my daughter's stash, I usually try to come up with designs that are quick and simple to make, but still interesting and fun. Here's one that I made for her and haven't yet shared on the blog.


The ice cream cone die that I used has just one scoop in it, but I simply cut out the scoop four times from different colored CS to get my extra special treat. I decided to use my four favorite flavors--strawberry, vanilla, mint chocolate chip and chocolate. In fact, that sounds like a pretty good combo right now. Wish I had some!

All the layers and the cone were duly inked around the edges and wherever there were dimensional cuts from the dies. I used a Fiskars border punch to get the brown border on the left, and I hand cut the banner for my computer-generated sentiment.


My husband and I are pretty close to being ice cream addicts. We both love Dairy Queen and often stop there when we're traveling. We both love their chocolate shakes. A second choice would be a Heath Bar blizzard for him and a chocolate cone for me.

We always have ice cream in our freezer at home, too, and often have it for dessert. No wonder it's so hard to keep our weight in check!!


The inside of the card is very plain with just a stamped sentiment. In retrospect, I feel like I should have stamped a little something else there.

Today is actually my birthday, so maybe I'll just celebrate with a big bowl of ice cream. AFTER my husband takes me out to dinner, that is.

Thanks so much for stopping by, and remember to laugh--a little or a lot--every day.
Cheryl

Tuesday, January 23, 2018

Another Valentine...

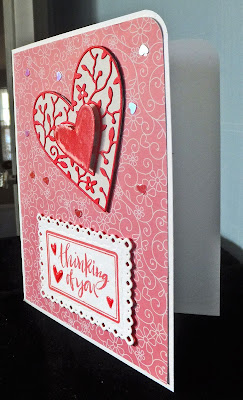
This Valentine came together really quickly. I used some pretty DSP that came with a magazine. For my die-cuts, the heart is unbranded and the rectangle is by Spellbinders.


Here you can see that I have elevated the middle heart with some foam squares. But before I did that, I covered this heart with Versamark and clear embossing powder before and heat set it.

I cut a heart in white to serve as a backing for the bigger heart with all the vines and flowers.


My sentiment is from a Recollections Valentine stamp set from Michaels, which I stamped in pink to match my heart. Then I filled in the little hearts around it with Nuvo Crystal Drops, which matched perfectly.


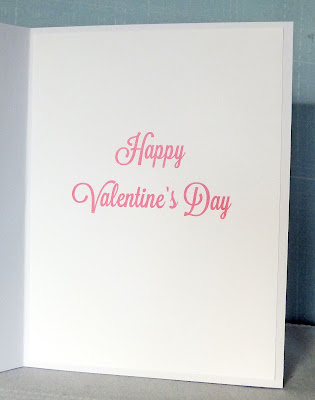
Another simple, stamped sentiment on the inside. But see that little heart by the word "Happy?" It's a sequin! I found a bunch of these in my stash. I had no idea they were there. I'm sure they were among the craft supplies inherited from my mother when she passed away in 1992!! If you look at the front of my card, you'll see that I added quite a few of them there, too.

We spent the morning shoveling snow at my house. We got about a foot of snow last night which had drifted into big piles in some areas--like against our back door. You couldn't even open the door from the inside until I had shoveled the snow away.  Luckily, it is not terribly cold outside, hovering at right round the freezing mark, so I wasn't cold at all while helping to clear the sidewalks, driveway, etc.


We also live on what is known as a "snow emergency route." That means that whenever a "snow emergency" is called, which happens whenever there are more than a few inches of snow, we have to make sure our cars are not parked on the street in front of our house. The City will tow them to an impound lot to get them out of the way for the snow plows to come through. To get them back you have to pay upwards of $150!!

Such are the joys of living in a northern city!

Thanks so much for stopping by, and remember to laugh--a little or a lot--every day.
Cheryl

Saturday, January 20, 2018

Lovebirds...

I've been busy making Valentines for my personal use and also to sell at a local thrift shop (the money raised goes to their various programs). Here's one of the Valentines that I made for my own personal use.


The little birdhouse and birds were made with an unbranded die set, as was my little bow.  I added some sparkle to the heart. The sparkly "LOVE" is a foam sticker that I picked up at the Dollar Store.


I kept the inside pretty simple, with a stamped sentiment and another sparkly heart like the one on the birdhouse. I always send my aunt and uncle a Valentine card, and I think this will be perfect for them.

My DH and I have been layabouts today because we each have the same bad cold - it's not that we feel so bad, but we have terrible coughs that keep us awake at night and make our throats sore. I guess it's good that we are both ill at the same time. Our meals, however, have been pretty blah--neither one of us wants to cook anything (not that he can cook anyway!). Maybe we'll actually lose a pound, which would be a very nice side effect.

Thanks so much for stopping by, and remember to laugh--a little or a lot--every day.
Cheryl

Tuesday, January 16, 2018

Twofer Card Challenge #1: Feathers!

Darnell, over on djkardkreations, has helped create a new challenge blog that is a lot of fun. It's called the "Twofer Card Challenge" and asks participants to use the challenge theme to make two different types of cards. Since the first challenge was to use feathers on a card, I grabbed my one and only feather stamp set and went to work. Here's what I came up with:


I tried to make my two cards very different, but using the same feather stamp.


This is, of course, a Valentine and came together very quickly. I simply stamped my feather twice to simulate the shape of a heart. Then I added my two little heart die-cut borders (unbranded).  My sentiment was computer-generated. I used a little cross-stitch bordered rectangle die to cut out my sentiment, because the cross-stitches reminded me of kisses.

I couldn't help but add a little bit of sparkle to my feather heart with a glitter pen. If you look closely at this photo, you'll see it!


The inside of this card is very simple, with another computer-generated sentiment. I considered adding something--maybe some hearts--but then decided I liked just the plain interior with the sentiment in its pretty Lavenderia font.


For my second card, I stamped a vertical row of feathers, masking off where they overlap to keep them looking neater. I also added a little blue to them with a ProMarker (alcohol marker) to reflect the blue in the tiny diagonal stripes on my DSP.  The sentiment is a stamp by Fiskars.


Here's another look at my feathers and also at the twine and tassel that I've added to the fold of my card. I did this by punching two small (1/8") holes in the fold--one at the very top (to hold the twine in place) and one about halfway down, where I tied the two ends together.


Here, you can see how the twine looks on the inside. Another simple card interior with a DSP matte and stamped sentiment (unbranded).

It was so much fun to try to figure out how I could use feathers differently on two cards--a good way to stretch my imagination!

I hope you'll head over to the Twofer Card Challenge and join in. There are a good number of entrants that you can look at for inspiration.

Thanks so much for stopping by, and remember to laugh--a little or a lot--every day.
Cheryl

Friday, January 12, 2018

Star struck birthday...

This is another card that was made some months ago, but I never got around to posting.

A very simple card using some star-patterned paper along with stitched star die-cuts.  The "Happy Birthday" die is one I bought on eBay a long time ago. It works so well here because of the little stars that are a part of it's design.

My sentiment was computer generated and then I cut it out using a rectangle die with a pricked edge. A few more of those die-cut stars finished off the inside of my card.

I purposely didn't add any sparkle to the stars on this one, as I made it for a boy's birthday.

We are once again in the deep freeze. It is currently -6 F (which is -21 C), and it is supposed to dip down to -12 F (-24 C) tonight. I needed to run to the store today and my poor car was so cold. I think it was hurling curse words at me for the first mile or so. It eventually warmed up, and we got along a little better after that. :)

Thanks so much for stopping by, and remember to laugh--a little or a lot--every day.
Cheryl

Tuesday, January 9, 2018

Retirement card...

I was looking through my photo files from 2017 and realized there were a few cards that I had not posted on my blog. This was one of them.


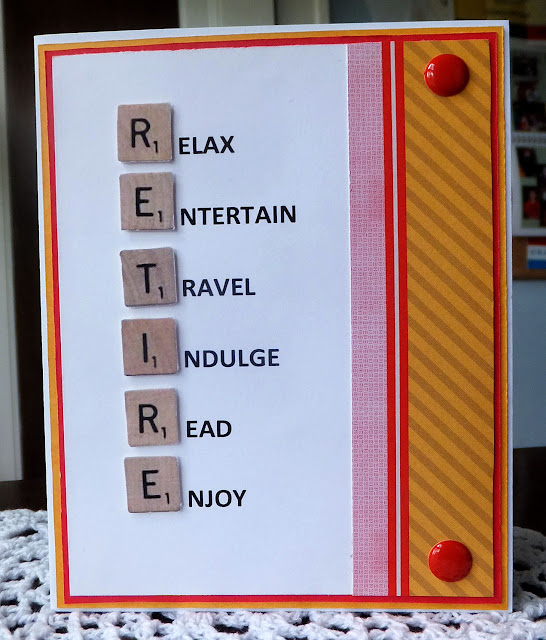
This was a simple card for my BIL. I found an image of scrabble tiles on line and simply printed them out on cardstock. Then I fussy cut them and popped them up on my card next to a computer-generated list of retirement activities.


Here you can see that they are, indeed, popped up a bit, adding a little dimension.


On the inside I used some of the same papers and mats that I had used on the front. The sentiment is my own and was also computer-generated.

This is a very simple card, but I think that's usually best when it's for a male.

I've finally gotten my Christmas decorations all put away, and I'm now working on cards for the next holiday--Valentine's Day!

Sometimes I wonder what I did with all my time before I started making cards for every occasion and for all my family members (and I have a big family). Of course, I had a fulltime job then.

I definitely prefer being retired and spending much of my time on paper crafts.

Thanks so much for stopping by, and remember to laugh--a little or a lot--every day.
Cheryl


Friday, January 5, 2018

Let's Craft and Create Challenge #133 - ANYTHING GOES + option LOVE IS IN THE AIR...

It is once again time for the monthly challenge over at Let's Craft and Create. I do hope you will join us!

It is an honor for me to continue to serve in 2018 as a member of the Design Team, and I want to say a special "thank you" to our dear team leader Mary Trainer who is so dedicated to the blog's success. She does a wonderful job, even though it must be like herding cats at times!

Since our optional theme this week is "Love is in the Air," I decided to make a card for Valentine's Day. I was a bit pressed for time, so my card is quite CAS, but it was fun to make, nonetheless.

 The heart banner is an unbranded die, as is the sentiment die. I enhanced the banner by adding colored hearts and accents and adhering some pink gems to the little "tie" above each heart. I also added a couple of pink hearts to the sentiment and some more pink gems placed randomly around it.

The dotted line near the bottom of my card was made with a Paper Smooches die, and the scallops at the very bottom were created with a Fiskars border punch.

Here's a little closer look at my heart banner where you can see some of the detail. This is such a cute banner, and I think I'll use it a lot. In fact, I have to make a new baby card soon, and I think this will work perfectly.

So, with one last look at my card, I urge you to hop over to Let's Craft and Create and join in on the fun. We'd love to have you submit your creation, whether it's a card, a 3-D object, a tag or even a scrapbook page.

Remember, you can choose between "Anything Goes" or "Love is in the Air."

Thank you so much for stopping by, and remember to laugh--a little or a lot--every day.

Cheryl

Tuesday, January 2, 2018

Silver and gold for Christmas...

No, I didn't receive any silver or gold for Christmas, but I did make some silver and gold cards--10 of them, to be exact.

My background die-cut is by Darice. It cuts nicely, but I did have to be careful pulling it out of the die. The glossy metallic cardstock is pretty strong, but the die is just so intricate! It was adhered to the front of my card with spray adhesive.

I heat-embossed my sentiment. This particular sentiment flag was edged with a gold metallic pen to help define its edges. On other cards, I used a stitched banner die, like the one I used on the silver card.


On the inside of my cards, I cut just a portion of the background die, cut it off of the frame and adhered it to the inside of my card. Then I heat-embossed a sentiment on the inside, as well. Sorry for the bad photo. Shiny cardstock is impossible to photograph!

I am entering these cards into Merry Monday's challenge #271: Embossing.

I have actually (since Christmas) made a dozen holiday cards for 2018, all using supplies I received with the latest issue of Cardmaking & Papercraft. I won't share any of them with you for a while. I'm a little tired of making and talking about Christmas cards. Tomorrow, I will start making cards for other occasions. Hooray!

Thank you so much for stopping by, and remember to laugh--a little or a lot--every day.
Cheryl