Wish List

Tuesday, June 30, 2020

Hangin' with my gnomie...

While I don't much care for gnome figurines for the house or garden, I sure do like gnome die-cuts. Here's an unbranded Christmas gnome that I think is super cute.

I love his striped leggings and sleeves, although those die-cut pieces are so tiny, they can be a little tricky to color and assemble.

I embossed my green flag banner with one of the snowflake EFs I have in my Christmas supplies and highlighted each snowflake with a glitter pen. You can't really see the glitter in this photo, but it adds a nice bit of sparkle.

My sentiment was die-cut from foam board, so it has great dimension. The stiffness of the foam board also makes delicate sentiments like this much easier to glue into place.


I popped my gnome up on foam tape to give him a little dimension, too. I've also added some glittery embossing paste to the fur areas on his hat.

I added a tiny bit of shading to his mustache with a gray alcohol marker to give it some definition.


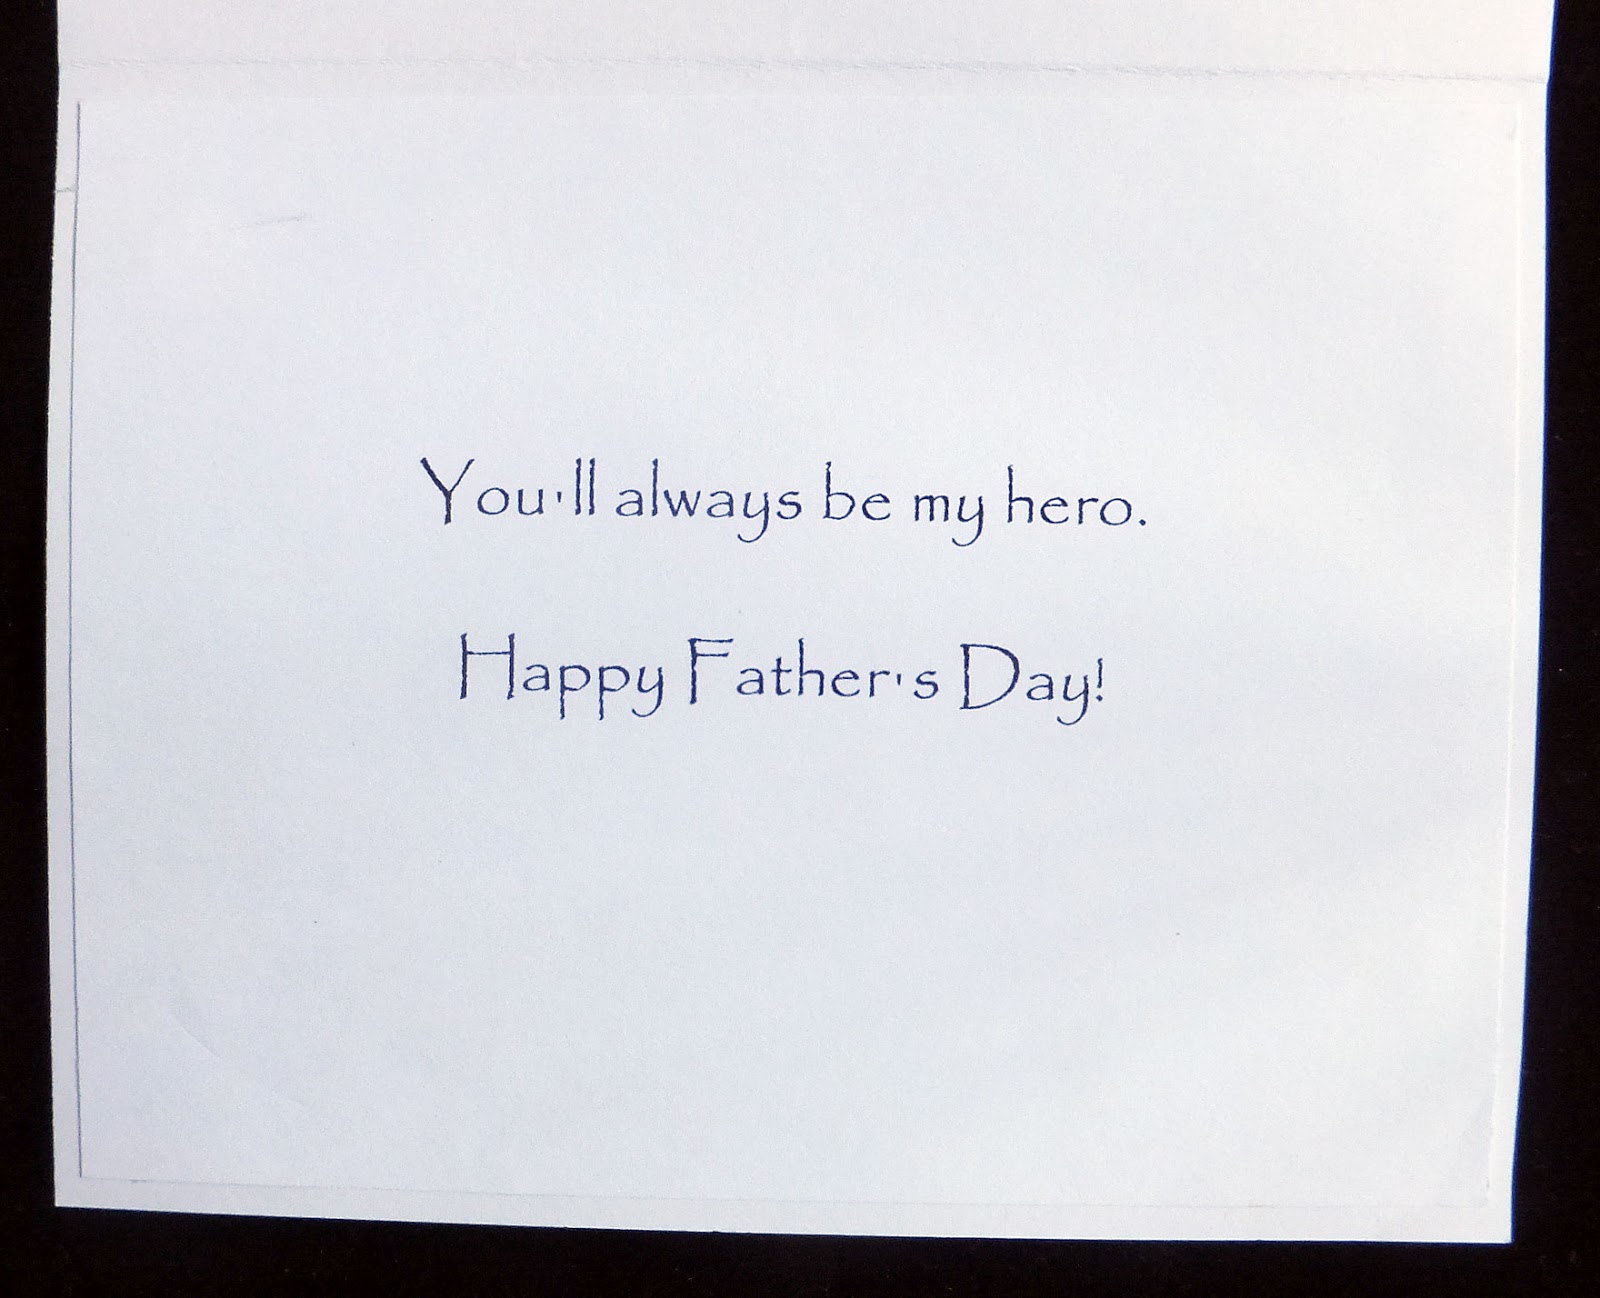
On the inside of my card I've added a mat (from the same DSP as on the front) and stamped a sentiment.

Because the sentiment didn't stamp as evenly as I would have liked, I went over each letter with a glitter pen. This evened it out quite a bit and added some nice sparkle.

I intend to make a few more cards like this when I have some time to cut and fiddle with the gnome die-set. I'll probably use some different papers and maybe add some holly die-cuts, too. I only have about 20 Christmas cards left to make, so I'm definitely ahead of schedule.

Thanks so much for stopping by, and remember to laugh--a little or a lot--every day.
Cheryl

Friday, June 26, 2020

Seas the day...


This is a fun-fold birthday card that I made for my 15-year-old grandson. Because it has additional folds on the inside of the card, it doesn't fold flat enough to get a good photo--which is why I'm holding onto it in the picture. After cutting and folding my card base (here's where I got the idea), I cut pieces of a lighter blue DSP for my "water and sky" and used a wave stencil to add the blue waves to the water portion. I really love how it turned out.


My little sailboat is a die set that I enhanced with a couple of layers of CS, some Nuvo Drops for the portholes and a little Glossy Accents.


When the card is fully opened, this is what it looks like.

My sister has a fishing net die, and she cut me a few of those to use on this and future cards. I actually used only part of a net die-cut on this one. My seashells and anchor were also die-cut and inked. I added a little piece of twine to the anchor and attached it to the net, as though the anchor had gotten tangled up in the net at some point.

I think my favorite die-cuts on this card are the seagulls. I love how they look when just a tiny bit of inking is done on their wingtips and body.

When adding my "'Seas' the day!" sentiment (computer-generated), I made sure it was directly behind the front sentiment (also from the computer) when the card was closed. I used the area to the left of "'Seas' the day!" to sign our names.

The trickiest part of making this card was to cut the pieces of pale blue DSP to fit onto the multi-shaped areas of the card. It was definitely doable, though, since each of the three panels of the card begins as a normal card base size.

This was such a fun card to make, that I plan to make more like this in the future. I think it's interesting for the recipient to open it up to see how the design on the card front continues to the inside.

I hope you all have a great weekend and are able to enjoy some time outside. I know we will!

Thanks so much for stopping by, and remember to laugh--a little or a lot--every day.
Cheryl

Tuesday, June 23, 2020

Graduation card...

My daughter attended a graduation in Bowling Green, OH, last weekend, so I made a card for her to give to the graduating senior.


This card was pretty quick to make with just a few die-cuts and some holographic stars. I love having the ability--with dies or with a cutting machine like the Silhouette Cameo--to quickly pull together a card. We don't always have the luxury of time!

The inside was quick and simple, too, with a mat for added color and a stamped sentiment. I like being able to put part of the sentiment on a banner I can pop up on foam tape. I think it adds a little dimension and interest to the inside.

Next year we will have two grandchildren graduating from high school. I sure hope we're able to attend a "normal" graduation celebration by then. It's always fun to see how happy and proud they are to walk across the stage to receive their diplomas.

Thanks so much for stopping by, and remember to laugh--a little or a lot--every day.
Cheryl

Saturday, June 20, 2020

Father's Day cards, take four...


I was given these pretty dimensional stickers and thought I should use them. They had such nice, masculine colors, so I thought they'd make a very nice Father's Day card.

As you can see, I simply added a strip of glitter cardstock across the top to add to the wee bit of glitter that is on the shell stickers, and die-cut my computer-generated sentiment.

On the inside of this card, I stamped a simple "Happy Father's Day."


For my second card, I used some DSP with fun words all over it. I highlighted three of the words with fine-point markers, die-cut some arrows to point them out, and added a die-cut sentiment.


I wanted to repeat the highlighted words on the inside, so I printed out an inside sentiment with my computer.


We've had a relaxing day, cleaning out some stored boxes of our grown children's high school and college mementos. We are packing them up to take to them so they can store them in their own homes. And we'll have a little extra storage space for our own "stuff!" Yay!

Thanks so much for stopping by, and remember to laugh--a little or a lot--every day.
Cheryl

Friday, June 19, 2020

Father's Day cards, take three...


Today's Father's Day cards are really simple, but that's how men like them right? At least that's what I tell myself.

For my two corners on this first card, I punched a small square, cut it in half and then used a small oval die to create the arched  interior. I sort of like the way that looks. I happened to have a couple of bronze metal stars so I added those as well.

 The shoes were die-cut and then inked while they were still in the die. My sentiment was computer generated and popped up on double-sided foam tape.

I made this card the same way, except I used a couple of fancy corner dies for embellishment.

Both cards had a simple, stamped "Happy Father's Day" on the inside. Once again these were made for the thrift shop.

I thought I should quit making cards as we get ready to leave on our trip, but I couldn't help myself. I actually made two cards today. I'll share them with you later after I have a chance to photograph them.

Thanks so much for stopping by, and remember to laugh--a little or a lot--every day.
Cheryl

Thursday, June 18, 2020

Father's Day cards, take two...

Over the next three days or so, I'm going to post the rest of the Father's Day cards I have made, just to be able to share them with you and as a reminder to me of what I made this year.


This was a simple card using some big word dies along with a few stars.

I started by using a strip of cardstock as a mask. I laid the strip across the center of my card and inked along it, darker next to the CS and lighter as I moved out. Then I rotated my strip 3/4" or so, making sure it still crossed the center of my card, and inked again. I kept doing this until the entire panel was filled with yellow rays emanating from the center point.


Once that was done, I adhered my die-cuts, and then glued the entire panel to my card base.


After finishing my yellow and white card, I decided to make one using a red, white and blue color combo. All of my die-cuts for these two cards were cut from glitter CS.


For the inside of both cards, I created a sentiment in Word and printed it from my computer.

These cards were made for the thrift store where I volunteer. When I took some cards into the store today, I barely got them priced when someone indicated they wanted to buy several of them. I am always so pleased when they sell!

We are getting ready for our first RV trip of the year. We plan to keep to ourselves on this trip, only visiting a few family members and a couple of national parks--and we will definitely be wearing masks when around others and regularly washing and disinfecting our hands. We'll take the necessary precautions to stay healthy and safe!

I will be writing and scheduling several posts, but I may or may not be able to comment on your blogs as much as I usually do. I promise to comment as much as possible, though.

Thanks so much for stopping by, and remember to laugh--a little or a lot--every day.
Cheryl

Tuesday, June 16, 2020

Pretty floral hello...

Every now and then I like to send my two elderly aunts a card to let them know I am thinking about them. I think that it is especially important now when they have to remain in their homes as much as possible and it is difficult for them to socialize with their friends and neighbors.

This is a card I made for one of them. First, I made my card base out of some pretty floral cardstock I've had for ages. Then I cut the the flower sprig out of white cardstock and painted the outline and the rose petals with water colors. I cut the negative spaces of the leaves and other flowers out of colored/patterned cardstock and inserted those pieces into my die cut outline.

"Hello" was die-cut out of some gray cardstock and adhered to the white panel which was embossed using the Lifestyle Crafts Quatrefoil EF. I added some sequins and a lavender strip on each side (to match the lavender in the tiny flowers), and that was it! It was blank inside so I could write a note.

I wasn't sure this card would work AT ALL when I first started. I have a hard time using some of the printed cardstocks I have on hand. Especially when they have a bold print like this one. I think the white panel helped to tone things down, though, so it all worked out ok.

We are now enjoying the longest days (in terms of sunlight) of the year. In Minneapolis the sun is rising around 5:30 a.m and not setting until 9 p.m. Do you enjoy this change in daylight, or would you rather have a constant amount of daylight all year long?

I have traveled to Costa Rica three times in my life, spending 1-4 weeks there at a time. I have a friend there who owns a coffee plantation, and I love visiting her. Since Costa Rica is very near the equator, the days don't vary much in the amount of sunlight they receive each day. In fact, the days are pretty evenly divided between light and darkness--12 hours of each all year around. When I was there, I enjoyed being able to count on the sun coming up at 6 a.m. and setting at 6 p.m.

Thanks so much for stopping by, and remember to laugh--a little or a lot--every day.
Cheryl


Friday, June 12, 2020

Twofer Card Challenge #28: Circles/Bubbles...


The most recent Twofer Card Challenge of Circles/Bubbles immediately caught my attention because I knew I had a circle die that I had never used. So, I'm not only entering the following cards into the Twofer Card Challenge, I'm also entering them into Darnell's June NBUS Challenge.


For both of my cards I used the circle die that cuts the cluster of circles you see on the right. For my seascape card, I used the die-cut as a stencil to ink in the bubbles coming from my fish. I actually added some Wink of Stella to the bubbles but it's just impossible to capture on my camera.


I started this card by heat-embossing the sentiment. The stamp is not a good quality one, so I had a little trouble getting it to look okay. This is an anniversary card for my husband, so it really doesn't have to be perfect. I know he'll like it, no matter what.

My sister sent me several of the die-cuts on this card--the net, jellyfish and starfish. It's so fun to be able to share die-cuts with each other. I just wish we lived closer so we could craft together more often.

I cut the fish and the conch shell using some dies I had on hand.

I also used a water stencil to lightly add some waves in the background.


I tried taking an angled photo to catch the sparkle on the bubbles, but no luck! You can see a bit of the sparkle on the jellyfish, though. My sister cut it from white glitter cardstock.


My second card is a simple thank you card, using the cluster of circles as a design element. I added a few sequins to some of the circles for a bit of sparkle and contrast.

The sentiment was cut from the same glitter cardstock as the circles.

I'm so glad the Twofer Card Challenge pushed me into using this NBUS circle die. Now I just have to come up with a few more ways to use it!

I hope you all have a wonderful weekend. The weather is perfect here, so I plan to do some weeding in my flower beds and other yard work.

Thanks so much for stopping by, and remember to laugh--a little or a lot--every day.
Cheryl

Tuesday, June 9, 2020

A father is someone to look up to...


The thrift store where I volunteer is open again, so I am making Father's Day cards for them. These two are in the bunch that I will take to the store this week. Hopefully, they will get sold!


This one is a top-folding A2 card. The sentiment is from Close To My Heart. I have simply colored in the banner, cut it out with a stitched square die and then matted it with some coordinating cardstock.

The shoes and hat were cut with an unbranded die set and then inked while the cardstock was still n the die.


This second card folds in the usual way--on the left side--and is put together the same way as the first card.

Inside both these cards is a simple, stamped "Happy Father's Day."

These two cards really came together quickly once I figured out what I wanted to do. I didn't pop anything up on foam squares, thinking they would be easier to mail if I kept them flat.

Making these cards brought back memories of my own dad. He loved tinkering around with electronics. And he was good at it! In fact, he built our first television from a kit in about 1955-56. I remember the first picture I ever saw on it. It was upside down because he had been making the final connections while it sat upside down on the table where he worked. I was just a little girl at the time and very excited about this new-fangled bit of "technology." My, how far we've come!

Thanks so much for stopping by, and remember to laugh--a little or a lot--every day.
Cheryl

Friday, June 5, 2020

Let's Craft and Create Challenge #160: Punch it...

What? June already? It always amazes me how quickly time flies.

Today I'm here to talk about our newest challenge at Let's Craft and Create. The theme is "Punch it!" but you can always choose the "Anything Goes" option, so I hope you'll join us.

http://letscreatechallenges.blogspot.com/

To start, I selected several punches and decided they would be the main tools in making my card. Here are the punches I chose:


The two white punches are by Martha Stewart. The little leafy sprig is an EK Success punch, and the well-used corner rounder is by Fiskars. One of the corner rounder's handles broke off, but it's still perfectly usable.


I happened to have a 12" X 12" sheet of this pink embossed cardstock, and I thought it would be perfect for my card. It was not so deeply embossed that I couldn't heat-emboss my sentiment directly onto the cardstock. After cutting and folding my card base, I used the corner rounder on the two outside corners.

I used the Martha Stewart border punch to create a trellis. I cut a 2 7/16" wide piece of white cardstock. I punch down one side, flipped it over, carefully lined it up and punched down the other side.

I fussy-cut thin strips of dark green cardstock to serve as my vines. Once I had them laced through my trellis, I added my punched sprigs.

The last step was to add some butterflies, made with the Martha Stewart punch from glitter cardstock and inked around the edges. One tiny pearl was added to the center of each one.

On the inside of my card, I added a white panel so I have somewhere to write a personal note.


Now it's your turn. I hope you'll join us for this fun challenge. For many of us, our dies have replaced most of our punches. If you're like me, you have even forgotten about some of the punches in your collection. Time to dig them out, dust them off and use them to create.

Check out all of the inspiration on Let's Craft and Create Challenge Blog and have fun!

Thanks so much for stopping by, and remember to laugh--a little or a lot--every day.
Cheryl

Monday, June 1, 2020

George Floyd memorial...

Today my DH and I went to the memorial site, which is only about 1 1/2 miles from our house, where George Floyd was killed by a Minneapolis policeman. This has been a gathering spot for protesters and for those who simply wish to grieve his loss and honor his life.

Here are a few photos I took so that I could share them with you.

Cup Foods is a small convenience store at 38th St. and Chicago Ave. The area just in front of the store is where Mr. Floyd was killed.

This is in the middle of the intersection of 38th St. and Chicago Ave. When we arrived there were many people standing in a circle around this memorial site and speakers were taking turns addressing the crowd.

This outlines the place where Mr. Floyd lay with two policemen holding him down and one with his knee on his neck. It has been determined through an independent autopsy that Mr. Floyd died from mechanical asphyxiation.

Finally, here is a mural on an exterior wall of Cup Foods with many notes, bouquets of flowers and other items honoring Mr. Floyd's life.

We are still under curfew here in Minneapolis, but it has been shortened to 10 pm - 4 am, at least for today. I don't know if that is a new "weekday curfew" or simply a minor lifting of restrictions.

This is a lovely little restaurant very close to our house--just 2 1/2 blocks away. It had just opened a few weeks before the pandemic raised its ugly head. It had to immediately switch to "take out only." Because of the riots that have accompanied the peaceful protests, many businesses have boarded up their windows and doors to prevent rioters breaking them and looting whatever is inside. We often see protest-supportive messages on the plywood, like you see here.

Even our closest Dairy Queen is boarded up. I believe they are still open for business during regular business hours, and the plywood is just a precaution.

As you can see from these photos, even my neighborhood on the southeast edge of the Minneapolis city limits has been greatly impacted by this senseless homicide. I only hope and pray it is resolved with courage, grace, wisdom and justice.

Thanks so much for stopping by, and remember to laugh--a little or a lot--every day.
Cheryl