Wish List

Tuesday, November 29, 2022

A happy snowman...


I love this happy little snowman. He's so easy to die-cut and assemble. I used a snowy/starry sky die to create my background on some blue CS. I backed it with a wide piece of double-sided tape so that I could burnish some fine, white glitter into the holes created by the die. A piece of glitter CS was added to the bottom as snowy ground and my panel was matted with some green cardstock that matches the scarf.


I cut all the pieces for the snowman out of white cardstock and simply colored a few of them with alcohol markers.

I also used a fine tip black pen to go over the scored lines for his mouth and eyes.

His cheeks were given a bit of pink with some chalk.


On the inside, I stamped a Christmas sentiment that went well with the die-cut sentiment on the front of the card.

And speaking of snow, we are supposed to get a lot of snow today. I'll be out on the road taking my granddaughter to school this morning, so I hope the roads are still in good condition for that! I really hate driving on icy roads.

Thanks so much for stopping by, and remember to laugh--a little or a lot--every day.

Cheryl

Friday, November 25, 2022

Sharing a couple more Thanksgiving cards...


We had a wonderful Thanksgiving meal at my daughter's house. The food was delicious, and it was fun to spend the holiday with family. I hope your day was as lovely as ours!

I had a couple more Thanksgiving cards to share with you, so thought I would do so quickly before I move on to sharing more of those Christmas cards I've been making at breakneck speed.

This one was a simple design, made a little more special by using gold strips on either side of my center panel, some gold embossing for the sentiment and Nuvo Drops. The leaf was cut with a stitched die and inked with three different fall colors. It has been popped up on dimensionals.


I just love ink blending with brushes. It blends so smoothly, and I think the results are beautiful!

To age the edges of my leaf a bit, I added some brown ink with a finger dauber.


On the inside, I added a stamped sentiment and a leaf that was made with a small punch.


These two cards were made using a design with a center flap that opens and two 1 1/4" sides that are adhered to the back of the card base. 


The leaves were dimensional stickers from Dollar Tree. I shared a photo of the sticker sheets in this post.

It's not visible in the photos here, but each leaf has a bit of glitter on it.


Underneath the center flap, I adhered an ivory-colored panel that was stamped with a Thanksgiving sentiment.

I really like this card design, so I'm trying to think of a Christmas card I could make using it. It's a great way to use up those scraps of DSP.

Thanks so much for stopping by, and remember to laugh--a little or a lot--every day.

Cheryl


Tuesday, November 22, 2022

Finally, the Christmas card pile is growing...

I have been making 5-10 Christmas cards a day for the last few days. One day I even made 26 of them! My process is to choose a design, gather my materials, do any necessary prep work, and then make at least 10 cards using that design. 

The snowy tree scene was a freebie I got from thehungryjpeg.com. I planned the size I needed and where I wanted it to print on my cardstock. Then I printed out four scenes on one sheet of 8 1/2" X 11" white cardstock and cut them out to fit my cards. 


I made a template the same size as my card front to help me place my circle die in just the right spot.

I then cut a gold ring using two circle dies and used one of my reindeer dies to cut a small, gold reindeer.

"Season's Greetings" was also cut from the same metallic gold cardstock and glued to the front of each card.


The last thing I did was to stamp a sentiment on the inside below my snowy scene. It is completely hidden when the card is closed, but there is still plenty of room below it to write a brief note and sign the card.


Using this design, I made five blue cards and five white and silver cards (with a tiny bit of purple in the mat).

In my stash of Christmas embellishments, I found two sheets of  rhinestone snowflakes that needed to be used before the glue holding them together deteriorated. 

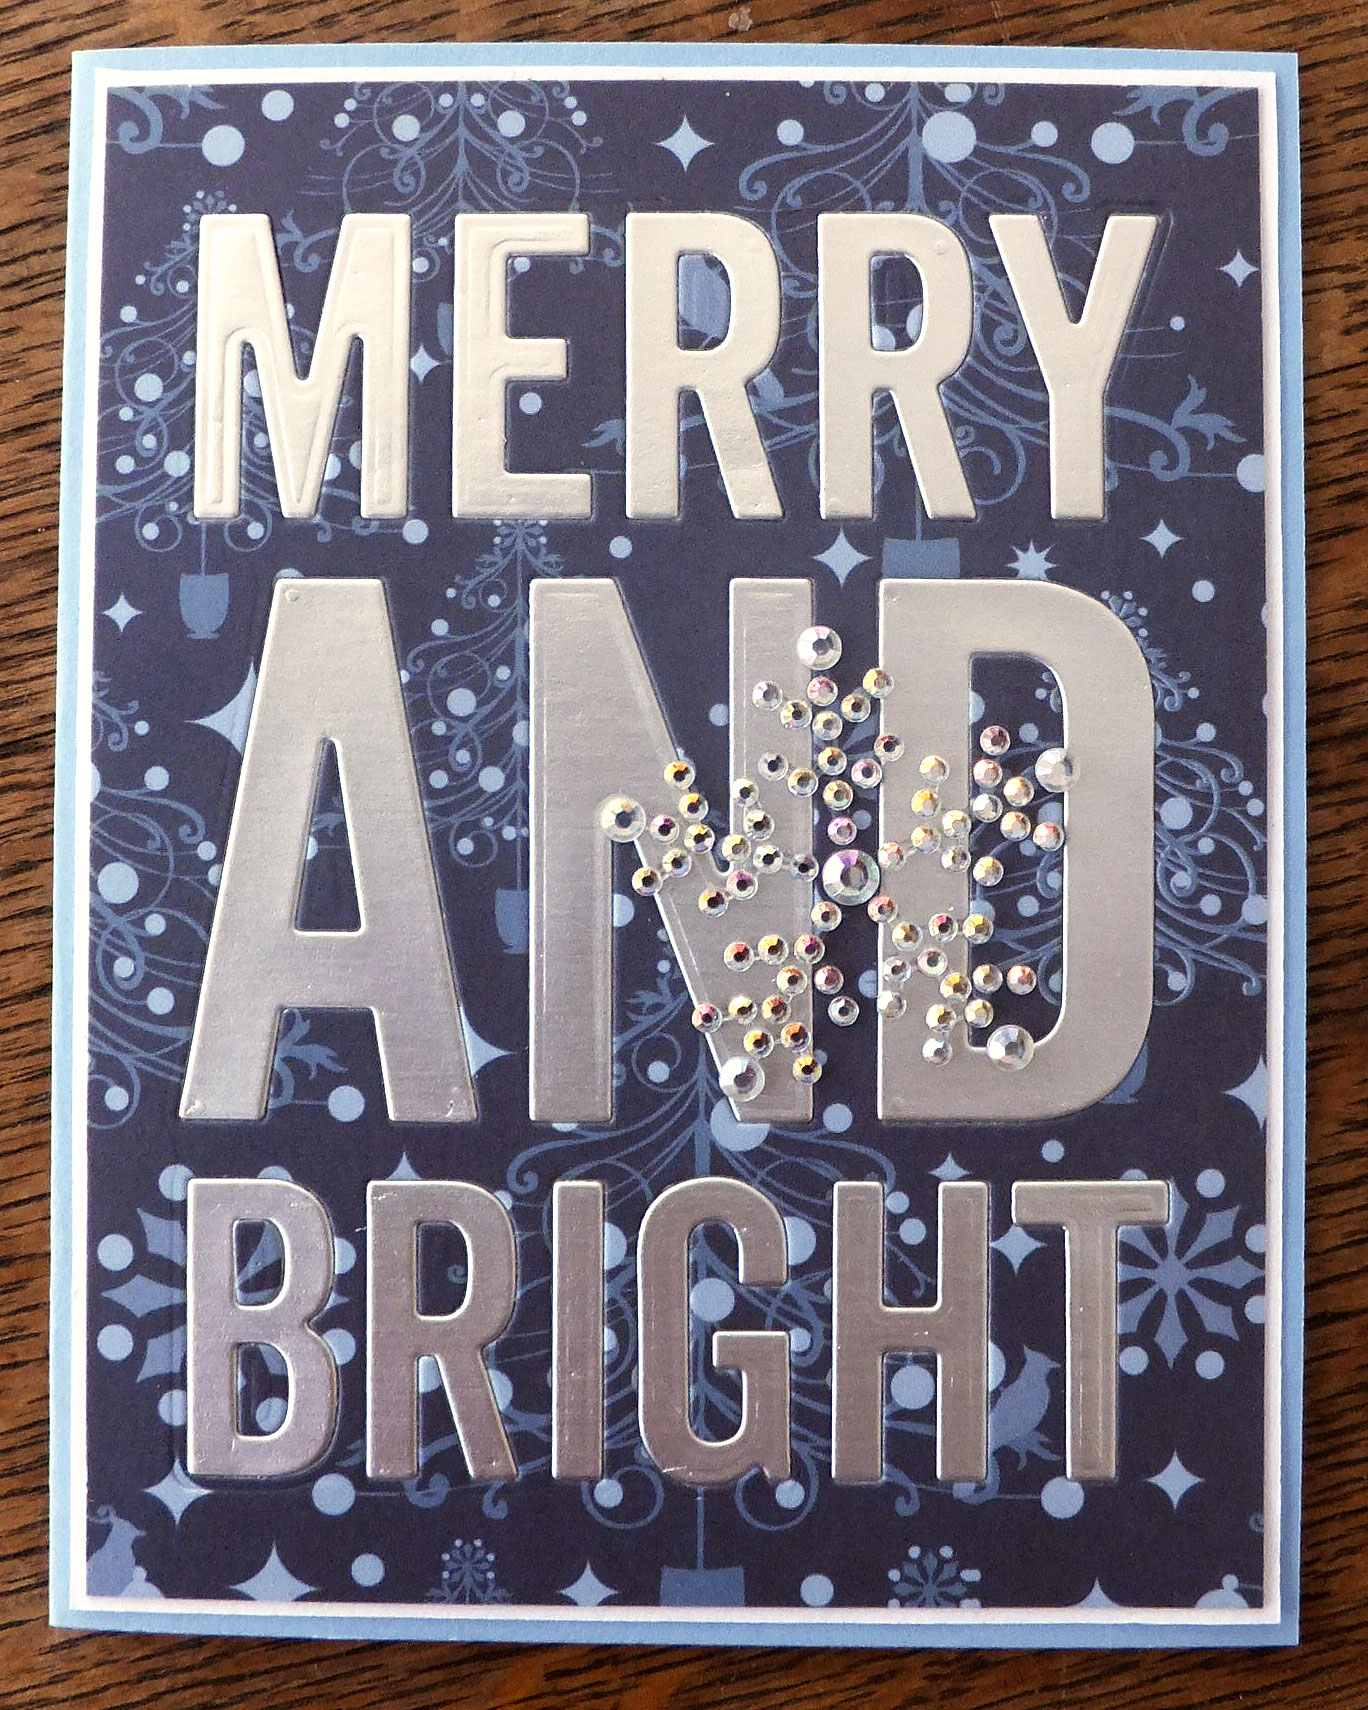
I started by using a "Merry and Bright" die to cut the letters out of the front panel of each card. Then I also cut the letters out of a piece of metallic silver CS and inlaid them into the front panel of each card. 

The only extra embellishment on each card was a big sparkly snowflake. I placed it over the "D" in AND, because it was still easy to read the sentiment even if that letter was obscured.


I love the way the snowflake gems reflect whatever color is near. In the bottom gem of this snowflake you can see the red of my sweater as I'm taking the photo.


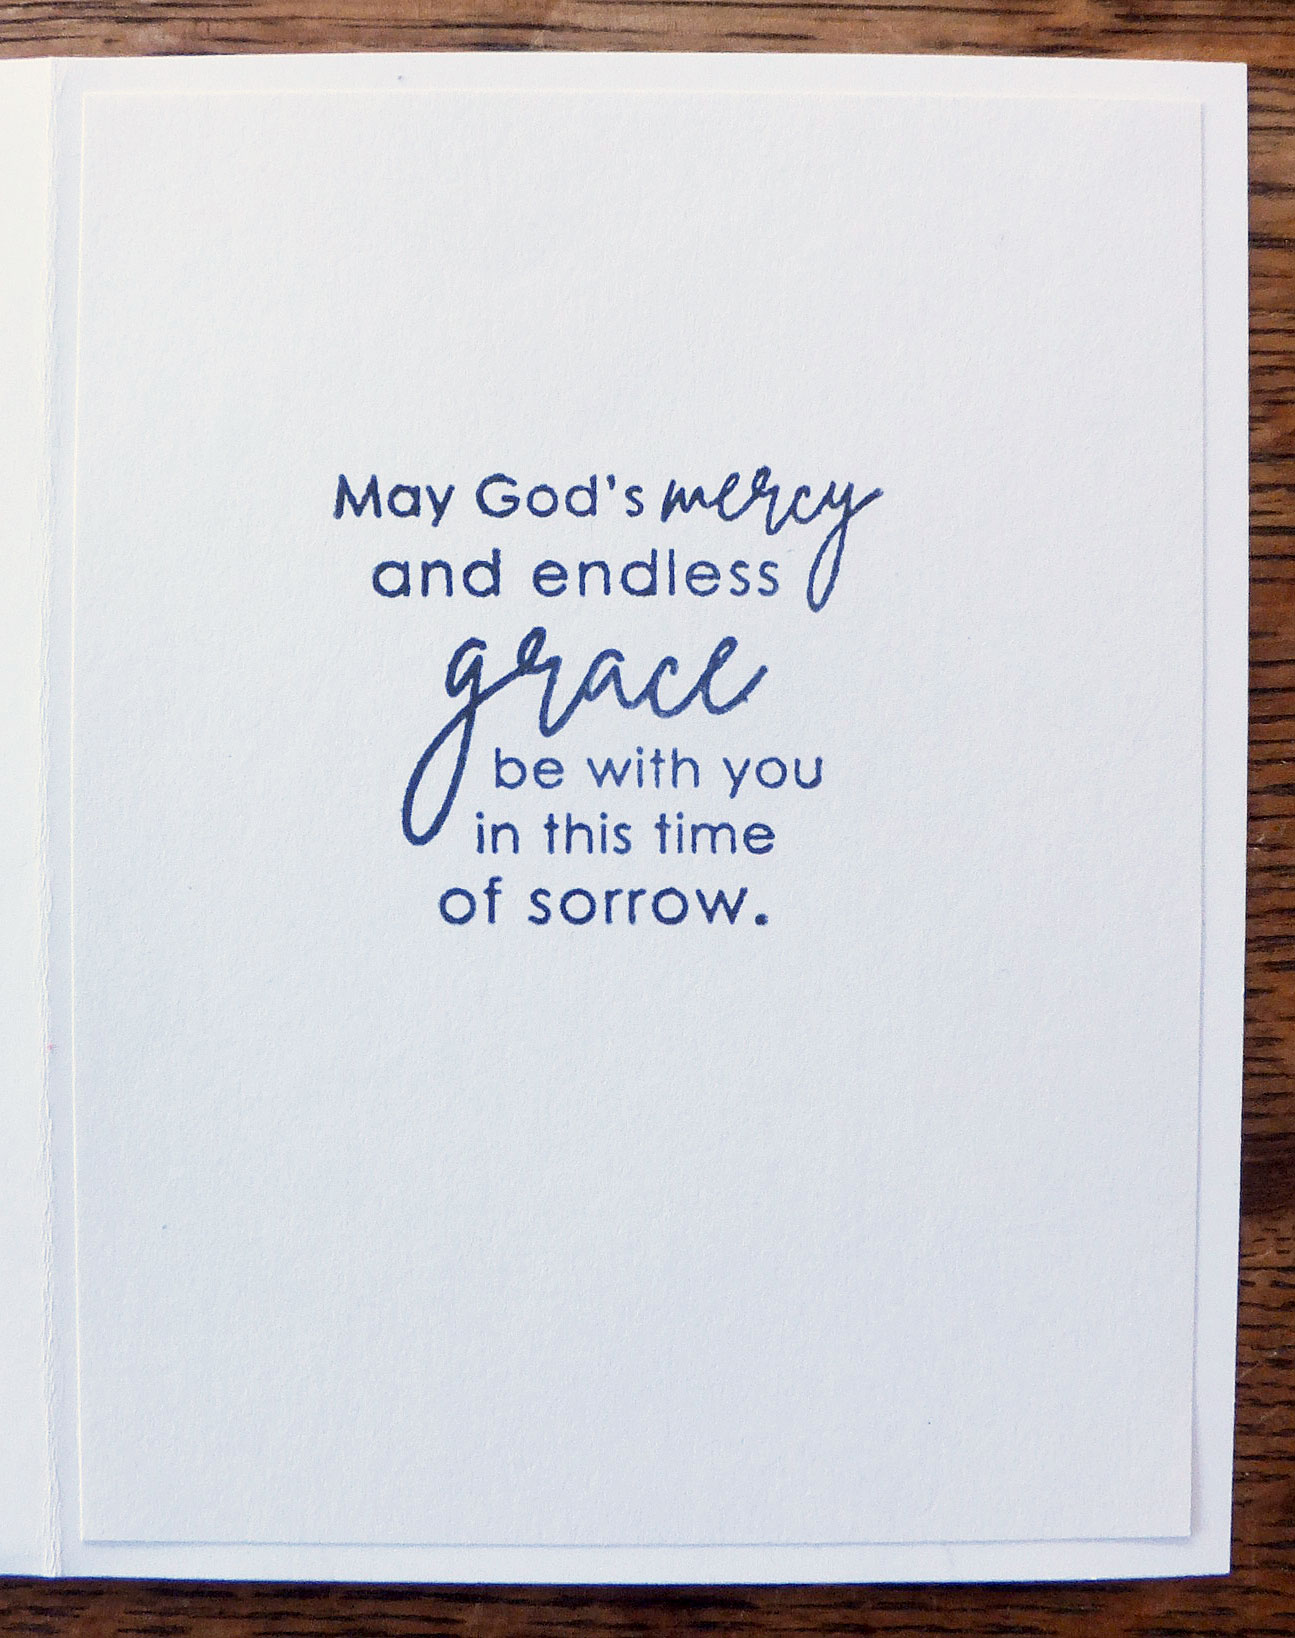
On the inside of each card, I stamped a "Merry and Bright" sentiment. 

All the cards in this post were really fun to make. Who knows, I may make even more of them as I still need to make 25 or so before I have enough.

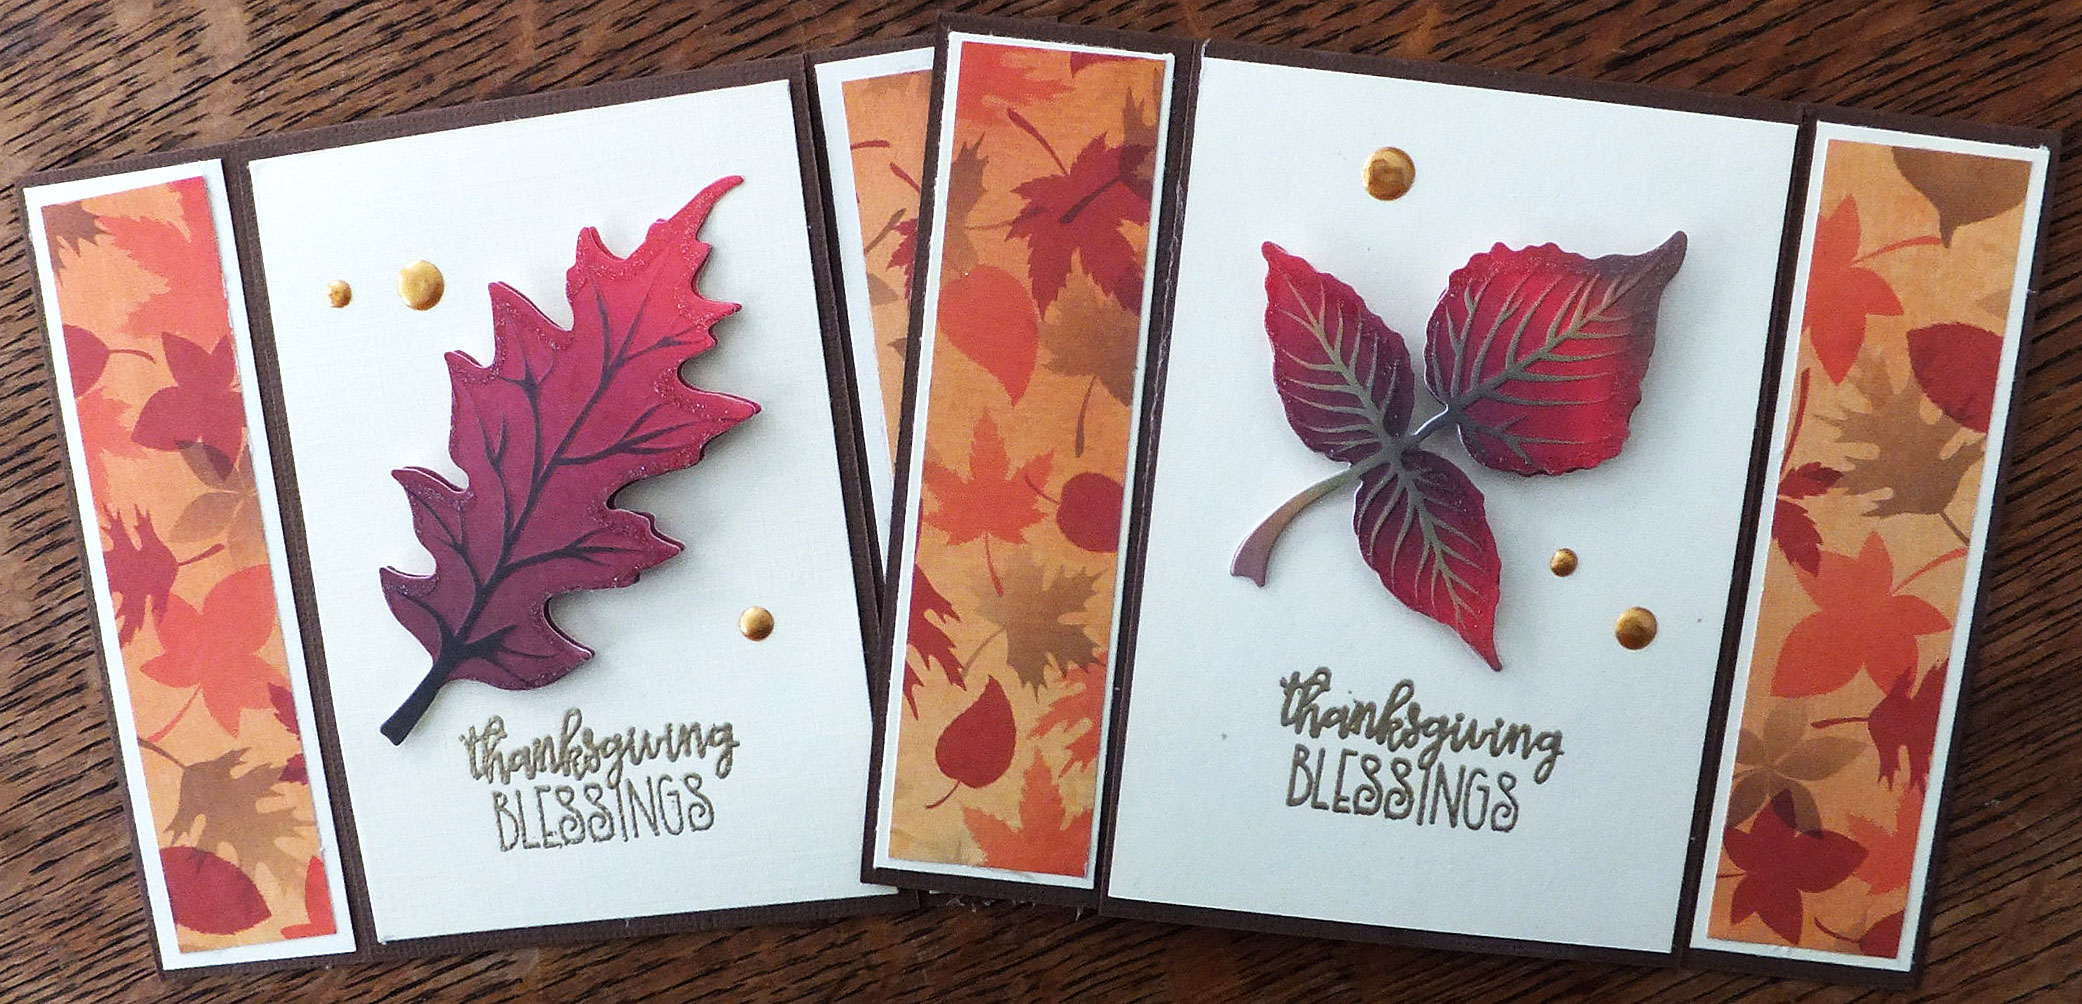
I made the cranberry relish today for Thursday's meal, and tomorrow I will start on the pies. My daughter is hosting Thanksgiving, but I have been charged with bringing the relish, pies and dinner rolls. I plan to make cherry, apple and pumpkin pies--all family favorites. 

If you celebrate it, I hope you have a wonderful Thanksgiving, surrounded by loved ones.

Thanks so much for stopping by, and remember to laugh--a little or a lot--every day.

Cheryl

Friday, November 18, 2022

Autumn Blessings...


These are some of the cards I made to send to family and friends for Thanksgiving. The fold is called an angled gatefold card, and I learned how to make it from a Stamp Your Art Out video by Rachel Tessman. She's a fellow Minnesotan and a fabulous cardmaker. 

I used slightly different measurements than she did by using 12" X 12" paper and cutting a card base that was 5 1/2" X 11 1/4", scored at 3 1/2" in from each end. My finished card was then the usual A2 size of 4 1/4" X 5 1/2". I used the same measurements for the angled cuts as she instructed on her video.

I used quite a few different old Stampin' Up papers. Since I made 16 cards like this , I was able to use up quite a few sheets. My circles were die-cut and then the edges were rubbed with a gold metallic ink pad. "Autumn Blessings" was heat-embossed with gold EP. A few flat-backed metallic gold pearls were added for a little shine.


My pretty leaves were double layered (with dimensionals between the layers) and had a smattering of glitter on them. 


I actually didn't make the leaves. They all came from two sticker sheets that I purchased at the Dollar Tree. The sheets each had such a nice selection of leaves and I used them on my personal cards as well as on cards for the thrift store.


This is what the cards look like when they're opened. I liked Rachel Tessman's description of this fold as being one that looks like a blanket wrapped around someone to keep them warm.


My inside sentiments were all computer-generated, then cut out with the same die that was used for the circle on the front. I also brushed the edges with my gold ink pad.


I am now knee-deep in Christmas card papers and embellishments. I hope to have them all done before December 1, but that means my card-making process has to continue steadily and without a hitch. Hopefully, I'll be able to share some of them in the near future.

Thanks so much for stopping by, and remember to laugh--a little or a lot--every day.

Cheryl

Tuesday, November 15, 2022

Best fishes...


For this card, I first created a background with the Pisces sign in a gold color. I just repeated the sign in rows and columns, and it created the pattern you see on my panel. "Best Fishes" was cut with a small alpha die set I have. It's a little tricky to line up the letters, but the regular pattern of the paper helped with that.


I found an image of these two fish online and printed them onto a white piece of cardstock. I gave them a watery background using a stencil and some blue ink.

Once that was done, I created my shaker element by cutting a circle (and a border for my circle), then adding foam tape underneath around the edge of the circle. I used some tiny micro beads as the shaker material, as I thought it looked like sand. The acetate cover for my "porthole" was just a piece of scrap packaging I had on hand.


I had the front of the card made for quite a while before I actually used it. By the time I created this card, I had purchased a set of fish dies. I decided to use one of them to add a little color to my computer-generated sentiment on the inside. I colored the die-cut to look a little bit like the fish on the front. I guess I should have added some fish whiskers to make it look more like a catfish!

This card was donated to the thrift store and it sold right away, so someone liked it, I guess.

I got to drive my granddaughter to school today. She had an early Jazz Band practice and her parents weren't available to get her there in time. She is always a joy to talk to, no matter the time of day. I love hearing about what is going on in her life. 

It has been snowing here since yesterday, so I was extra careful driving at 7:00 a.m. when the roads could still be icy. Thankfully, only the side streets were a bit slippery and the highway was fine. The roads are heavily salted in the wintertime in Minnesota, so as long as it's above 0 degrees, they're driveable. 

Thanks so much for stopping by, and remember to laugh--a little or a lot--every day.

Cheryl

Friday, November 11, 2022

Simple get well card...


I made this card by using the partial die-cutting technique to create the lacy, scalloped edge on the front of my card. The die I used is actually meant to cut a lacy strip (it has a cutting blade across the top of the design, too), but I placed my plastic cutting plate below the top cut line so that I could keep that lacy edge as part of the card base front.


After cutting the fancy edge, I adhered some DSP to the top part of the front and then a strip of pink cardstock where the patterned paper ended. 

To finish it off, I added a pretty little die-cut butterfly with a couple of enamel dots for his body and a stamped sentiment that I had fussy cut.


On the inside, I added another stamped sentiment and a strip of the pink cardstock that covered the area underneath the lacy edge.

Simple, really, and very quick to make. 

The weather is turning cold here, and they are predicting a little snow this weekend. I dread the icy streets and wind so cold it takes your breath away. Fingers crossed for a mild winter!

Thanks so much for stopping by, and remember to laugh--a little or a lot--every day.

Cheryl

Tuesday, November 8, 2022

Sympathy card in pink...

Pink may not be your go-to color for sympathy cards, but I made one a few days ago and really liked the end result.

I began making this card by using a 3-D embossing folder on a very pale pink panel of cardstock. Once that was done, I used an ink blending tool that has a flat surface and uses felt pads to add some medium pink ink to the raised portions of the design.


There's a little texture in the paper, but I felt this only added to the pretty design of the EF.

The sentiment was die cut and glued to a strip of pink vellum, which I adhered to my embossed panel.

This panel was then taped to the front of a white cardbase.


The inside of the card featured a stamped sentiment.

I actually made two of these cards for the thrift store. They were quick to make, but the result was so pretty. I think I'll try a few more in other colors.

Renovation update: We have gotten our dining room walls painted and the furniture back in place. Now we're working on the living room. We had some nail holes, cracks and other wall blemishes that needed spackling. Once we get those filled and sanded, we'll paint the walls and move on to the next project - the stairs leading to the second story. We need to remove the carpet from those, determine if we can stain and finish or paint them, and then have a new runner installed. It's a never-ending saga!

Thanks so much for stopping by, and remember to laugh--a little or a lot--every day.

Cheryl

Saturday, November 5, 2022

Let's Craft and Create Challenge #189: Anything Goes with an option of Feeling Sketchy (Use a sketch)...

 
It is challenge time again at Let's Craft and Create. This time it is a challenge that I was so glad to see, because it addresses one of my weakest crafting skills--using a sketch! I have downloaded a number of sketches, printed them out and placed them in a small photo album for easy access. Do I use them with any regularity? I think you can probably guess the answer to that one.

When this challenge was given to the Design Team, I pulled out my little photo album of sketches and chose the one shown in the following photo:

This is a versatile and fun card design to use. It's not too complicated and can be used for any occasion.


I think we all know that sketches are a mere guide and can be interpreted any way the crafter chooses. I chose to use a circle instead of a rectangle as my focal point. I also did not mat it, as it had a decorative edge already, and I didn't think it needed anything else. The sentiment was stamped directly onto the circle, rather than placed as indicated in the sketch.


The flowers and foliage were all cut from white cardstock and colored with alcohol markers and ink, which was applied with blending brushes.


I used a pink panel on the inside on which I stamped a sentiment with Versafine black ink and heat-embossed it with clear embossing powder.

I added a little color to the flower with an alcohol marker.


I also managed to make a couple of Halloween cards using the sketch.  These were fun, and the sketch helped make them super quick to pull together.

With these cards, I followed the sketch more closely. The focal point--with three glittery "BOO" stickers applied--is a rectangle that is angled per the sketch. The sentiment was printed, cut, matted with black, and popped up on foam tape.


The "BOO" stickers were a Dollar Tree find a year ago. I was so pleased to figure out a fun way to use them this year.

The inside of this card was stamped with "Happy Halloween."


I hope you'll give this challenge a try. For inspiration, head on over to Let's Craft and Create to see what the Design Team has created. And be sure to take note of the prize that will be awarded this month.

If you do a simple search, you will find that the internet is full of card sketches. Pinterest has many sites with card sketches available. Some individual blogs also offer them. I've downloaded quite a few from this site.

Thanks so much for stopping by, and remember to laugh--a little or a lot--every day.

Cheryl

Wednesday, November 2, 2022

Cone flowers to help you feel better...


I love seeing cone flowers (echinacea) in flower beds or in the wild. They are such a sturdy, vibrant flower and are valuable for their use in fighting viruses and the common cold. I know I've seen echinacea products in the cold medicine section at my local pharmacy. 

The pretty Spellbinder's oval that is centered on my card base is popped up on foam tape.


I used a little ink blending to color my petals, which I had cut out of white cardstock.

 To create the fuzzy "cone" center of my flower, I covered just the center die-cut with double-sided tape and then added some brown Flower Soft to it. I burnished it in by pressing down on it very firmly.

I think you can see in the photo at right how it gave a fuzzy look to the center.


Since I used double-sided cardstock for my card base, I had a nice pink pattern on the inside that coordinated with the color of my flowers.

I added a stamped sentiment, and my card was done.

Even though today is November 2, we managed to have grilled hamburgers for lunch and ate them on our patio. That's almost unheard of for Minnesota! We're usually bundled up whenever we're outside at this time of year.

Our only problem eating on the patio was that leaves kept falling on us from the Maple tree branches overhead. Every little gust of wind sent the leaves flying and fluttering downward.


Some of you have asked to see photos of our finished kitchen renovation. Here are a couple for you:


I love my little cooking alcove and the overall functionality of this kitchen design. We are still having a few things made for it: decorative shelf; triangular bench, that will also hold our recycling in the back entryway; and a coat rack with shelf and a shoe rack, also for the back entry.

The kitchen is still quite small, since we didn't change its footprint, but it is SO much more functional than the old one. I am very happy with the construction company (TLC Home Renovations) that managed the project. They came in at budget and without adding any extra time.

Thanks so much for stopping by, and remember to laugh--a little or a lot--every day.

Cheryl