Wish List

Friday, June 30, 2023

Important Notice! We regret to inform you...


Our grandson, who graduated from high school in May, celebrated his 18th birthday in June. I was scratching my head, trying to come up with an idea for a card for him, when I saw something similar to this one on Pinterest.  I thought this would be just perfect for him.


I made a gatefold card and then adhered the front panel to only the left side of my "gate."

The sentiment was printed out on my computer.  I printed the word "Expired" separately, cut it out and then popped it up on foam tape.


The inside of the card has a peek-a-boo shutter mechanism that reveals the sentiment as you open the card. If you want to see it in action, you can watch the brief video in this post.

My grandson told me he liked this card AND the birthday money inside it (of course)! I had so much fun making it, that I made a similar card for my brother-in-law. I'll share that one in a future post.

This week my DH and I joined the YMCA so that we can exercise there on a regular basis. Today we are starting a routine of going twice a week (Tuesdays and Fridays). They have so many fabulous machines that I'm a bit intimidated. I hope I don't make a spectacle of myself trying to figure out how to use them.  And I sincerely hope we can keep at it and get our poor, aging bodies into better physical shape.

Thanks so much for stopping by, and remember to laugh--a little or a lot--every day.

Cheryl

Tuesday, June 27, 2023

Special graduation card...

Our grandson, who lives in Germany, graduated this spring, but he informed us there would be no graduation ceremony, no robes or mortarboards, not even an after-graduation party like those so typical here in the U.S. This meant that the usual graduation symbolism wouldn't work on a card for him, so I had to come up with something else.

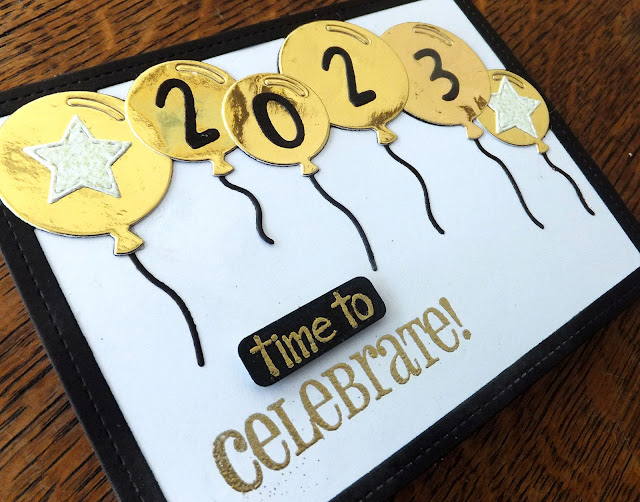
I decided to use my balloon coverplate die as the basis for my card design. I cut it out in black and then cut all the balloons out of gold metallic cardstock. It was so hard to photograph, because the balloons reflected everything around them!


I heat embossed the word "Celebrate!" onto the card front with gold EP and "time to" on a scrap of black CS. I popped up "time to" on some foam tape. The numbers for the year were die-cut and adhered to the balloons, as were the glittery stars.


On the inside, I added a gold, die-cut "congratulations" and a stamped sentiment.

This definitely was not the usual graduation card, but I think it worked for our German-American grandson.

Thanks so much for stopping by, and remember to laugh--a little or a lot--every day.

Cheryl


Friday, June 23, 2023

Using colored pencils on embossed panel...

I shared with you a few posts back how I had done some painting with metallic paints on an embossed panel. This time, I thought I'd try using Prismacolor pencils and some odorless mineral spirits on a panel that I embossed with a 3D embossing folder.  This was a great panel to try it on, as it is a fairly simple design with flowers that were a little larger than the usual floral pattern.


You can see in this photo that I was able to get a bit of shading by using at least two different colors of pencils on both the flowers and the leaves.

I also added some fine glitter to the blossoms with a Spectrum Noir glitter brush.


The inside features a stamped sentiment. I thought this particular sentiment was vague enough that the card could be used for a wedding or an anniversary.

I think I will also try painting this particular embossed pattern with my metallic paints. I really like adding some color, and I think it makes the card look a bit more special. In fact, I've had people ask me incredulously, "How do you DO that?"

I volunteered at the thrift store today. I had taken in a batch of 18 cards for them to sell, and all but five had sold by the time I left! There are regular "card customers" who come in every Thursday because they know that is when I resupply the cards.

Thanks so much for stopping by, and remember to laugh--a little or a lot--every day.

Cheryl


Tuesday, June 20, 2023

Marble-like backgrounds on birthday cards...

Just a quick post today. I recently made a couple of birthday cards and used some marble-patterned papers for the backgrounds. I really liked how they turned out, so I wanted to share them with you.

I think the gold on the blue background is my favorite.

I used gold glitter cardstock for the letters. It nicely complemented the streaks of gold in the background paper.

I also used glitter cardstock for the letters on this one. The cardstock is an off-white color with flecks of pale gold in it.


On the inside of each card I stamped a sentiment and three candles in either red or blue. I colored the flames with a gold metallic pen.

These cards were donated to the thrift store and sold quickly, so I guess I need to make a couple more. I think part of their appeal is that they can be used for male or female.

Thanks so much for stopping by, and remember to laugh--a little or a lot--every day.

Cheryl

Sunday, June 18, 2023

Father's Day cards...

This is just a quick post to say Happy Father's Day to all the dads, granddads, uncles, teachers, mentors and other men who have been a positive influence in a young person's life. I hope you have a wonderful day!

I made a few Father's Day cards for the thrift store to sell this year. Here are a couple of them:

This card was for a coffee-loving dad. It's pretty simiple, but that's how men like their cards, right?

I die-cut the sentiment, glued it to the front of my card and then added some Glossy Accents to the letters.

You may not remember, but I mentioned in one of my posts that my Glossy Accents had gotten quite thick and was really difficult to squeeze out of the tiny nozzle on the bottle. I had read that it is water-based, so you can add a few drops of water to thin it out. I did that, and it worked

If you have some Glossy Accents that have thickened over time, just add a few drops of water at a time, shaking it well after each addition until it is the thickness you like. Just be careful not to add too much.

This is another card that features some masculine DSP. I really didn't think anything other than the die-cut sentiment was needed on the front. 


This was the computer-generated sentiment that I put in each of these cards.


Here is the card I made for my husband, featuring a photo of our dog, Mickey. It was made with no die-cutting, minimal stamping (paw prints), but no coloring, and no special folds. 


This is what it says on the inside. To say he loved it is a vast understatement. I think it is his most favorite card I have ever made for him.

Thanks so much for stopping by, and remember to laugh--a little or a lot--every day.
Cheryl
Friday, June 16, 2023

Two more glimmer cards...

It seems I will never get to the bottom of the card parts that I brought home with me from my day of crafting with friend Lynette (My Stamping Addiction).  Below are two more cards made with a couple of those pieces.

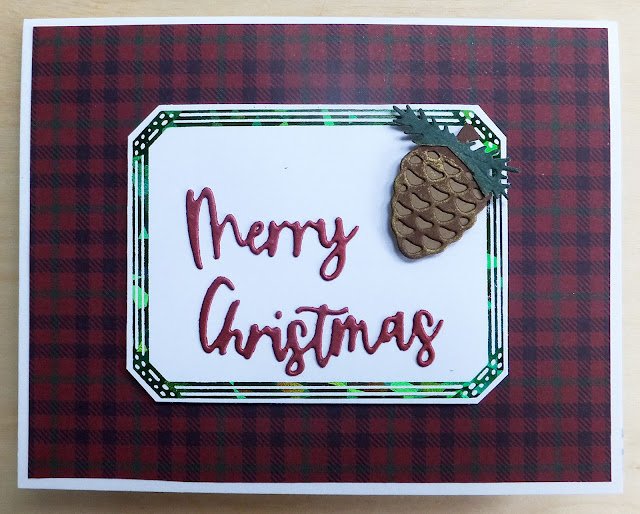
She foiled this frame for me in a very pretty green, holographic foil. I decided to use it on a Christmas card. After carefully cutting aournd it, I popped the frame up on foam tape on a panel of red and green plaid paper.


But before I added the panel to my card, I adhered a die-cut sentiment and pinecone. Simples!


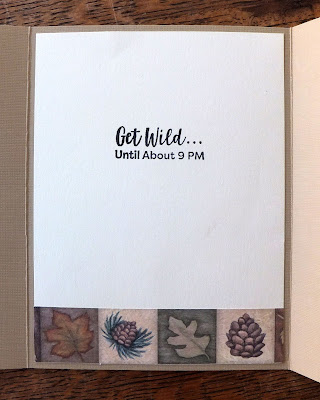
On the inside I used a sentiment from an old Christmas card that we had once used at my work. For some reason I had this one hanging around in my Christmas supplies, even though I've been retired since 2014!


Lynette was so kind to foil the reverse of the frame, too. Once again, I cut around the edges of it, added a white die-cut and popped it up on foam tape.

This time, I had added an embossed leafy panel to my card front for a little interest and dimension.


You can really see the holographic characteristic of the foil in these photos.

"Happy Birthday" was stamped, die-cut and popped up on some foam tape.


This sentiment was also stamped.


I have one more photo I want to share with you today. Last weekend, my DH and I made a little trip to a store called Axman Surplus. It is stuffed from floor to ceiling with all manner of items. It's impossible to explain the variety of items they sell, as it all comes from store overstocks, inventory clean-outs, store closings, etc. One of the supplies I always look for there is tape--all kinds of tape. Our visit last weekend didn't disappoint.

The "Mounting Tape" is a thicker double-sided foam tape. I use it when I want lots of dimension. The green-patterned tape is a thinner double-sided foam tape (my most-used dimensional tape). I had picked up 12 rolls of it (at 45 cents each), and the checkout gal ran back and got me another roll. She said whenever you buy 12 of anything, you get a 13th free. The solid green tape is low-tack tape and the kraft-colored tape is a VERY strong double-sided taped. I think it might be carpet tape, but it works perfectly when you want something adhered and you NEVER want it to come apart. I got all of this tape for $15.00. I don't think any roll was over $1.50

If you have a surplus store in your area, I recommend checking them out for crafting supplies. If you find some, you'll probably get them at bargain prices.

Thanks so much for stopping by, and remember to laugh--a little or a lot--every day.

Cheryl

Tuesday, June 13, 2023

Glimmer butterflies...

 When I was at my friend Lynette's (My Stamping Addiction) home for a day of crafting, she took some time to show me how the Spellbinder's Glimmer Hot Foil System works. She foiled a couple of butterflies for me and cut them out with the coordinating die. When I got home, I had fun making cards with them.

I used an NBUS die to cut the stitched lines and circles on the front panel of each card, so I'm entering these cards into Challenge #51 on the NBUS challenge blog.

This is the first butterfly that Lynette foiled for me. She used a rainbow-colored foil. Isn't it beautiful?

I used my lines and dots die to create a natural focal point for the butterfly.  There is double-sided tape under the dot openings and some coordinating glitter was burnished into the open circles. It doesn't show at all in the photos, but it really adds a pretty sparkle to each card. 

The sentiment was stamped, inked around the edges and popped up on foam tape.

This butterfly was made using the "reverse foil" technique. Lynette simply took the piece of foil from which the first butterfly had been made and foiled what was left onto a piece of white cardstock and die-cut it. My only addition was to use a colored pencil to color in the body and antennae (they had been white). I think this reverse image made a pretty butterfly, too.


I stamped a simple sentiment on the inside of each card.


Then, I found a glittery butterfly in my stash, and I decided to use it to make another card.

This card was done the same way as the others, but with a landscape orientation. Also, I made this one as a Get Well card. I think this card design can be used for many different occasions. 

All of these cards were donated to the thrift store, and because they were so quick and simple to make, I'll definitely be making more of them. In fact, I've already tried another card--this time a mini-slimline--with one of the sentiments that Lynette foiled for me.


In this photo, you can finally see the glitter that I've burnished into each open circle. The sparkle, along with the glimmer of the sentiment made this an eye-catching card.

Thank you, Lynette, for foiling all these pretty images and sentiments for me. I've had so much fun using them.

And thank YOU for stopping by, and remember to laugh--a little or a lot--every day.

Cheryl


Friday, June 9, 2023

A couple of masculine cards...

 The thrift store gave me a partially used paper stack that had some very masculine designs and cut-aparts in it, so I decided to use it to make some cards for them to sell.

Because I don't often make clearly masculine birthday cards, that's what I decided to work on.

The first card was a gate-fold A2 card. I added some of the DSP to each side and then fussy-cut a tag and a loon from one of the cut-apart pages.  After stamping "Happy Birthday," I also cut a tag from kraft CS that was just a bit bigger than the printed one and adhered them together. Finally, I added the loon and a bit of twine and adhered the left side of my tag onto the left side of the card. If you look closely, you'll see that I used a red Viva Decor pen to give my loon a red eye.

Did you know that loons have red eyes? They help them to see better underwater when they're looking for fish to catch. My family used to go to northern Minnesota quite regularly in the summertime when the kids were small, and I loved hearing the loons out on the lake at dusk. They make a somewhat mournful, but beautiful sound. If you've never heard a loon, listen to this short video:  Voices: Common Loon - YouTubeI think you'll be amazed at the sound!

My second card is a standard A2 card.


I cut out the oval and then cut a mat out of some burlap-patterned paper that was included in the stack. I added a little more twine and then created a matted birthday sentiment on a die-cut circle. The stamped leafy sprig was added with a second-generation stamp to make it a little lighter.

Both the oval and the circle have been popped up for added dimension.


On the inside of each card I added a stamped sentiment and a little bit of the DSP. I thought this sentiment was perfect for cards that depict "the wilds" of northern Minnesota.

Thanks so much for stopping by, and remember to laugh--a little or a lot--every day.

Cheryl


Monday, June 5, 2023

Let's Craft and Create Challenge #196: Hip to be Square or Anything Goes...


Happy June, eveyone! The warm weather is here, school is over and summer fun can commence. For me, summer fun always includes playing with paper.

This month's challenge at Let's Craft and Create holds so many possibilities. Most of us have an assortment of square dies or punches. And if we don't, it really is not difficult to cut a square shape.

I recently got a new set of square dies and decided to use them to make a card. In fact, I made two cards!

Because we're so close to Father's Day, I decided to make a couple of cards for that occasion.


The die set I used consists of two "double squares." I cut three of the smaller double square and added them to my card front as shown in the photo.


As a little extra embellishment, I added three large enamel dots.

The sentiment was printed with my computer, inked around the edges and popped up on foam tape.


My inside sentiment was computer-generated.


My sescond card was a square card. I don't make them too often, as they require additional postage when mailing (unless you put them in a rectangular envelope). 

The only woodgrain DSP I had was white with a gray grain pattern. I blended some green ink onto this paper so that it would better coordinate with the green cardstock I wanted to use for my card base.

I cut the larger of the double squares and also a single, thicker square shape that was the result of cutting both the small and large double squares while they were nested, one inside the other. 


I added some Glossy Accents to the die-cut letters for DAD. It has gotten a little too thick, so they're not as smooth as I'd like, but they actually look better in real life.


I printed out the same sentiment for the inside of this card, but with an added "Happy Father's Day."

Now it's your turn. I hope you'll join us at Let's Craft and Create for a little crafting fun. You can follow the "Hip to be Square" suggestion or follow your own mojo for an "Anything Goes" project.

The Design Team has posted lots of inspiration, so be sure to take a look.

Thanks so much for stopping by, and remember to laugh--a little or a lot--every day.

Cheryl

Friday, June 2, 2023

So many graduation cards...

I have made a good number of graduation cards beyond what I showed you in this post, so I thought I would share a few more with you.


These cards are pretty self-explanatory--they feature either a DSP background or an embossed background, a die-cut sentiment with shadow (popped up on foam squares) and a die-cut mortarboard (also popped up). The inside of each card said, "Congratulations on your graduation!"


I made a couple of cards like this one. The mortarboard was already embossed in silver onto the cardstock, and I simply cut it to size and then added the silver die-cut "Congrats" and the heat-embossed sentiment below it. The inside sentiment said, "You've worked so hard for this & we're so proud of you!"


I got the idea for these cards from my online friend, Donna (Design by Donna). I had mailed her a couple of cuts from the die set that makes the "HAPPY" card, and she came up with the idea of using them for a graduation card. The inside of this card said, "Congratulations! Take a moment & savor your accomplishment."


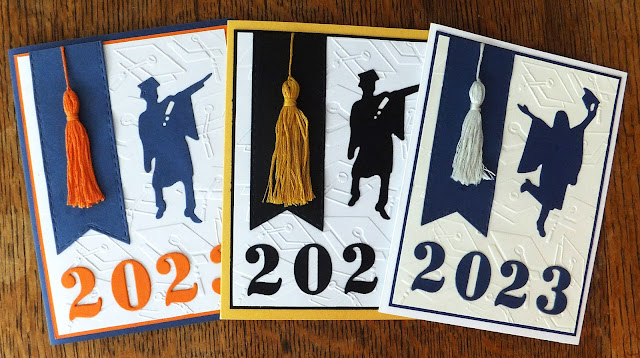
These cards were all made with specific graduates (and their school colors) in mind. I started by making the tassels out of embroidery thread. The numbers on each card were cut three times and stacked for dimension. The graduate figures were some new dies that I had purchased just in time to make these cards. My grandson received the blue/orange/white card. He thought the tassel was a "really cool" embellishment. The inside sentiment said, "Congratulations on your graduation! We're so proud of you."

I'm entering these cards in the current NBUS Challenge #51.


I had a leftover die-cut of a female graduate. and since the thrift store is located near a school with red and white as its school colors, I decided to make one last card. I couldn't resist adding a few sequins, too. It's for a girl, after all! I donated this card, along with most of the others I made, to the thrift store.

I think I am done making graduation cards for the year, but coming up with a few new ideas for this year's batch was a lot of fun. 

Thanks so much for stopping by, and remember to laugh--a little or a lot--every day.

Cheryl