I will also finish up my cards today and then finish the decorating and bake some cookies. The cookie baking is not as onerous as it used to be, since we don't have as many people around to eat them. I will only bake enough to have plates to share with a few neighbors and family members with some left to eat over Christmas.
I have a couple of Christmas cards to share with you today.
I have this Marianne Creatables snowman die that I really love. He is such a happy, friendly-looking fellow! My little lace edge under my strip of red cardstock was made with another Marianne die called "Border Stitch Lace," and my two little snowflakes were made with a small punch (I think it's by Recollections).
I cut my snowman out of white cardstock and then used a combination of chalk and ProMarkers to color a few areas. Once that was done, I covered the entire die-cut with spray adhesive and sprinkled on some clear glitter. He looks sparkly and snowy!
To create my snowy background, I put some white craft paint onto an old toothbrush and flicked it onto my DSP. Note, that I masked off the bottom 2 inches or so before I did that. I love how this turned out. It looks so...so...well, snowy!
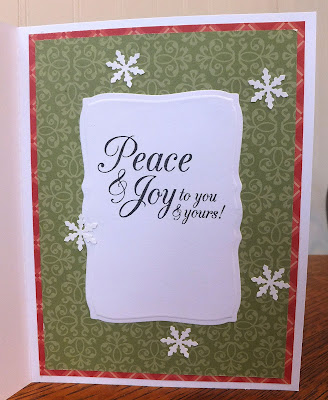
I added a couple of layers and a few snowflakes to showcase my sentiment on the inside of my card. My sentiment label was die-cut with a Spellbinders Label 8 die.
Here's my second snowman card. For this one, I did a little light inking on my white CS before dry-embossing it with a "Falling Snow" embossing folder.by Sizzix. The "flakes" that were a little too blue were touched up with a tiny bit of white craft paint. My snowman on this card received the same treatment as the one on my first card.
The inside of this card is very simple. But one thing I did that I LOVE was to run a glue stick along all the edges of my sentiment panel and then dip those edges in clear glitter before adhering it to the inside of my card. If you look closely, you'll see the glittery edges. It adds such a finishing touch and a nice sparkle to the inside. Give it a try. I think you'll love the effect, and it is so quick and easy.
How are your holiday preparations coming along? Nearly there? Or a long ways to go yet?
Thanks so much for stopping by, and remember to laugh--a little or a lot--every day.
Cheryl


5 comments:
Lol...no gifts under our tree - we have to ship them all! Your card is darling, as always! The recipient will love finding this one in their mailbox! Have not started our Christmas cards yet - they may end up being New Year cards! EEKS!!! Thanks for sharing :)
Cheryl, Your glittery snowmen are so cute. I love both your cards. I've used a lot of glitter this year too. Done shopping, waiting on a couple of deliveries, then wrapping. Ahhh! I think I will go soak in the jacuzzi for a little stress relief.
Love snowmen - and both of these cards are just too cute. Love how you inked some background in the second card before you embossed it. Love the glitter. I have my cards made but not addressed or any notes written yet. The older you get the faster time flies!!!
Super cute card Cheryl! That snowman is adorable! Love all the shimmery detail!
What a fab snowman, love how you added the colour. And great idea for the sparkle inside, I'm going to give that a go.
Enjoy your cookies .... yummmm ;)
Post a Comment