Wish List

Tuesday, October 31, 2023

A card for her, a card for him...


Before I talk about a couple of cards, I want to say, "Happy Halloween!" I hope you have lots of trick-or-treaters tonight, but not so many that you run out of candy. My DH has been sneaking some of our candy, but we have plenty (I bought a humongous bag at Costco).


This card was inspired by the embossed panel and the die-cut vase. Both were laying on my desk, begging to be used on a card.


I did some ink blending on the vase and popped it up on some foam squares.

The flowers were die-cut from white cardstock and then given some life with colored pencils and mineral spirits.

The little banner at the bottom of the vase was one from a package of blank banners that I had in my stash. I found a "Happy Birthday" stamp that was just the right size. I added a bit of ribbon and then popped it up on foam tape.

The little pale blue dots in each corner were created with Nuvo Drops.


The inside has a stamped sentiment. This one is from an old Fiskars stamp set that was one of the first stamp sets I ever bought.


This card features some dimensional gear and screwhead stickers that I got at Dollar Tree. Whenever I can find some good-looking, male-oriented stickers at Dollar Tree, I buy them!

I used the bookbinder fold for this card, adding a little twine around the "bound" part.


The sentiment was printed with my computer, cut out with a hexagon die, inked around the edges and popped up on foam tape.


I've been wanting to use this stamp on a birthday card since I got it several months ago. It fit so perfectly in this card!

We got our first snow of the year last night. It didn't amount to much, so I won't have to do any shoveling...yet. I'm hoping my DH's broken elbow heals to the point where he can help with the shoveling before we get a really big snow.

Thanks so much for stopping by, and remember to laugh--a little or a lot--every day.

Cheryl

Friday, October 27, 2023

Halloween cards, Part III...


I had a couple of  tri-fold shutter card bases in my stash in Halloween colors, so I decided to use them to make a couple of cards. These are a little putsy to make because of all the small pieces that need to be cut, but it was a great chance to use up some stickers and DSP scraps.

Here's the green card base when it's been opened up. the blank square is for writing a brief message and signing the card.

And here's the purple card opened up. These were both donated to the thrift store. Because they are so different from a normal card, I always wonder what the buyer thinks when they're able to take the card out of the clear plastic bag and see it in its entirety. I always type up what the inside sentiment(s) is and adhere that to the front of the bag, but the customer is unable to see the inside until after they purchase it.

I made a few of these cards for my grandsons. The mummy is on an action wobble spring, so when you flick it (and squint your eyes), it looks like it's running.

The clouds were created with a stencil and a little ink blending, and the sentiment and cemetery background were die-cut.


This is the sentiment I printed out with my computer for the inside.


And these are the cards I made for some of my granddaughters. The cute little ghost is also on an action wobble spring.


For these cards, I used a stamp for the inside. I also added some embellishments to dress it up a little.


In one of my online searches, I found this sentiment in white letters on a spooky background. It was free to whoever wanted to download it. I printed it out several times, cut it out and added it to some card fronts. Then I added a piece of trim to the bottom of the sentiment panel. I also die-cut and added a silly skeleton and a colorful bat.


The inside featured a row of stamped sentiment, along with a row of skulls.


I also found a free spider web bavkground online. I printed it out several times and made some cards with it. For this card, I die-cut "Trick or Treat" and a few spiders to complete my card front.

Here's another card, using the same background with some die-cuts on the front.

Finally, I made a couple of cards using this Halloween frame die. I used some Post-It tape to mask off the bottom and sides of my card so that I could blend a little orange ink onto my card front before gluing on the frame.

Although you can't really see them, I added white eyes to the bats with a gel pen and black gems to the heads of the spiders.

This final Halloween post doesn't cover quite all of the Halloween cards I made, but it does show most of the various designs and layouts I used. I love making them, but I was a little rushed in getting them done this year because of other commitments.

Thanks so much for stopping by, and remember to laugh--a little or a lot--every day.

Cheryl


Wednesday, October 25, 2023

Halloween cards, Part II...

Today I have more Halloween cards to share with you. I have finished making them and can now move on to Thanksgiving cards.

This card was made from bits and pieces from my Halloween stash. The sentiment and spider were die-cut and the three dots were made with a Viva Decor pen.


A stamped sentiment was added to the inside.


For this card, I used a pre-made card base from a card kit and some of the colorful striped papers from the same kit. The witch is a die-cut and the sentiment was created with a stamp from the kit.


I used my computer to print out a few inside sentiments for cards like this one.


These two cards were made using the bookbinder fun fold. The ghost on  the first card and the middle ghost on the second card were popped up with action wobble springs, so they wobble when you flick them or shake the card. The papers came from the Halloween card kit, and the bats were die-cut. Both of these cards had the same sentiment inside as was printed for the witch card above them.

I had some pre-made card bases that had a cat cut-out on the front. I decided to back the cut-out with some green glitter cardstock for the card on the left. I cut "Happy Halloween" out of the same glitter cardstock and adhered it to the front. In my Halloween stash I had a bunch of Halloween-themed adhesive-backed trims, so I added three of them just under the cat.

For the card on the right, I actually cut the front off the card base and cut it down to fit a green A2 card base. Before adhering it to the card base, I backed the cat cutout with the green glitter cardstock, added three different trims and then adhered a strip sentiment that was popped up on foam tape. A Viva Decor pen was used to create the cats' eyes.


This is the inside of the card on the left. I used the die-cut spider web to disguise the fact that I had adhered a circle of glitter cardstock there (to create the green cat on the front). I did add a die-cut spider to the web, but only after taking this photo. The sentiment was stamped.


I still have more Halloween cards to share with you, and I'll do that in a couple of days. 

The weatherman has been warning us that the temperatures are going to drop and we will probably be getting some snow. Oh joy. The shoveling begins...

Thanks so much for stopping by, and remember to laugh--a little or a lot--every day.

Cheryl

Monday, October 23, 2023

Halloween cards, Part I...

 I've been making Halloween cards like mad, but haven't shared any here on my blog--until now.

I found some large black tags in my box of Halloween supplies and decided to use them on a few cards. I first adhered part of a gold spider web doily in one corner. Then I glued the "Boo to You" on top of that. After adding a little bit of ribbon, I popped the tag up on my card with dimensionals.


The inside sentiment was computer-generated. The pumpkin is a die-cut that was left over from last year.


These cards were similar to some I made last year. It's so much fun to die-cut some spiders and place them on the cup. Don't you just want to swat them away (and maybe step on them)?

The sentiment was printed with my computer, die-cut and inked along it's edges. Both the sentiment panel and the cup are popped up on dimensionals.


I used some leftover scraps to add an embellishment to my inside panel. The sentiment was stamped.


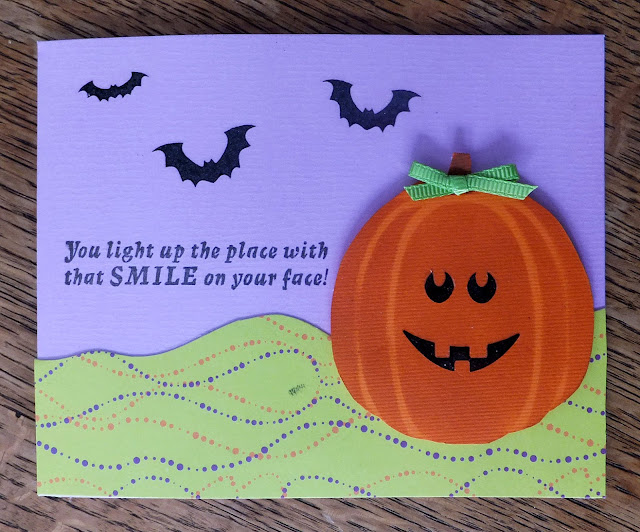
Among the card kits my friend gave me was one Halloween kit. This card was made with supplies from that kit. The pumpkin was first inked using a stencil and then fussy-cut. The pumpkin's face and the bats are all rub-ons. The sentiment was created with one of the stamps that came in the kit. 


Another computer-generated sentiment on the inside of this card.


This was another card (mostly) made from supplies in the kit. The tree was created using a stencil and some black ink. The "trick or treat" sentiment was made with a stamp included in the kit. The only item not from the kit is the little pumpkin. It was made with a punch. I colored the stem and inked along its outer edges.


Once again, I used my computer to create a sentiment for the inside.

I've got lots more Halloween cards to share with you, but I'll save them for a couple more posts later during the week.

Thanks so much for stopping by, and remember to laugh--a little or a lot--every day.

Cheryl

Friday, October 20, 2023

One for the books...

 When I was in Dollar Tree not long ago, I saw some really nice book stickers and just had to buy them. Here's what I made:

I had just the right stamp to make a couple of masculine birthday cards.

I used a metallic silver and craft woodgrain dsp for the background. I inked around my focal panel and then matted it with some of the kraft cardstock that I had also used for my card base.


Doesn't that pile of books look great? The stickers are dimensional, but not cheap looking.


I added one of the smaller stickers to the inside, along with a stamped sentiment.


Here's a closer look at the sticker that I used on the second card. 

I keep checking Dollar Tree to see if they have any more of these stickers, but I haven't seen them since I bought these. Because I cannot depend on Dollar Tree to get them in stock ever again, I broke down and purchased a die set for books in some similar configurations as these.


I used the same stamped sentiment on the inside of this card and added another of the smaller stickers.

I thought this would be the perfect card to go along with a gift of a book.

We are back from our trip to Arizona. We had a lot of fun with our friends, but I had a cold the entire time. I did my best not to spread germs by using a mask when in enclosed areas (like a car), incessantly washing my hands and religiously covering my mouth with a tissue whenever I coughed. I had tested myself to make sure it wasn't COVID before we left. I would have happily worn a mask all the time, but they insisted they'd be more comfortable if I didn't.

I hope that all of you have stayed healthy so you can enjoy some beautiful fall weather if you're in my half of the hemisphere.

Thanks so much for stopping by and remember to laugh--a little or a lot--every day.

Cheryl

Tuesday, October 17, 2023

Card with a big boo-boo...


A few weeks ago, I purchased this die that cuts the daisy circle into a piece of cardstock. I thought it would be a quick way to make some card fronts. 

So, after cutting my white panel, I decided to do some stenciling with yellow ink on the white space outside the circle. BUT, without my noticing, my stencil slipped down a bit and my stenciling went askew! It is clearly evident in the upper right hand corner. I tried to make it a bit less noticeable by doing some extra ink blending around the edges. 

I was ready to throw the panel in the trash, but then decided I'd just go ahead and finish the card. Maybe someone would think it was a "loosely" patterned paper and meant to be that way.


I like the die a lot, and I think I'll use it often to make cards for the thrift store. Next time, if I decide to do some stenciling, I'll be VERY careful to tape my die-cut panel to the back of the stencil so it doesn't slide.


I stamped a simple get well message on the inside. 

I almost always try to salvage my cardmaking booboos, rather than throwing them away. I feel like it stretches my creativity by forcing me to come up with ways to use, cover up, or change them.

How about you? Do you more often use them or throw them away?

Thanks so much for stopping by, and remember to laugh--a little or a lot--every day.

Cheryl


Friday, October 13, 2023

Almost no embellishments...

 In my previous post, I shared a card with lots of embellishments. Today, I'm sharing one with almost no embellishments.

I thought this paper was cute enough to carry the card design on its own. All I did was mat it with some dark teal cardstock.


I cut a scalloped circle from the same dark teal cardstock, topped it with a white, pierced circle and then added a die-cut sentiment. 

The two little hearts were actually white, but I colored them with an alcohol marker to coordinate with the colors on my card. 

I think this card took about 15 minutes to make, but I love how it turned out.


On the inside I stamped a sweet sentiment to complete my card.

When you read this, I will be in sunny Phoenix, Arizona, visiting friends. We haven't done much traveling lately, so this trip will be fun. My daughter will be taking card of our dog Mickey, who will have loads of fun playing with her dogs.

Thanks so much for stopping by, and remember to laugh--a little or a lot--every day.

Cheryl

Tuesday, October 10, 2023

Wedding card silhouette...


I love using this silhouette die-cut for wedding cards. I think it looks quite romantic, don't you? 


I couldn't resist adding my favorite flower to the card, too. I cut it in white (the leaves in white vellum) and inked it with a bit of aqua ink. I didn't have a coordinating gem for the center so I colored a clear gem with an alcohol marker.  I did the same thing with the gems in the bride's bouquet and the gem in her hair.


The Mr. & Mrs. heart is actually part of another bride and groom die that I have. I just cut out the heart portion to use as a sentiment and backed it with some solid aqua cardstock.


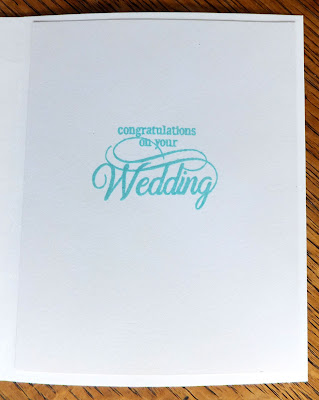
The inside was stamped with a wedding congratulations in a pretty font.

When I make cards for the thrift store, I try to make some with lots of embellishements and others that are a little simpler. I guess this one would qualify as "lots of embellishements." There must be all kinds of customers looking for cards as they all seem to sell quickly.


I have just finished staying at my daughter's home for nearly two weeks looking after my two teen-aged grandchildren and their four dogs and three cats. My 18-year-old granddaughter was very self-sufficient and didn't need much assistance from me, but my 16-year-old grandson had swim practice or training sessions at 5:30 or 6 a.m. most mornings and then again for a couple of hours after school. He also took part in two swim meets on the weekends and had to be driven (he has only a driver's permit) to his practice/training sessions and meets. And, of course, I made dinner for everyone every night. It was a busy time and I have a new appreciation for the grueling schedule the entire family keeps. Believe me, they have a lot of balls in the air at once. It wore me out after just two weeks, I don't know how they do it month after month. Because it gave my daughter and her husband some much-needed vacation time, however, I was glad to help.

Thanks so much for stopping by, and remember to laugh--a little or a lot--every day.

Cheryl