Wish List

Monday, September 30, 2013

Putting the proverbial cart before the horse...

It seems that all I want to do lately is work on Christmas cards. Since I haven't made a single Halloween or Thanksgiving card, I'd say I've definitely got the cart before the horse. I've even got a birthday card floating around in my head that needs to be made--really soon--yet whenever I walk into my craft room, I look at my Christmas stamps, paper and embellishments and start working with holiday trees, snowflakes, candy cane images...well, you get the idea.

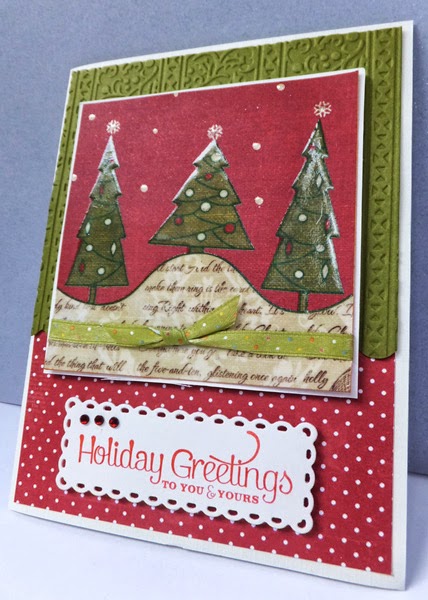
Here's what came together for me, the last time I played with paper:
If you've read my previous posts, you know that I am working on using all the papers in a particular paper stack called "The Heirloom Christmas Stack" by DCWV. A couple of its pages contain some great holiday images like the trees you see on this card. These great images make the cards come together very quickly. I simply matted the image with some white CS, added a little ribbon and then used some foam squares to adhere it to the embossed green paper. I used the Holly Ribbons embossing folder for the green CS. It's hard to see in the photo, but I also used my Fiskars scalloped border punch on the bottom of the green card, and I overlapped the scalloped edge on the red polka dot paper.

 
Here's a little closer look at the sentiment. I just love this font! I'm not sure who makes this stamp - it could be a Reflections stamp from Michael's - but I'll be using it a lot this year.


Here's the inside of the card. I hand cut a tree for an embellishment and embossed it with a Sizzix Evergreen embossing folder.

I love the dimension that embossing folders add!
So have you started your Christmas cards yet? I've only gotten about eight of them made so far, so you'll be seeing a lot more of them here. I promise to also post some Halloween and Thanksgiving cards, too, however. In fact, I have a few designs rolling around in my head for those holidays, too, and I just need to actually put those ideas into actual card-making.
 
Thanks for stopping by, and remember to laugh--a little or a lot--every day.
Cheryl
 

Friday, September 27, 2013

Another belated birthday card..

I needed to make another belated birthday card this week. Not sure what that says about me - it could be that I'm getting old and forgetful. I'm hoping, though, that it just says I've been distracted by more important things.

Because I was already late in getting this one in the mail, it had to be a QUICK card to make. I can think of nothing quicker than to use some colorful banners and a favorite embossing folder. In this case, I used the D'vine Swirls embossing folder for the yellow CS and cut the banners by hand.

I printed the sentiment with my computer and cut it out with a Lifestyle Crafts die. I traced around the die and hand cut that piece to use as a mat for the sentiment, since I didn't have another die in the correct size.

A little bit of yellow baker's twine and a couple of flat-backed gems finished the front. The only thing that was popped up on foam squares was the sentiment.

The inside was simple with some of the polka-dotted paper and a single banner. I had a stamp for this sentiment. I only wished I had used some heavier paper/cardstock so that the polka dots didn't show through.  Oh well. Live and learn.

I've got another birthday card that needs to be completed this weekend, so I hope to be able to share that one with you soon.

Thanks for stopping by, and remember to laugh--a little or a lot--every day.
Cheryl

Tuesday, September 24, 2013

Thinking of you...

I wanted to use some more of the beautiful, heavy-weight wrapping paper that my daughter gave me a while back. I used some of that paper on a card featured in this post.

Here's another card using some of that same paper:

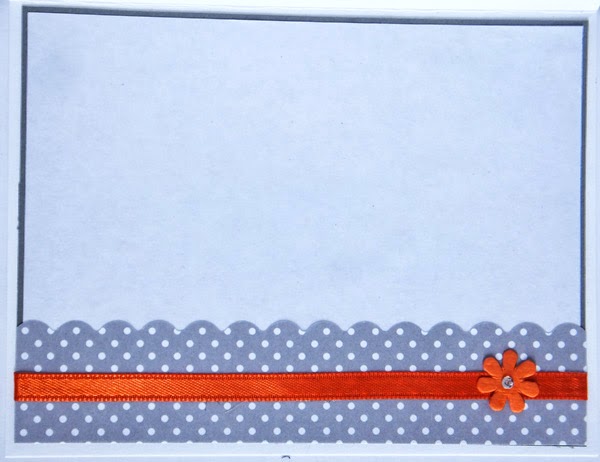
The paper with the orange flower pattern is the wrapping paper. It was even heavy enough to cut with my Cricut, so I cut these two label shapes from the Christmas Cards cartridge.


I think it makes such a cute accent paper on this card. And the orange ribbon and Petaloo flowers were the perfect touch and made such a nice contrast against the gray polka dot paper.

For the sentiment, I heat embossed "Thinking of you" and then cut it out with a Spellbinder's oval die.


The inside was dressed up with some of the gray polka dot paper, orange ribbon and one tiny Petaloo flower.

So easy and fun!

I didn't do any inking around the edges on this card because I liked the clean, fresh look that it had. Sometimes, less is more!


Thanks for stopping by today, and remember to laugh--a little or a lot--every day.
Cheryl

Friday, September 20, 2013

This thank you card was fun and quick to make...

I love it when a card comes together really quickly. This card was one of those.
Isn't that paper with the hot air balloons image on it just the best?  It's from a 6" X 6" My Mind's Eye paper stack called "Sky's the Limit."

I inked the edges of the paper as well as the sentiment label, which was cut with a Spellbinder's die and stamped. Three pearls were added to the upper right corner for a little more interest and dimension.


I actually won this paper stack from Sara at Folded Paper & Printed Pixels, and I love it!

Sara was so sweet to wrap the little prize package and tie it with some pretty aqua ribbon. I used some of that ribbon on this card because it matched the paper beautifully. I liked the way it allowed the balloon image to show through, too.


I used two coordinating papers from the same pack for the inside. I love the DSP with all the small hot air balloons on it. And the notebook pattern is really fun and makes the perfect spot to add a personal note.

Of course I inked around all the edges of these cuts, too.


Thanks for stopping by today, and remember to laugh--a little or a lot--every day.
Cheryl

Tuesday, September 17, 2013

Another Christmas card...

I am continuing my quest to use up an entire 12" X 12" Christmas paper pad in making my Christmas cards. Here's another card using some of the pretty paper in DCWV's Heirloom Christmas stack.
The paper in this stack is so pretty, I hardly have to add a thing!


I did add this pretty snowflake, cut with a Spellbinder's die, and put a fun, glittery brad in the center of it.


I stamped the sentiment with Versamark and heat embossed it with some white embossing powder.

The scalloped border was cut from a coordinating sheet of green patterned paper in this stack.  I added some gold Stickles in each of the holes along the scallop.


I made two of these cards, so that's two more to add to my stack. Yay! Only about 80 more to go!

Have you started on your holiday cards yet? I know, I know, we still have Halloween and Thanksgiving cards to make and send before worrying about our Christmas cards.

Thanks so much for stopping by today. Remember to laugh--a little or a lot--every day!
Cheryl

Sunday, September 15, 2013

Happy Birthday, Eugene...

Today is my older brother Eugene's 65th birthday. I hope he has a wonderful day and an even better year! Here's a photo of my brother and me when we celebrated his birthday on Friday. I love the sparkle in his eye!


As you can see, my brother is a nice looking man, and while he's a bachelor, he always seems to have a lady friend or two. We like to tease each other, and I especially like to tease him about his lady friends and his "night life." Here's the card I made for him:


The image was cut from the "Fun in the Sun" cartridge, and the 65 was cut from George.  I added a little shading with my ProMarkers and some whiskers, chest hair, etc., with a brown fine-point pen. I also used a metallic ProMarker for his sunglasses and the legs of the lawn chair. I know that the sentiment is a little hard to read, but it says "65 ...and still sexy,"  I printed out the second part of the sentiment on a label maker and the reflection off that tape has made it hard to read.

You can't tell in the photo, but I also used some black flocking for his hair. Of course my brother's not bald, but I didn't know quite how to add hair to the top of this guy's head without making it look ridiculous!

Here's the inside of the card (more teasing!).

We gave my brother a gift certificate to a local restaurant as a gift (maybe he'll take one of those "lady friends"), but I also gave him one of my jars of grape jelly, made from the few grapes we grow in the back yard. I have only two grape vines, so we don't get much. This year's batch was only 9 half-pint jars of jelly!
To make the topper, I simple cut a circle of fabric in my Cuttlebug with my biggest circle die and tied it onto the jar with a little tag cut with a Spellbinder's die. I thought this fabric was the perfect match for the grape jelly!

Thanks for stopping by today, and remember to laugh--a little or a lot--every day.
Cheryl

Wednesday, September 11, 2013

We visited the Emerald Isle...

My husband and I just returned from a two-week trip to the Republic of Ireland. This was our second visit to this beautiful country. We were there for the first time nearly nine years ago when we helped build a Habitat for Humanity house in Downpatrick, just south of Belfast, Northern Ireland.  When we were done building, we drove down the east coast into the Republic of Ireland, staying a couple of nights in Wicklow Head Lighthouse and then continuing down the east coast, around the southern end to the city of Cork. It was a fantastic trip, and we knew we wanted to return.

For this trip, we decided to concentrate on visiting areas along the west coast of the country. We chose Doolin as our base for the first week of our visit. Doolin is regarded as the capital of traditional Irish music. When we arrived, the townspeople were in the midst of celebrating a craft beer and music festival. We joined in, of course!

Here's a photo of my husband and me in front of O'Connor's Pub in Doolin. There is live music in this pub every night during the summer months.
Notice that I have a shopping bag in my hand? I needed a new Irish sweater. The one I bought 9 years ago is nearly worn out!


This is a view of some of the beautiful countryside. It is so gorgeous, everywhere you go and the landscape can change drastically in the different regions.


No trip to Ireland is complete without some Beef and Guinness stew (right front). It's delicious and very hardy. Notice that the servings are not skimpy, either!


This is a megalithic tomb, Poulnabrone Dolmen, in the Burren. It's thousands of years old!!


Another amazing place to see is Kylemore Abbey, which currently serves as a Benedictine community of nuns. The Abbey was originally built by Mitchell Henry as a gift for his beloved wife. Now THAT'S love!!!


We saw a number of old castles. This photo was taken at the castle in Cashel which we toured and learned a little about its history.


This is my DH standing in front of one of the millions of rock fences that you can see everywhere. I cannot imagine all the manpower it has taken over the centuries to build these fences. Doesn't my DH look like an Irishman in that hat? He actually bought it in the U.S. and has loved wearing it for years.

Don't you love this photo of an amazing field of wildflowers? We often saw these brilliant orange flowers along with fuchsia hedges and many colors of hydrangeas. Gorgeous!!!

In contrast to the field of flowers, but no less beautiful in its own way, is this view of the shoreline of Inisheer, one of the Aran Islands in Galway Bay. Do you see the lighthouse in the background? I hiked to within a few hundred meters of it, but since it is a working lighthouse, that was as close as I was allowed to go.

These are just a few of the places we visited and the sights we saw. It was a wonderful vacation, and I cannot wait to go again. If you haven't visited Ireland, please consider putting it on your to-do list. It's an amazing country, and the people are warm and welcoming.

Thanks for stopping by, and remember to laugh--a little or a lot--every day.
Cheryl