Wish List

Friday, January 5, 2024

Let's Craft and Create Challenge #203: Anything Goes or A Penny for your Thoughts (use a sentiment)...


Wow, it's 2024! When I was a child, I couldn't even imagine living in that faraway year. Yet, here we are, and it's time for another challenge at Let's Craft and Create.

This month we are giving you the inspiration of using a sentiment. I have a favorite sentiment stamp and die set, and I've used it on these cards:

I've opted to use the "Sending" die and its shadow and popped it up with foam tape at a slight angle at the top of each card. Underneath, I have stamped, die-cut and popped up a secondary sentiment from the set.

I chose colors that were in the background DSP. Although you can't really see it in the photos, there is a bit of metallic gold in the pattern.

I die-cut several flowers in graduated sizes and layered them. Before doing that, I inked the ends of the petals with a very pale pink oxide ink. Normally, I will ink the centers of flowers, but in this case, I decided to ink the petal edges.

The flower layers are held together with a tiny green brad and attached to the card with a glue dot.

I die-cut a couple green, leafy sprigs and a couple of metallic gold sprigs and arranged them around my flowers.


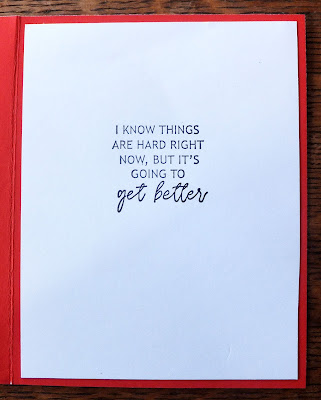
On the inside of the card, I have stamped a simple birthday sentiment.


This card was made using the same process as I used on the first one.


You may be able to see evidence of the lighter inking on the edge of the petals in this photo.

The gold sprigs are a little easier to see, as well.


Once again, a sentiment was stamped on the inside of the card.

Check out all of the inspiration from the rest of the Design Team on the Let's Craft and Create site. They have some wonderful creations on display.

I hope you'll take this chance to join in the fun and post your creation on the site. It's so much fun to see what you create, and to make it even more fun, there is a prize being offered.

Thanks so much for stopping by, and remember to laugh--a little or a lot--every day.

Cheryl


Tuesday, January 2, 2024

Using a book-themed die set...

I continue to stop in Dollar Tree when I can and look for any book stickers they might have. I haven't found any  since I got the ones I shared in this post.

I'm a reader and I've been an active member of the same book club for about 25 years, so I loved their book stickers. Since DT doesn't seem to offer them anymore, I decided to get a book-themed die set. 

Here's a card I made with it:

I cut the books out of some kraft cardstock and colored them. I cut the pages out of off-white cardstock and inked it a little. I even added what I hope looks like book titles with a black fine-point felt pen.


I will definitely be making more of this card for the male members of my family!


Here's what I stamped on the inside.

I am linking this card to the NBUS Challenge Blog, Challenge #58, since this is the first time I have used this die set.                                              


And since I'm on the topic of masculine cards, here are a couple more:

This one used one of the papers from a marble-like paper pack. I thought it looked a bit like ocean water. I used a couple of dimensional seashell stickers and a netting die-cut that I got from my sister quite a long time ago. I die-cut the birthday sentiment three times and stacked it for some dimension.


I used the left-over piece of DSP on the inside along with a lone seahorse sticker that was in my stash.

My sentiment on the inside of this card was computer-generated.


This card features an old Model T? car. I believe it's an old die from Cottage Cutz, but I'm not certain, as it was given to me by a neighbor. I popped the white panel up on foam tape and added an enamel dot at each end of my birthday banner.


And here's the stamped sentiment I added to the inside.


I hope you had a celebratory New Year's Eve. We stayed home and had some homemade soup. We're big soup fans! As we neared the witching hour, my husband insisted we sit on the floor in front of the television (they were showing fireworks) and smooch at the stroke of midnight!


So here we are, smooching away. You'd think we were a couple of teenagers. LOL

I hope that 2024 brings you more happiness than your heart can hold--and some quality crafting time.

Thanks so much for stopping by, and remember to laugh--a little or a lot--every day.

Cheryl


Friday, December 29, 2023

A flip card from a kit...


One of the card kits that were given to me contained some black, rectangular "flip" cardbases, fun punch-out shapes and some coordinating DSP. 


I pulled out one of the cardbases and a red punch-out shape that resembled a flower. I stamped a die-cut circle and popped it up on the flower shape before adding it to the flip mechanism. I also added a tiny black gem to each petal of the flower.

I chose two of the coordinating DSP patterns and added one to each side of my card base. Then I cut a white rectangle and matted it in red before stamping "What's new?" on it and adding it to the backside of the flip mechanism. This photo shows the card when it has been "flipped" open.

This card was fun to make, so I think I'll make a few more.

I thought I would also share a Christmas card (or three!) on this and some upcoming posts. I like to have them documented so that next year, when I'm trying to come up with Christmas card ideas, I can easily look back at my previous December and January posts and see what I made that year.

These cards were made with some very old cardbases that had a red and green striped border. 

For this card, I matted a piece of DSP that had holiday greetings written in rows across it. After adding that to my card base, I also added a holly sprig, some red gems for berries and a ribbon bow.

This card features a red panel cut from an old store-bought Christmas card. I love when I can upcycle parts of old cards. I added a snowflake (the larger one) and the word "merry." Both had been enclosed as a little extra in a Christmas card from fellow cardmaker Darnell of D J Kard KreationsBeneath "merry" I popped up the word "Christmas." 

Finally, I added a die-cut gingerbread boy and a ouple more punched snowflakes.

Darnell had also enclosed a red "merry" in her Christmas card, so I added that die-cut to this card. This time I heat embossed "Christmas" onto a strip of red CS and popped it up.

The Christmas tree was made with a die set I had on hand. The set has some tiny ornament dies, but I opted to just do a little inking on the lower branches and add a simple red garland made with Nuvo Drops. The die-cut star on top was also from the set.

I am still working at cleaning up the Christmas mess in my craft room. I have more dies and stamps for Christmas than I have for any other holiday, so it's a lot to clean up and reorganize.

Thanks so much for stopping by, and remember to laugh--a little or a lot--every day.

Cheryl


Tuesday, December 26, 2023

Good tidings of comfort and joy...


I have a 4" X 6" stack of Christmas papers, and I try to use a few of them every year on my holiday cards. The patterned paper you see on this card was cut from a sheet in that stack.


After matting and adhering my patterned paper, I cut a large banner, stamped it with my "Good Tidings" sentiment and added a little die-cut ornament, popped up on a foam square. 

Finally, I also popped my banner up on foam tape and then stamped a sentiment panel for the inside.


I thought I would also share with you a photo of the cookie platters and containers we gave away to a few neighbors and family members. The snowman tin you see in the back is also full of cookies and was given to my brother.

Here is a picture of one of the Christmas crackers I made to have at each place setting on our Christmas table.


I only had to make nine of them, as we had two store-bought crackers left over from a previous Christmas. I put those two at my husband's and my place settings. 

My crackers were gender specific. The females all received a pair of earrings, a nail file and a lip gloss. 

The male crackers contained a Chap Stick, a small comb, and a mechanical pencil with extra lead.

All the crackers contained a tissue paper crown, a Christmas joke and some candy.


I watched May May's video on how to make them, using my envelope punch board, but made mine longer to fit what I had purchased for them. I also put a stopper at each end so that the items inside wouldn't fall out. The stopper is simply a punched circle glued in place.

I may now have to make these every Christmas, as my family members MUCH preferred them over the store-bought ones. Oh-oh. That's all I need is another craft item I am expected to make at Christmas time. It sure is a great way to use up some of that Christmas paper, though!

I hope your Christmas was as full of family, fun and love as ours was. I wish you all good things in 2024.

Thanks so much for stopping by, and remember to laugh--a little or a lot--every day.

Cheryl

Friday, December 22, 2023

Silent Night...

I really enjoyed making 10 cards like this one for Christmas. The embossing folder is 3D and adds so much detail to the image.


When I was done embossing, I swiped my Versamark ink pad over the raised image and added some sparkling "snow" embossing powder. I really couldn't capture the sparkle in these photos, but it was so pretty!


I printed these sentiments with my computer for the inside of each card.

I enjoyed making all my Christmas cards (and I have a few more to share with you), but I'm ready to move on to Valentine's Day now. How about you?

I have just a few more items on my Christmas "to do" list: I have a couple more gifts to wrap and I need to fill some trays with cookies for the neighbors and family members. I also need to make about a dozen crackers (the English kind of crackers that are filled with party favors). I like to put one at each place for our Christmas Eve dinner. I've always purchased them in the past, but the price has gone up so much that I decided to make them this year. I'll take a picture or two so I can show you how they turned out.

Thanks so much for stopping by, and remember to laugh--a little or a lot--every day.

Cheryl


Wednesday, December 20, 2023

Using up those Christmas DSP scraps...

I don't usually post anything mid-week, but I thought some of you might still be frantically wrapping gifts and in need of some gift tags. I always make gift tags out of my Christmas paper scraps.

I simiply cut a scrap (left-over strips work perfectly!) and add some embellishment to the top. Leftover Christmas stickers work great for the embellishments, but I also use die-cuts, stars, gems, snowflakes, etc.

This photo shows a die-cut snowman on one and a dimensional tree sticker on another. Instead of a die-cut snowman, you could just punch or die-cut a couple of circles to make a snowman. The eyes and mouth are easy enough to draw on and a narrow triangle of orange cardstock can be glued on for the nose. A piece of ribbon could be used as the scarf. 

If I'm not in too much of a hurry, I will add a few extra touches like rounding the bottom corners, as you see I did with the tree tag.

If needed, I add a piece of white CS to the inside and stamp "To:" and "From:". You wouldn't have to stamp this. It could certainly be hand-written.

If the DSP is one-sided, I don't add an extra white piece, I stamp directly onto the inside of the tag.

On the back of each tag I add some double-sided tape so that when I want to add it to a gift, I simple pull off the tape backing and stick it down.

Gift tags like this are so much easier to use than a tag that is on a string or ribbon.

I hope this little suggestion is helpful.

Thanks so much for stopping by, and remember to laugh--a little or a lot--every day.

Cheryl

Tuesday, December 19, 2023

A simple card, but I like it...


This card was very quick to make. I used a spatter stamp to stamp some white snowflakes onto a navy blue card base. Then I added the bottom snowflake DSP and the wavy die-cut that says "Merry Christmas."


I actually traced the curve of the die-cut unto my DSP and then used my scissors to cut along that line so that my die-cut fit perfectly on top of it.

You can also see in this photo how I've added a small blue gem to the center of each of the stars that are part of the die-cut.


I used some blue ink to stamp the sentiment on the inside.


Twofer:


This was another super simple card. I had some DSP that featured this funny little snowman with a tiny tree next to him. I first used some Versamark ink to stamp and heat emboss some snowflakes with white EP on the rest of the panel. . I used some wonky snowflake stamps to better coordinate with the fun style of the snowman.


Then I added some holiday banners, anchored with an enamel dot at each end. These banners were made with a stamp and die set that I used to heat emboss each banner on red cardstock and then cut out with the coordinating dies.

I also cut a triangle shape out of some green cardstock and popped it up over the tree that was printed on the DSP. I added some red Nuvo Drops as decorations.


Here's the sentiment that I stamped on the inside.

Both of these cards were fun to make and came together really quickly.

I had a really busy day yesterday. I did the laundry, went to the post office to mail some letters, went to the store to pick up some Christmas odds and ends, made 6 cards, made a batch of cookies and some candied almonds, printed and bound five of our family calendars to be sent to those family members we won't see in person over the holidays, and made ravioli for dinner for my hubs.

I think the rest of the days this week will be equally busy, getting ready for the big holiday.

I hope your preparations are going smoothly and you are able to enjoy this lead-up to Christmas.

Thanks so much for stopping by, and remember to laugh--a little or a lot--every day.

Cheryl