Wish List

Tuesday, March 29, 2022

Granddaughter's birthday card...


This card was quite simple on the front. I made the base with heavy, glossy cardstock and added a pretty peacock that had been die-cut from holographic cardstock. 


I added just a few gems for color and a simple sentiment, popped up on foam squares. 

I had decided to keep the outside simple and save all of the Wow! factor for the inside.


This is what she saw when she opened the card. I used a" twist and pop" mechanism for the pop-out. I have made them by hand in the past, but I now have a die set that cuts out all the components for me.

I probably should have chosen a die with a shadow background for my happy birthday. It is easier to read IRL, but I think some white behind it would have been nice.


The little pocket (one of the dies in my die set) was where I was able to tuck a check as her birthday gift. I die-cut a little purse to signify what the pocket was for.


The little butterfly that you see on the left panel in this photo was punched from the same holographic cardstock as the peacock.

To finish the card, I added a white rectangle beneath the pop-out as a place to write a note and sign the card. 

I'm happy to report that my granddaughter loved it. In fact, she said I must be a "paper magician." It's so much fun to make and give cards that are received with such enthusiasm.

My DH is doing great after his knee-replacement surgery. In fact, I took him to his first physical therapy session today. They certainly don't waste any time getting the patients back into shape. His discomfort has been minimal, and he really hasn't taken many pain pills at all. He does take one at night before bed so he can be sure to sleep, but he hasn't taken any during the day since Saturday. 

Thanks so much for stopping by, and remember to laugh--a little or a lot--every day.

Cheryl


Friday, March 25, 2022

Another Easter card...


I saw a card online somewhere with a bit simpler design, but similar to this one, so I decided to make a few to send to family members.

I started with a yellow card base and added a smaller white panel on which I had printed the sentiment with my computer and then added a pierced design with a large die.


For my "sunrise," I first die cut the square with rays, then also cut a piece of yellow glitter cardstock the same size as the die-cut. I used an orange alcohol marker to add some deeper color to the yellow. After adhering the glitter CS to the back of the die-cut, both were added to the top of my pierced panel.

My cross was cut with a sentiment strip die from some wood-patterned cardstock and the leafy, curly branch from a medium green cardstock. Then it was just a matter of positioning the leafy branch around the cross and attaching both to the card with foam tape.


I printed the inside sentiment with my computer and my card was complete.

I've made a LOT of Easter cards already, but most of them have been donated to the thrift store. In fact, I took 16 cards to the thrift store at 10 a.m. yesterday morning, of which 8 or 9 were Easter cards. All the Easter cards had sold by lunchtime. I think that Easter is one of those times, like Christmas, when people who rarely send cards actually do.

 I haven't taken photos of most of my Easter cards--it's just too time-consuming when I make so many of them. You'd be bored to tears looking at all of them, anyway.

As you read this, I will probably be at the Orthopedic Surgery Center with my husband. He is having his second knee replaced today with a new one. For his first knee surgery, he was heading home only 1 1/2 hours after the surgery ended. I hope it goes as well this time. 

Thanks so much for stopping by, and remember to laugh--a little or a lot--every day.

Cheryl


Tuesday, March 22, 2022

Book binding fold for cards...

 The book binding fold is truly one of my favorite folds to make. I've been turning to this quick and easy fold a lot lately. Here are a couple cards I have made using it:

This is an A2 card created from a 4 1/4" X 11" piece of cardstock that has the score line/fold on the left. The first 1 1/4" is glued to the back with a score line that is 4 1/4" from the right-hand side. That leaves a 4 1/4" square to decorate/embellish.

Before I glued down the first 1 1/4", I adhered my polka-dotted DSP and tied a white ribbon around this section. Once it was glued down, the ribbon was securely in place.


This flower die is an old one. So old, in fact, that I cannot remember who the manufacturer is. I cut it from white cardstock and added three little gems at the top of each flower.

I stamped a sentiment on a scalloped oval, cut with a Spellbinder's die, and placed a tiny gem on either side of it.


On the inside, I stamped a sentiment. I think that smaller sentiments look fine on this card's interior because it's smaller (4 1/4" X 4 1/4") than usual.


This card features a chipboard "Hello" sticker that has been in my stash forever! I've looked at it so many times wondering how I could use it. Finally, one day I bit the bullet and put it on a book binding card. The fishtail banner helps it stand out against the striped background.


This picture gives you a better idea of just how thick it is. 


To dress up the inside a bit, I added some pink paper and then a strip sentiment, which was in my stash. 

This card took only about 10 minutes to make, and I think it's a nice cheery card to send to someone. Both of these cards have been donated to the thrift store.

Well, our snow is finally gone (almost). It is visible only in a few areas where it drifted into deep banks or where it was piled high. I am eagerly watching the trees to see when they begin to bud and my flower beds for spring bulbs to begin poking out of the ground. Spring is sort of an exciting time of year, isn't it?

We drove to a city about an hour away this past weekend to watch my grandson swim in the Minnesota State swim meet. He did SO well, capturing two 1st place awards, several 2nd place awards, and at least one 3rd. I believe he was the most winning member of his swim team. We're so proud of him!

Thanks so much for stopping by, and remember to laugh--a little or a lot--every day.

Cheryl

Friday, March 18, 2022

Fun, masculine cards...

When I complained in one of my previous blog posts about making masculine cards, my sister offered to send me some vest and tie die-cuts. I readily accepted her offer thinking they'd jumpstart my "masculine mojo" and help me get some cards made for the men in my family. Here are a couple of the cards I came up with:

It was fun putting them together. The die set is pretty easy to assemble. I added Nuvo Drops for the buttons and simply drew in the buttonholes.

My sister asked me what colors and/or patterns of paper I wanted her to use for the die-cuts. I told her she could decide and I would work with whatever she sent me. I thought she did a great job picking out some masculine-looking patterns.

I think this one is my favorite. It reminds me of my husband. He loves an argyle pattern. The reverse-scallop circles were inked on their edges and the vests were popped up on foam tape.

I hadn't added any inside sentiments yet when I took these photos, so I can't share those with you. I'll be making more cards like these (I think I received six vests and ties), so I'll be sharing those in the future along with their inside sentiments.

I am really looking forward to the weekend. We are supposed to have true spring-like weather here in Minnesota. Our snow is melting fast and will soon be gone (hooray!), and then the flowers will begin to poke their heads above ground. We are having some exterior work done on the front of our house this spring, so the workers may trample the tulips we've planted there, but it can't be helped. We will save as many of them as we can.

Thanks so much for stopping by, and remember to laugh--a little or a lot--every day.

Cheryl

Tuesday, March 15, 2022

A couple of St. Patrick's Day cards...


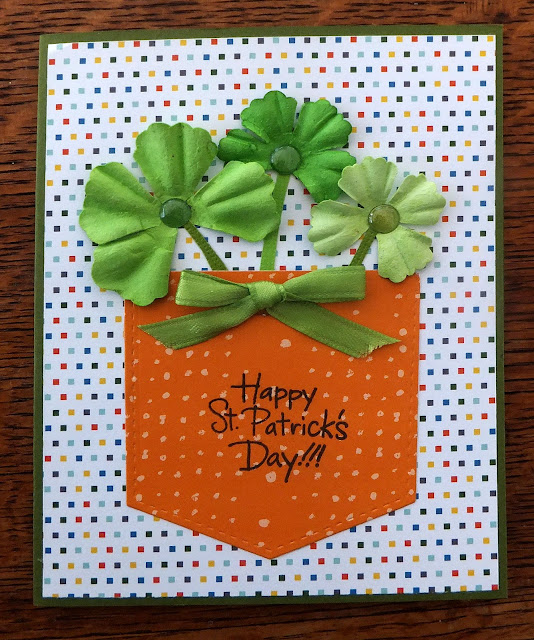
I made a little pocket card for St. Patrick's Day, using up some scraps of DSP from my stash. To make the four-leaf clovers, I simply removed one petal from a few green flowers I had in my stash. Then I added some hand-cut stems and a green enamel dot in the center of each. 

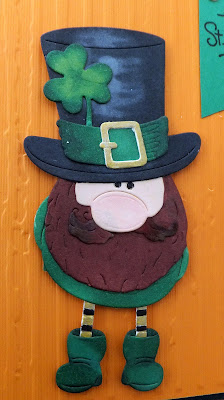
For my second card, I cut, colored and assembled a little leprechaun (or is it a St. Paddy's Day gnome?). He's pretty cute, don't you think? My background panel was dry-embossed with a Sizzix (I think) embossing folder. The two little gold dots on my banner are brads, holding it in place.


Here's a closer look at the little guy. He was fun to color and put together. I rather enjoy cutting all the pieces out of white cardstock and then using my alcohol markers to color them. After that, a few dabs of glue are added and it all comes together.


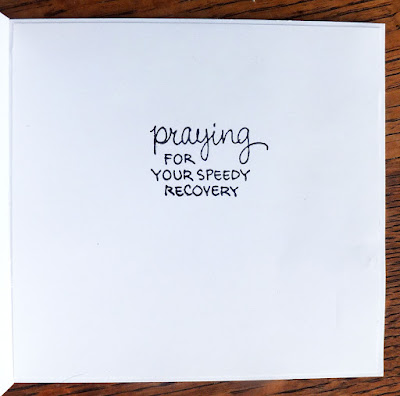
Both cards had this sentiment on the inside. I found it online and really liked it. 

I've been very busy making cards for the thrift store this week. I've got 14 done so far and hope to get another 8 or 10 made.  I'll be sharing some of them with you in the coming days. I try to share cards when they are not repeats of ones I have made before, and this week I have a few new designs.

Thanks so much for stopping by, and remember to laugh--a little or a lot--every day.

Cheryl

Friday, March 11, 2022

Cutting intricate patterns from patterned cardstock...

To be honest, I didn't think it would work very well. I had some glossy big-patterned cardstock. It was the kind of pattern that I look at and think, "What can I possibly make from that?" Well, I decided I had to give it a try, and if it looked awful, I'd just toss it.

This piece of CS had big flowers and greenery on it. I should have taken a photo before I cut into it. I used a flowery background die that I thought would complement the colors in the pattern.

I used some spray adhesive to apply my die-cut to a card base.


A few sequins added some sparkle.

The sentiment was one I had in my stash. I simply matted it with black and popped it up on foam tape.


To add the barest bit of interest to the inside, I used a pink rectangle for my stamped sentiment, rather than a white one.

I donated this card to the thrift store last week and today, during my usual Thursday shift, I saw that it had sold. Somebody appreciated it, so I will make a few more. I'm thrilled to be able to use up some of the cardstock I had once thought unusable.

Thanks so much for stopping by, and remember to laugh--a little or a lot--every day.

Cheryl

Tuesday, March 8, 2022

Easter cards for Ukraine...

In the midst of making Easter cards for family and friends, I decided to make a few to show my support for the brave people of Ukraine.

I started by using a pierced pattern background die on a panel of white cardstock. I then used my brayer to apply a coating of blue ink to the panel. 


Once I was satisfied that I had enough ink on the panel, I adhered it to my card base. 

The Easter egg was created with a layered die set using three different shades of yellow and some metallic gold CS for the top layer. A few blue gems were added for a bit of sparkle.


My blue ink pad was getting a little dry, so I decided to try some medium blue cardstock with white ink brayered onto the pierced design. You can see the result in the photo at right. It's more subtle, but I still liked it. The white ink helped the pierced design to be more pronounced.


I also created a banner for each card, stamping the word "Peace" from one of my Christmas stamp sets. The banner die is an old one I've had for many years. I think it was one of the first die sets I ever bought.

The banners were popped up with foam tape. I couldn't decide if I liked them better in the center of the egg or towards the bottom, so I made a few of each.


I used my computer to print out an Easter sentiment for the inside of each card.

When I see the news reports about Ukraine, my heart breaks for the people there. I cannot imagine such a vicious and unprovoked invasion of my homeland. I pray they will stay strong and united and that the U.S. and other countries will give them the help they need to overcome this aggression.

Thanks so much for stopping by, and remember to laugh--a little or a lot--every day.

Cheryl