Wish List

Friday, July 21, 2023

You're only young once...

 My brother-in-law's birthday was last month, and this is the card I made for him:

This is another gatefold shutter card. I really love making these, and I think the way it reveals the sentiment on the inside is so cool.


The digital image is "Gus" from Bugaboo stamps. He's easy to color and I like adding some glossy accents to his glasses.

This was the perfect image for my brother-in-law, as he is still recovering from an extended stay in the hospital and rehab and often dresses uber casually at home. He lives alone, so there's no one he needs to impress! LOL

He laughed when he opened the card, which was exactly what I hoped would happen.


Here's what it looks like on the inside when it's fully opened.  If you want to see a similar card in action, you can watch the very short video in this post. 

I have a die set that cuts out this mechanism on the inside so it is very quick to add to the card. I think I'll make a couple of these this weekend for the thrift store. The regular buyers of my cards there will love the option of an interactive card.

Our dog Mickey is in training--again. The current trainer is much better than the first one we had, and Mickey is progressing nicely. He knows come, sit, stay and we're working on stand and watch me. Eventually, he'll also learn to heel. He's not all that great on a leash right now, and it will be a relief when he can heel properly.

Thanks so much for stopping by, and remember to laugh--a little or a lot--every day.

Tuesday, July 18, 2023

3D embossing folders and a little white ink...

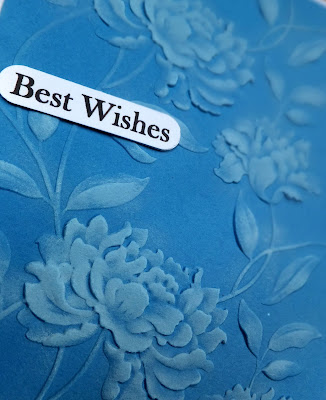
I made several cards recently using nothing more than a 3D embossing folder, a little white ink and a sentiment.


After embossing my blue panel of cardstock, I used a finger dauber and a white ink pad to highlight the raised areas.

White ink takes a long time to dry, so I would typically do this to a couple of panels (or more) at a time and let them dry overnight.

The sentiment as been popped up on foam tape.


This card could be used for a wedding card or an anniversary card.


This card was a little trickier to hit just the raised areas with the white ink. I still liked the end result.


I had a smaller piece of blue CS left, so I embossed that, added some white ink and a white frame  before adhering it to a patterned cardbase. The sentiment was popped up on foam squares with a couple of punched sprigs to tie in to the patterned CS.


Next, I tried the same technique with some purple cardstock. I love how this one turned out! This time I tied some sheer ribbon around the purple panel before gluing it to my cardbase. 


The sentiment was popped up on foam squares that also help to keep the ribbon in place.


Many years ago, before I had many stamps, I printed out some sentiments onto white cardstock. This was one of them. I must have been planning on making a lot of sympathy cards, because I still have quite a few of these left. The problem is, I didn't print them on card-size panels, so I have to cut them out with a square die and then matte them or frame them for a finished look.

I just love working with 3D embossing folders. Folks who are not at all familiar with what we cardmakers do will wonder, "How did she DO that?"

Thanks so much for stopping by, and remember to laugh--a little or a lot--every day.

Cheryl
 

Friday, July 14, 2023

Tri-fold shutter cards...


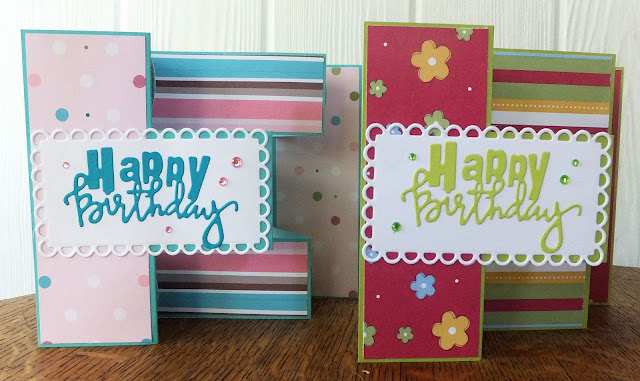
These are the cards I made my twin daughters for their birthday a few days ago. I had some pre-made tri-shutter fold card bases on hand, so I decided to use a couple of those.

I added the die-cut scalloped rectangle to each card. It was the perfect size for the die-cut "Happy Birthday."

They were kind of fun to make because there are so many different little areas to embellish.

Here's a birds-eye view of how the cards are cut and folded.


They both turned 46 years old this year. I can hardly believe it! They're my babies. lol I added some sentiments on die-cut ovals to the small rectangular areas and left a little room for a personal note and signature on the larger rectangular area.


These were so much fun to make. It took a little time to get all the measurements, but after I did that, it was a piece of cake!


This is my favorite picture of my twins. I think they were three years old in this photo. I sewed the little sunsuits they are wearing, and they look so darn cute in them.

They played outside a lot in the summertime, so their little legs would get nicely tanned.

Sometimes I miss the days when I had four little kids running around the house and crawling into my lap every time I sat down.


Here's one last look at the cards standing on display.

Thanks so much for stopping by, and remember to laugh--a little or a lot--every day.

Cheryl

Monday, July 10, 2023

Baby cards to donate...

Right now we have no new babies in our family, nor is there an expectation that there will be a new baby anytime soon. I don't let that stop me from making baby cards, though. They always seem to sell well at the thrift store, so recently I made a couple of cards with a new onesie die set.

I had a small piece of blue cardstock that had been embossed with an argyle embossing folder, so I cut the first onesie out of that (it really didn't flatten the embossing at all). I wanted the argyle pattern to show up a little more, so I used a finger dauber to lightly add some ink to the raised pattern.


The little giraffe was cut using an old Cuttlebug die. It was the perfect size for the onesie. I simply added a few brown Nuvo Drops for the eye and the spots.

I also used some Nuvo Drops for the snaps between the leg holes and on either side of my sentiment, which was stamped, die-cut and popped up on foam tape.


I'm not sure what this card fold is called, but as you can see in the photo, the bottom flap comes up and the top of the card folds over the top of that.


Here you can see the full panel on the inside with its stamped sentiment.


I made another card for a little girl. This time I used the bib die and the "Sweet Baby" die that were in the die set with the onesie.


The inside of this card was stamped with the same sentiment as the first card.

Since this is the first time I've used this die set, I'm entering this card into NBUS Challenge #52 over on the NBUS blog.

Thanks so much for stopping by, and remember to laugh--a little or a lot--every day.

Cheryl


Friday, July 7, 2023

Two wedding shower cards...

 I was asked to make a couple of wedding shower cards, so here's what I came up with:

This is a relatively simple card. First, I used my computer to print the sentiment onto a panel for the front of my card. I used some blending brushes and a cloud stencil to add some interest to the background. Finally, I cut out my umbrella and flowers with dies.


I used a finger dauber to add a little ink to my umbrella to give it a little dimension. I also popped the canopy up on foam squares.

Each of the flowers got a tiny gem adhered to its center.


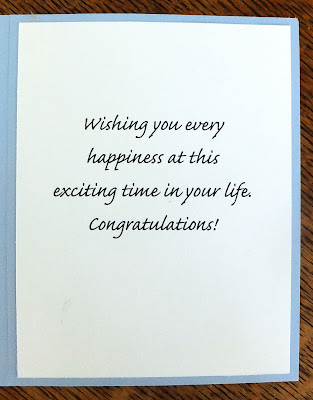
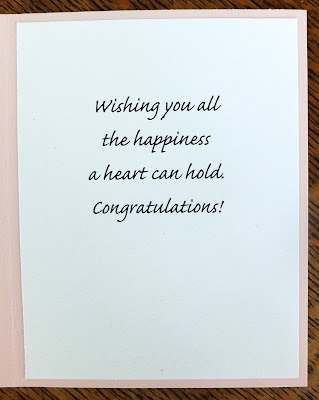
The inside sentiment was also printed with the computer.


Since I was at a loss for ideas, I used the umbrella dies for the second card, too. This time the umbrella was turned upright with tiny flowers along the edge of the canopy. The raining hearts were created with a stencil.


Once again, the canopy is popped up on foam squares, but this time I used Nuvo Drops for the flower centers and for the button at the top of the umbrella.


Both sentiments on this card were created on the computer. 

Have you ever made cards for a wedding shower? If so, what did you use for the front of your cards? I'd really love some more ideas to have on hand when I get requests like these.

I fulfilled another "out-of-the-ordinary" request for two cards today. I'll share them in another post. These requests are really making me stretch my imagination and my cardmaking repertoire!

Thanks so much for stopping by, and remember to laugh--a little or a lot--every day.
Cheryl

Wednesday, July 5, 2023

Let's Craft and Create Challenge #197: Anything Goes or Add a Flower...


A belated "Happy Independence Day" to all those in the U. S. I hope you had a great holiday weekend and were able to join in some festivities with family or friends.

This month's challenge at Let's Craft and Create is an easy one for most crafters--Add a Flower! We all use flowers in our cardmaking at some point, don't we? I opted to color a couple of flower images and use them on two cards.

I used Prismacolor pencils and odorless mineral spirits to color both images.

On this image, I used the technique of adding color near the center of the  flower and then blending it out to the edges of the petals. I did the same with the leaves. 


The image was die-cut and popped up on foam squares. It was just wide enough to cover the seam of my two patterned papers.

I added some gems to the centers of the flowers for a little sparkle.


On the inside I stamped a sentiment and a small flower image, coloring the flower the same way I had colored those on the front.


For the image on this card, I used my colored pencils to add some darker color to the tips of the petals and then smoothed and blended that color towards the center of the flower with mineral spirits. Each leaf was colored by adding color to both ends and blending it towards the center.


I used two different shades of blue to color the cup and saucer, trying to add some shading under the flowers and on the saucer. I definitely need more practice, but I am gradually getting a little better.

I only added some gems to the sentiment oval on this card.

The sentiments on both card fronts were popped up on foam squares.


Once again I added a stamped sentiment and the little stamped flower. This time the flower was colored using the same technique as I used on the main image.

Now it's your turn. I hope you'll check out all the wonderful inspiration on the Let's Craft and Create website and then enter your own flower-embellished card, or any other card you wish to share. There is always the "Anything Goes" option.

Thanks so much for stopping by, and remember to laugh--a little or a lot--every day.

Cheryl

Monday, July 3, 2023

Happy Birthday, America...


Since I won't be posting anything tomorrow, which is July 4th, I thought I'd add a quick post today.

I always make a few cards for the 4th of July holiday, and this is the design that I made this year. I purchased the fireworks stickers a while ago, thinking they would work perfectly for the occasion.

I've had the "neighborhoodscape" die for years and have used it for several New Home Congrats cards, but it was perfect for this card, too. I just had to put some white cardstock behind the windows and then adhere it directly to a red card base. "Celebrate" was heat-embossed onto a strip of white CS.


Here's a little closer look at one of those fireworks stickers.

I've got lots more of them, so I need to think of a few more card designs where I can use them. If you've got any ideas, I hope you'll share them with me.


I printed the inside sentiment for each card with my computer. 

We will be heading to a local festivity/parade/picnic-in-the-park tomorrow to celebrate Independence Day. I think it should be fun. If you're celebrating, I hope you have a good time, too.

Thanks so much for stopping by, and remember to laugh--a little or a lot--every day.

Cheryl