Wish List

Friday, October 29, 2021

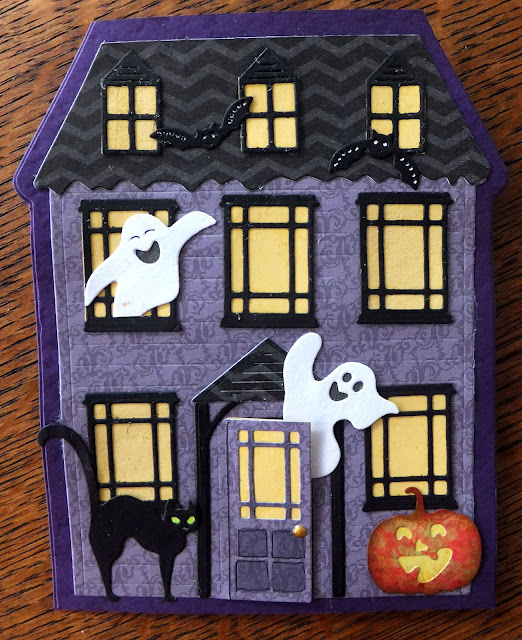
Halloween house...

I had fun making this Halloween house easel card, but it did take a lot of time -- so many little pieces to cut and assemble!

I used several die sets for this card to add all the little characters.


This is what the inside of the card looks like. The circle is several layers thick, and the "Happy Halloween" is cut from some thick packaging material.


And here's what it looks like with the easel in place. 

I made several of these cards. To increase my efficiency, I cut out all of my pieces first, then glued all of the windows together and finally assembled the card. 

This house die can also be used for other occasions, like Christmas (red house with snow?) or Easter (pastel house with bunnies and eggs.

It also fits inside an A2 envelope.

 I didn't put any sentiment on the front of this card. I thought it had a lot going on already. After looking at the photos, though, it occurred to me that I could have put a banner at the top of the roof that said "Spooky" or something similar. What do you think? Any other ideas?

Thanks so much for stopping by, and remember to laugh--a little or a lot--every day.

Cheryl

Tuesday, October 26, 2021

Some days you just have to put on the hat...


I have a couple more Halloween cards to share with you today. They were quick to make since I already had the hats stamped, colored and die-cut. I had actually done that last year and saved them in my "Halloween supplies" box.

The sentiments were stamped, cut out with a rectangle die and adhered with foam tape. The rickrack was from a reel of different sticky-backed trims in Halloween colors that I've had for a couple of years.


The reverse-scallop circle was cut with an old Spellbinder's die. I inked the edges, popped it up with foam tape onto my card and then added the hat (also with foam squares) and some holographic stars.


I used this stamp and die set quite a lot last year, too. It's really great for Halloween cards--especially those I make for teen girls or female friends and family members.


I saw this sentiment online and thought it was funny, so I reproduced it with my computer. I added a clipart witch's hat in the middle of it, which I have colored with alcohol markers. Both cards had the same sentiment inside, just different colored bands on the hats (to match the hats on the card fronts).

I have finally finished putting away all of my Halloween cardmaking supplies. And I also got all of my personal Halloween cards in the mail. Boy did that feel good! I still have a few to share with you here on the blog, but I'm looking forward to moving on to Thanksgiving and Christmas cards very soon.

Thanks so much for stopping by, and remember to laugh--a little or a lot--every day.

Cheryl

Friday, October 22, 2021

Quick Halloween cards...

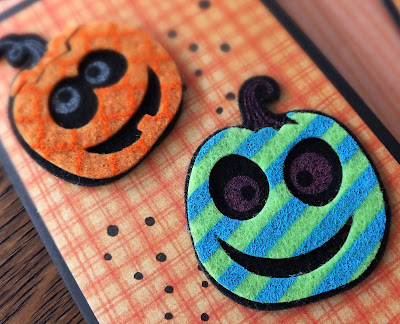
Because I make so many Halloween cards for family, friends and the thrift store, I need some quick-to-make ideas and supplies. Last year, after Halloween, I picked up a couple packages of felt stickers that had been greatly reduced in price. One of the packages contained some colorful jack-o-lanterns, which I have used to make the cards in today's post. All of these cards have been donated to the thrift store where they have already been sold.

I made two mini-slimline cards, with finished dimensions of 3" X 6". I also made envelopes to match. The "Happy Halloween" at the bottom of each is a die-cut.


I thought these felt pumpkins were so much fun. They're not the least bit scary, so these cards could even be given to very small children.


I used an old Stampin' Up stamp to create the black dots.


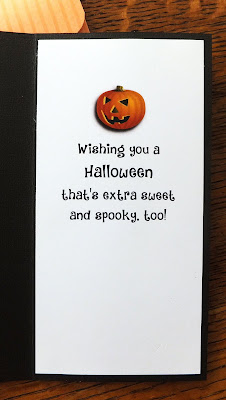
On the inside, I used my computer to create a sentiment, adding some clipart of another pumpkin.


I made some A2 cards, as well, adding some holographic stars to my dotted background. The "Boo!" is also a die-cut.


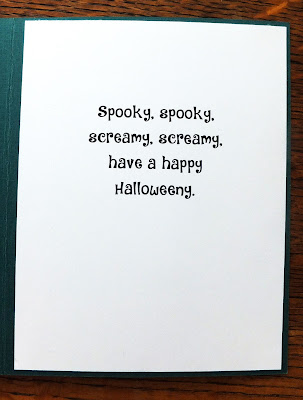
I added another computer-generated sentiment to the inside of this card.


Finally, I made another slimline card with the last two pumpkins and the letter B, which was cut several times and layered so as to give it a bit more dimension.

To add a little character to the pumpkins, I adhered some googly eyes over the painted-on eyes. I think they look pretty cute!


This card has a stamped sentiment on the inside. 


When I arrived at the thrift store for my volunteer shift yesterday, the manager said, "Cheryl, I have a note for you." I couldn't imagine why I was receiving a note. 

The first words of the note said, "Dear Card Designer, I would appreciate it if you would be willing to create a birthday card for my son..."

I was very surprised. Of course I will make the lady a card. She said she would be willing to pay the store a "special design price" for the card. She gave me a few specifics and some wording she would like included, so I will begin to work on it for her tomorrow. It should be fun!

Thanks so much for stopping by, and remember to laugh--a little or a lot--every day.

Cheryl


Tuesday, October 19, 2021

Stormy skies...


I saw a Halloween card onlne that had heavy gray clouds with a bit of pink in them, and I thought they looked so cool. I just had to try it myself, so this is what I came up with. 


I first created my clouds using some Black Soot Distress Ink and a little Picked Raspberry Oxide Distress Ink with a cloud stencil.

Once that was done, I stamped my focal image and a couple of bats with Black Versafine ink.

Finally, I added a few holographic stars and a stamped sentiment, cut out with a banner die.

My panel was matted with purplish-pink cardstock and adhered to a black card base.


On the inside of my card, I stamped a sentiment, added three more holographic stars and adhered a die-cut "Happy Halloween."


I had so much fun creating the clouds that I decided to make another card using the same colors. I have a new alpha set of dies that cuts letters with a woodgrain pattern in them. That is what I used for this card. If you enlarge the picture, I think you can see the woodgrain pattern. 


The little ghosts and bats are from older die sets that I've used many times before.


A couple of stamped sentiments finished off the inside of this card.

I am finally finishing up my Halloween cards. I'll be sharing some more of them in future posts. I've made quite a few for the thrift store, and they seem to be selling well. I have estimated that I have made 750-800 cards for the thrift store since the pandemic began. My crafty friend Lynette has donated more than 300 cards, too, (THANK YOU, Lynette!) so together, we've managed to make well over 1,000 cards for them. I know they appreciate the cards, because they have told me so several times.

Thank you so much for stopping by, and remember to laugh--a little or a lot--every day.
Cheryl


Friday, October 15, 2021

Happy 17th birthday...

 Our grandson Sebastian turned 17 years old this month. He has received his card, so I can now share it here with you.

For me, it is particularly difficult to come up with ideas for cards for teenage boys. This is a pretty basic card that includes a shaker element that adds a bit of fun. 


I had a sheet of this bicycle-patterned paper in my stash and thought it would be perfect for Sebastian--he loves to ride bike. He lives in Heidelberg, Germany, and bikes nearly everywhere he wants to go.

The shaker frame was die-cut from blue CS and the numbers from glitter CS. I accented my card with a yellow Happy Birthday and yellow CS at the back of my shaker, along with some yellow and blue sequins.


On the inside I added a computer-generated sentiment.

I know there are some cardmakers out there who say that masculine cards are their favorites to make. I wish I was one of them!

There is a definite chill in the air--so good for sleeping at night. Tonight we are going to a football game to watch our granddaughter participate in the marching band performance at halftime. She plays the trombone and really enjoys it. I love a good marching band, so I'm looking forward to it.

Thanks so much for stopping by, and remember to laugh--a little or a lot--every day.

Cheryl

Tuesday, October 12, 2021

They say you're only young once...


I just love this image. His name is Gus, and he's from Bugaboo Stamps. It's a digital stamp, so I printed him on white cardstock and then cut him out with a dotted border rectangle die. He's been colored with ProMarkers, and I added some Glossy Accents to his glasses.

I adhered navy blue layers of cardstock under the image and under the pale blue dotty DSP for added dimension.


The sentiments on the front and the inside are from a couple of old wood-mounted stamps that I purchased at the thrift store. I like them a lot and have used them several times. I think they work perfectly with this image.

I heat-embossed both sentiments with white EP and used double-sided foam tape to pop up the one on the front. Just for fun, I placed it at a "jaunty" angle.


As you can see in the photo at right, I added the second heat-embossed sentiment on the inside. I like this look, and plan to use it on lots of cards in the future.

It's so nice to not worry about stamping straight when adding a sentiment strip. I only have to make sure I apply the strip straight, which isn't hard if I use my t-square.

This is another card that I donated to the thrift shop. It sold right away. I think people love humorous handmade cards--especially for guys!

Thanks so much for stopping by, and remember to laugh-- a little or a lot--every day.

Cheryl

Friday, October 8, 2021

I've made a few Christmas cards...


 This is a prototype of a Christmas card that I made recently. I used a dotted snowflake background die for the white panel and some silver mirror cardstock for the snowflake and sentiment.


I believe my snowflake is a Sizzix die. It's so delicate and pretty. The photo really doesn't show how lovely it is.

I plan to cut some of the snowflakes (and the accompanying sentiments) out of holographic cardstock, too, for a little different look when I make more cards like this.


My inside sentiment was stamped with Versamark and  heat-embossed with silver embossing powder. I punched three little snowflakes to add around it. Not sure they look all that great. I think I'll use a stamp next time and heat emboss a few snowflakes.


I also made the same card using a white card base. Which do you like better? I'm a little partial to the white, but I think the navy blue card base works well, too. 

When I come up with a card design I like, I usually make at least 10 of them. This one will be no exception.

We've been looking at homes for sale lately. If we could find one that met our needs, had room for a relative to live with us, if need be, and was the right price, we'd buy it and move.  A TALL order!  

Also, we're looking in only one small area of St. Paul, MN, because that is where my husband would really like to live, so that definitely limits the selection of homes available. Who knows--it may or may not ever happen. In the meantime, we are hoping to have some work done on the house we've lived in for the last 20+ years and are meeting with a contractor later this month. I have to admit, I get a headache just thinking about all the work involved in both scenarios--rehabbing our current home or moving into a new one.

Thanks so much for stopping by, and remember to laugh--a little or a lot--every day.
Cheryl

Tuesday, October 5, 2021

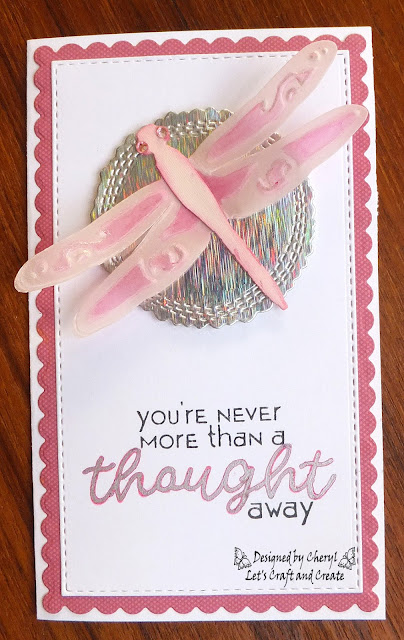
Let's Craft and Create Challenge #176: Anything Goes or Things with Wings...


It seems as though September--one of my favorite months--simply sped by, and we are now well into October. That means the weather is cooling, the leaves are changing colors, and it's time for another challenge at Let's Craft and Create. This time the option is "Things with Wings."

I briefly thought about using one of my many butterfly stamps and/or dies to create a card. Then I looked at a couple of owl dies...but I still wasn't inspired. It wasn't until I came across a really old dragonfly die by Spellbinders that I began to form an idea for a card.

After die-cutting a pink scalloped mat and a white panel, I stamped my sentiment, using two different colors of ink--black soot Distress Oxide and picked raspberry Distress Oxide. I wasn't happy with the way the pink looked, so I went over it with a self-outlining metallic pen.

My sentiment looks a little off kilter in the photo, but that's due to my lack of photography skills. It really is straight!

I cut the dragonfly from pale pink vellum and embossed it with the die. There are many Spellbinder's dies that also emboss a pattern into the die-cut piece. 

I also cut the dragonfly out of pale pink cardstock, and, cutting away the wings, I added the cardstock body to the vellum one.


I did a bit of inking around the dragonfly's body and some coloring with a marker on the back side of the vellum wings. If you look closely you'll see that I also added a little sparkle to the wings with a glitter pen and two tiny pink gems for the eyes.

The dragonfly was mounted onto a holographic cardstock circle that featured wonky stitches and scallops. The circle was popped up on foam squares.


On the inside, I added another pink scalloped mat, identical to the one on the card front, and a stitched panel on which I stamped a sentiment.

I hope you'll join the challenge this month with your own creation. Remember you can choose "Anything Goes" or "Things with Wings." Some other ideas for the latter option might include airplanes, butterflies, bats, bees, birds (even emus and flamingos!) and angels. 

Want more inspiration? Head over to Let's Craft and Create and see the fabulous projects the Design Team has created.

Thanks so much for stopping by, and remember to laugh--a little or a lot--every day.

Cheryl


Friday, October 1, 2021

Pretty cardstock, two cards...

 I had some pretty patterned cardstock in my stash, and since it was a nice heavy quality, I decided to make a couple of card bases with it.

My first card was a simple "Happy Birthday" card. I die-cut a fancy rectangle and carefully adhered my die-cut sentiment with some glue.


I wanted a little glittery sparkle, so I added some Nuvo Drops and sprinkled them with white glitter while they were still wet. I think I lost control and went a little crazy, though. I should have stopped at three! 


I added a simple stamped sentiment on the inside.


This is the second card I made with the pretty cardstock. This time I die-cut a flower out of white cardstock and then inked the edges of the petals with gold metallic ink to make them look a bit like the ones in the cardstock pattern. I added some deep yellow Nuvo drops to my flower center and a few white sequins to my framed rectangle.


Another stamped sentiment on the inside finished off my card.


As I walked into the thrift store today for my volunteer shift, I was stopped by a lady who asked if my name was Sherry. I said, no that wasn't quite right; my name was Cheryl. Then she asked, "Do you make the cards?" I told her yes, at the moment, I am the one making the cards. She proceeded to tell me how much she loved them and that she had purchased several. She was anxious to see what cards I had brought in today (I only had nine new ones as that is all I was able to make this week). It was so sweet of her to take the time and effort to let me know how much she liked the cards. It gives me renewed energy to continue making them!

Thanks so much for stopping by, and remember to laugh--a little or a lot--every day.

Cheryl