Wish List

Friday, August 28, 2020

Simple sympathy card...

 I've been inspired by crafting friends who have been working hard to use their accumulated card parts (I'm talking about you, Lynette!). I recently went through some of mine and found a pretty dragonfly that my sister had cut for me (ahem) years ago. Since I always like to have sympathy cards on hand, I decided to use it on one.


I had this pre-colored panel (that's a card part, too, right?) and decided to use it as my background. First, I heat-embossed my sentiment with gold embossing powder. Then I added my panel to a green mat, which was taped to a white card base. I adhered the dragonfly and a few gold-colored flat-backed gems.


If I remember right, my sister cut this dragonfly out of some packaging material. I hope she'll correct me in the comments if I am wrong. Isn't it pretty? I don't know why it took me so long to use it.


I kept the inside of my card as simple as the outside. I stamped a tiny dragonfly and a sentiment with gold metallic ink. This ink is not the best--can any of you suggest a metallic ink brand that you really like?

I haven't bought any new card-making supplies, other than a few dies and double-sided tape, in ages. The thrift store gives me a lot of stuff which I use to make cards for them to sell. There is enough that I can also use it to make cards for my own use, too.

Have you been buying supplies online since the pandemic hit, or do you still go to the craft stores?  Are you making more cards now that you're staying home more? Inquiring minds want to know! lol

Thanks so much for stopping by, and remember to laugh--a little or a lot--every day.
Cheryl

Wednesday, August 26, 2020

Emboss and deboss...

I received a new Christmas embossing folder called Christmas Decor Pendant from In Love Art Shop and decided to make a couple of Christmas cards with it. This folder is available in their online store, and don't forget to use this 15% off coupon if you decide to purchase it:

G-22717

I don't usually use the debossed side when I make an impression with an embossing folder. After all, they don't call it an "embossing" folder for nothing! But sometimes its fun to do something a little different.


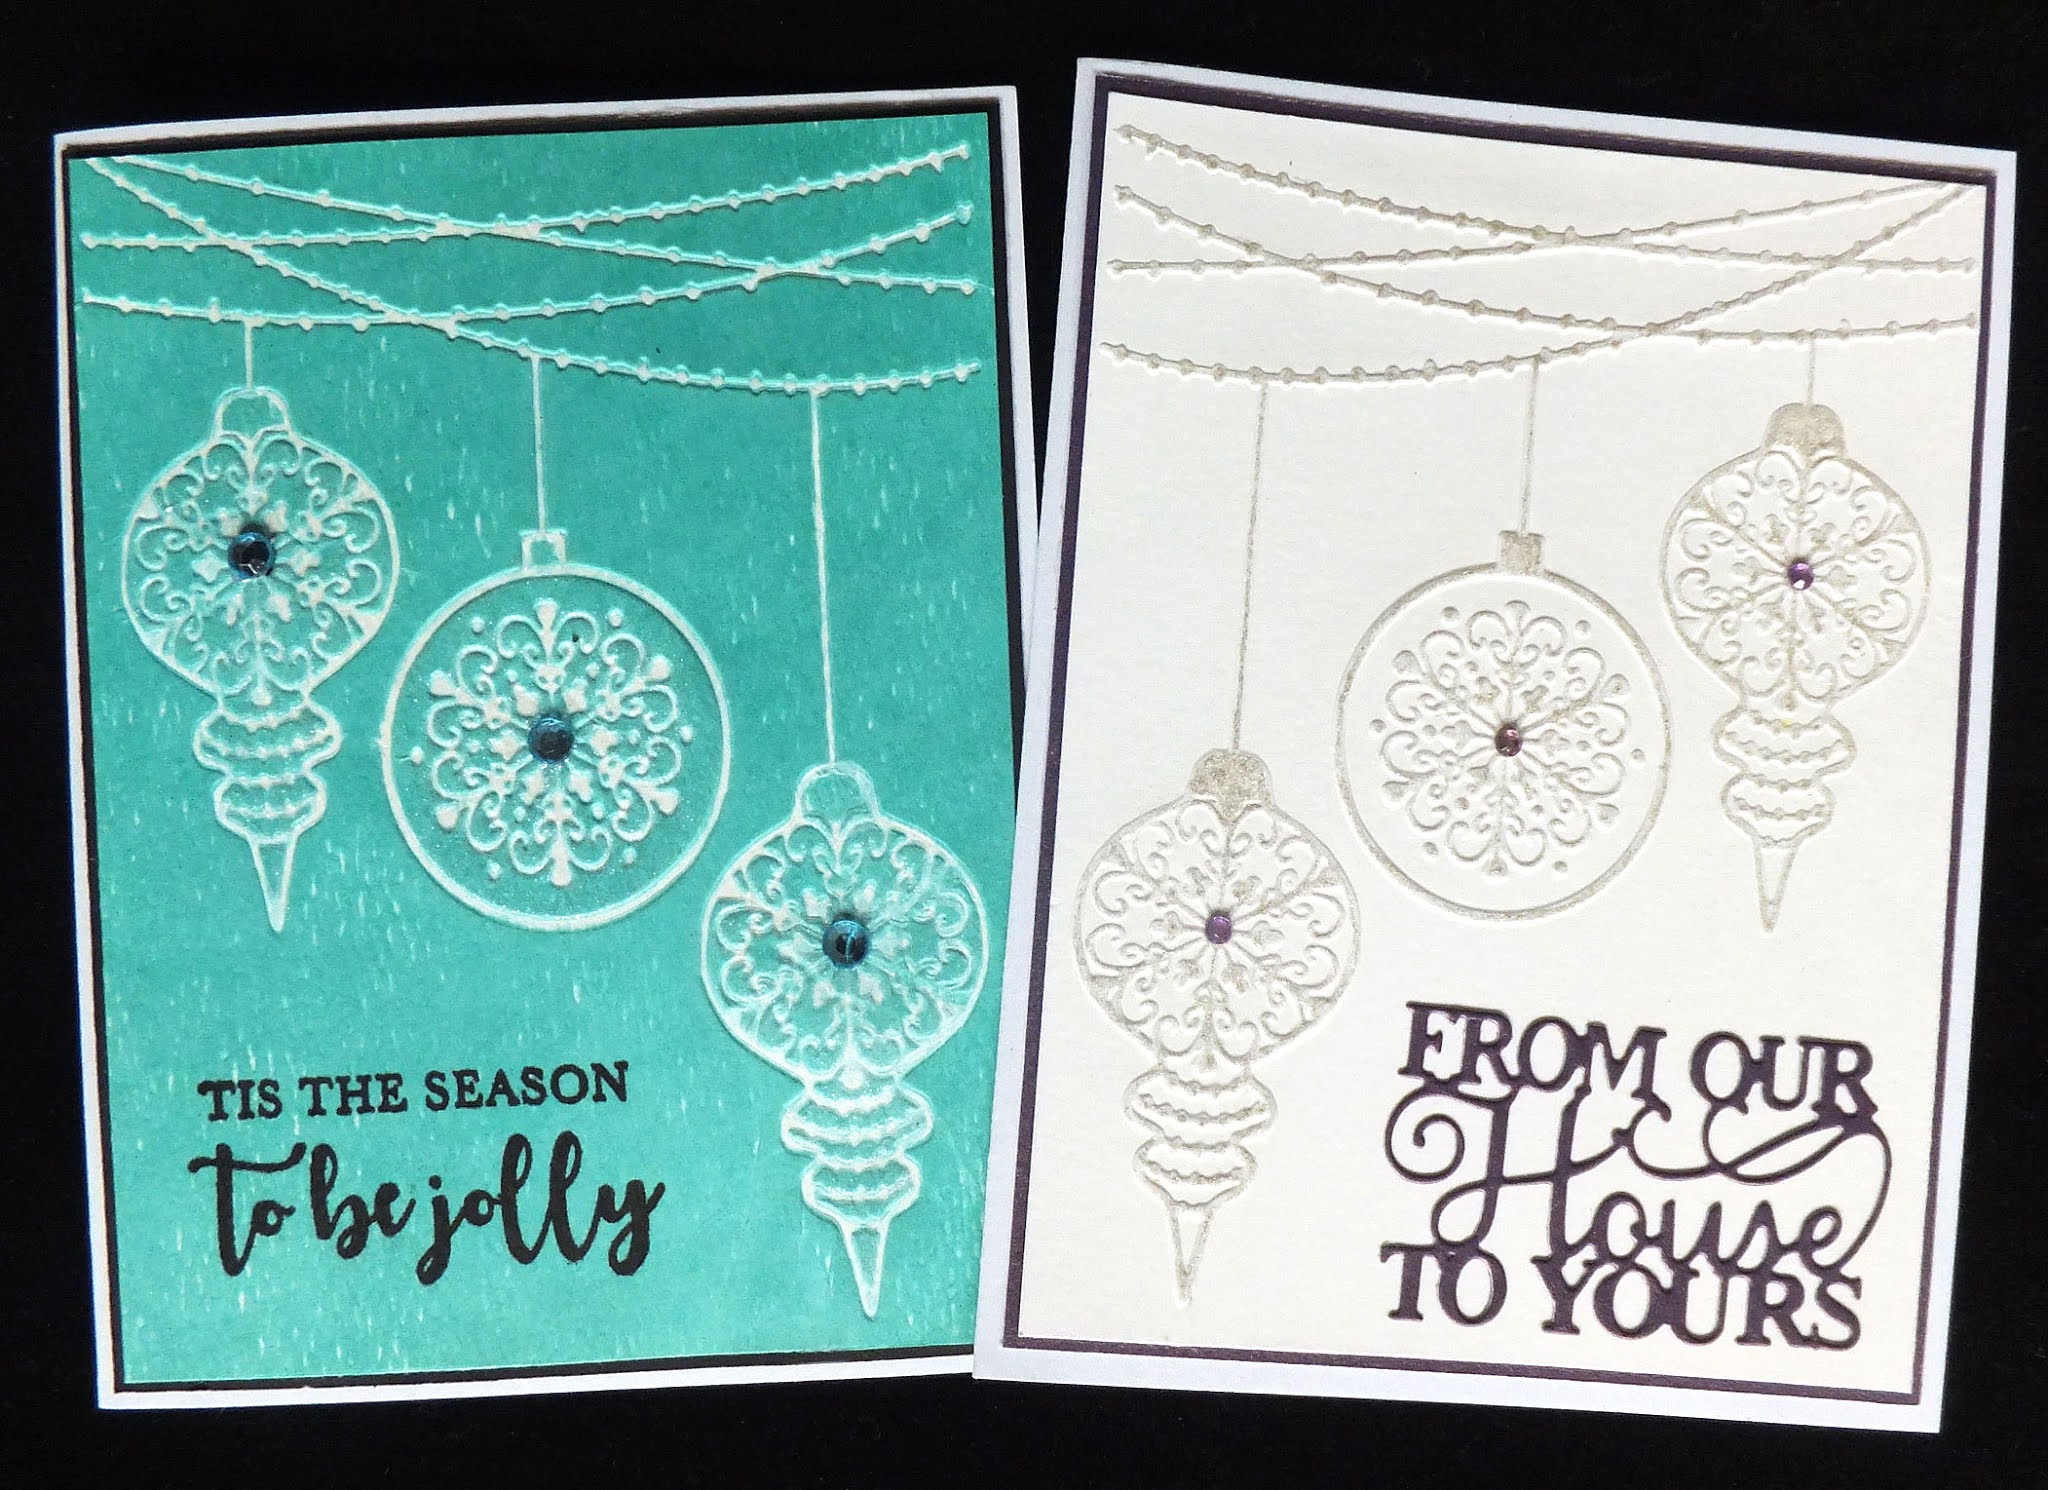
Here's a photo of both cards. For the first card I embossed a piece of watercolor paper, but flipped it over to use the debossed side. The second card features the usual embossed image.


After removing my panel from the embossing folder, I used a brayer to apply some aqua ink to the debossed side. The brayer insures that the ink does not fill the the debossed areas. 

Because this is a heavily textured watercolor paper, the texture shows through the inked areas. I was okay with that, though. I thought it gave it a bit of a rustic look.

My panel is backed with a black mat, aqua gems were added to the centers of each ornament, and my sentiment was stamped with Versafine ink.


The last thing I did was to add Wink of Stella to each ornament. I think if you look closely at this image, you can see a bit of the sparkle.


On the inside of my card, I did some light ink blending with teal ink around the outside edges and added a stamped sentiment.


This card features the embossed image on smooth, mixed-media cardstock. To make the image stand out a bit more, I used a glitter pen to add some sparkle to the raised design.

It was actually pretty quick to do this, and really made a difference. I can see that this would be something I could do on a number of embossed panels while watching TV at night. And it's so pretty IRL!

I know that my mat and die-cut sentiment look black in the photo, but they're actually a dark purple. The gems in the centers of my ornaments are purple, too.


In this photo you can see the sparkle from the glitter pen and the purple gem a little better.


On the inside of this card I stamped the same sentiment with purple ink and ran my ink pad around the edge of my sentiment panel to add a little definition.

These were super quick cards to make, and I may make a few more. I only need 10 more Christmas cards, so I should soon have them done and can start on some for 2021. That will be a first for me!!

Thanks so much for stopping by, and remember to laugh--a little or a lot--every day.
Cheryl

Monday, August 24, 2020

Christmas, congrats and grapes...

In my latest order of products from In Love Art shop I received a pretty Vintage Frame stamp. It really adds a nice finishing touch to a card front. If you're interested in it, you will find it here, and you can use this 15% discount code:

G-21840

 Here's the card I made:

I know it's hard to see, but the colored cardstock I used for my focal panel has some shades of green in it. It's actually an upcycled piece from a large purchased Christmas card that I received in years past. The sentiment was cut from some gold foil packaging material. I'm definitely frugal when it comes to crafting!


I cut my poinsettia from colored cardstock, did a little shading (although it's hard to see) and added some gold drops to the center using a Viva Decor pen.


The inside of my card has a stamped sentiment and small holly image, which I colored with alcohol markers.


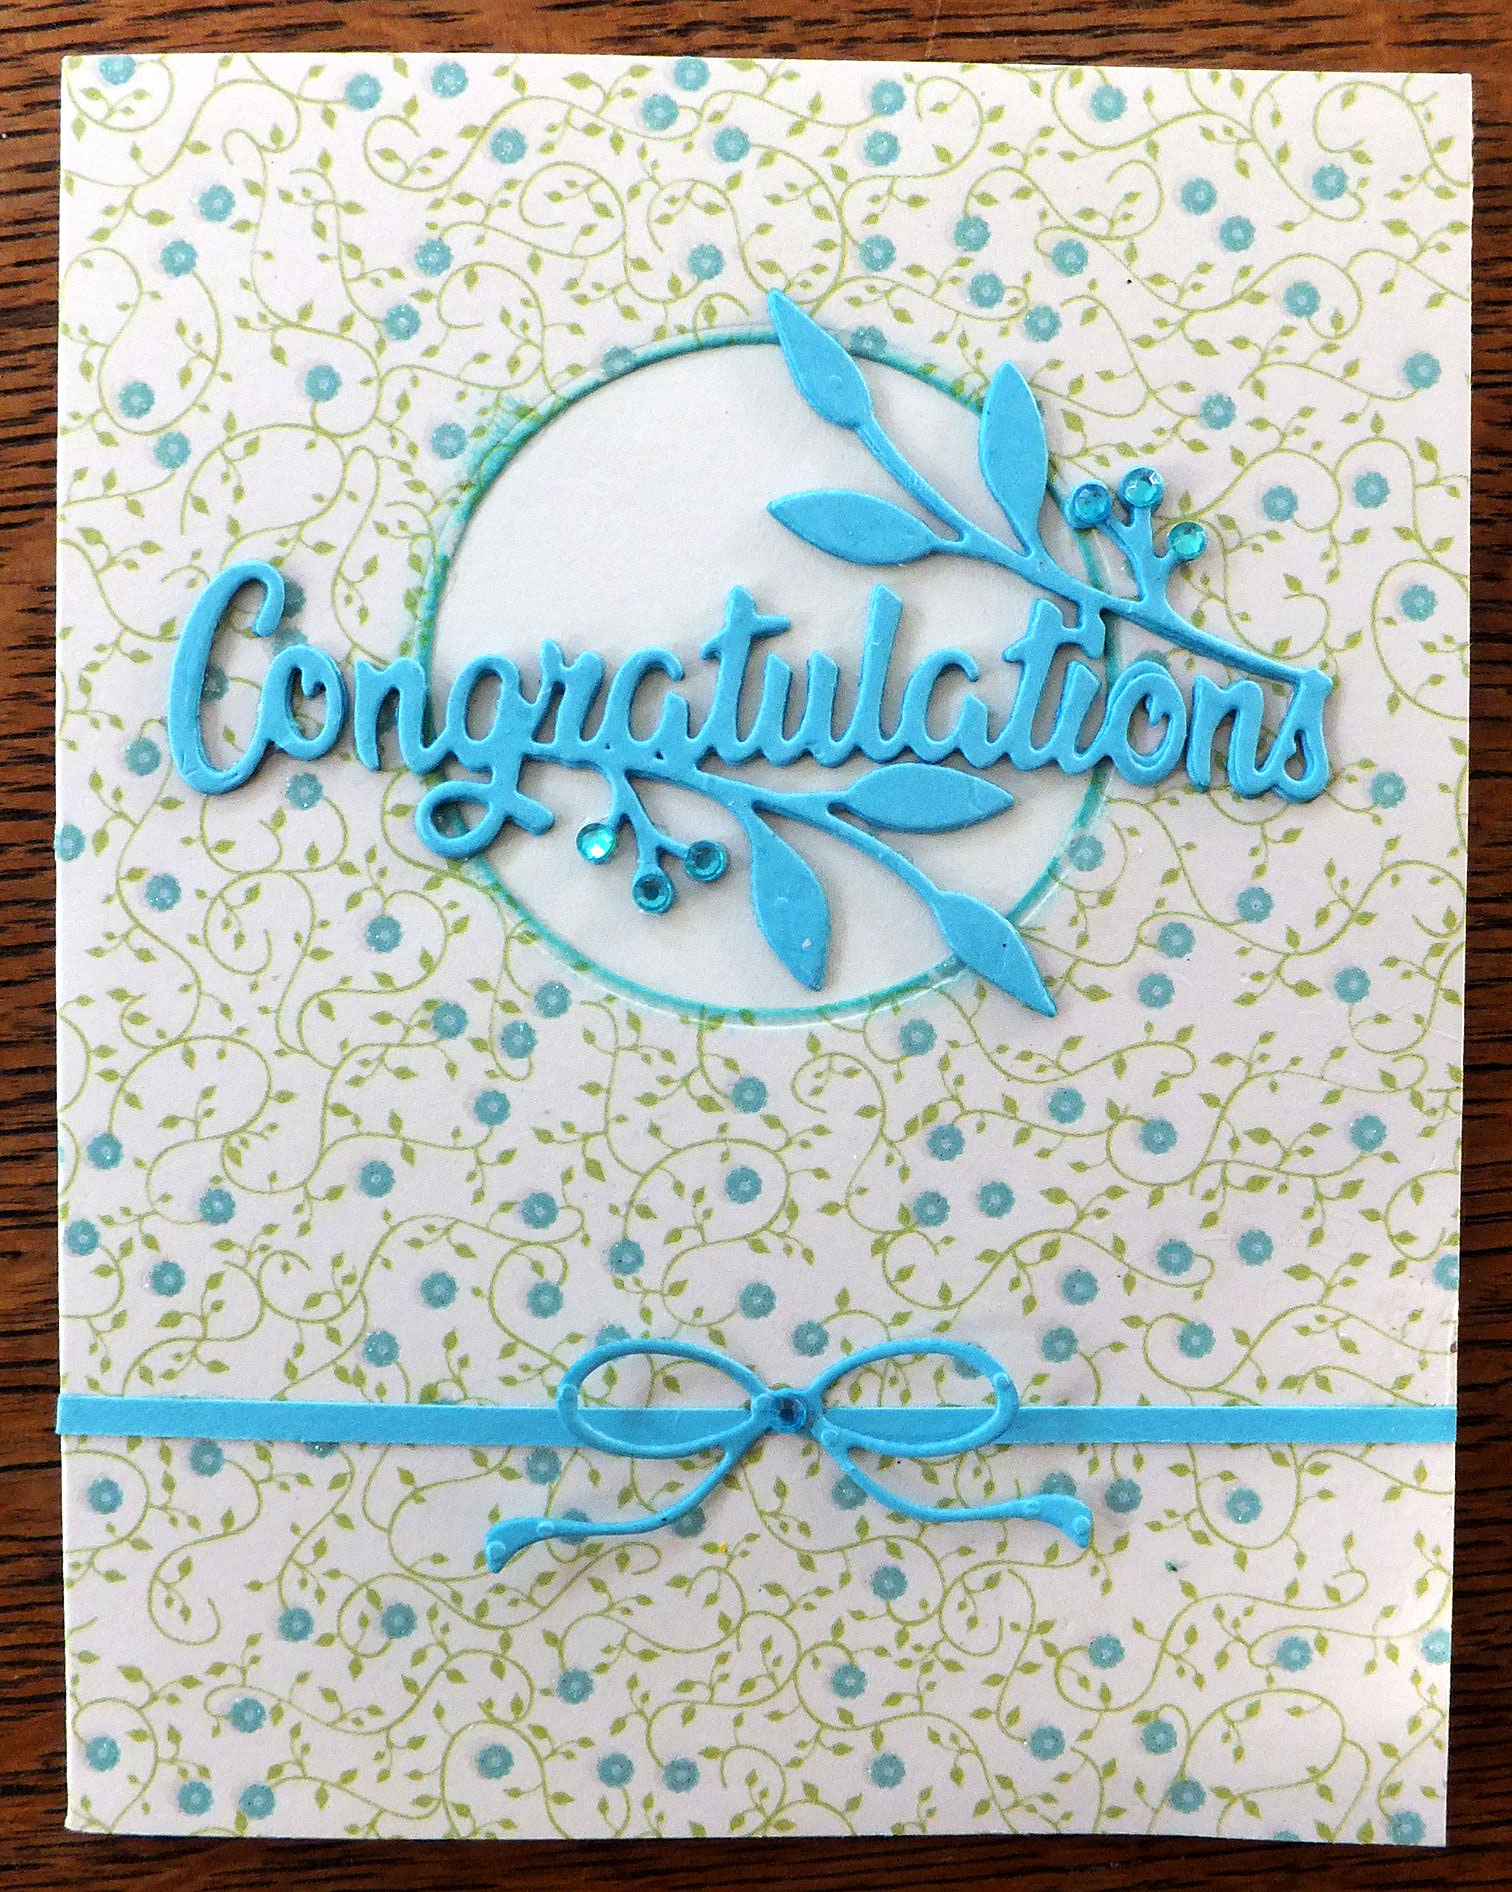
Another product that I had ordered from In Love Art shop was this Congratulations die.

It's a lovely die and cuts well, but be aware that the "Co" cuts separately from the rest of the word.

I glued together several layers of the word to give it some nice dimension. I also added some tiny blue gems to the "berries" on the sprigs that decorate the die-cut.

I think the leafy sprigs are really pretty, but they could definitely be cut off if you didn't want them there.

I left this card blank inside and it is now at the thrift store in my "rack of cards."


I got busy last week and picked some grapes off our grape vines.

They're small grapes but they have wonderful flavor and make excellent jelly.

I'm hoping to get a few more jars yet this summer. More grapes are ripening on the vine, and I will pick them soon.

Thanks so much for stopping by, and remember to laugh--a little or a lot--every day.

Cheryl

Friday, August 21, 2020

It's Twofer time...

 The Twofer Card Challenge blog is wrapping up another of their monthly challenges, so I needed to get my entry in. It's always fun to try to create two very different cards using the same image.

This time, I decided to use my sun die. Since time was running short and my mojo was being very lackadaisical, it seemed a sun image was my best bet for coming up with two card ideas.

These cards were fun to make--especially since they both required some stenciling (one of my favorite card-making techniques).

I inked my background with a pale blue ink and then added some stenciled raindrops. The grass was cut with a border punch and inked around its bottom edge. I used various dies to cut out my sun, clouds and umbrella. The frog is from a fun Craftin' Desert Divas stamp set. He was stamped, colored and fussy cut, and I applied some Glossy Accents to his eyes. The frog, umbrella canopy and one of the clouds are all popped up on foam tape.

The stamped sentiment is from the same stamp set as the frog.


On the inside of my card, I added another cloud and stamped my sentiment onto it. I'm debating as to whether I should add a sun in the corner, too.


This card uses an NBUS leaf stencil, so I'm also entering this one into challenge #17 on the NBUS blog.

My flower is four sun die-cuts layered up so that the "petals" are in alternate positions. I've added some dark brown fun flock to the center of my flower, hoping it will look a little like those centers on coneflowers. The sentiment is also a die-cut, and I've added a few iridescent sequins.

Here's a little closer look at all the dimension of my flower. 


On the inside of this card, I have stamped a sentiment that I like, but have rarely used. It usually doesn't seem to fit the occasion, but I thought it worked out fine for this card.

That's it for me today. We'll have a quiet weekend, I'm sure. The one thing I miss a lot during this time of social distancing is going to the movies. We used to go almost every weekend. Watching movies at home just isn't the same!

I hope you have a good weekend wherever you are. Thanks so much for stopping by, and remember to laugh--a little or a lot--every day.

Cheryl

Wednesday, August 19, 2020

Pretty frames...

 The In Love Art shop sent me the prettiest set of Wavy Square Frame dies. I really love them! If you like them, too, you can get them here. And don't forget to use the 15% discount code:

G-21840

Here are the cards I made with this set.

As delicate as these frames are, they cut beautifully. I took a little extra care getting them out of the die, but it really wasn't hard at all.


I wanted to add a little variation in color to my die-cut flower. I decided to use a white colored pencil and add some white to the center of my flower, bringing it out at least half way towards the edge of each petal. I loved the results.


On the inside of my card I added a die-cut flourish that was cut from the same cardstock I had used for my flower. I also added a stamped sentiment using purple ink.


This is the second card I made. It's not as long as one of the popular slimline cards, but it is longer (nearly 8 inches) than a normal card. 


Each of my squares is popped up on foam tape to add some dimension. I used spray adhesive to glue down each of my wavy frames on both these cards.


The inside is pretty plain--just a pale pink mat with a stamped birthday greeting.

The stars of these cards are those delicate frames. I'm looking forward to using them...a lot!


Today I finished filling my card rack for the thrift store. I got most of the cards priced, until I ran out of pricing stickers. I will finish them up after I take the entire rack to the store tomorrow. I haven't told them that I'm bringing them an entire rack of cards. I am hoping they will be pleased. In the past I have taken only 6-10 cards in at a time. 

Thanks so much for stopping by, and remember to laugh--a little or a lot--every day.

Cheryl

Monday, August 17, 2020

Sweet little heart die...

 I received a few more dies from In Love Arts and one that I really enjoyed using was a sweet little hearts die. You can find it here on their site. They are once again allowing me to offer my readers a 15% discount using this code:

G-21840

I am continuing to make cards for my "rack of cards" to sell at the thrift store and noticed that I didn't have hardly any baby cards for it. This little hearts die inspired me to make this simple card.

I stamped the word "Precious" onto my stitched oval before I embossed it with one of those 3D embossing folders. Then I added my little hearts image and a popped up, heat-embossed sentiment, "little one." A few gems finished off my card front.


On the inside of my card, I used a couple more stamped sentiments from a really old baby-themed set of stamps I have in my stash. 


I also made a little tag to go with the card using my hearts die. This time I simply punched a 1/8" hole in it and added it with some twine.  "For You" was stamped on some coordinating cardstock, cut out with a small circle die and popped up on my tag.


The next card that I made was a Valentine. This card was simple and quick to make, but the little hearts, cut from glitter cardstock, added the right amount of glitz to make it special. 

On the inside, I stamped "Happy Valentine's Day" and added three small punched hearts, cut from the same DP as was used on the front.

I'll have a few more cards made with In Love Arts stamps and dies that I'll share with you later this week. My stash of cards is building up pretty quickly now!

It's going to be a beautiful day here today, so I really need to get outside and enjoy the weather. Heaven knows, we will have piles of snow and icy sidewalks soon enough. There's never a dull moment when it comes to Minnesota weather!

Thanks so much for stopping by, and remember to laugh--a little or a lot--every day.

Cheryl
Friday, August 14, 2020

Gear up for a great day...

 I've been working on filling a rack with cards to sell at the thrift store. I will price them really low--most will be $2.00 or less, in order to make them really affordable. After all, a thrift store is supposed to be affordable, right? And it makes me happy to think that someone can get a handmade card for a low price.

Here is one of the cards I have made for my rack:

I've been making mostly flowery, feminine cards, but I figured I had better get my act together and make a few masculine cards, too.

I had the gear die set, so decided to make that the focal point. My sentiments (both front and inside) were computer-generated.

The cardstock that I used for the gear frame and extra gears is copper-colored with a metallic sheen.


Here's my interior sentiment. I was pretty proud of myself for coming up with this one! he he

I think it will work well for an older boy, particularly one who drives, or a grown man.

That's all I've got in the card department today.

We had a long line of strong storms work their way through Minnesota tonight. The tornado sirens went off just before the storm came through. We tend to sit up and take notice when that happens! Some funnel clouds were sighted outside the city, but there was no real damage other than a few downed trees and a loss of electricity for a few thousand residents. Thank goodness.

I hope you are all staying safe and healthy. Thanks so much for stopping by, and remember to laugh--a little or a lot--every day.

Cheryl