Wish List

Friday, April 29, 2022

Remember those "Peter Pan" collars?


I made three cards with "Peter Pan" collars for Mother's Day cards. If you do a search for them, you'll find lots of examples. The real Peter Pan-style collar is a bit more rounded, but still quite similar to what I created.


I used double-sided DSP and cut a piece that was slightly smaller than my card base.

I cut 1 1/2" down from the center point of the top of the piece.  After it was cut, I rounded both the corners that met in the middle.

Each collar half was rolled over a narrow strip of foam tape that held it down while also giving it some dimension.


Once that was done, I added a bow and three buttons. The buttons on this card were made using button dies. I cut several layers and glued them together.

For this one, I added real buttons. Each one was adhered with a glue dot.

I also stamped my sentiment in the middle of the card base above the collar.


This card also had die-cut buttons. I used baker's twine for what looks like the thread in each button.

I'm not sure why this card's bow looks so wonky. I guess it's been a while since I've tied ribbon bows!


Each card had a computer-generated sentiment on the inside.

I took these cards to the thrift store today, so we'll see if the customers like them.


And now for a bit of family news--my DH and I attended our first synchronized swimming meet this week. Three high school teams competed in the meet. It was so much fun to watch. Our granddaughter Polly is on her high school's synchronized swim team and absolutely loves it! I'm proud to say that Polly's team won the meet.


Polly is the swimmer in the center. She performed here with two other girls.

There were actually solo, duet, trio and team performances during the meet.


This was taken while they were performing. Polly is again in the center, and the trio is perfectly in sync!

Thanks so much for stopping by, and remember to laugh--a little or a lot--every day.

Cheryl


Tuesday, April 26, 2022

Using up some stash...

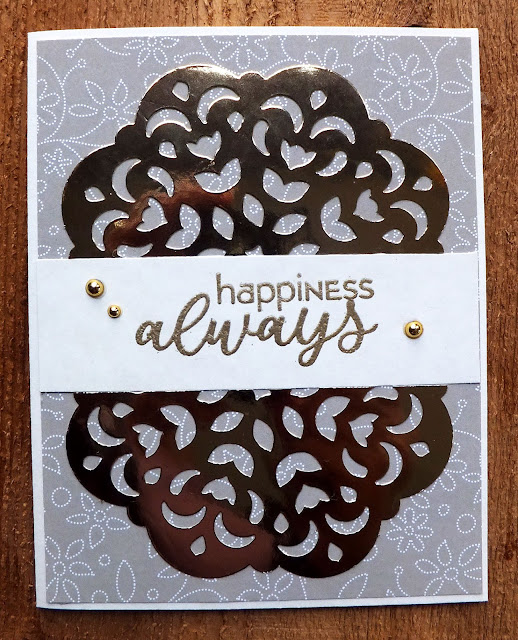
 I've had--for a few years--a small paper pack (4" X 4") that has some gold foil doily punch-outs included in its pages, and I really wanted to use them. I finally just took a couple of them out and made two identical cards.

I decided to make two anniversary cards for the thrift store. I cut each doily in half and glued each half to either side of a strip of ivory cardstock on top of a DSP panel. My card base was also made from ivory cardstock.

My sentiment was heat-embossed with gold EP onto my ivory strip. I also added a few gold half-pearls.


On the inside, I heat-embossed another simple sentiment.

As you can imagine, these were quick to make, and I had two of them done in no time flat!


Then, I looked at a random pre-made cardbase that had been laying on my work table for months. I NEED to use that up, I thought, but what could I do with it?


When you look at this card base, I'm sure you can understand why it took me so long to use it. With a pattern that large and uniform, how can you complement it?


I decided to use a little trellis-like die-cut (also laying on my desk for a couple of weeks) and add some climbing flowers to it. I was hoping they would sort of mimic the flowers on the card base.

I glued the trellis directly to the card base. Then I die-cut the climbing flowers twice out of white cardstock and colored them with alcohol markers.

After gluing them onto the trellis, I added a banner sentiment (another unused item on my desk!) over the point where the two die-cuts met.


On the inside, I cut and colored a couple little flowers and added a strip sentiment (from my pile of strip sentiments) to finish the card.

I felt pretty self-satisfied, having used so many items from my stash for these cards. But then, two seconds later, reality set in and I realized I hadn't really made a dent. I promise to keep trying, though. LOL

Thanks so much for stopping by, and remember to laugh--a little or a lot--every day.

Cheryl

Friday, April 22, 2022

Flowers for Mother's Day...

I was able to put together a half dozen Mother's Day cards for the thrift store this past week and this is one of them.

I know it looks black, but the card base is actually a deep purple. I used a couple of stamps to create the sentiment on the white oval.


The flowers and leaves were cut with some unbranded dies that I purchased recently. I really like all the detail that is embossed into them.

I added some ink to the edges of the yellow flower and to the centers of the pink flowers.

The pink flowers have a tiny hole in the center of each layer, so I joined them together with a tiny green brad.


The inside of this card has a simple stamped sentiment. I was in a hurry so no extras on the inside of this one! When I looked at the photo, however, I thought I should have put one of the pink flowers inside, too.

Mother's Day cards always sell really well at the thrift store, so I will be making a lot of them.

My own mother passed away from brain cancer 30 years ago. She was only 68, so quite young by today's standards. I still have three elderly aunts that I try to remember each Mother's Day with a card. I've begun to think about what kind of card I'd like to make for them, but I haven't nailed it down yet.

Thanks so much for stopping by, and remember to laugh--a little or a lot--every day.

Cheryl

Tuesday, April 19, 2022

On to Mother's Day...

Since the next holiday we celebrate here in the U.S. is Mother's Day, I've begun making some cards for the occasion.

This pretty little teapot filled with flowers is from the same stamp set as the spray of flowers on the card in my last post. It was actually really fun to color--not too difficult and quick to finish.


I used my alcohol markers as well as some colored pencils. I think I'll stamp a few more of these and make them into cards for the thrift store.


I made this card as a z-fold with the white focal panel glued on just one side and hanging off the front.


When fully opened, the card looks like this. Easy, fun to make, and looks pretty impressive to those who don't make their own cards.

For this card, I colored my image first and then picked out my DSP. I think I'll reverse that order when I make my next card. Then, hopefully, I won't spend an inordinate amount of time looking for a DSP that coordinates with my image.

Today I met with the kitchen designer to help us get started on our new kitchen. She's taking measurements as I type this. It's so exciting! I'm actually going to start packing away seldom-used kitchen items and donating some never-used items tomorrow, which I think will be very cathartic. 

I'm also doing laundry today--not fun at all!

Thanks so much for stopping by, and remember to laugh--a little or a lot--every day.

Cheryl

Friday, April 15, 2022

An Easter card for next year...

I made 60-70 Easter cards this year (I should have taken an actual count), but most of them were donated. I'm happy to say, when I finished my volunteer stint at the thrift store yesterday, they had all sold but one. And who knows? Maybe that one will sell, too, before Sunday. 

I held one Easter card back for myself, however, to give me a little start on next year's Easter cards.

I had this flower stamp with its matching die, and I thought it would make a pretty focal point on a card. It's quick and easy to color, too. I'm not the best at coloring, although I do enjoy it, so it's a good one to practice on. The spray of flowers is easy to pop up on foam squares for a little added dimension.

I happened to have a section of self-adhesive pink border that was just long enough to fit across the bottom. That, along with a printed sentiment that was also popped up on foam tape, was all I needed to finish the card front.

I stamped a sentiment on the inside. I may still add a stamped flower, but I've got an entire year to figure out if that's what I want to do.

We had lots of wind and a bit of snow here today. The snow was not enough to even cover the ground--absolutely nothing compared to what they've gotten north and west of here. I have sisters in North Dakota who have received two feet of the white stuff, along with high winds! Having grown up there, I know what that is like. It's especially rough for the cattle farmers whose cows may be in the midst of calving right now. I pray it all works out okay for them.

Thanks so much for stopping by, and remember to laugh--a little or a lot--every day.

Cheryl

Tuesday, April 12, 2022

Silhouette Easter cards...

I made two Easter cards with my Silhouette Cameo. They were both exactly the same, so I'm sharing just one of them with you today.

I began making this card by cutting the design (122342 in the Silhouette Design Store) from some champagne-colored cardstock that had a nice sheen to it. I have found that cardstock with a sheen usually cuts quite cleanly on the Silhouette and works well for intricate designs.

Once the cutting was done, I scored and folded my card and then wondered what I could do to enhance the pretty design. 

I decided to cut a piece of cardstock that had a deep teal color on one side and white on the other side to exactly fit the entire front of my card. I covered the teal side with a double-sided adhesive sheet. Then I carefully adhered it to the back side of my card front so that the teal showed through the design.

Finally, I rubbed some clear glitter into all the open areas of the design on the front. That gave me a sparkly teal design that I loved!

I added a stamped sentiment on the inside, and my card was done!

I liked these cards a lot, but I had already made more Easter cards than I needed for this year. I decided to keep these two cards in my stash for next year and make some more of them whenever I have time, using different colors of cardstock behind the design. I feel pretty good having already gotten a jumpstart on next year's cards.

Exciting things are about to happen at our house! I had a fun conversation with a kitchen designer today. She is going to help us design a new kitchen that we hope to get started on very soon. I know it is going to be a lot of work (we'll have to get everything out of that room), it's going to be uncomfortable not having a stove or kitchen sink for a while, and the hammering will probably drive me to distraction, but I am SO looking forward to a clean, new, workable space. I'll keep you posted!

Thanks so much for stopping by, and remember to laugh--a little or a lot--every day.

Cheryl

Friday, April 8, 2022

Easter butterflies...

I am finally getting around to writing my usual Friday post. I had a second COVID booster shot and a second shingles vaccination shot on Wednesday. They told me I may be a little achy and tired on Thursday, and I was, so didn't get it written then.


 I made these two bright and cheery Easter cards and added them to my pile of cards to donate to the thrift store.

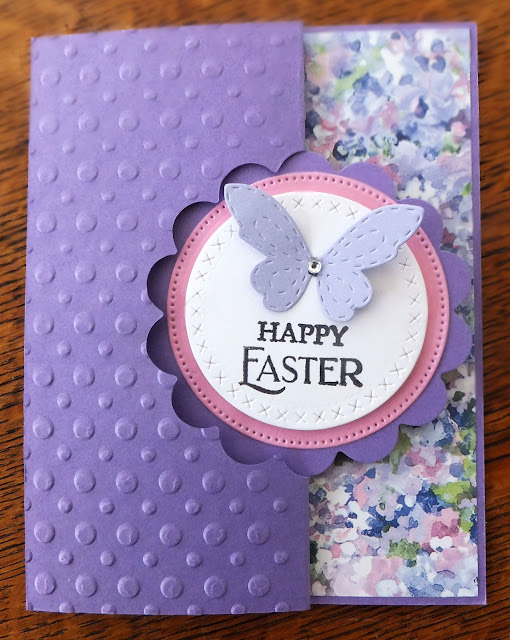
These were fun and quick to make, as they used two pre-made card bases that the thrift store had given me. These are Z-fold card bases, where the front is scored halfway across, down to the scalloped cutout. The panel on the right side then folds back onto itself. 

All I did to complete the cards was dry-emboss the front panel, add some circles and butterflies to the scalloped section, and then finish the inside.

Before adding the white circle, I stamped my sentiment and added some foam squares behind it to pop it up a bit.

This teal card was done exactly the same way.


My little butterflies were cut using one of my favorite butterfly dies. I love its simplicity and the stitching on the wings. A little gem was added to the center of each.


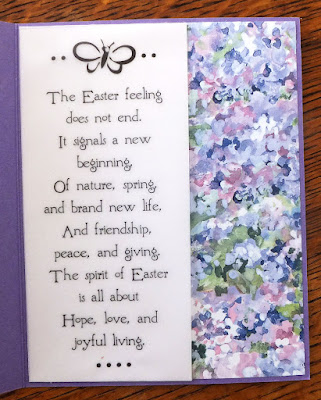
On the inside of the purple card, I added a sentiment on vellum that was in my stash. It was long enough that I could wrap the ends around a white piece of cardstock and adhere it. I realize there is no room for a signature, but I figured one could be added to the left inside panel of the card.

The teal card had a stamped sentiment on the inside, which I didn't bother to photograph.

We had an issue yesterday with our kitchen faucet--it quit working, in that we were unable to shut it off! Gary used the shut-offs (which were in the basement) to stop the flow of water. Since neither of us has any plumbing skills, I called my brother, who does. He came over today, installed a new cartridge, and--voila!--the faucet works perfectly! Bless him! I don't know what I'd do without him. I am so thankful he lives nearby and is so willing to help us out. 

Thanks so much for stopping by, and remember to laugh--a little or a lot--every day.

Cheryl

Tuesday, April 5, 2022

Let's Craft and Create challenge #182: Anything Goes or Beautiful Butterflies (use a butterfly)...


It's time for another fun challenge over on the Let's Craft and Create Challenge Blog. We always offer the option of Anything Goes, but this month we're also encouraging you to use a butterfly on your project. I have quite a number of butterfly stamps and dies, so I jumped right in and came up with two cards.

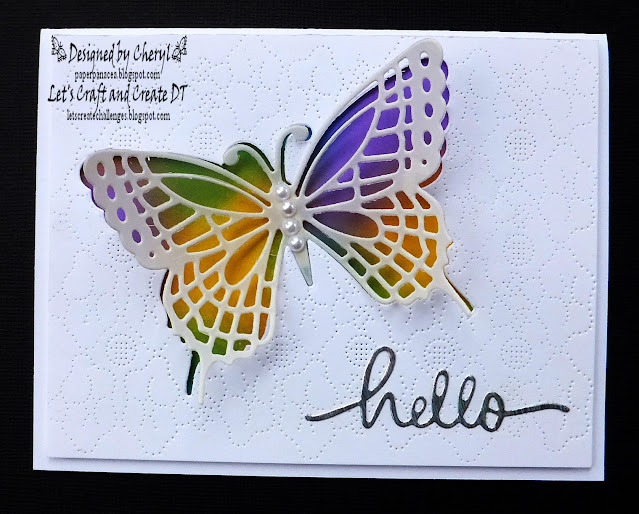
This card started with a white card base and a somewhat smaller white panel that I embellished with a pierced design cover die. I think these pierced designs add a nice, subtle texture to the background.


I cut a butterfly shape out of my panel using my largest butterfly die. I set that die-cut butterfly aside and cut another butterfly out of some heavy vellum paper.

I also used some Distress Oxide inks to randomly add some color to a small panel that I adhered to my card base behind the opening from the die-cut.

Once that was done I popped up my pierced panel with foam tape, glued my vellum butterfly in place with a narrow piece of foam tape behind the body, and also added a holographic die-cut sentiment.

A few pearls added to the body of my butterfly finished my card front.


On the inside I added a simple stamped sentiment.

I still had that original butterfly die-cut laying on my desk. I decided I needed to use it on another card.


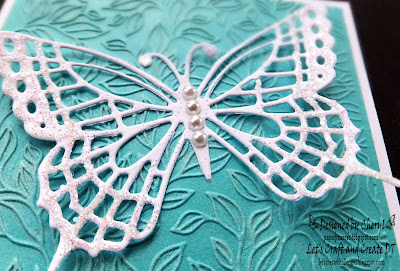
I began by dry-embossing the aqua background panel and applying some Perfect Pearls with my finger to the raised leafy outlines for some extra shimmer. To make sure the shimmer stayed in place, I sprayed the panel with a fixative before adhering it to my card base. It really doesn't show in the photos, but I assure you, the Perfect Pearls added a beautiful sheen to the leafy design.

I added glue to the body of the butterfly only and again placed a few pearls along the length of it. Because I love a little sparkle, I used my needle-nosed glue bottle to put a thin line of glue along some of the outer edges of the wings and then sprinkled them with white glitter.

"Happy Spring" was stamped on white cardstock and cut out with a pierced-edge die before I popped it up on foam tape.


Finally, I used a stamped sentiment on the inside.

I hope you'll join us this month and share your creations at Let's Craft and Create. The Design Team will inspire you with their beautiful projects. Just click HERE to see them all.

Thanks so much for stopping by, and remember to laugh--a little or a lot--every day.

Cheryl
Friday, April 1, 2022

Easter egg shaker cards...

I made five shaker cards for Easter. I've only kept one of them for my own use--the rest were donated--but they were fun to make.

I started by choosing some pale cardstock colors and stamped five panels with an Easter background stamp in a somewhat darker color.


I cut the back piece of each shaker out of the pale cardstock I had stamped on. Then I chose a darker shade as a mat for the stamped panel, and also for the shaker edge and bow.

I used coordinating alcohol markers to add a little dimension to the bows.


I also cut the shaker's outer edge from Dollar Tree foam board to give the added dimension needed so my sequins could move around.

Looking through my scrap acetate (most of it from packaging materials), I found a piece that was big enough and sturdy enough to use as the clear cover piece for each shaker. 

The shaker pieces--backer, foam board edge, acetate cover, cardstock edge and bow--were adhered together with a special glue. It's called Beacon 3-in-1 Advanced Craft Glue. It seems to work well on embellishments, hard-to-glue items and mixed materials.

On the inside of each card, I added a stamped sentiment and an Easter egg stamped in the appropriate color.

I thought these cards would work well for grandparents to give to their grandchildren, so I hope they sell well at the thrift store.

Workers were here today tearing the brick and stucco off the lower 5 feet, or so, of the front of our house. We are having some work done to repair and waterproof it. I will be so glad when it is done so that we can put in some new plants and flowers. Of course, the best outcome will be that we will not have to worry about continuing water damage when the rains come.

Thanks so much for stopping by, and remember to laugh--a little or a lot--every day.

Cheryl

P.S. Don't get fooled today!