Wish List

Monday, August 5, 2024

Let's Craft and Create Challenge #210: Anything Goes or Grey with One Other Color...


It's time for challenge #210 over on the Let's Craft and Create blog. Your creation can be defined as "Anything Goes" or you can opt for "Grey with One Other Color."

I thought it would be fun to create a card using grey with one other color. I decided to make a Christmas card because I am woefully behind in getting them made. For my "grey," I used some silver metallic cardstock and some silvery glitter cardstock. I chose a couple different shades of pink to pair with the silver.

I started by creating a slimline card base that measures 7 1/2" X 3 1/2". Then I cut three small recteangles from a darker pink cardstock that would fit evenly across the front of my base, leaving about 1/4" spacing on all sides. I heat-embossed a few snowflakes on two of them. 

Each small pink rectangle was matted with silver cardstock before it was glued to the card front.

I also die-cut a banner out of the lighter pink cardstock and heat-embossed "Happy Holidays" on it. It was adhered to the card with dimensionals.


I cut three snowflakes in graduated sizes--two from a silvery glitter cardstock and one from the same cardstock as the banner and card base. I layered them up and added a flat-backed gem to the center.


I heat-embossed a sentiment for the inside and added a few snowflakes that had been die-cut from some more of the silvery glitter cardstock that I had used for the other snowflakes.

I was pleased with how my pink and silver card turned out. Now I'm looking forward to seeing your creations. Head over to Let's Craft and Create and check out what the Design Team has posted to inspire you.

Thanks so much for stopping by, and remember to laugh--a little or a lot--every day.

Cheryl

Friday, August 2, 2024

Thinking of you in black and white...


Sometimes black and white is just the right combination of colors for a card. I liked the pretty floral pattern, and the black strip was perfect for focusing attention on the intricate butterfly.


The butterfly is one that has been hanging around in my stash for a while. I added a few Nuvo Drops to the body for a little extra dimension.

The sentiment had also been in my collection of sentiments for...well...who knows how long. It seemed perfect for this card, so I popped it up with a little foam tape and added three Nuvo Drops beneath it.


On the inside I stamped a sympathy sentiment. I know that sometimes it's very hard for people to express their sympathy in their own words, so a stamped sentiment gives them a little help.

We had two of our teenage grandkids over for dinner tonight. It is so much fun to talk to them about their dreams for the future and what direction they want to go in the coming years. It reminds me of my high school and college years and how exciting life can be when you're on the brink of adulthood. Remember those days?

Thanks so much for stopping by, and remember to laugh--a little or a lot--every day.

Cheryl


Wednesday, July 31, 2024

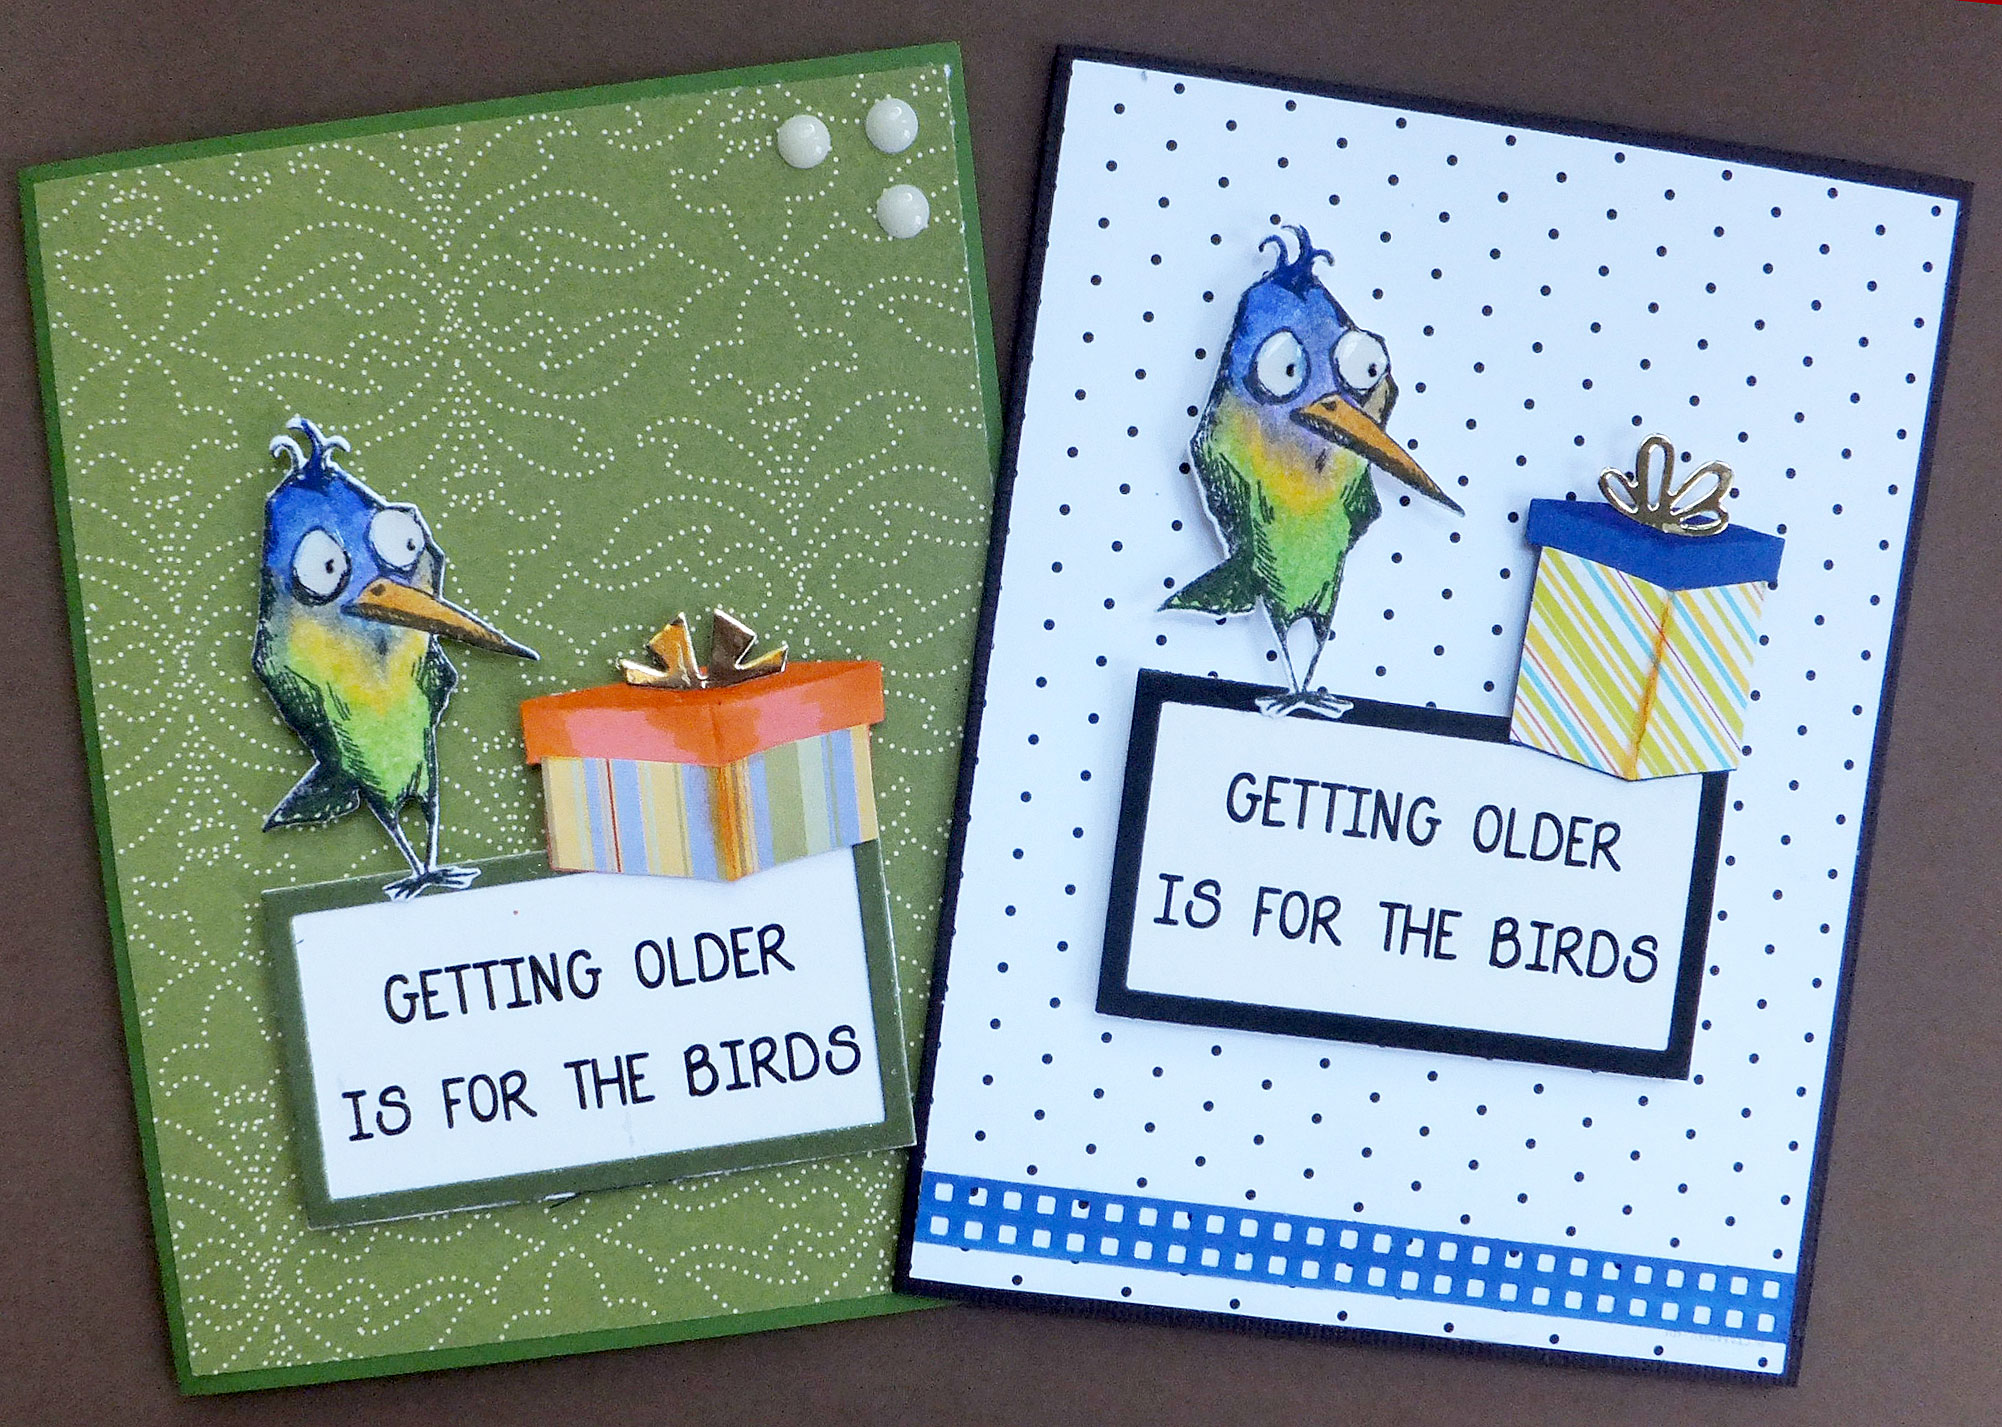
Getting older is for the birds...

 Recently, I made a couple of cards that I thought would work nicely for both men and women. 


I stamped the birds, colored them using some colored pencils and odorless mineral spirits, and then cut them out with the coordinating dies. In looking at the photo, I should have gone around the edges with a black marker. The dies cut pretty close to the outline, but they still leave a tiny margin of white. Oh well, next time.

The gifts were cut using dies from a little set that is just gift boxes and bows in different shapes and sizes. It's very handy for cards like this!


All three items--bird, gift and sentiment--were popped up on dimensionals. 

The blue strip embellishment was created with a border punch and a scrap of blue cardstock. It was glued directly to the DSP.

I added three enamel dots to the first card and some Glossy Accents to the eyes of both birds.


I printed this sentiment with my computer and used it on the inside of both cards.

The customers at the thrift store seem to love buying humorous cards, but it's a little harder for me to come up with ideas for them. I guess  should make a few more of these, since they sold very quickly.

Thanks so much for stopping by, and remember to laugh--a little or a lot--every day.

Cheryl


Monday, July 29, 2024

A couple of get well cards...


These are both simple cards, made with some DSP and die-cuts. This one features a vase I had cut from a linen-like piece of cardstock and a die-cut sprig of leaves.


I inked around the edges of the vase before popping it up on dimensionals.

The sprig of leaves, and the single leaf, were glued directly to the DSP.

The sentiment had been laying on my desk. It was already several layers thick, so it didn't need any popping up.


This is the sentiment I stamped on the inside.

When I was finished with this card, I thought I should make one that would be a little more masculine. After all, guys get sick, too!

I felt the next card would fit this purpose.


This card has a little more out-doorsy feel to it with the cattails die-cut.


I popped the top of each cattail up with a thin strip of foam tape.

The stamped sentiment was cut with a really old Spellbinder's die. It has two parts, the frame and the insert. 

I thought it worked nicely for this card. I added some gold Nuvo Drops to each end of it.


For the inside I chose a stamped sentiment that I thought would be a bit more masculine, too.


I went out to our flower garden on Saturday and picked a few blooms to bring inside. It's so hot out right now that we don't spend much time out there, and I like to enjoy the flowers when I can. My DH took a photo of them on our dining room table, so I thought I'd share his picture here.


Thanks so much for stopping by, and remember to laugh--a little or a lot--every day.

Cheryl

Friday, July 26, 2024

A fun and fancy birthday cake...


I used a fun die and stencil set to create this fancy birthday cake. I first used the stencils to create the flowers and the candles. Then I cut them out with the coordinating dies.


I also cut the cake stand out of silver holographic cardstock with a die in the set. I could have cut out dimensional pieces to add to it, but I found that using a stylus on the back of the cardstock while it was still in the die created the detail I wanted.

The candles were glued directly to the card. The cake and cake stand were popped up on dimensionals.

I stamped the sentiment, cut it out with a die and matted it. I had a couple of tiny translucent flower stickers on my desk, so I added them, along with a couple of gems.


This was a top-folding card, and here's a photo of the sentiment I stamped on the inside.

I've been trying to think of other ways to use this set. I think it could be a wedding cake (with no candles). 

I also think I could use some flower stamps to stamp the cake with Versamark ink and heat emboss with gold embossing powder. Then, if I added "50" on the cake or somewhere on the card front, it could be a golden wedding anniversary card (again, no candles).

I've also thought of cutting the cake out of DSP and adding dimensional details with Nuvo Drops.

Now if I can just find the time to try all those ideas!

Thanks so much for stopping by, and remember to laugh--a little or a lot--every day.

Cheryl
Wednesday, July 24, 2024

Happy Anniversary...


I was in need of a few anniversary cards to donate to the thrift store so I came up with this design.

I wanted to use this pretty paper that included shades of purple, yellow, blue and teal. I chose a coordinating solid cardstock to pair with it.

I created a card base by cutting 1" off the righthand side of the A2 card front. Then I added a piece of the pretty DSP that was 3" X 5 1/4". On the inside of the card, I added a strip of a solid cardstock that was 1" X 5 1/4".

Finally I added a shaped die-cut on which I had adhered my stamped sentiment (also die-cut) and a few gold flat-backed pearls. I placed the sentiment shape at the visual center of the A2 card, which meant it hung over the card front just a bit.


This card was made exactly the same way, using different papers, of course.


This is the sentiment I stamped for each card on a white piece of cardstock that measured 3" X 5 1/4". I adhered it on the inside, butted up to the 1" strip of solid color cardstock. You could stamp directly onto the card base, but I prefer to add the white cardstock. I feel it gives the inside of the card a more finished look.

This card design is great for using patterned papers from a 6" X 6" pad. Since you only need a 3" wide piece for the front, you can make two cards with only one sheet. I hope you'll give it a try!

*****

We had our T'ai Chi class yesterday. I think we're finally getting the hang of it and able to anticipate quite a few of the moves. My DH and I are still pretty clumsy, though, compared to those who have been taking T'ai Chi for years. 

When I was looking at some videos on line to help me learn the forms, I realized there was often an apostrophe in T'ai, and I wondered why.  I looked that up and found that the apostrophe was used in the Wade-Giles system of transliteration for Mandarin Chinese. Then I had to look up what they meant by the "Wade-Giles system of transliteration for Mandarin Chinese." Oh, boy, I think I just fell down a rabbit hole!

Thanks so much for stopping by, and remember to laugh--a little or a lot--every day.

Cheryl


Monday, July 22, 2024

It's time to PARRRRTAY!...


Not long ago I purchased a die and stencil set for party hats. Since I love to stencil and I love to die cut, it was perfect for me! The stencils include different designs for the party hats and the dies feature different edge fringes and pom poms.


The hats are quite large so two of them pretty much fill up an A2 card front.

I plan to make some slimline cards in the future so I can use at least three party hats on a single card.

Glitter cardstock works great for the fringes and pom poms. There are several different dies to choose from and they can be layered up for lots of dimension.

I glued the blue/white party hat directly to my card front and popped the white/silver one up on dimensionals.

The sentiment was stamped directly onto the card front.


I stamped two different sentiments on the inside. The top sentiment was an open font, so I colored it in with a yellow colored pencil to tie into the yellow card base.

I plan to use this die and stencil set again in the near future and maybe use some more dramatic colors. I think magenta and black would be eye-catching, don't you?

I also want to try die-cutting some hats from patterned paper, rather than stenciling them. It would be a great way to use up some of my unending pile of scraps.

 This weekend, my grandson became the Minnesota State Champion in the 200 backstroke at the Long Course Senior State Meet in Rochester. He will only be a Junior in High School this coming year and already has college swim coaches calling him from across the country. It's so exciting to watch him swim!

Thanks so much for stopping by, and remember to laugh--a little or a lot--every day.

Cheryl