This card is a Mother's Day card, but could be changed to suit many other occasions.
Once again, I used one of my sister's dies - Park Bench by Spellbinders - as my focal point. I added the decorative border on the left (Cuttlebug Ornamental Iron die) and some tulips, which are a border cut from the "A Walk in my Garden" cartridge.
I think this little bench is so cute. I cut it out in a couple different colors of cardstock, but I really like it best in black. I think it looks like a wrought iron bench.
The inside of my card is pretty simple with just a matted border for decoration. My sentiment was computer-generated.
I'm entering this card into Challenge #251 - May Flowers over on the Fantabulous Cricut Challenge Blog.
Do you notice that yellowish cast at the bottom of my photo? That's the reflection from the little wooden stand that my card is sitting on. I would have retaken these photos, except this card had already been sent by the time I realized this problem. Lesson learned: Cover this little stand with something white!
I still have a couple of Mother's Day cards to share this week. Even though this holiday has come and gone, I think the designs of Mother's Day cards are easily used for birthdays, thinking of you and other purposes.
Did you have a nice Mother's Day? My day was lovely. I spoke by phone to my three kids who live in other parts of the country and spent some time at my daughter's home who lives blocks from me. I also had the chance to go to the plant store and buy some flowers for my planters and flower beds. Now I just need to get them all planted!!
Thanks so much for stopping by, and remember to laugh--a little or a lot--every day.
Cheryl
Monday, May 11, 2015
Thursday, May 7, 2015
A very colorful thank you...
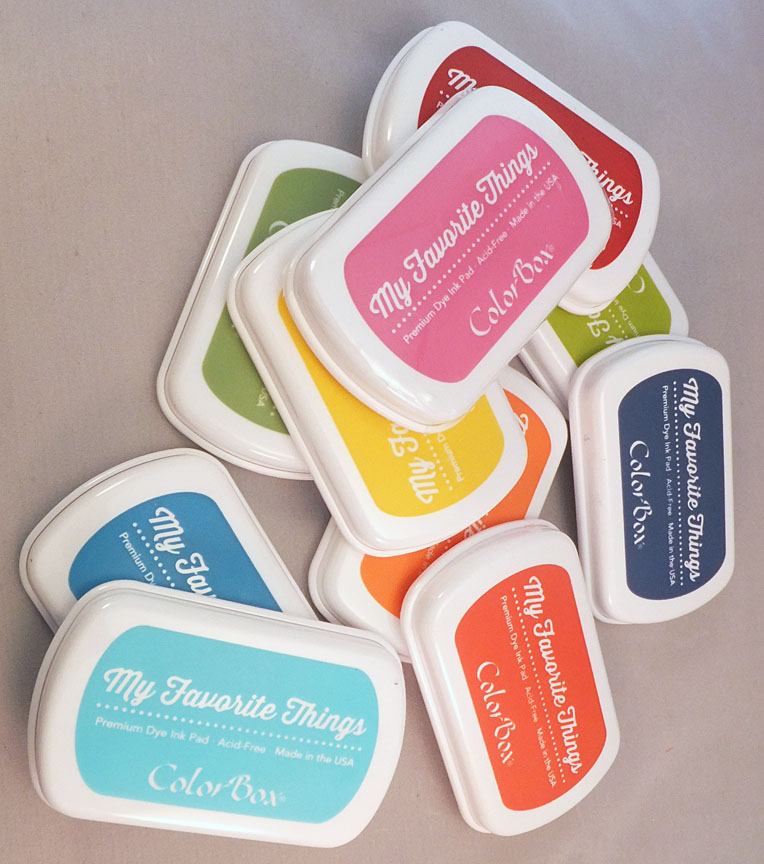
I recently won this lovely selection of My Favorite Things ink pads from Kathy Racoosin of The Daily Marker. THANK YOU KATHY and MFT!!! Kathy is a fabulous artist, colorist and card maker. If you don't already follow her blog, you should! I get so much inspiration from her.
I couldn't wait to try out these lovely inks, and the first card I made was this one:
I chose several of the ink colors and used a simple floral stamp set to stamp some brightly colored flowers onto glossy cardstock. Look at those fun, bright colors! These dye inks worked perfectly on my glossy cardstock, with no smearing. I used a small flourish from the same set to add some green to my background pattern.
I was hoping that the little rhinestones in the middle of my flowers would show up better on this angled pic, but you still have to look really hard to see them. They add some fun sparkle IRL.
At least you can see the rhinestones on my sentiment. This sentiment stamp is an older wood-mounted stamp - not sure of the manufacturer right now and too lazy to go find it again and look! LOL
On the inside of my card, I stamped some of the flowers and a few bits of the green flourish in a corner. Here, you can actually see the rhinestones!
We've had company from Germany for the last week, which is why I've been a bit slow in visiting some of the blogs I follow. They just left on a trip through Wisconsin, Illinois and Iowa, and will be back in a couple of weeks. Then, they'll stay with us for a final week before returning to Germany. It's been fun having them around. We just hope they're having as good a time as we are!
Thanks so much for stopping by, and remember to laugh--a little or a lot--every day.
Cheryl
I couldn't wait to try out these lovely inks, and the first card I made was this one:
I chose several of the ink colors and used a simple floral stamp set to stamp some brightly colored flowers onto glossy cardstock. Look at those fun, bright colors! These dye inks worked perfectly on my glossy cardstock, with no smearing. I used a small flourish from the same set to add some green to my background pattern.
I was hoping that the little rhinestones in the middle of my flowers would show up better on this angled pic, but you still have to look really hard to see them. They add some fun sparkle IRL.
At least you can see the rhinestones on my sentiment. This sentiment stamp is an older wood-mounted stamp - not sure of the manufacturer right now and too lazy to go find it again and look! LOL
On the inside of my card, I stamped some of the flowers and a few bits of the green flourish in a corner. Here, you can actually see the rhinestones!
We've had company from Germany for the last week, which is why I've been a bit slow in visiting some of the blogs I follow. They just left on a trip through Wisconsin, Illinois and Iowa, and will be back in a couple of weeks. Then, they'll stay with us for a final week before returning to Germany. It's been fun having them around. We just hope they're having as good a time as we are!
Thanks so much for stopping by, and remember to laugh--a little or a lot--every day.
Cheryl
Tuesday, May 5, 2015
Let's Craft and Create Challenge #101 - Anything Goes Male
It's time for a new challenge on Let's Craft and Create. This month's theme is Anything Goes Male. I know many of you find that making masculine cards can be difficult. I struggle with them, too, but this month's sponsor, the Cutting Café, has provided the Design Team with some fabulous patterns for a card and a box that are perfect for giving to the important men in your life.
I decided to create both a card and a box as a set for a Father's Day gift for my husband. First, here's a look at the card I made.
Isn't this a fun idea for a masculine card? I used a shiny, orange metallic paper for the main parts of the car, added some wood patterned paper for the doors, and used silver mirror and black cardstock for the remaining details. It was so easy to print and fussy-cut the various parts. An image of a sample card comes with the file so that you can see how everything fits together. The hardest part was choosing the papers!
Here's a peek at the inside of my card. It was easy to create a slightly smaller mat on which to print my sentiment. I inked the edges to give it a little definition.
Next, I made a coordinating box that looks like a book. It was so easy to create this box! I will use this pattern again and again, I'm sure!
I wanted to incorporate the same colors and some of the same papers from my card. I used the shiny, orange metallic paper for my faux keyhole and behind the diamond trim on my sentiment rectangle. I actually created the keyhole by hand. I cut out and embossed my rectangular shape (Spellbinders die). Then, I punched a hole (using a single hand-held hole punch) and used a craft knife to cut out the area below the hole. Finally, I backed my keyhole with some black paper and distressed it a bit to add a somewhat vintage look.
Can you guess where I used some of that wood-grained cardstock? Take a look at the next photo!
I used the wood grain on the sides of my box to give the suggestion of pages.
On the inside of my box, I made three compartments and filled them with some chocolate deliciousness (hoping my husband will share!).
Here's a final peek at both of my Father's Day creations.
I know you'll want to check out what the rest of the Design Team has created. Their projects are spectacular, and you are sure to be inspired!
Hazel
Karen
Mary
Maryvonne
Eileen
Catherine
Cheryl - That's me!
Ursula
Deborah
Please join us with a creation of your own. There is a fun prize from The Cutting Café up for grabs.
Thanks so much for stopping by, and remember to laugh--a little or a lot--every day.
Cheryl
Wednesday, April 29, 2015
Happy Mother's Day...
While my own mother passed away more than 20 years ago, I do have some important women in my life that I like to acknowledge on Mother's Day. Three of those women are my elderly aunts who are dear people and who have collectively given birth to 18 children!! And I have even more first cousins than that. We were a BIG family.
Even my own immediate family was super-sized - we were a family of eight (six kids, all born within nine years).
Anyway, here are a couple of the Mother's Day cards I have made:
Once again my sister let me play with one of her dies - a Spellbinders Die D-Lites flower die.
Isn't it great? So easy to cut out and layer up. I did ink the ends of the petals a bit, to add a little dimension and help them look more life-like.
I added a black gem flourish above and below the flower and used some Liquid Pearls to create the flower center.
On the inside of my card, I added another gem flourish and the same small punched heart that was on the fishtail banner on the card front.
Here's my second card using the same flower die The only thing different on this one is the black leafy die-cut instead of the gem flourish. This leafy flourish is a Die-namics die. I love it and use it quite a bit.
Once again I added some Liquid Pearls to the flower center. This time, though, before it dried, I sprinkled on some black glitter. It's sparkly and pretty IRL.
On the inside of this card, I simply added a matted strip of the DSP across the top. Do you think I should add a portion of that leafy flourish, too?
I've got a couple more Mother's Day cards to share with you, but I'll put those in another post
Thanks so much for stopping by, and remember to laugh--a little or a lot--every day.
Cheryl
Sunday, April 26, 2015
Sparkly, shiny Christmas ornament...
When my sister came to visit a few weeks ago, she brought along a few of her dies for me to play with. One of them was this ornament die from Marianne Creatables. Since purple is my favorite color, I just had to make some cuts with it from purple glitter paper.
My sentiment is a wooden stamp from the $1.50 bin at Michael's, and I used a Martha Stewart Pine Needles Edge Punch on my sentiment mat which helped create the illusion that the ornament is hanging on a tree.
I also used the MS Pine Needles punch on the inside mat. This inside sentiment stamp is by Penny Black.
I am entering this card into this week's Winter Wonderland blog challenge: Twinkle, twinkle (all things sparkly and bright).
I made some cards like this in more traditional colors, too, and here are a few pics of those:
Even though I made 10 of these ornament cards, I am still a bit behind on my self-imposed Christmas card schedule. I really need to get busy and make some more!
Thanks so much for stopping by, and remember to laugh--a little or a lot--every day.
Cheryl
This is the card I made with it. I backed the die with some shiny silver embossed cardstock and then used the "Precious Hearts" die by Memory Box to cut a bow and the "string." I added a sparkly silver enamel dot to the center of the bow.My sentiment is a wooden stamp from the $1.50 bin at Michael's, and I used a Martha Stewart Pine Needles Edge Punch on my sentiment mat which helped create the illusion that the ornament is hanging on a tree.
I also used the MS Pine Needles punch on the inside mat. This inside sentiment stamp is by Penny Black.
I am entering this card into this week's Winter Wonderland blog challenge: Twinkle, twinkle (all things sparkly and bright).
I made some cards like this in more traditional colors, too, and here are a few pics of those:
Finally, I ran out of the red and purple sparkly die-cuts, so I used one of my own ornament dies (Lifestyle Crafts, I believe) to cut another ornament for a couple more cards like this:Even though I made 10 of these ornament cards, I am still a bit behind on my self-imposed Christmas card schedule. I really need to get busy and make some more!
Thanks so much for stopping by, and remember to laugh--a little or a lot--every day.
Cheryl
Friday, April 24, 2015
Thanks a melon...
Recently, I was lucky enough to be selected as one of the winners of Taunya Butler's (Daisies Girl) many birthday giveaways during the 12 days leading up to her birthday on April 12. The little package that I received was chockfull of delicious Doodlebug products. I decided to use some of them to make a quick thank you card for Taunya.
One of the products Taunya included was the fruity Washi tape that you see at the top of my card. It was my inspiration!
I cut the word "melon" and my watermelon image from the Preserves cartridge. I added the "bite" out of my watermelon by using a small scalloped circle die. Some Diamond Glaze on the seeds made them look like real seeds!
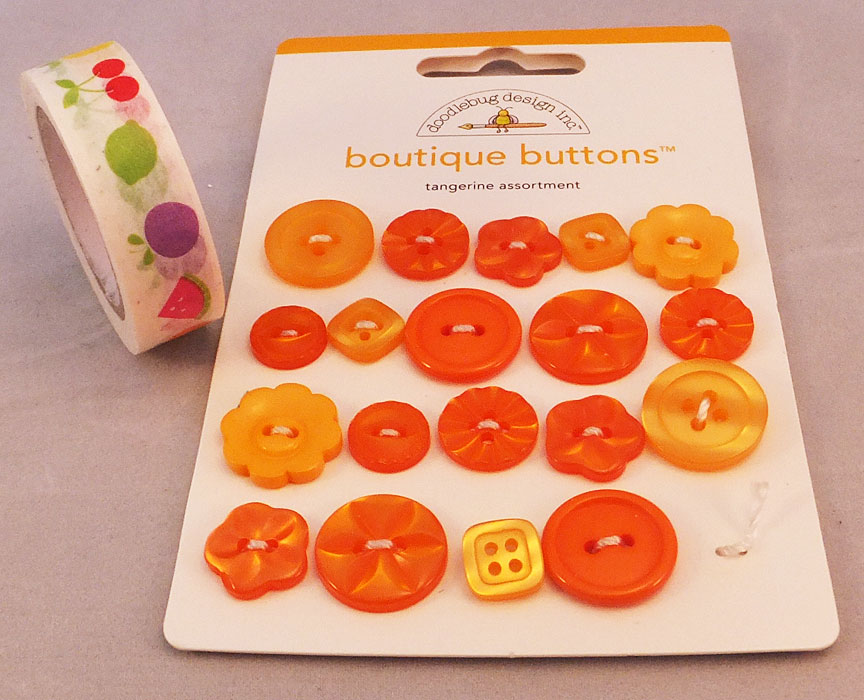
Here's a picture of the roll of Doodlebug Washi tape and some pretty buttons that were also part of my prize package.
The buttons are in shades of orange - not quite the color I wanted for my card. But - no problem! I just colored one of them with a red alcohol marker and it became the perfect shade!
See what I mean? The perfect color! A little green thread tied in a tiny bow was the finishing touch.
To decorate the inside of my card, I simply added a strip of that cute Washi tape. It was just the right touch of color and fun.
I'm entering this card into the Double-Click Skittles Challenge #20: Thank You or Teacher. Taunya is a big inspiration over on the Double-Click Skittles blog, too. Check it out!
Thanks so much for stopping by, and remember to laugh--a little or a lot--every day.
Cheryl
Thursday, April 23, 2015
Masculine thank you card...
Just a quick post from me today. I needed a masculine thank you card and just happened to have some of this map paper in my stash. I thought it would be perfect for a guy. My daughter had also given me some sheets of burlap - what's more masculine than that? I cut a banner shape and used my sewing machine to stitch it across the top to help keep it in place.
The encircled letters were some stickers from my stash. I added some Diamond Glaze to each one to make them a bit more substantial.
I created a couple of corners out of kraft cardstock and inked them with Frayed Burlap Distress Ink before adhering them to my two right-hand corners. If you look closely, you'll see that I also inked the edges of my burlap banner.
I left the inside blank so that I could write a personal note.
That's it for me today. See? Short and sweet!
Thanks so much for stopping by, and remember to laugh--a little or a lot--every day.
Cheryl
Subscribe to:
Posts (Atom)