This is the cute Halloween card I made for my two elderly aunts. They are dear ladies, and it does my heart good to bring a smile to their faces with my cards.
I stamped all the images, cut them out with coordinating dies and then colored them with markers. Even the ghost got a bit of light gray shading. Each one is popped up with a foam square.
The frame was cut twice--once from black cardstock and once from black foam core (from Dollar Tree) to help pop it up a bit.
I glued the cardstock frame on top of the foam core frame and then glued that to my card front.
On the inside I stamped a sentiment and another little ghost.
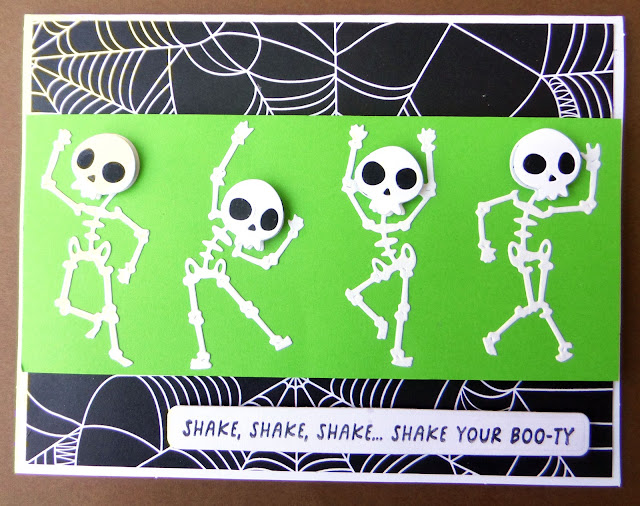
This card was made to donate to the thrift store, but I envisioned someone buying it for a young boy. I think boys would like all those dancing skeletons.
The green panel was popped up on foam tape, as was the sentiment.
I cut an extra skull for each skeleton, backed it with a scrap of black cardstock and popped it up with a dimensional.
I stamped a sentiment on the inside and added a little skeleton from my stash.
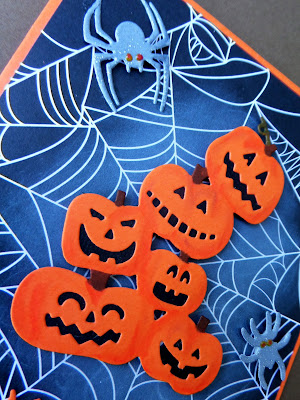
I started this card with an orange card base. I glued on the web-patterned DSP and then used a blending brush to add a little white ink to the center. "Happy Halloween" was die-cut and glued directly to the DSP.
The pumpkin stack was backed with black CS to better show the pumpkin faces. The whole stack was popped up with foam squares.
I added two spiders cut from gray glitter cardstock so that they'd show up against the dark DSP. I even gave them some red eyes with Nuvo Drops.
I had another little pumpkin laying on my desk, so I added it to the inside along with the stamped sentiment.
This card was my own creation, but I did see one that was similar in the card section of my local drugstore. I like to look at the cards whenever I stop to pick up a prescription or other supplies.
I started with a white A2 card base and used an arched rectangle die (A2 in size) to curve the top. There are 15 dies in the set (the A2 sized one is the largest).
Then I cut a top panel with the next largest die. I selected the second smallest die in the set to cut the arms into the panel, using the partial die-cutting technique.
The eyes were punched black circles with half a punched white circle for the lid. The mouth was cut with the smallest oval die I could find in my stash.
After adhering this panel to the card base, I put a dimensional under each arm to pop it up a bit and glued on one of those pumpkins that was still lying on my desk. The sentiment was printed with my computer and popped up with foam tape.
I finished this card with another die-cut panel on the inside and a stamped sentiment.
If you can stamd to look at one more photo, I thought I'd share one I took of the pretty trees on my street.
Thanks so much for stopping by, and remember to laugh--a little or a lot--every day.
Cheryl


5 comments:
You have made a great assortment of Halloween cards. These are all so cute. I can see little boys trying to copy those dance moves on the skeleton The ghost you designed is very creative. I've found inspiration at those card racks too.
You have made a great assortment of Halloween cards. I love all of these. You are right about little boys loving the skelet
Sorry I'm behind, but I just checked out all of your most recent Halloween cards. They are all so fabulous!! I love the AI witches images. Beautiful street you live on, too. The colors are so pretty this year.
Such great Halloween cards - I love the skeletons for boy cards. Love the picture f your beautiful street. I'm still waiting for our woods to turn "beautiful" has been a dry summer so it is taking a while for all the trees to turn.
These are all so cute! I think my fave is the one that you made for your aunts! This year, I haven’t made any Halloween cards! Next year, perhaps! Thanks for sharing!
Post a Comment