Wish List

Friday, December 27, 2024

Happy birthday, Lynette...

My crafty friend Lynette's (My Stamping Addiction) birthday is this week, and this is the card I made for her. I sent it to her well before Christmas, because I was afraid I'd forget to get it in the mail on time with all the holiday tasks and activities demanding my attention.
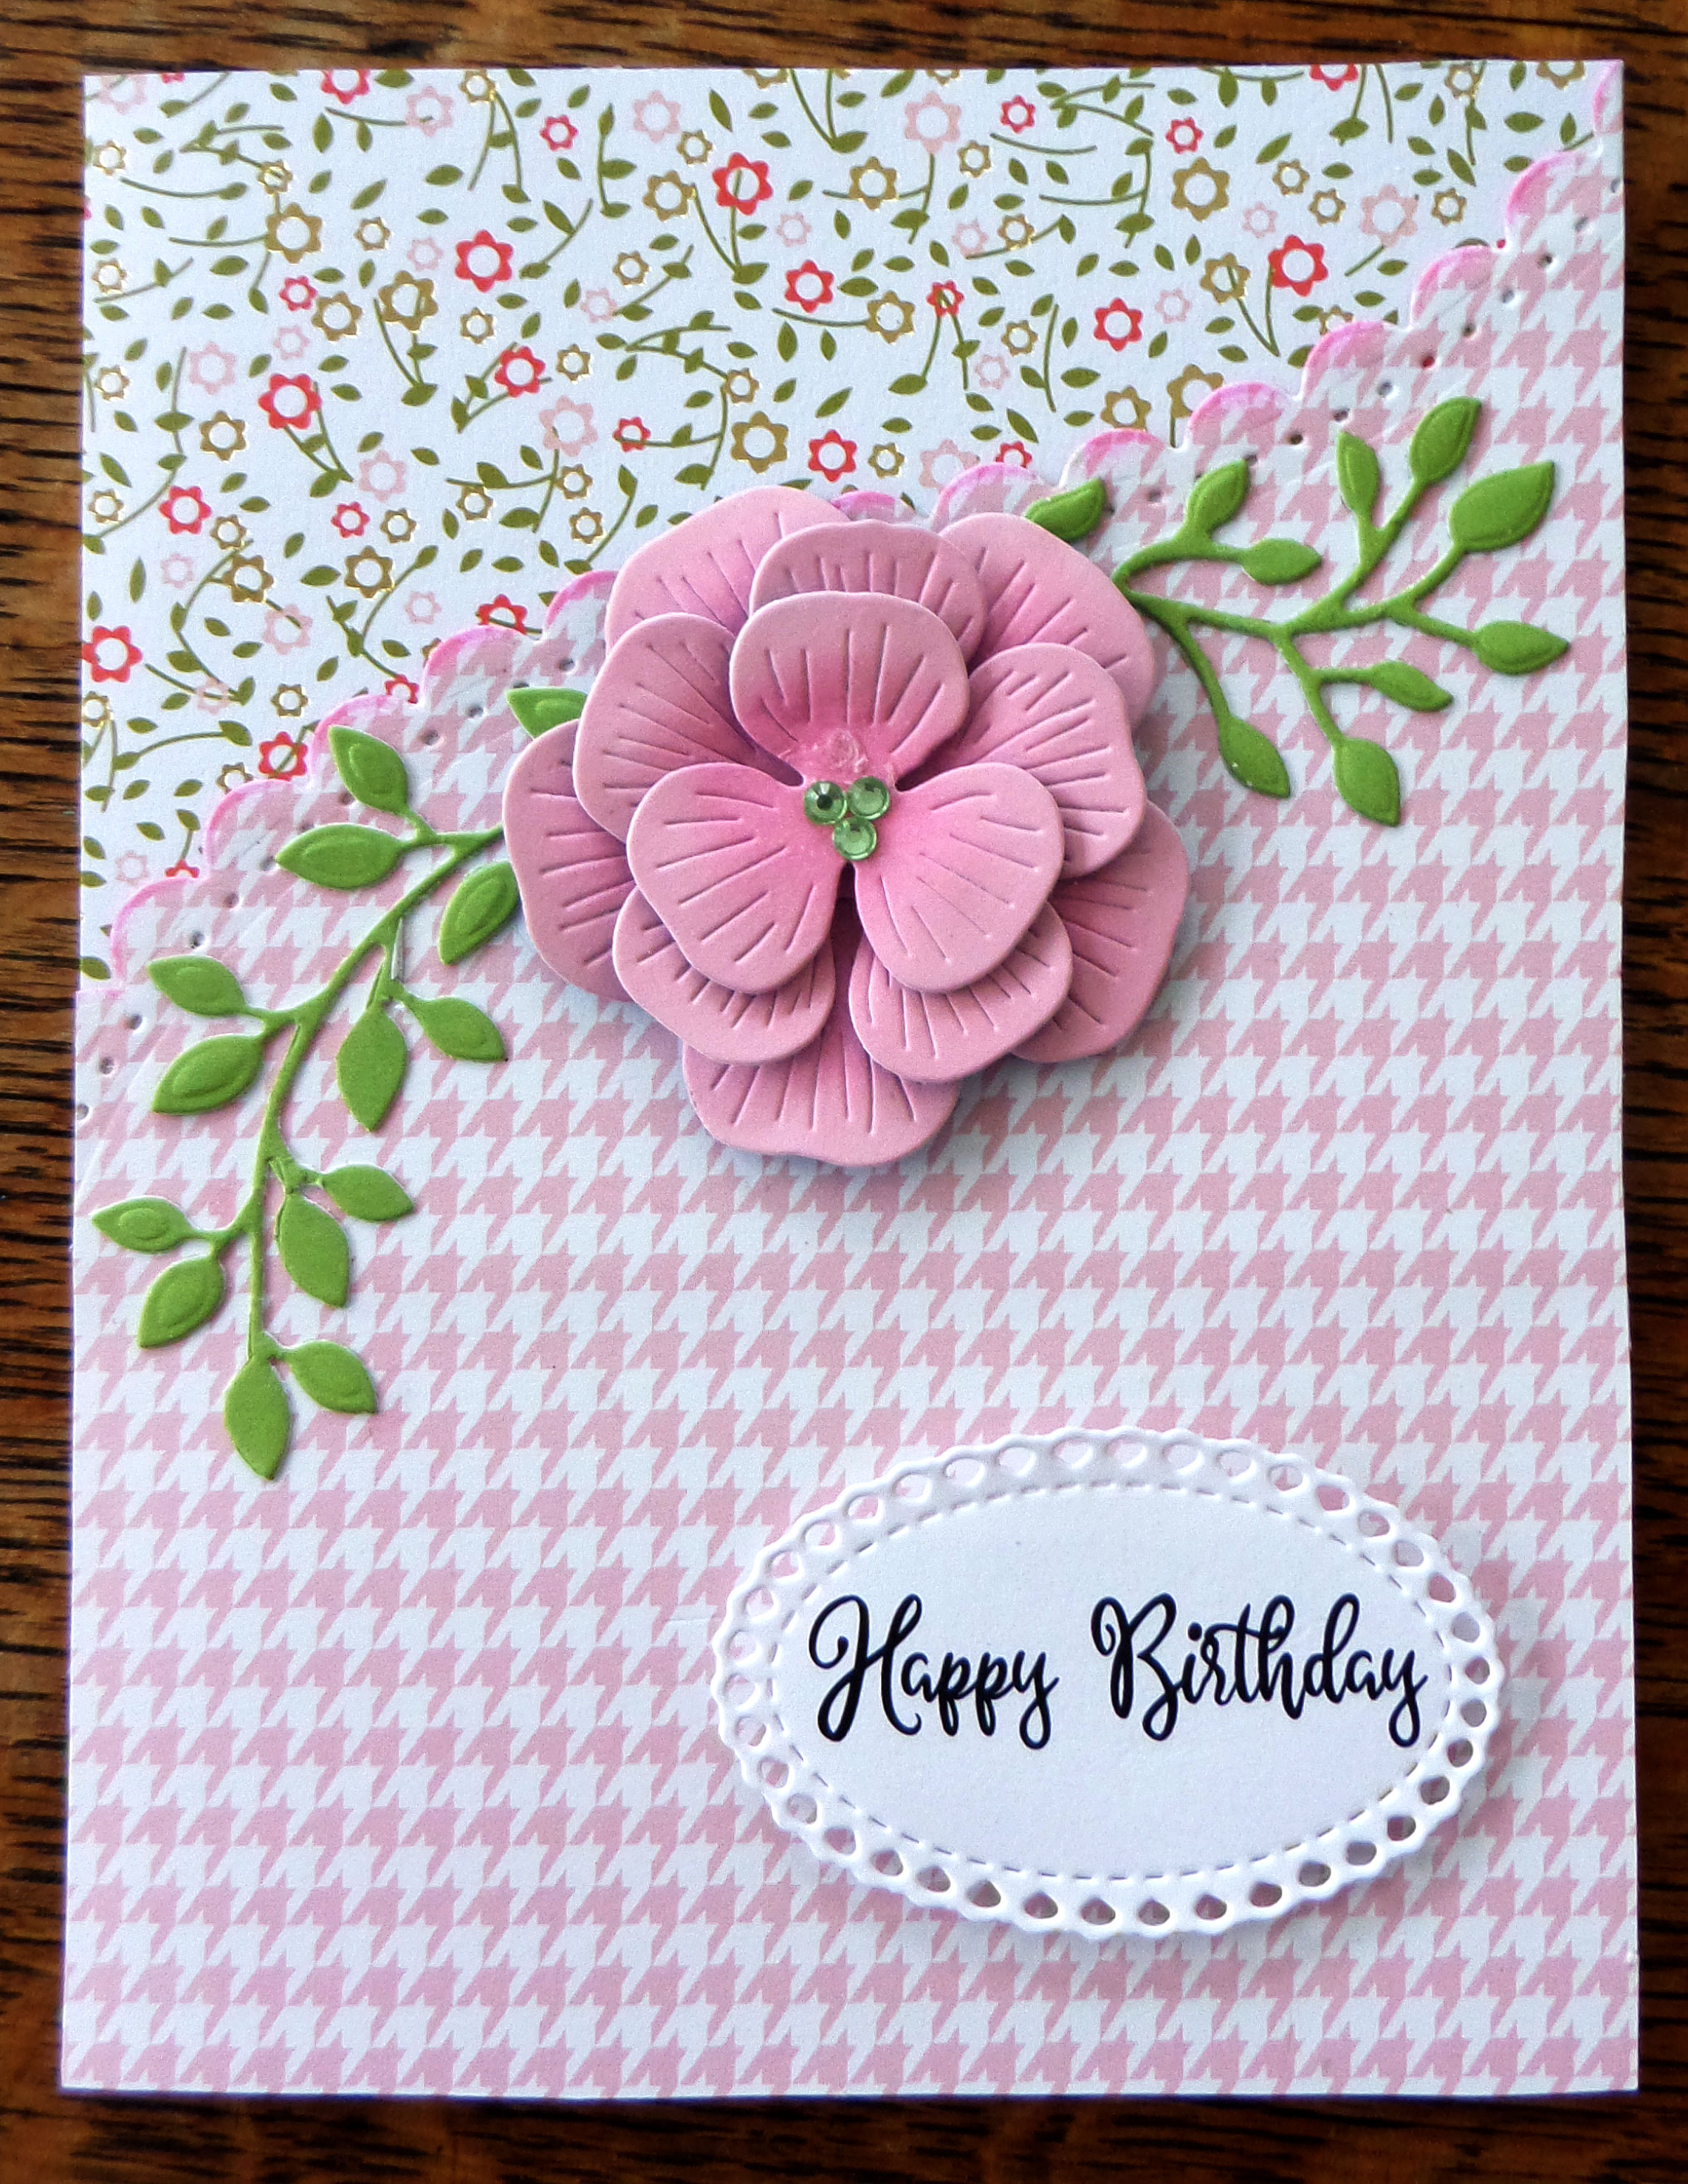
I used a border die to cut the curved, scalloped edge on the pink houndstooth-patterned paper. I sponged a little pink ink along the edge of those scallops to give them more definition.

The sentiment was stamped, die-cut, and popped up on some foam tape.


The flower was made from one of my favorite flower die sets. I added some darker pink ink to the center, but in looking at the photos, I think I should have used an even darker shade. The petals were each popped up with a small adhesive square.

After adding the leafy sprigs on each side, I glued three tiny green gems in the center of the flower.

I stamped a sentiment on the insde and added a bit of embellishment at the bottom with a single layer of petals and some leafy sprigs on another piece of the scallop-edged houndstooth paper.

Lynette is an awesome crafter. She not only makes beautiful cards, but she has generously donated hundreds upon hundreds of them to the thrift store where I volunteer and also donate my cards. Together, we keep the card basket filled, even though it sells out almost every week.

THANK YOU, Lynette. I hope you have a wonderful birthday and are treated like a queen! May the coming year be filled with blessings for you.

Thanks so much for stopping by, and remember to laugh--a little or a lot--every day.

Cheryl

Wednesday, December 25, 2024

Wishing you JOY, today and always...


This was a quick holiday card I made using a factory-made card base.

The letters were die-cut and popped up with thin foam strips. You can see them under the "Y" in the picture at left.

A gem was glued in the center of the snowflake.


A stamped sentiment on the inside was embellished with three punched snowflakes.

I wish you joy this holiday season and throughout the year.

Thanks so much for stopping by, and remember to laugh--a little or a lot--every day.

Cheryl

Monday, December 23, 2024

Gifts for the grands...

Since all of my grandchildren are in their teens or 20s, we now give them money for Christmas and their birthdays. That way they can buy what they want and not feel obliged to say "thank you" for something they really didn't want.

I always try to give them money in interesting ways. You can see a fun way I gave money for a previous Christmas in this post. Just scroll to the end of the post to see what I'm talking about.

This Christmas I decided to design and create a "tri-panel packet" for each of our ten grandchildren.

Here are four of the ten that I made:

They each measured 4" W X 6" H X 1/2" D and were tied shut with ribbon or gold cord that was attached on the back. 

I used nearly an entire sheet of 12" X 12" cardstock for each one, as I had to adhere two pieces together to get the 13" length that I wanted. I also needed several pieces for the pockets on the inside.

ETA: The two pieces that I adhered together measured 6" X 9" (scored at 4", 4 1/2", and 8 1/2") and 6" X 4 1/2" (scored at 1/2"). After reinforcing your folds, you will see that you have a 1/2" section on the right-hand side of the longer piece and a 1/2" section on the left-hand side of the shorter piece. Those two 1/2" sections are glued together, ensuring the "seam" is toward the back of the packet.


1

When you open the top panel, this is what you see on the right side - a heat-embossed sentiment with space for a brief note and our signatures. This is actually the back of the inside right panel.

When the panel above is flipped to the right, this is what you see on the inside:

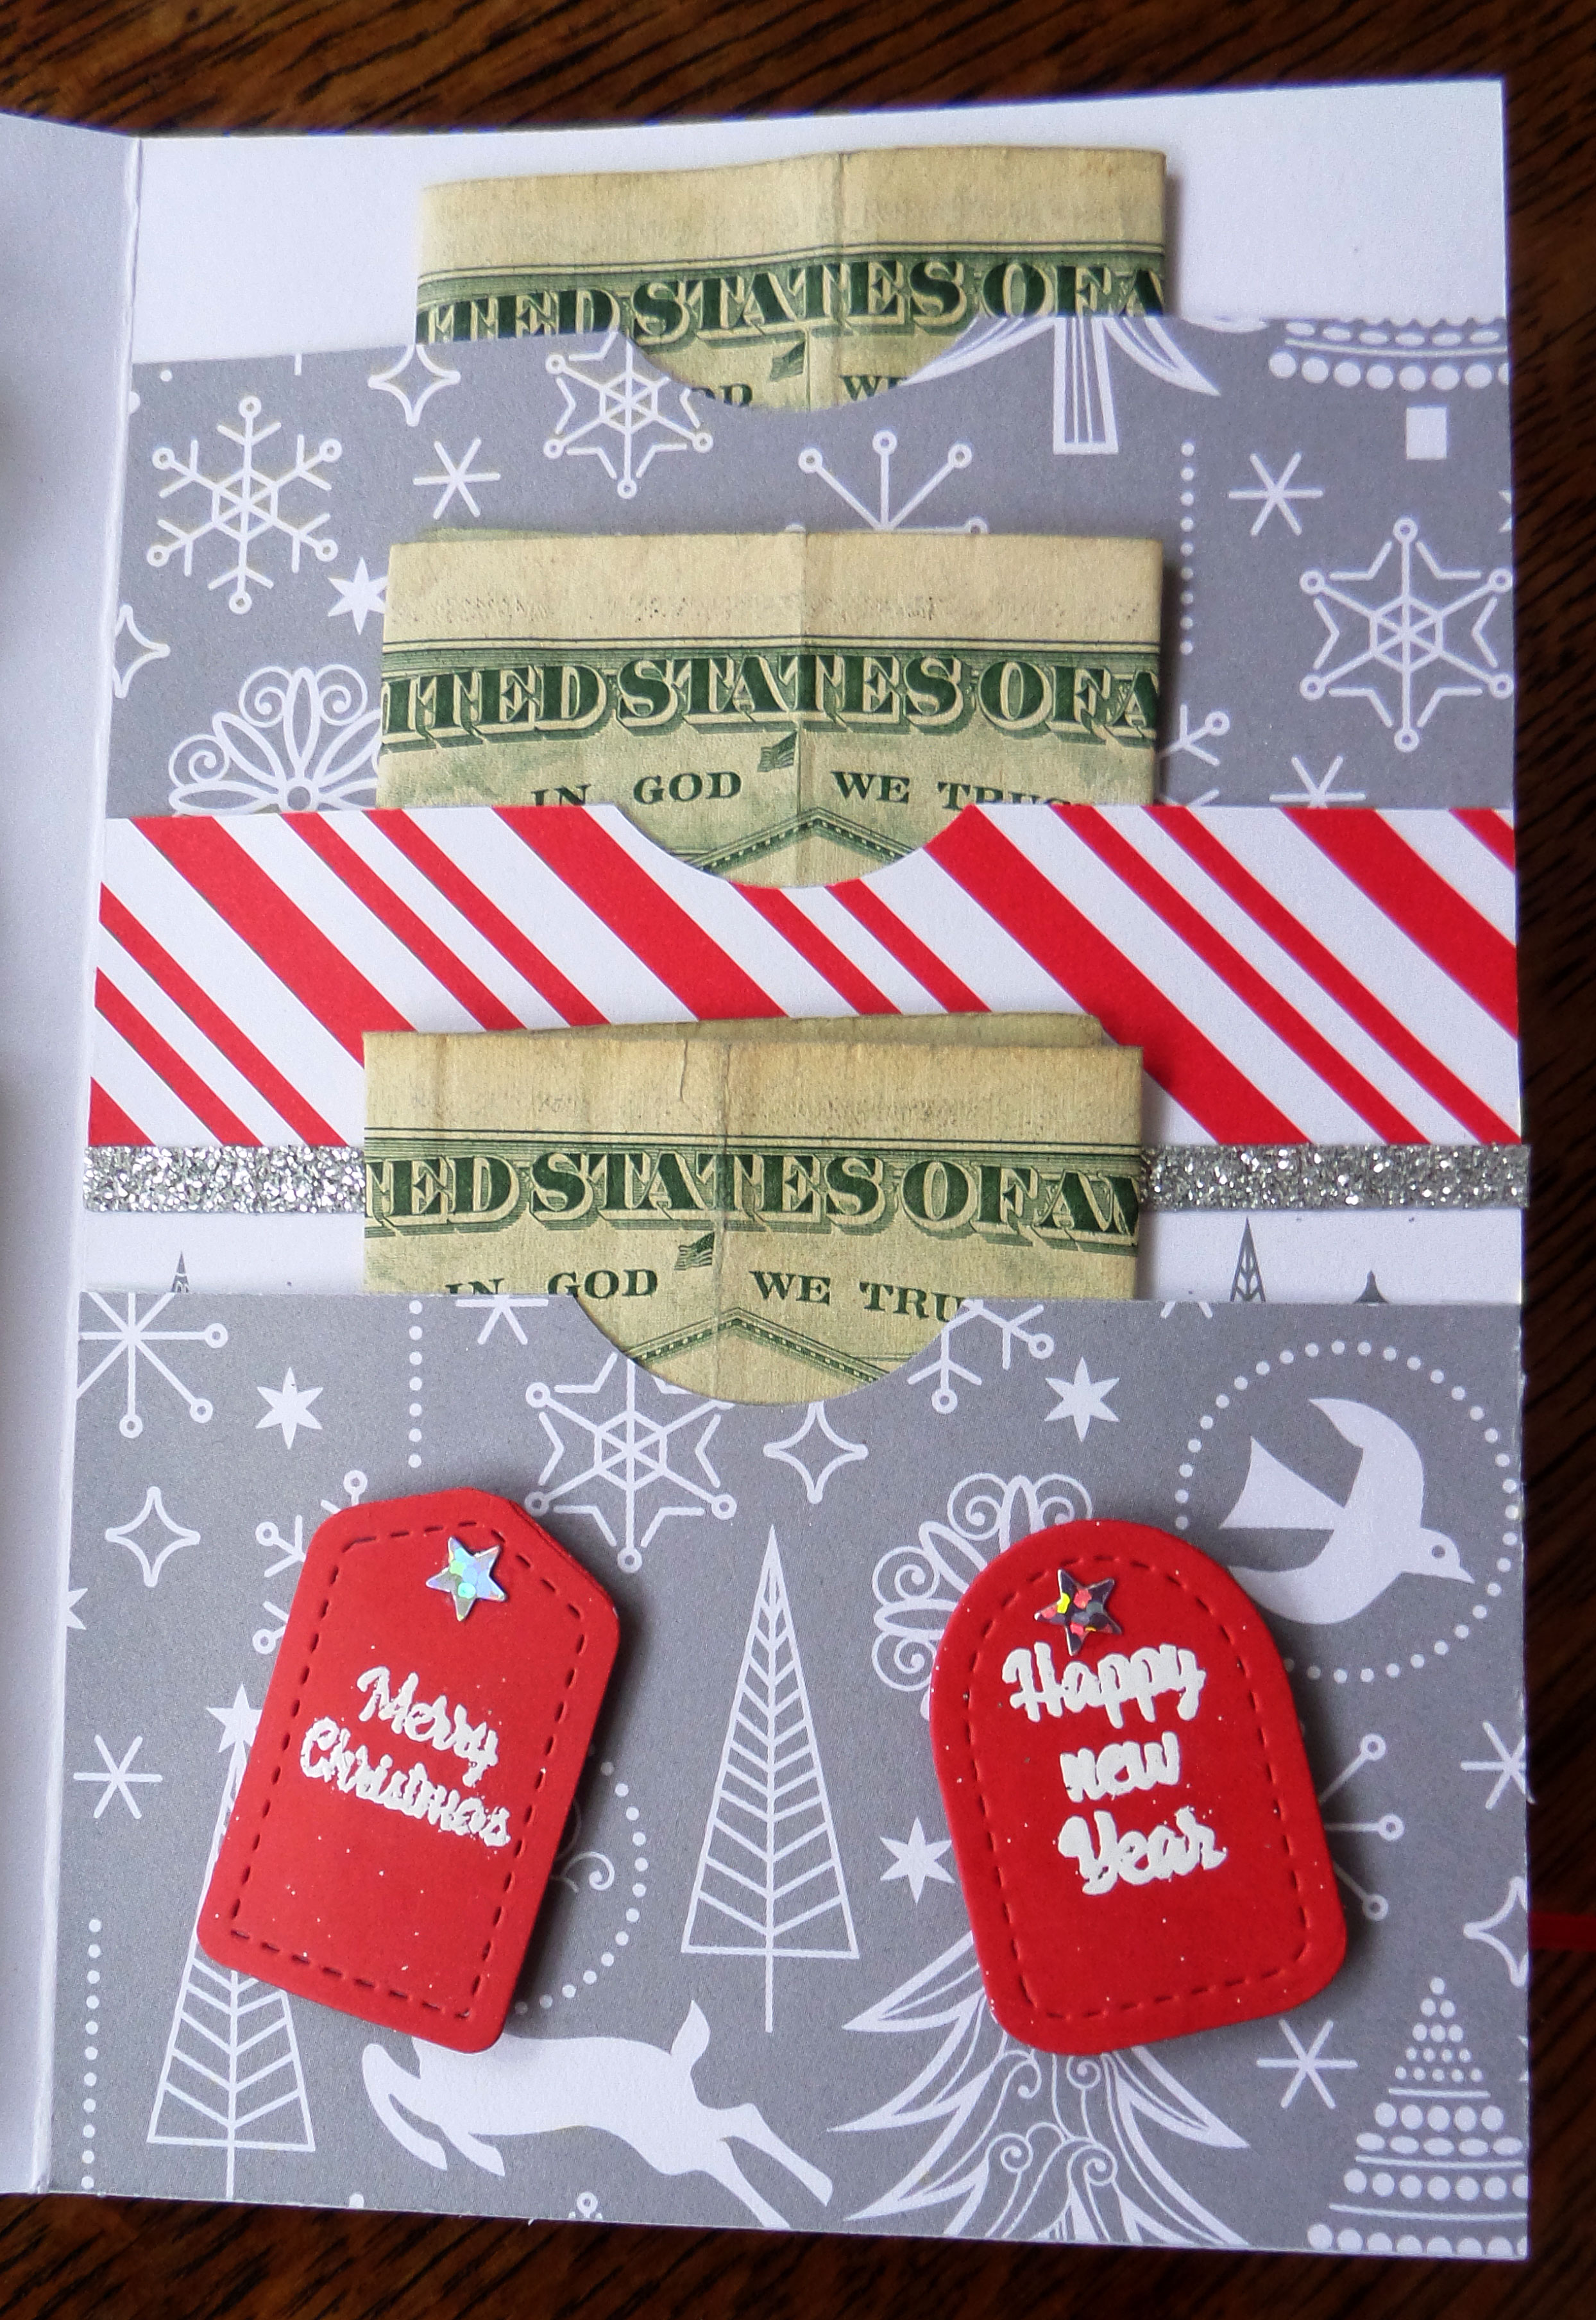
I created two pockets on the left panel to hold some cash, a 1/4" deep pocket in the center to hold a hot chocolate mix, and then three stacked pockets on the right panel to hold more cash.

Then I added some decorations and more stamped sentiments, popping them up on dimensionals when possible. Each packet was similar on the inside, but with different papers and embellishments.

Here are some close-ups:


It took me a couple of hours to make the first one, but once I had my design figured out, I could make them in less time. 

Today, I will be making the Christmas crackers for our Christmas Eve table. I made them last year (and saved my design instructions, thank goodness!), so they shouldn't take too long. I have all the little goodies to put inside, including a Christmas-themed joke for each one. 

If you want to see what they look like, check out this post. Once again, scroll to the bottom of the post to see the crackers.

I want to wish each of you a MERRY CHRISTMAS or HAPPY HOLIDAYS, depending on how and what you celebrate. I hope your days are filled with the warmth and love of family and friends.

Thanks so much for stopping by, and remember to laugh--a little or a lot--every day.

Cheryl

Friday, December 20, 2024

Another blue Christmas card...


I love the look of poinsettias, especially pastel colored ones like the one on this card. 

I had the snowflake frame (a die-cut) on my desk, and almost as an afterthought I glued it to a blue card base. I had already mailed out all of my 2024 Christmas cards, so I was just making a few more to donate to the thrift store and trying to use up some pieces in my stash.


I thought a white poinsettia with just a hint of blue in the center would be perfect for this card.

I used one of my favorite die sets for the flower and, after inking each layer lightly, I added a blue gem to the center. 

I also die-cut the Merry Christmas and adhered that to the top of the oval space.

Don't you think this would be pretty in several different pastel colors? Like lilac, aqua, pink, etc.


I stamped a blue sentiment on the inside to finish the card.

I liked this one so much, that I decided I need to make a bunch of them for next year!

We had at least 5" of snow on Thursday. It was my day to volunteer at the thrift store, and it was a little dicey driving on snow-covered highways to get there. I have to drive on a bridge that spans the Minnesota River, and bridges can be extra icey in the wintertime. It was definitely slippery out there, but most people had reduced their speed (as did I) to about 40 mph. Thankfully, there were no problems going or coming home again.

Thanks so much for stopping by, and remember to laugh--a little or a lot--every day.

Cheryl

Wednesday, December 18, 2024

Christmas "Joy" and a bit of upcycling...


The card base for this card came from a partially used card kit that I had been gifted. The letters (and ornament) for "Joy" were punch-outs. I carefully removed them and backed the openings with some very sparkly glitter cardstock. 


I decorated the ornament with some strings of red gems that I had in my stash. The fact that the gems were all connected with a line of adhesive made it really easy to apply them.


On the inside, I stamped a sentiment with red ink.

Now, however, I had the punchouts to deal with. I didn't want to just throw them away, so I decided to make another card with them.


This is the card I made with the punchouts. I colored the ornament hanger with a silver metallic marker. 


I used a glitter pen to trace around the holly leaves on the ornament and added a tiny bow and a few gems.

This card had the same sentiment on the inside as the first card.


The image on this card came from a previous year's Christmas card that we had received from a family member or friend. The snowman was just so cute, I wanted him to be used on a card once again.


I backed him with a red, scalloped rectangle and popped him up with foam tape. 

The strip sentiment was also popped up with a couple of thin foam strips.

As a final touch, I added some red half-pearls in both top corners.


I stamped a sentiment with red ink on the inside of this card, too. But then I decided I should add a little line of cute blue snowflakes.

Well, the mad rush to the Christmas finish line is upon us. I have been making a last batch of Christmas cards to donate to the thrift store and baking cookies like a mad woman. I've made five different kinds so far, as well as some sugared almonds, and I have the ingredients for at least three more recipes sitting on my countertop. I also still have a few gifts to wrap and my Christmas Eve family dinner to prepare, but I think I'll get it all done. 

Thanks so much for stopping by, and remember to laugh--a little or a lot--every day.

Cheryl

Monday, December 16, 2024

Over the hills we go, laughing all the way...


This AI image made me think of the song "Jingle Bells," especially the line "over the hills we go, laughing all the way." The houses are set in a hilly neighborhood and are painted such cheery colors. I just had to use it for a Christmas card.

As you can see, I added a couple of thin strips on each side of the image and popped up a sentiment that had been heat embossed with silver EP.


You can't really see it in the picture, but I added some glitter to the snowy roofs and hillsides. It's really very sparkly IRL.


I also heat-embossed the sentiment on the inside.


This card was the first time I had used this tree die set. I really like it. There are two dies for the branches, which I cut in two different shades of green, and a die for the trunk and branches.

The sentiment was stamped in green, and I used some dark green cord to tie a bow around my white panel, which was popped up on foam tape.

I think this makes a nice masculine Christmas card, don't you?


I added some glitter to areas of the tree, hoping it resembles snow. 


The sentiment on the inside was also stamped in green. 

I think I will use this tree to make some masculine birthday cards and Father's Day cards. I just have to come up with a few sentiments to go with it. Any ideas?

I am very happy to announce that I have finally made some Christmas cookies. Time was getting short, and I began to feel the pressure of not having gotten them done yet. We always give boxes of cookies to our neighbors and platters of them to our kids who come over for the holidays, so I just HAD to get moving on them. I'm trying a couple of new ones this year, so we'll see how they turn out.

Thanks so much for stopping by, and remember to laugh--a little or a lot--every day.

Cheryl

Friday, December 13, 2024

Shiny ornament card...


Gold metallic cardstock is horrible to photograph, so please excuse all the shadows and reflections.

For this card, I first created a 4" X 6" card base and rounded the two right corners. I had some pretty striped cardstock with gold stitch lines running through it. I added a 3" wide piece to my card front and then started die-cutting my ornaments.


After the ornaments had been cut out, I backed them with red glitter CS so that the open design would be filled with some red, glittery goodness.

After popping them up with foam squares on the edge of my striped CS, I added a red gem in the little hanger of each one. 

The sentiment was printed with my computer and then foiled with a laminator. I die-cut it and popped it up on foam strips.


I stamped the inside sentiment with gold, metallic ink.

I made as many of these cards as I could, given I had only one 8 1/2" X 11" sheet of the striped CS. I will definitely be keeping my eye out for more paper with some gold accents in it to use for Christmas cards.

Today was my day to volunteer at the thrift store. A Xyron personal cutting machine had been donated, and those types of craft tools come to me to test, price and display. I had never used a Xyron cutting machine before so it was fun to figure out how it worked. The user manual was included, but it wasn't very good. I did get it to work, and it cut paper just fine. The big drawback was that the shapes it would cut were very limited and they had to fit on a 4" X 4" piece of paper. It seemed really archaic after using a Cricut and a Silhouette Cameo for many years. I think they cost about $100 when they first came out, but this one went on the shelf for just $9.00!

Thanks so much for stopping by, and remember to laugh--a little or a lot--every day

Cheryl