Wish List

Tuesday, December 18, 2012

Some of my favorite Santas...

Since I've had a nasty flu the last couple of days I haven't done much crafting. So instead of a paper creation, I thought I'd share some of my favorite Santas with you. I have a small collection of them, and I like to pick them up, when I can, from wherever we travel.

Here's one of my most treasured Santas:
This Santa is from Russia. He is handpainted and was given to me by a friend who imports these types of gift items to this country. This Santa is very regal, and I really love him!


This Santa on the "rocking reindeer" is also from Russia and was given to me by the same friend. The little bells that hang from the saddle blanket actually jingle when he rocks.


This is another much-treasured Santa that I purchased in Prague, Czech Republic. My husband and I visited there a couple of years ago during the Christmas season, and I vowed not to leave until I had a Czech Santa. My grandmother was Czech so it was important to add this one to my collection. He is also hand-painted and very regal looking.


The Santa at right is quite rustic.  He was hand-carved and painted by a gentleman from northern Minnesota. I liked him because of his green shirt and his stance--with his hands in his pockets. These peculiarities make him different from most Santas you see.
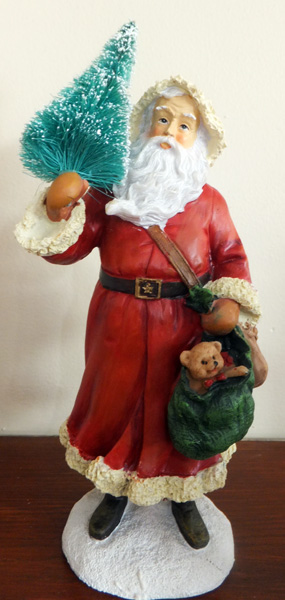


The Santa at left was purchased in Heidelberg, Germany. He is wearing the traditional dress of the European-style Santa.  I chose him especially for that reason.

Don't you love his mittens, too? They look like they must be leather mittens.


This is a look at my entire small collection. Some I have painted myself, others have been purchased here in the U.S. and a few have been given to me as gifts. It's always fun to pull them out of the box and set them on the mantel in December.

Thanks for visiting today, and remember to laugh--a little or a lot--every day!
Cheryl


Friday, December 14, 2012

A few more of Connie's pretty Christmas cards...

As promised, here are some more cards that my sister's friend Connie made. For these she cut some images from the Sweater Weather cartridge.
Isn't this a lovely card? I love the red gingham check. It goes so perfectly with the pixelated stocking image.


Here are two similar cards using the mitten image. I love how she added the button in the middle of the design on the mitten.


I really love this card. The combination of the red gingham and the dark green polka dot is just so perfect. I love all the dimension from the red ornaments on the Chritmas tree, too.

This is one last card that should have been included in the previous post. Isn't that little mouse sitting at the bottom just the cutest little creature? He looks so full of sweets and satisfied.

Thank you, Connie, for letting me share some of your beautiful cards! I am certain you have inspired whoever has stopped by this blog today.

I appreciate that you have taken the time to visit.  Just remember to laugh--a little or a lot--every day!
Cheryl

Tuesday, December 11, 2012

Connie's pretty Christmas cards...

If you've read my previous blog posts, you know that I have a sister who loves to make cards, too. My sister has a friend named Connie who is also an amazing papercrafter. I love to see the cards that Connie creates because they are so beautifully and precisely made with lots of fun details. Recently, my sister sent me some photos of some of Connie's Christmas cards so that I could share them here on my blog.

Here are the first few cards that feature some stickers that Connie has had for a long time, but decided to use this holiday season.
Aren't these images just so sweet. I honestly don't like mice...except for these sweet little creatures.

I love the pink diagonal stripe paper on this card. I think the peppermint candies are a great touch, too--especially on either side of the "Christmas morning" sentiment.

Hee's another card with a super sweet image. I have to admit, though, that the thought of mice around my Christmas cookies makes me cringe a bit. :)


This last card is my favorite. I love, love, love that pink polka dot paper. And the ribbon behind the scalloped oval is just perfect!


Here's one last look at all four cards.  Beautiful job on these, Connie! I wish both you and Michelle lived closer to me so I get some papercrafting lessons from you!


If you liked Connie's cards, please leave a quick comment letting her know.  I'll share some more of her cards, made with the help of her Cricut and the Sweater Weather cartridge, in my next post.

Thanks for stopping by and remember to laugh--a little or a lot--every day!
Cheryl

Saturday, December 8, 2012

Gift bag toppers...

My sister and her friend Connie get together on a regular basis and make cards and have lots of papercrafting fun. Connie is a very talented papercrafter. Of course, my sister is no slouch, either! One of their projects a while ago was to make some decorative gift bag toppers.

Aren't these wonderful? And they're such a good idea, especially at Christmas time when gift bags often sit under the tree for many days. It's such a temptation to peek inside...unless there's a bag topper preventing you from doing so!  And these toppers add so much to the look of the bag.


The topper is a piece of cardstock folded in half and decorated along the edges.  A slit has been cut through which you can slip the handles. Doesn't this deep edge punched border look terrific?


This yellow and peach colored bag is one of my favorites. The topper is the perfect space to add flowers, gems, cutouts, all sorts of things, yet you don't have to decorate the entire bag front. The topper really makes the bag look special. I don't know if they've adhered the topper to the front and back of the bag, but I think that's something I would do in order to hold it securely. Maybe my sister will leave a comment regarding that issue.


This blue bag shows how pretty it can be to layer borders. The complementary color of the flower border really draws attention and makes it a focal point.

Thanks, Connie and Michelle, for letting me share your  beautiful bag toppers. In my next post I'll share some of Connie's Christmas cards with you.  You won't want to miss those!!

Thanks for stopping by, and remember to laugh--a little or a lot--every day!
Cheryl

Thursday, December 6, 2012

Merry Christmas tags...

Well, it's been a loooooong time since I've posted anything - not because I've been ill or away from home, but because I've been so busy. Last week I managed to make 80 Christmas cards! I felt I just HAD to get them done so that I could move on to other Christmas projects. It's the first time I've managed to make 80 cards in 6 days, so I was pretty pleased with my progress.

Next, my book club decided we should have a little gift exchange at our December meeting. I love gift exchanges, and I had a cute little Christmas platter in my gift box that I could give, but I also wanted to add something handmade. I decided that a little collection of Christmas gift tags would be just the thing.  Here's what I made:
 
These four tags were the "tie on" type and were cut using the Art Philosophy cartridge.


 As you can see at left, the back has room to write the name of the recipient and the giver.
 
 
I like the simplicity of the tag at right. It's similar to one in the group of four in the photo above and is cut out of craft cardstock. I added some velvet holly leaves, a flourish cut with a Spellbinders die and some glittered red Card Candi for the berries.
 Here's a very simple gift tag that is still glittery and festive.  The snowflake was cut out with a Spellbinders die and consists of three layers. It was actually cut out of plain white cardstock, covered with spray adhesive and then dipped into a container of glitter. A vintage gem is adhered to the center with Glossy Accents.


These two tags are more like small cards. They were also cut with the Art Philosophy cartridge. The images were stamped and colored with ProMarkers.  The fancy blue bird was dressed up with a glitter pen, but unfortunately, that doesn't show up in the photograph.

These two Christmas stocking tags are also small cards, as well. For all of these tags, I put a couple strips of double-sided tape on the backs so that they are ready to adhere to a package. The inside is stamped so that the names of the giver and receiver can be added.


 The last two tags that I made were simply stamped, cut out,  colored and glittered with a pompom glued to each hat.

I was really pleased when the person who received these gift tags was very excited about them. She had not started wrapping her Christmas gifts yet, so the timing was perfect!

I hope to have another post for you soon with another great Christmas idea that was passed on to me from my sister.

Thanks for stopping by, and remember to laugh--a little or a lot--every day.
Cheryl


Monday, November 26, 2012

Barbie Ballerina Cake and Happy Birthday Owl

Over the long Thanksgiving weekend, we celebrated my granddaughter Lucy's 6th birthday. She wanted me to make her a Barbie ballerina cake. It's hard not to give a little girl the cake she desires, so I decided to see if it could be done with an angel food cake. I made the cake as I usually do in my angel food cake pan. I also purchased a Barbie ballerina. When my daughter Shanna and her family arrived, she took over the task of decorating the cake.

We first measured the height of the center hole and cut a piece of paper towel tube to fit. We removed Barbie's legs (she was too tall for the cake) and put her remaining torso into the cardboard tube to hold her up in the center of the cake. My daughter trimmed off the sides of the cake to form Barbie's "skirt." Then she frosted it with some pale pink 7-minute frosting and decorated with a tube of purple icing and some candies.

Here's the result:
I think Lucy was very pleased with her cake and we had fun making it. It is super easy to do when you use an angel food cake pan, and I liked having those plain pieces of cake that were cut off. I'd rather eat cake with no frosting on it! We were also able to snap Barbie's legs back on after we ate the cake and give the doll to Lucy as an additional gift.

Here are a couple more photos:


I also made Lucy a special card for her birthday. I recently won the Hoot 'n' Holler cartridge and wanted to use that for the main image. It has so many cute owls and sentiments on it.


I used some aqua and lime green glitter papers for the owl and gave her a little party hat. The sentiment was cut from plain papers but I added lots of stickles for some more sparkle. I don't have any Action Wobbles, but I still wanted to give the owl the ability to "boogie." I made a spring out of some heavy jewelry wire that I had on hand and adhered it to the back of the owl and to the card. Here's a picture of the spring. It's terribly out of focus, but you get the idea.

 
The inside of the card was pretty simple:
 
 
Thank so much for stopping by today. Remember to laugh--a little or a lot--every day!
Cheryl


Wednesday, November 21, 2012

Thanksgiving cards #6...

This will be the last Thanksgiving card I share with you--promise! I'm so ready to move on to Christmas cards.
This card was fun to try. I attempted to give my stamping a distressed look by not loading the stamp with too much ink and stamping off, if necessary. I also used the "rock and roll" method of inking a stamp and then rolling its edges in another color ink pad.

Rather than me telling you how to accomplish this look, I'd rather give credit to France Martin at www.frenchiestamps.com. She has a great video here that will teach you exactly what you need to do.

I think I made this technique a little trickier than it need be because I used so many different ink colors. I'm going to try it again using a single color and some different stamps and see how it goes.


Here's a peek at the inside. I just used one of the same stamps that I had used on the front, stamping off to give it a distressed look.


Thanks for stopping by today, and remember to laugh--a little or a lot--every day.
Cheryl