Wish List

Tuesday, December 29, 2020

Pretty bird stickers that inspired a card...


I purchased these simple, but pretty, bird stickers at Dollar Tree. Like everything else in the store, they cost $1.00.


This is the card I made with one of them.

I cut a little branch with an old Quickutz die, punched out a few flowers and added my bird to this little scene.

The sentiment is also a die-cut, so this card was super quick to make.


My background paper was actually a sheet of white emboss-resist paper from Stampin' Up. I simply used some pink ink to blend onto the paper, and then I wiped the excess off the resist design with a paper towel. 


In this photo you can see how the bird is popped up on a foam square. I did a bit of inking on my flowers, too, and added a gem to the center of each.


On the inside of my card, I added a stamped sentiment and some stamped flowers that hopefully looked a tiny bit like the ones on the front.

I'm definitely going to use a few more of those birds to make additional cards like this. I will probably use the emboss resist paper for the backgrounds, too, and match the color of ink I use to the sparkly wing of the bird. 

I plan to take my Christmas decorations down and store them away the weekend after New Years. I've stopped watering the tree so that there is no water left in the pan by that time. It's always kind of a mess to get the tree out of the house, but it feels good once it's all cleaned up.

How about you? When do you dismantle your tree and store your decorations away? I know some folks leave them up until the end of January or even longer.

Thanks so much for stopping by, and remember to laugh--a little or a lot--every day.

Cheryl

Saturday, December 26, 2020

My annual ornament...

 Each year I give each of my kids an ornament. Sometimes it's store-bought, sometimes it's handmade. This year it was a bit of both.

I purchased clear round glass ornaments that were flattened a bit, rather than round like a ball. These flattened ornaments are much easier to apply designs to.


After removing the cap and hanger, I poured some floor wax into each one, made sure the entire inside was covered with it, and then drained out the excess. When that was done, I added a generous amount of glitter and shook the ornament (with my finger covering the opening) until the entire inside was covered. After shaking out the excess glitter, they were allowed to sit for a week to dry out.


I used my Silhouette to create the design you see on the front and the back. It was cut out of self-adhesive vinyl and applied. This is the same design I used on the cups for my neighbors. My final embellishment was to add a red bow to each of them, using some ribbon I had in my stash.

These were really fun to make, and hopefully they'll decorate Christmas trees for years to come.

I spent over four hours cleaning my craft space today. It was such a mess from all the Christmas crafting! I still have a few things to sort and file, but it is mostly done. It will be so nice to start my 2021 cards in a clean, organized space. When I was vacuuming all the dust and bits of debris on one of my work tops, I managed to vacuum up a small tube of glue! It took a while, but I finally got it out of the vacuum hose. I think that added an extra 20 minutes to my cleaning time!!

Thanks so much for stopping by, and remember to laugh--a little or a lot--every day.
Cheryl


Thursday, December 24, 2020

Santa hats on a slimline...

 I really enjoy making the slimline cards that are currently so popular. I just wish we could get two card bases out of a letter-size piece of cardstock. 

Here's one that I made recently:

I used a special die that is specifically for slimline cards to make the top panel with the three apertures.


I put some double sided tape behind the leaf-like openings around each circle. Then after adhering this white piece to the green panel, I sprinkled some glitter over these tiny openings and burnished it into the exposed tape.

The Santa hats were die-cut and then the red and white parts were glued together. I added a little glitter to the white portions of each hat. The center sentiment was made using several dies from different sets--a circle die, sentiment die and holly die. The hats and the center sentiment were all popped up on foam squares.


After stamping my inside sentiment, I added another Santa hat at a jaunty angle. This card measures 4" X 8 1/2" and fits nicely into a business size envelope.

I like how this one turned out, so I hope to make more of these cards for next year.

We had planned to visit my daughter, who lives 9 blocks away, on Christmas morning, but that has now been called off. They had a visitor in their home a couple of days ago, and a day or so after the visit, she (the visitor) tested positive for COVID-19. My daughter and her family are now quarantining just in case one or more of them contracted the virus during that visit. We are sad we won't be able to get together, but we so appreciate their care and concern for us and others. We're just praying that none of them gets sick.

I hope all of you have a very merry Christmas and a healthy and joyous New Year!

Thanks so much for stopping by, and remember to laugh--a little or a lot--every day.

Cheryl

Wednesday, December 23, 2020

My holiday gift to neighbors...

In previous years I have always shared an assortment of the Christmas cookies and other treats I have made with some of my neighbors. I felt that this year called for treats that were individually packaged and not homemade, so this is what I came up with.

I purchased some plain white coffee cups and used my Silhouette to create a special design in vinyl. This is one side of the cups.


And this is the other side. I filled each cup with Ghirardelli chocolates and Hershey's kisses.


Once I had them all filled, I set each cup inside a clear goody bag from Dollar Tree, added a little note and tied them with some curling ribbon. 

These were so much fun to make, and we got some nice responses from our neighbors.

It's blizzarding here today. The roads are really icy because we had rain first, which froze to a layer of ice before the snow began falling. There have been lots of accidents around the metro area. We're staying home and staying safe.

Thanks so much for stopping by, and remember to laugh--a little or a lot--every day.

Cheryl

Tuesday, December 22, 2020

Glittery cards for the thrift store...

 I have a 12" X 12" cardstock stack that has a lot of card toppers in it that you can cut apart and put on cards. I've used quite a number of them to make cards to sell at the thrift shop, but I still have a number of them left. Guess I'll have to use them next year.

Here are a couple of the cards I made with them:

I first dry-embossed a white panel using a holly embossing folder. I placed that on my card fronts with a strip of red-striped vellum on either side.


If you look closely at this picture, you can see how I've added some gems to the deer's antlers, some glitter to the halo around its head and also some glitter to the word "Believe."

My process for adding the glitter was to use a fine point glue bottle to "write" with a small stream of glue over the words or graphics where I wanted to add glitter. Then I sprinkled the glue with glitter, tapped off the excess and let it dry. The hard part is being patient enough to give it time to dry.


I used the same process on this card, writing over the words with my glue bottle and sprinkling on some glitter.

The sentiment panels on both cards were popped up on foam squares, and as a final touch, I added a small silver bow.


My sentiment on the inside was heat-embossed with silver embossing powder.

When I purchased this paper stack, I wasn't sure I'd use these card toppers. Now, I can see how perfect they are for quick cards, and they really look special with some glitter and a few added embellishments.

The Christmas cards I have made for the thrift store have sold really well. Each week during the last half of November and all of December I have brought a batch of 8-12 cards to the store and they were always sold out by the next week.. It's very satisfying to know that people like them enough to actually purchase them!

Thanks so much for stopping by, and remember to laugh--a little or a lot--every day.
Cheryl


Monday, December 21, 2020

Cute little gift tags...

I made a few sets of gift tags to sell at the thrift store and this was one of those sets.


 I started out with these dies. The set of six circle dies on the left is fairly new, but the Quickutz ornament die on the right is really, really old! I think it was one of the first dies I ever bought when I first got my Cuttlebug (which bit the dust a couple of years ago).

I first cut out 6 of the round ornaments from different colors of cardstock and 6 from white cardstock, along with six toppers from silver hologram cardstock. Then I used the decorative circle dies to cut a design out of each of the colored ornament shapes.

Finally I glued the white shapes to the backs of the colored shapes and embellished.


Here's a picture of the completed tag fronts. I thought they really turned out cute. I added just a very few embellishments, like a gem in the middle of the snowflake, some Nuvo Drops on the tree, some Wink of Stella on the candy cane, etc.


On the back, I used my very old wood-mounted stamp for the "to" and "from," and I added a length of red and white baker's twine to each one. Easy peasy!

I really enjoy making tags. They're so quick and easy and really seem to sell well at the thrift shop. 

I'm going to try to squeeze in a few posts this week about some of the Christmas cards I've made recently. 

I also made a little Christmas gift for some of my neighbors that I want to share with you, so I hope you'll come back and visit.

Thanks so much for stopping by, and remember to laugh--a little or a lot--every day.

Cheryl

Friday, December 18, 2020

Cute little gnomes make Christmas all the merrier...


I have made several different gnome cards this year. I really love gnomes! Maybe it's my Scandinavian heritage, but I find them so appealing.  

The Christmas paper I used on these cards is some that I had in my stash from a few years ago. The factory-embossed white paper on the bottom is REALLY old! I've had it for (I think) at least 10 years. It comes from a pack of beautifully embossed 12"X12" papers that I bought at Costco. I only have a couple of sheets left, so I'm pretty judicious as to how I use it.


These little guys were stamped and then colored with ProMarkers (alcohol markers). I used the coordinating dies to cut them out.


On the inside, I added a little canopy, using the patterned paper that I had also used on the front. I think it adds a nice touch of color to the inside. The sentiment was stamped with Memento ink.

I was super busy today, trying to finish up my baking and gift wrapping. I almost got the baking done. I still have a couple batches of cookie dough chilling on the back porch (my wintertime walk-in cooler) which I will bake tomorrow. I made a little progress on my gift wrapping and have only one family's gifts left to do. I should be able to finish that up tomorrow, too. Yay! 

I hope you are nearing the end of your holiday preparations and are ready to relax and enjoy the festivities--such as they are this year. Ours will be very low-key, but I'm looking forward to them nonetheless.

Thanks so much for stopping by, and remember to laugh--a little or a lot--every day.

Cheryl

Tuesday, December 15, 2020

Simple-to-make card...


 This card was super simple to create; the floral pattern die did all the work! I simply chose a deep rose-colored paper with a subtle pattern and cut it to the size of my card front. Then I placed my die at a diagonal across this piece and and ran it through my Big Shot.

The design is so intricate that I used spray adhesive to glue it down. Spray adhesive doesn't give you any time to maneuver your paper so you have to be vey sure of its placement before pressing it to the card front.

I've only added a stamped sentiment and a few sequins for embellishment. The inside is blank so I can write a personal note to the recipient.

See? Easy peasy, but I think it looks great.

I've been busily making Christmas cards to sell at the thrift store. I'll share a few of them with you in my next few posts.

Thanks so much for stopping by, and remember to laugh--a little or a lot--every day.

Cheryl

Friday, December 11, 2020

Mandala stencils...

 I have a set of at least a dozen mandala stencils. I wanted to use a couple of them to make some holiday cards. I especially needed some cards that weren't specifically Christmas cards, as we have friends who practice other faiths--Muslim, Hindu, etc.--and we always send them a card at Christmas time to let them know we're thinking of them.


I started with a couple of pale blue panels and some darker blue ink and began blending the ink into the design of the mandala. I find this to be such a relaxing way to make a pretty card front.


Once I had my design inked in, I added a pretty die-cut snowflake and a few gems. I also die-cut the word "peace" and heat-embossed "on earth" on some navy blue CS. My mandala panel was matted with the same navy blue CS


Inside, I used another navy blue mat and added some snowflakes cut from the pale blue CS that I had started with for my front panel.  My sentiment was stamped with navy blue ink. 

These cards were both easy and fun. I kept them very simple, using just two colors of blue, but I love how they turned out.

My Christmas cards (91 of them) have all been mailed. Whew! Glad that job can be checked off my list! Today I started making cookies and other goodies. My sugared almonds are finishing up their cooking time in the crockpot as I type this. 

And how are your holiday preparations coming along? Are you in good shape or struggling to get everything done in time? I'm usually on the struggling end of the scale, especially in the final week before the big day.

Thanks so much for stopping by, and remember to laugh--a little or a lot--every day.

Cheryl

Tuesday, December 8, 2020

Fun gift tags...

 I make all my own gift tags, and I've been making some to sell at the thrift store, too. Here are a couple samples of the kind I most like to make:


I like to make them "card" style with some double-sided tape on the back so I can quickly adhere them to wrapped packages.

The Santa suit was easy once I got a buckle die. It came with a "twist and pop" die set and I honestly didn't know why it was included--but I'm glad it was because it works perfectly for this purpose. The white "fur" was made with a deckle-edge rectangle die.

The little poinsettia is a sticker. It had kind of a big, gaudy gem for the flower center, so I replaced it with some Nuvo Drops.  The only die-cutting I did for this one was the word "Joy."

In this photo you can see how it opens like a little card. 

I have a really old wooden stamp that I use for the "To" and "From."


When I add the double-sided tape to the back, I leave the backing paper on the exposed side until I'm ready to use the tag.

These are so easy and fun to make, and you can use up a lot of scraps in the process!

Do you make your own gift tags?  I think a set of dimensional gift tags like these would make a fun little pre-Christmas gift for a neighbor, friend or family member.

Thanks so much for stopping by, and remember to laugh--a little or a lot--every day.
Cheryl


Saturday, December 5, 2020

Let's Craft and Create Challenge #166: Santa Claus is coming to town!


Can you believe it is December already? For once I don't mind, because the sooner we can get through 2020, the better. I'm SO ready for 2021!

To finish out the year at Let's Craft and Create, we've decided to honor that favorite guy about town--Santa Claus. Of course, you can choose the other option of Anything Goes if you prefer.

Here's what I have made for this fun challenge:


I stamped, colored and fussy-cut my little Christmas gnome, North Pole sign and tree. My gnome looks like one of Santa's elfin helpers, doesn't he? He even has a jingle bell tied at the end of his cap.

I created my little scene on a fish-tail banner. Before die-cutting the banner, I created some snowy texture using a snowfall embossing folder, and some snowy hills, using white glitter cardstock.


I stamped my sentiment and then cut it out with a scalloped oval die. The holly sprig was cut from some green cardstock to which I added red Nuvo Drops for the berries.


On the inside of my card I stamped the sentiment and added some of the same striped DSP as I had used on the front.

Now it's your turn. You probably have some Christmas cards in process that you could link to the challenge at Let's Craft and Create. If not, be sure to clink on the link to see what the Design Team has created to inspire you. I hope you'll join in.

Thanks so much for stopping by, and remember to laugh--a little or a lot--every day.
Cheryl


Tuesday, December 1, 2020

Make yourself a cup of tea...

 I thought I would make a few cards to sell at the thrift store that featured a pocket on the inside that could hold a teabag as a little gift. Here's what I came up with:

I actually made four of these cards but these two show the two different patterns of papers I used.


I think I like the contrast of the green DSP the best. I die-cut the tea cup and added a tiny holly die-cut to decorate the front of it.


The tea bag was cut from vellum. I colored the back of it to look like it had tea leaves inside of it. I also tied a thread onto it as the string one often sees connected to a tea bag.


Here's a little closer look at the cup with its teabag. I added a white dot to my holly berries to give them a little "life." In looking at this photo now, I probably should have done some shading on my cup to give it a little depth, too. Oh well, next time...


In this photo you can see the pocket I created on the inside. I even added a teabag to it to show you how nicely it works for this purpose.

"Wishing you a" was stamped and heat embossed onto red cardstock, then cut into a strip and added above my stamped "Merry Christmas."

This card came together very quickly. I was able to print the front sentiment four times on a single sheet of cardstock. Then all I had to do was die-cut them and add them to my card fronts along with the cup and teabag. It will be interesting to see if they have sold when I volunteer on Thursday.

Thanks so much for stopping by, and remember to laugh--a little or a lot--every day.

Cheryl

Friday, November 27, 2020

Season of thanks...


I know Thanksgiving is past, but I thought I'd share another card I made for the occasion anyway. The photos really don't do this one credit. It looks so much better IRL.


The leaves were die-cut and inked around the edges.  I added a little gold twine bow where their stems crossed.

"Season" was die-cut from gold metallic cardstock. "Of Thanks" was cut from a strip of white CS. I then backed the strip with some of the gold CS.


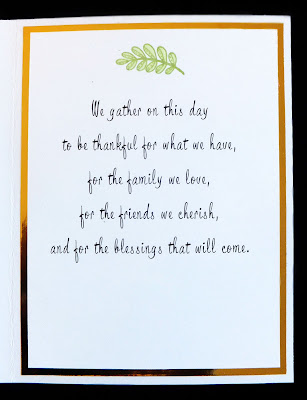
I used some of the same DSP on the inside as I had used on the front. My sentiment was computer-generated.


Finally, here's a photo of our tiny Thanksgiving celebration--just my husband, my brother and me. No extra leaves in the table and chairs crammed together to accommodate all our family members. I cooked much less than usual, yet it was enough so that I could send several meals' worth home with my brother. We will use the turkey bones to make the broth for our annual tradition of having turkey wild rice soup on Christmas Eve.

We had a lively Zoom call with the kids and grandkids shortly after we were done eating. It was so much fun to see them all at once and to interact with each other in real time. 

The 2020 holidays are definitely different--and a little lonely--but this, too, shall pass. I am just so thankful for my big family and look forward to "in person" celebrations sometime in 2021.

Thanks so much for stopping by, and remember to laugh--a little or a lot--every day.
Cheryl

Tuesday, November 24, 2020

Shimmery pumpkin...


For this card, I cut my wreath out of kraft cardstock and used some distress inks to blend some color onto the leaves. I also added some dots using a gold Viva Decor pen and the word "thankful" cut from olive green glitter cardstock.

My pumpkin was cut out of a deep orange cardstock. I colored the stem dark brown with an alcohol marker. 

To add some shimmer to the pumpkin itself, I laid my Versamark ink pad directly on it. Once I could see it had a nice coating of the ink, I added some coppery colored Perfect Pearls. Finally, I spritzed it with a fine mist of water to set the Perfect Pearls. It's so pretty IRL!


My sister gave me a set of dies (Thanks, Michelle!) that cuts strip sentiments for all sorts of occasions. One of them says "Happy Thanksgiving," so I used it for this card. I also included a computer-generated sentiment.

I have started preparing our Thanksgiving dinner. Today I made the cranberry relish, which my family loves. I will drop some off at my daughter's home, as they love it, too. On Wednesday, I will make the dinner rolls and pies. I have a 12-13 lb. turkey (a lot, I know), but will share the leftovers with my brother. He is always so appreciative when I give him leftovers, since he really doesn't cook much for himself.

We plan on joining other family members on Thursday via Zoom. It will be fun to talk and laugh with them and see their smiling faces.


Thanks so much for stopping by, and remember to laugh--a little or a lot--every day.

Cheryl

Friday, November 20, 2020

Wreath builder Thanksgiving cards...

 I decided to use my homemade wreath builder template to make a few cards for Thanksgiving.

The hardest part about making these cards is picking out the small stamps to use for my wreaths. I wanted them to each be a little different, so quite a number of stamps had to be selected.

After my stamping was done, I added some coloring with ProMarkers. I also used a "speckle" stamp to add a little more "texture."


Once my wreath was created, I die-cut it with a circle die and matted it with gold metallic cardstock. You can see in the photo at right that I've popped the entire circle up on foam tape. I stamped a sentiment, matted it with the same metallic cardstock and also popped it up on foam tape.

I also scattered a few gold gems on my wreath.


My computer-generated sentiment on the inside was matted with the gold cardstock. I also added a stamped frond, using one of the stamps that had also been used on my card front.


While this card does not really use traditional autumn colors, I really loved how it turned out.


This time I stamped my sentiment and cut it out with a circle die, popping it up on the center of my wreath. I also added three little purple gems for some sparkle.


For the inside of this card I used the same sentiment and the same stamped image. Instead of matting with foil cardstock, I used the same purple striped cardstock that had been used on the front.


Here's my final card where I've left the wreath on its 4" X 4" piece of CS.  I used black CS as a mat for the front panel, wreath panel and the sentiment. 


I used some different colors on this one and included some purple Nuvo Drops on the berry clusters.


On the inside, I used some of the same DSP as was used on the front and matted it with black CS. The sentiment was computer-generated and a berry cluster was stamped and given dimension with some Nuvo Drops.

I hope you've enjoyed seeing these wreath-builder cards. It's loads of fun to create them. They don't always turn out the way I envision, but that just keeps it interesting!

Thanks so much for stopping by, and remember to laugh--a little or a lot--every day.
Cheryl