Wish List

Friday, May 30, 2025

Husband card for Father's Day...


I had the "Husband" punch-out in my stash and decided to use it for a Father's Day card. I stamped "To My" on a strip of paper, die-cut it and added it to the punch-out. The punch-out was then popped up on the front of the card.

As a little embellishment, I added two different-sized screwhead stickers in the bottom right corner.


I started with a kraft card base. I added some striped DSP on the left side and a larger, embossed piece on the right. Before adding the embossed piece, I lightly ran a blue oxide ink pad over the raised design. Oxide ink is opaque, so it added a nice depth of color to the blue cardstock.


On the inside of the card, I stamped two sentiments. The top one used an open letter font, so I colored in the letters with a blue colored pencil.

I only managed to make eight cards this week, so I had to pull another 10 from my stash of cards to take to the thrift store on Thursday. I am hoping to get three times as many made this week! I am so thankful for the ideas and inspiration I see online every day.

Thanks so much for stopping by, and remember to laugh--a little or a lot--every day.

Cheryl

Wednesday, May 28, 2025

My daughter's lovely cards...

My daughter bought a Cricut some time ago and, for a while, used it mainly to cut vinyl for t-shirts and other items. She did a beautiful job and thoroughly enjoyed making special shirts for her children's sports teams and even their parents. She used some purchased designs, but also enjoyed designing some of them herself.

We went to visit her and her family and attend my granddaughter Lucy's graduation from high school.


Lucy's a beautiful girl and has inherited her mom's (my daughter's) crafty talents. She will be attending the University of North Dakota next year where she plans to study engineering.


During our visit, and after the graduation ceremonies had concluded, my daughter gave me two cards she had made with her Cricut. I was so excited that she was branching out into creating with cardstock! She has also been making some 3D animals out of paper, and they look amazing! I'm kicking myself now for not taking a photo of them.

This was a simple thank you card she made. The Cricut printed the "thank you," but she used a black pen to draw the line up to the balloon.

The balloon shape, also cut by her Cricut, was popped up with a foam square. So simple, but so cute!

This was a belated Mother's Day card she gave to me. The front of the card was simple and unassuming. It was the perfect lead-in to the beautiful surprise inside.

This is the inside of the card--a big, beautiful flower with a gorgeous butterfly sitting on it's center. The right side of the card formed a pocket in which she could put a special note.


Here's a closer look at the butterfly. It's delicate and dramatic at the same time.


You can see the flower stamens in this photo.  Everything folds together perfectly when the card is closed.


The notecard tucked into the right hand pocket had a pretty design drawn on it, which was also done with the Cricut.


For my granddaughter's graduation party, she made 2025 out of Cricut-cut, rolled flowers. At right is a photo of one of the numbers. She believes she spent about 20 hours making all the flowers needed for the four numbers.

I love seeing her having so much fun designing and creating. I only wish she lived closer so that we could occasionally work together.

Thanks so much for stopping by, and remember to laugh--a little or a lot--every day.

Cheryl

Monday, May 26, 2025

Really BIG blossoms...

I had a piece of DSP that had really BIG yellow blossoms with BIG orange centers in the design. I kept looking at it, wondering how in the world I could use it. I finally decided to just cut into it for a card.

Do you see those BIG blossoms behind my lacey-edged rectangle? I think the orange centers are a bit distracting, but I deided to create a die-cut flower to mimic them, just the same.


I didn't pop my rectangle up because I planned to give my flower lots of dimension. To start, I added some ink to the center area of each layer.

I put tiny foam squares under some of the petals and under the orange center.

The strip sentiment over the stamped "hugs" is also popped up with a narrow foam strip.


After stamping a sentiment on the inside, I added a two-layer flower in the corner. These layers were also inked a bit it in the center before adding the orange circle.

Do you have any great ideas for using big-patterned DSP? I'd love it if you would share your ideas with me, as I really do struggle with it.

Thanks so much for stopping by, and remember to laugh--a little or a lot--every day.

Cheryl

Friday, May 23, 2025

Simple graduation cards...

I decided I wanted to make a couple of simple graduation cards to donate to the thrift store. I wanted the cards to be neutra; that is, not to reflect specific school colors. That way, anyone could use them.

Here is what I came up with:

I have two dies that cut images of celebrating male and female graduates. I hadn't used them on a card yet this year, so I pulled them out to use them on these cards.

After cutting the graduate image, I also cut a long, stitched banner from matte silver cardstock. After gluing it to my card front, I felt the card was a little "blah." What would liven it up? A little sparkle, of course!

I dug through my glitter ribbons and found some self-adhesive gold and silver ribbons that were about 5/8" wide. I cut a length from each and fish-tailed one end. 


I think the glitter ribbon added just the right amount of pizzazz.

It occurred to me that these banners look a little bit like the gold and silver cords that are given to honor students to wear when they graduate.

Now, the only thing left to do to finish the front was to stamp the sentiment.


I made the feminine card the same way, except for using gold instead of silver. The large banner is also matte, like the silver one.


These cards could definitely be made with banners in school colors, if you have a specific graduate in mind.


This is the sentiment I stamped on the inside of each card.

I was pleased with how these turned out and took them to the thrift store yesterday. I usually donate graduation cards throughout the month of May, so I'll be making a few more.

Thanks so much for stopping by, and remember to laugh--a little or a lot--every day.

Cheryl


Wednesday, May 21, 2025

From scrapbook background page to cards...

 I had a 12" X 12" scrapbook background page that was meant for a wedding or anniversary. Since I don't scrapbook, I decided to make cards from it. Here are two samples of the cards I made:

The stitched pattern was as narrow as you see here and, along with the ribbon, ran across one entire top of the page. The three little roses were already there, and the rest of the page was black. 


The cardstock had a semi-gloss sheen to it and was very good quality. 

Underneath the roses, I added a die-cut "congratulations" and a strip sentiment.


I stamped a sentiment on the inside to finish the card.


I decided to make the second card into an anniversary card. I used my newest flower die, cutting it in white and popping the blossom up on foam squares. The stem was glued directly to the cardstock.


I used a black fine-point felt pen to make the black dots in the flower's center.


Another stamped sentiment finished this card.

*****

We bought a new area rug yesterday for our dining room. It's for under our dining room table and will look very pretty once the floors are refinished and all the furniture is back in place. My DH was shocked that I was able to pick it out in about 15 minutes, but I really didn't want to spend any more time looking for one!

Thanks so much for stopping by, and rmember to laugh--a little or a lot--every day.

Cheryl

Monday, May 19, 2025

Another arrow card...


I love making fun folds, and this one is quick and easy. I actually posted directions on how to make it in this post. Just click on the link and then scroll down a bit in the post to find them.

"Happy Birthday" was stamped, die-cut, matted and popped up with some narrow foam tape.


I have a  die set that makes these little mushrooms. It's one of my favorite sets. I think I need to use it to make a slimline card that has a long line of different pastel-colored mushrooms. Wouldn't that be fun?

The tallest mushroom is glued to the card front, but the small mushroom is popped up.

I cut the mushrooms from off-white cardstock and then did some inking with brown and yellow inks.


I added two stamped sentiments on the inside and adhered a little mushroom beneath them. I just had to make sure it all fit underneath the arrow-shaped front.

This card is for my brother-in-law. I hope he likes it.


*****


My rhubarb is nearly ready to harvest. I am excited to have some this year, since I didn't get any last spring. My DH had put about 8-10" of soil on it and it struggled to get through. This spring it is in "fine fettle," as they say. The stalks are thick and long and the leaves are as big as elephant ears. Okay, maybe that's a bit of an exaggeration. LOL I remember that we used my grandfather's rhubarb stalks as umbrellas when, as children, we ran around outside in a warm spring rain. Precious memories! The rhubarb plants I have now come from those very plants.

Thanks so much for stopping by, and remember to laugh--a little or a lot--every day.

Cheryl

Friday, May 16, 2025

Cards for 2025 graduates...

We have two granddaughters graduating this year--one from high school and one from college. We're excited for both of them as they start a new phase in their grown-up lives, and, of course, I had to make each of them a card.

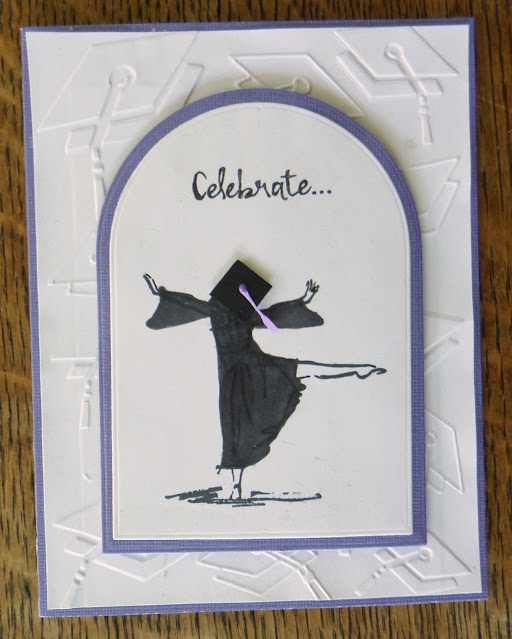
I made this one for our college graduate. I think she'll feel like doing a celebratory dance once she's handed that diploma.

I embossed a panel of white cardstock with the only graduate-specific EF that I have and glued it to a purple cardbase.

Then I cut an arched rectangle from the purple cardstock and a smaller one from white.


I stamped the image, which is of a female (from the back) in a sleeveless dress. I simply used a black marker to color in the dress and add the belled sleeves that make it look like a graduation gown.

I cut a small square of black cardstock for the mortarboard and popped it up with a dimensional on the back of her head. I hand-cut the tassle out of a bit of purple cardstock. It's SO small that it was a bit of a challenge, but I think it turned out ok.

Finally, I stamped "Celebrate..." at the top before gluing the two shapes together and then popping them up on my card.


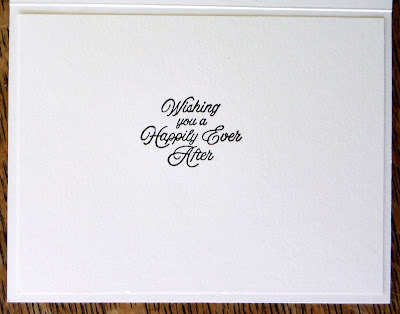
I stamped a sentiment on the inside to finish the card.

My granddaughter's school colors are purple and white, so I think this card will fit the bill.


I believe I saw the idea for this card on Facebook. I liked the composition of elements and I had what I needed to put it together. 

This granddaughter's school colors are blue and orange, so I started with a blue cardbase. Then I added a white panel that had been embossed with a stripe EF.  I adhered a strip of blue cardstock across the center with a strip of orange polka-dot cardstock on top of that. The "Big Congratulations" was popped up with foam tape.

I used dies to create the mortarboard and tassel.

I also used dies to cut my banners and numbers. I wish I had number dies that looked more "scholarly" in this small size, but I had to go with what I had. I guess I could have cut some out with my Silhouette, but my crafting space is so tiny, that I don't use it unless I have a bunch of cutting to do. I have to clear a space and hook my computer up to it, so it doesn't seem worth it for four little numbers.

Each flag on my banner has been popped up with foam tape. I added an orange string to hold my banner flags, but it's only visible at each end.


I added the same sentiment inside this card. I just didn't add the "congratulations" because it already says that on the front.

*****

We are working hard, getting ready to have our wood floors and steps to the second floor refinished in June. We're getting some much needed painting done and getting rid of some furniture we don't want to use anymore. We have to get everything out of our front entry, entry closet, living room, dining room and hallway. It makes me ask, "Why do we have so much stuff!"

Thanks so much for stopping by, and remember to laugh--a little or a lot--every day.

Cheryl

Wednesday, May 14, 2025

Let's dance like no one is watching...


 I had a leftover bee and a leftover hexagon of yellow cardstock from some other projects. I embossed the hexagon with a honeyconb EF and popped it up on my card front. Since the cardbase was blue and the background DSP had some blue in it, I die-cut a couple of blue corners and glued them on, as well.


I love this particular bee. He's from a stamp and die set of six (I think) bees, all in different happy poses. I've colored him with markers and added some sparkle to his wings.

The bee has been popped up on foam squares.

I stamped and die-cut the Happy Birthday and glued it directly to the hexagon with a bow at one end.


I saw a similar sentiment somewhere online, so I created this one with my computer. This card was donated to the thrift store, and I thought someone would get a kick out of it.

It was great fun to make this card and use up some random bits in the process.

*****

We are currently trying to give away our sofa sleeper by offering it on several giveaway sites online. We've been rather surprised by the interest in it. I hope it eventually goes to someone who can really use it.

Thanks so much for stopping by, and remember to laugh--a little or a lot--every day.

Cheryl

Monday, May 12, 2025

Sometimes the paper makes the card...


This card came together with just a strong, masculine piece of DSP and a large sentiment. When I saw this DSP, I immediately thought of a masculine card. But then I wondered, "How, exactly, I would use it?"

I decided that it would be okay to just let the paper do all the work on this card. I stamped the sentiment, added a couple of scored lines above and below, and matted it with red cardstock and then with black before popping it up on my card front. This card measures 4 1/2" X 6", so it's a bit bigger than the usual A2.

I added two stamped sentiments on the inside along with a couple of stamped flourishes.

Since I had the leftover strip of DSP, I added it at the bottom of the inside panel. Card done!

*****

We have had a beautiful weekend and I finally got some flowers planted. We've been enjoying our tulips and daffodils, but now there are lots of flowering annuals to enjoy, too. The lilacs are also in full bloom and they smell heavenly. What a fabulous time of year!

Thanks so much for stopping by, and remember to laugh--a little or a lot--every day.

Cheryl

Friday, May 9, 2025

Have a wheelie great day...


I made two cards like this one to donate. I have this bicycle die and have rarely used it, so I thought it was time to use it for a couple of cards.

I started by cutting a piece of cardstock that was 5 1/2" X 11" and scoring it at 4 1/4" and 8 1/2" on the long side.

I ended up cutting a tiny sliver off the first 4 1/4" section so that it would fold easily under the top flap.

The sentiment was stamped, die-cut and popped up on foam squares.


After gluing some DSP to the top flap, I added a darker blue border (it was a punch-out) before adhering the bicycle. 

The dark circle in the center of each wheel is an enamel dot.


This is what you see when you lift up the top flap. 


When that inside flap is turned down, this is what you see on the inside of the card.

I added a pocket where a gift card, money or note can be inserted. It also added a bit of color to the inside of the card.

These were fun to make, and I'm thinking of some other ideas for decorating the fronts. 

I think this fold would make a good Father's Day card with some tools on the front and a suggestion to add a gift card to his favorite home improvement store.

A girly dress on the front would be fun for a girl with a suggestion to add a gift card to her favorite clothing store.

A teddy bear on the front would be cute for a baby card with the suggestion to add a gift card to a favorite baby store.

I think these will sell well at the thrift store. I guess I'd better get busy making some more!

Thanks so much for stopping by, and remember to laugh--a little or a lot--every day.

Cheryl

Wednesday, May 7, 2025

A new flower die, and I love it...


This flower die is so simple (all one piece) and such a nice size that I know I'll use it often. In fact, I've already used it on several cards.

I used some ink and blending brushes to add color to the flower which had been cut from white cardstock.


I loved the effect of adding only a bit of pink ink to the center of the flower. 

The stem is glued directly to my lacy rectangle, and the blossom part is popped up with foam tape.

Four gems were added to the flower's center.


This card has a lovely surprise when it is opened. Lots more DSP inside! The white rectangle I added here is exactly the same size as the one on the front, and I made sure that I placed it exactly beneath it.

If you want to know how to make this fold, check out my post here.


I decided to use the die again when making these two cards. This time I cut it first from green cardstock and then just the flower head from the deep red cardstock, which was layered over the green.

Then, after cutting two pieces of DSP that each measured 3 3/4" X 5", I placed one on top of the other and cut them once horizontally and once vertically. I simply eyeballed where I wanted the cuts to be. Then I placed them on a pink mat (4" X 5 1/4") in the order you see above.


I popped up the stamped sentiment on both cards and added two die-cut flowers to this one. Their centers are circles that were made with a 1/8" one-hole punch.


Once again, on this card, I glued the flower stem directly to the front of the card and popped the blossom up with foam tape.

The dots in the center were made with a 1/16" single-hole punch and gold metallic cardstock.


I printed sentiments with my computer for both cards and added a couple of die-cut flowers for embellishment.

*****

We will have two graduates in the family this month--one from high school and one from college--so I am working on cards for them. It's so exciting to see them heading off on a new adventure, whether it be college, work or something else. Our high school graduate will be heading to college and our college graduate will be heading to yet more schooling, in a whole new direction. I am proud of what they have achieved and for their desire to do even more.

Thanks so much for stopping by, and remember to laugh--a little or a lot--every day.

Cheryl