Wish List

Tuesday, September 29, 2020

Quick Christmas card...


 This card was so quick to make, but I think it turned out really pretty, too. I dry-embossed the bottom of my front panel, added a die-cut snowflake wreath and sentiment to the top, and finished it off with a bit of gold ribbon.  The snowflake wreath was cut from glitter CS that has a little gold sparkle in it.


Here's a little closer look at the wreath and sentiment. In looking at this photo, I feel like I could have added a few gold gems to the wreath. What do you think? Yay or nay?


On the inside of my card I heat embossed a stamped sentiment. And because I had cut a larger snowflake out of the same glitter CS, I decided to use it here. I glued a portion of it on the top edge of my panel, trimmed it down and put the cut-off portion on the left side of my panel. I think it dressed up the inside quite nicely!

We had a busy day today, driving our RV across the entire metro area to a shop where we had the generator fixed. When it was ready we drove across the metro area again, picked it up, drove it to the opposite end of the metro area where we store it for the winter and then drove home. I think we spent at least 4 hours on the road!!

I also managed to get a fun project started. I had decided to have a t-shirt quilt made out of all the t-shirts I had collected while working for Habitat for Humanity. I knew I would never wear so many t-shirts, but they were still meaningful to me. Anyway, I found a company (Project Repat) that makes t-shirt quilts. My part of the project was to cut all the t-shirts into two halves--front and back--and then box up all the halves I wanted included on my quilt. I needed 30 shirt halves plus a few extras in case they were needed. Project Repat will cut the quilt squares from the shirt halves that I have mailed to them. They will make me a quilt big enough to use on a full-size bed. I'm excited that I'll have a fun and usable quilt that will remind me of how much I loved my work with Habitat.

Thanks so much for stopping by, and remember to laugh--a little or a lot--every day.

Cheryl

Friday, September 25, 2020

Coloring in a black and white image...

 I have had some card bases with black and white images on their fronts for...well...years! When I went through my card bases, looking for some inspiration, I found this one and decided to color it up, cut the front off and add it to a blue card base.

This card front featured the script background and the flowers. No color, no dimension. Just a very plain, black and white design. I decided to jazz it up a bit, so I grabbed some alcohol markers and went to work. I also stamped a simple sentiment in the open space above the flowers.


I also used some Nuvo Drops on the berry clusters.


It was fun choosing the colors for the flowers and  bringing them to life. 


I decided to make this a get well card and added the appropriate stamped sentiment on the inside. So many people are ill these days, and I felt that a get well card would be a welcome addition to the cards I sell at the thrift store.

We had my daughter and her family over for dinner tonight. It is such a treat to have them join us for a meal. It just doesn't happen as much as we would like these days. The grandkids are growing up so fast, and the Coronavirus is keeping us from participating in their lives as much as we would like.

Thanks so much for stopping by, and remember to laugh--a little or a lot--every day.

Cheryl

Monday, September 21, 2020

Another fun Twofer Challenge...


I love participating in Darnell's twofer challenges. It always helps me think about my craft supplies in new ways. I must admit, though, for this challenge I totally STOLE Darnell's idea about turning a treetop image into a hairdo. Thanks, Darnell, for this great idea, and I hope you don't mind that I copied it.

I had a little tree die set that was NBUS, so I pulled it out and went to work. And since I did use some NBUS supplies, I'm entering both my cards into the September Challenge on the NBUS Challenge Blog, too.


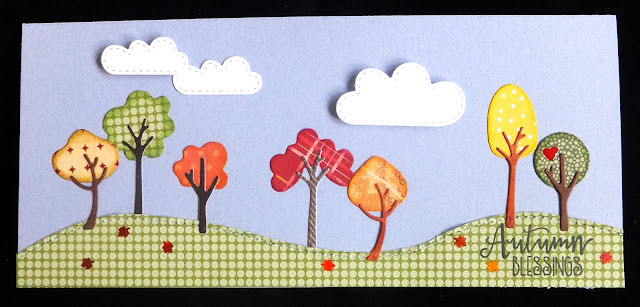
My first card is very traditional. I pulled out some fall-colored scraps of DSP and started cutting my tree tops and trunks. I just sort of mixed and matched the trunks with the trees and lined them up on some green, grassy hills. Can you see the little heart in the tree on the far right? That was a heart-shaped opening cut into the tree top by the die. I just filled it with Nuvo Drops. 

This is nearly a slim-line card. It measures 3 1/2" X 8".


I added some fluffy clouds, popping up a couple of them on foam squares. I also added some teeny, tiny maple leaf sequins, just for fun.


On the inside of my card I added a couple more trees and a computer-generated sentiment.


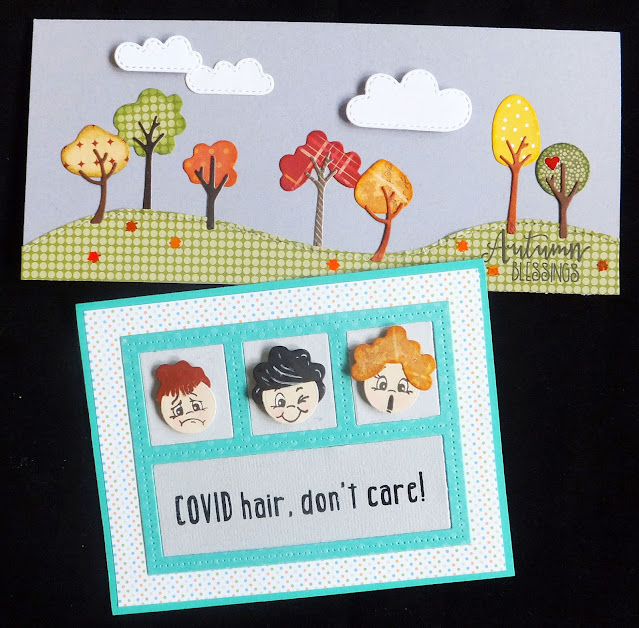
This card shows the design idea that I totally stole from Darnell. I selected three tree tops and cut them out in hair colors (sort of). I did a little surgery on two of them, cutting a slit in them in which to insert my round die-cuts with stamped faces (Peachy Keen stamps). I decided to take a few snips to create some fringy bangs on the brown one and add some gray hairs with a white gel pen to the black one.


You can see in this photo that I've popped each of my little faces up on foam squares.


Both the sentiments on the front and the inside of this card were computer-generated. 

This card was so much fun to create. I even had fun coming up with the sentiments.

I hope you'll join in the Twofer and NBUS challenges, too. It's a great way to give your imagination a kickstart.

Thanks so much for stopping by, and remember to laugh--a little or a lot--every day.
Cheryl


Thursday, September 17, 2020

Versatile border die...

Some of you may remember when I posted a picture of this card. I used this die from In Love Art Shop. If you missed it, you can read my blog post here.

I don't think this was originally meant to be a Christmas die, but the petals reminded me of poinsettias. 


Here are a couple more cards that show how versatile this border die is.


Doesn't it look great in these Easter-y colors? I used some Nuvo drops and light pink gems on the flower centers. I also added some gems around my stamped sentiment and one on my double butterfly.


Here's a little closer look at those flower centers.


On the inside, I added some more of the cheery yellow DSP from Stampin' Up. I could have stamped my sentiment right on it, but I thought it would look better if I put my sentiment on a white, stitched oval.


Here's another card I made with the die. Once again I added some gems to the flower centers and around my stamped sentiment.


My stripes were created by using a stencil and some white ink on my purple CS. I added a scored line on the right hand side of my diagonal stripes.


My sentiment was stamped on a small, stitched tag and popped up with foam squares. The bow was added with a glue dot.


Another stamped sentiment on the inside, and I also added a leftover piece of my striped CS for decoration. I couldn't bear to just throw it away!

I took 11 cards into the thrift shop today for them to sell. I noticed that all the birthday cards I had made for children had sold, so I need to get busy and make some more of those. In general, the cards seem to be selling really well. Sooooo....enough of my prattling on. I need to get back to my craft desk!

Thanks so much for stopping by, and remember to laugh--a little or a lot--every day.
Cheryl


Monday, September 14, 2020

Ombre die-cuts...


I decided to do a little layering of die-cuts in a progression of purple tones for this card. I used a "Thanks So Much" border die along with the open scallop border die from In Love Art Shop. I don't believe the open scallop border die is available any more, but they have quite a few other border dies to choose from.

I had to do a little bit of surgery on some of my scalloped die-cuts so that each of the lower ones would fit neatly under the one above it. It didn't take any time at all, though, and was super easy.

My card is blank inside, so I didn't bother to take a photo of its plainness. :)

We are back from our little camping trip to northern Minnesota. We visited the headwaters of the Mississippi, and I walked across it on some strategically placed stones. My hubs was wearing some loafers (slippery soles!) and as he began to walk after me, he slipped on a rock, causing him to reach for another one to steady himself. His arm went into the water up to the elbow. The arm of his wool shirt got soaked up to the elbow, of course, but after this little setback, he bravely took off his shoes and socks and steadily walked across. A few people standing on the other side cheered. My hero!! he he

My hubs is a good sport and doesn't mind if I tease him about such things. And I accept that turnabout is fair play--he can tease me, too, about my foibles.

Thanks so much for stopping by, and remember to laugh--a little or a lot--every day.

Cheryl

Friday, September 11, 2020

Stencil fun...

 Because I love using blending brushes and stencils, I recently got them out to have a play. My playing around generally ends up as a completed card, but not always. 


This was one of those times when playing with my stencils actually produced something. I grabbed several ink colors and began brushing them onto the stencil in a diagonal pattern. When I was done, I cut my panel to the size I wanted, matted it with some yellow CS and added it to a blue card base. Then I pulled out my glitter cardstock to see if I had some coordinating colors for a few punched balloons.


Here you can see that I've popped up my balloons and my sentiment panel (with a die-cut sentiment) using foam squares. That is actual thread for the balloon strings, which has been taped to the backside of the balloons.


This card will be sold at the thrift store, so I kept the inside pretty simple - just a cute stamped sentiment.


I learned a few days ago that my granddaughter's boyfriend and his twin brother both contracted COVID-19. They are currently quarantining in the basement of their family home for a couple of weeks. Hopefully, they will recover with no ill effects. They know where they picked up the virus and when, and my granddaughter has not seen her boyfriend since before that time, so she is hopefully in the clear. 

I hope you are staying healthy. While young people seem to recover fairly quickly, it's a lot more dangerous for us "mature" types.

Thanks so much for stopping by, and remember to laugh--a little or a lot--every day.

Cheryl

Tuesday, September 8, 2020

Fun Halloween card...

 This card came together so quickly. I used this frame die from In Love Art Shop. It's so pretty that it really didn't take much else to complete the card.


I cut my "Happy Halloween" from glitter CS, then cut my pumpkins and ghosts from regular white and orange cardstock. I did a little inking/shading on the pumpkins and colored the stems with a brown marker.. The smaller pumpkin is popped up on foam squares.


On the inside I cut a dot-edge rectangle, stamped my sentiment and added one final pumpkin.

I thought this card turned out so cute that I made two more of them. I plan on sending them to my three elderly aunts. I think they'll enjoy receiving them.

When you read this, I will be camping in our RV in northern Minnesota. The weather is supposed to really cool down with highs in the 60s. That means it may be getting down to the 40s at night where we are. I've taken along some warmer clothes, and I've made some chili and roast beef to have for a couple of our meals. It will be fun no matter the weather.

Thanks so much for stopping by, and remember to laugh--a little or a lot--every day.

Cheryl

Saturday, September 5, 2020

Let's Craft and Create Challenge #163: Best of friends...


I think we all have friends we are unable to see during this pandemic, so this challenge was perfect for making some cards to send to them. I hope you'll join in the fun at Let's Craft and Create and make some cards for your friends.


I made this card using the Lace Floral Frame dies from In Love Arts. Aren't these die-cuts beautiful? They're so delicate, and it takes some patience and extra care to remove the cut from the die, but it's so worth it! 

In Love Arts has even given me permission to offer you a 15% discount (Code: G-22717) if you wish to purchase this set.

After adhering the smaller die-cut to some white CS, I popped it up on foam tape. My sentiment is actually from two different stamp sets and was heat-embossed with silver embossing powder.

I've also made a Halloween card with the larger of the two dies (it looks fantastic in black), but I'll share that with you in a later post.

I used one of my favorite flower die sets (unbranded) to make this flower. The center was enhanced with Nuvo Drops.


My inside sentiment was stamped and heat-embossed with silver embossing powder.

Now it's your turn. I'm certain you can whip up some fabulous friend-centric cards to send to all the special people in your life.

If your mojo is napping, just pop over to Let's Craft and Create and see what the Design Team has come up with. They've provided some wonderful creations that are sure to inspire you.


Thanks so much for stopping by, and remember to laugh--a little or a lot--every day.
Cheryl

Thursday, September 3, 2020

Birthday cards using colorful scraps...


I made these three cards using some of my colorful cardstock scraps.


I started by adhering a bunch of strips of different widths onto a piece of printer paper.


For this first card, I cut a coin-edged oval out of my colorful piece. I also cut my happy birthday sentiment (and some stars) from glitter cardstock and glued it to the top of my oval. Then, I added my oval and those stars to a pre-inked panel and put that onto a green card base.


A simple stamped sentiment finished off the inside.


I carried on with the star theme for this card. I die-cut the sentiment from my striped piece, and then added a bunch of die-cut stars to a dry-embossed panel.


Finally, I die-cut a final "Happy birthday" along with a little banner. I added the stars from the banner to my sentiment panel and replaced them with white, glittery stars.


For these two cards, I stamped a sentiment on the inside and added a few more stars for color.

This was a fun way to decorate some cards. I even made a second striped piece for a future set of cards. I love using up some of those scraps!

Thanks so much for stopping by, and remember to laugh-- a little or a lot--every day.
Cheryl

Tuesday, September 1, 2020

A couple more Christmas cards...


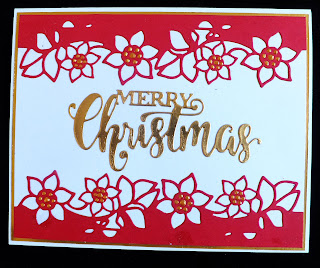
This was a quick Christmas card that looks great IRL. I used the "Flowering in Vine Border" die from In Love Art shop. I don't think it is necessarily a Christmas die, but the little flowers looked like poinsettias to me, so that's how I decided to use it. It cuts beautifully and can be used as a border on any size piece of cardstock since it doesn't cut across the bottom.

In Love Art shop is generously offering a 15% discount with the following code, if you wish to purchase it:

G-22717


I added a sentiment that was cut out of some gold packaging. I also added gold Nuvo Drops to the centers of my flowers and matted the whole panel with  some metallic gold cardstock.


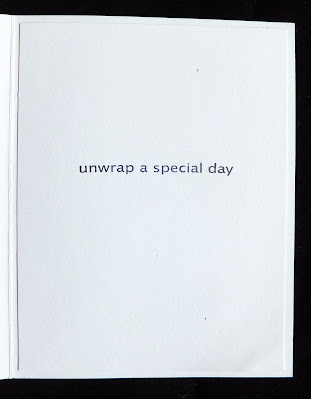
My inside sentiment was stamped with Versamark and heat embossed with gold embossing powder.


This is another simple card to make. I embossed the center white panel with a snowflake embossing folder. I decided to use the debossed side so that my die-cut sentiment would lie flat on the panel. This worked really well, and I think it looks nice, too.

The fancy sentiment was cut from the center of the mat that I used on my previous card. It just made sense to use an area that would be covered up anyway!

I glued a narrow strip of the gold metallic CS on each side of my snowflake panel to give a finished look to it. 


Once again, I stamped my sentiment with Versamark and heat embossed it with gold embossing powder.

I'm feeling pretty good now because I've finished making my Christmas cards for 2020. I will, however, continue to make them--for the thrift store and for 2021, so I'll also continue to share them.

We had a big day today--we went out for lunch with some friends. We met at an Italian restaurant that had outdoor seating. As badly as I wanted to give them each a hug, we just bumped elbows. LOL We had such a nice time visiting with them as we haven't seen them all summer.

We're also getting ready to go on a little camping trip to Itasca State Park - where the Mississippi Headwaters are located. It will be nice to get out of the house for a few days.

Thanks so much for stopping by, and remember to laugh--a little or a lot--every day.

Cheryl