Wish List

Wednesday, April 9, 2025

Using pretty book images...

I came across some pretty AI book images online that were free to use, so I made a few cards with them.


 I loved the combination of old books and flowers on a rustic background. I didn't add much to this card--just a stamped sentiment that was popped up and a tiny bit of glitter in the flower centers.


And just a stamped sentiment--actually two--on the inside.


For this card, I added a die-cut happy birthday and, again, a tiny bit of glitter to the flower centers. It had the same two sentiments on the inside as the first card.

I decided to make an anniversaray card with the third and final image. The stamped sentiment was popped up, but there's no glitter on this one.


And, finally, two stamped sentiments finished off the inside.

These were very quick to make, but I thought the images made them very attractive. They were all donated, and I think they'll sell quickly.

Thanks so much for stopping by, and remember to laugh--a little or a lot--every day.

Cheryl

Monday, April 7, 2025

Green flowers?...

I had a couple of green flowers in my stash that I wanted to use up. I'm always a bit hesitant to use green flowers because you rarely see them in nature, but this time I bit the bullet and decided they would be on a card.

I first cut a piece of DSP that was 4" X 4", and then I cut that piece in half diagonally. After that was done, I glued the two pieces to my card front as you see in the photo above.


I die-cut a wonky scalloped circle and adhered it to the center of the card front with some foam tape. 

I decided that since I was going to use green flowers, I would use deep teal foliage instead of usual green. I die-cut some leafy sprigs and added them to my flowers.

The two little white flowers (from Dollar Tree) were also glued to the card front to brighten it up a little. A gem was put in the center of each flower. 

The sentiment was stamped, die-cut and popped up with foam dots.


I used a computer-generated sentiment on the inside.

I actually liked this card once it was done. It was donated to the thrift store and sold quickly, so I think someone else liked it, too.

I think I will finally be done making Easter cards for the thrift store by this coming Thursday. They sell so quickly after I put them on display. In fact, last Thursday 17 out of the 18 cards I put out were sold by the time my volunteer shift was done. And I'm only there half a day!

Thanks so much for stopping by, and remember to laugh--a little or a lot--every day.

Cheryl


Saturday, April 5, 2025

Let's Craft and Create challenge #218: Anything Goes or (Option) Add Flowers...


"April showers bring May flowers...," and so our optional theme this month at Let's Craft and Create is "Add Flowers." 

Anything Goes is always an option, but I decided to add lots of little flowers to my cards. 

Flowers always work for Mother's Day cards, so I created a couple of cards that I hope will make some Moms feel special.

I used two coordinating paper patterns on my card front. The seam between the two is actually curved, but you can't see it because of all the leaves and flowers. I first cut two panels that were exactly the same size. Then I used a curved die to cut them both in half at the same time. That way they fit perfectly together.

After joining the two halves with a little tape on the back, I adhered them to a mat cut from the same cardstock as the deep pink flowers.

I have a die that cuts out five little flowers at one time, so it was easy to get them all cut out quickly. The leaves were cut with a leafy garland die. I just used it twice on different shades of green cardstock and layered them. Quick and easy!


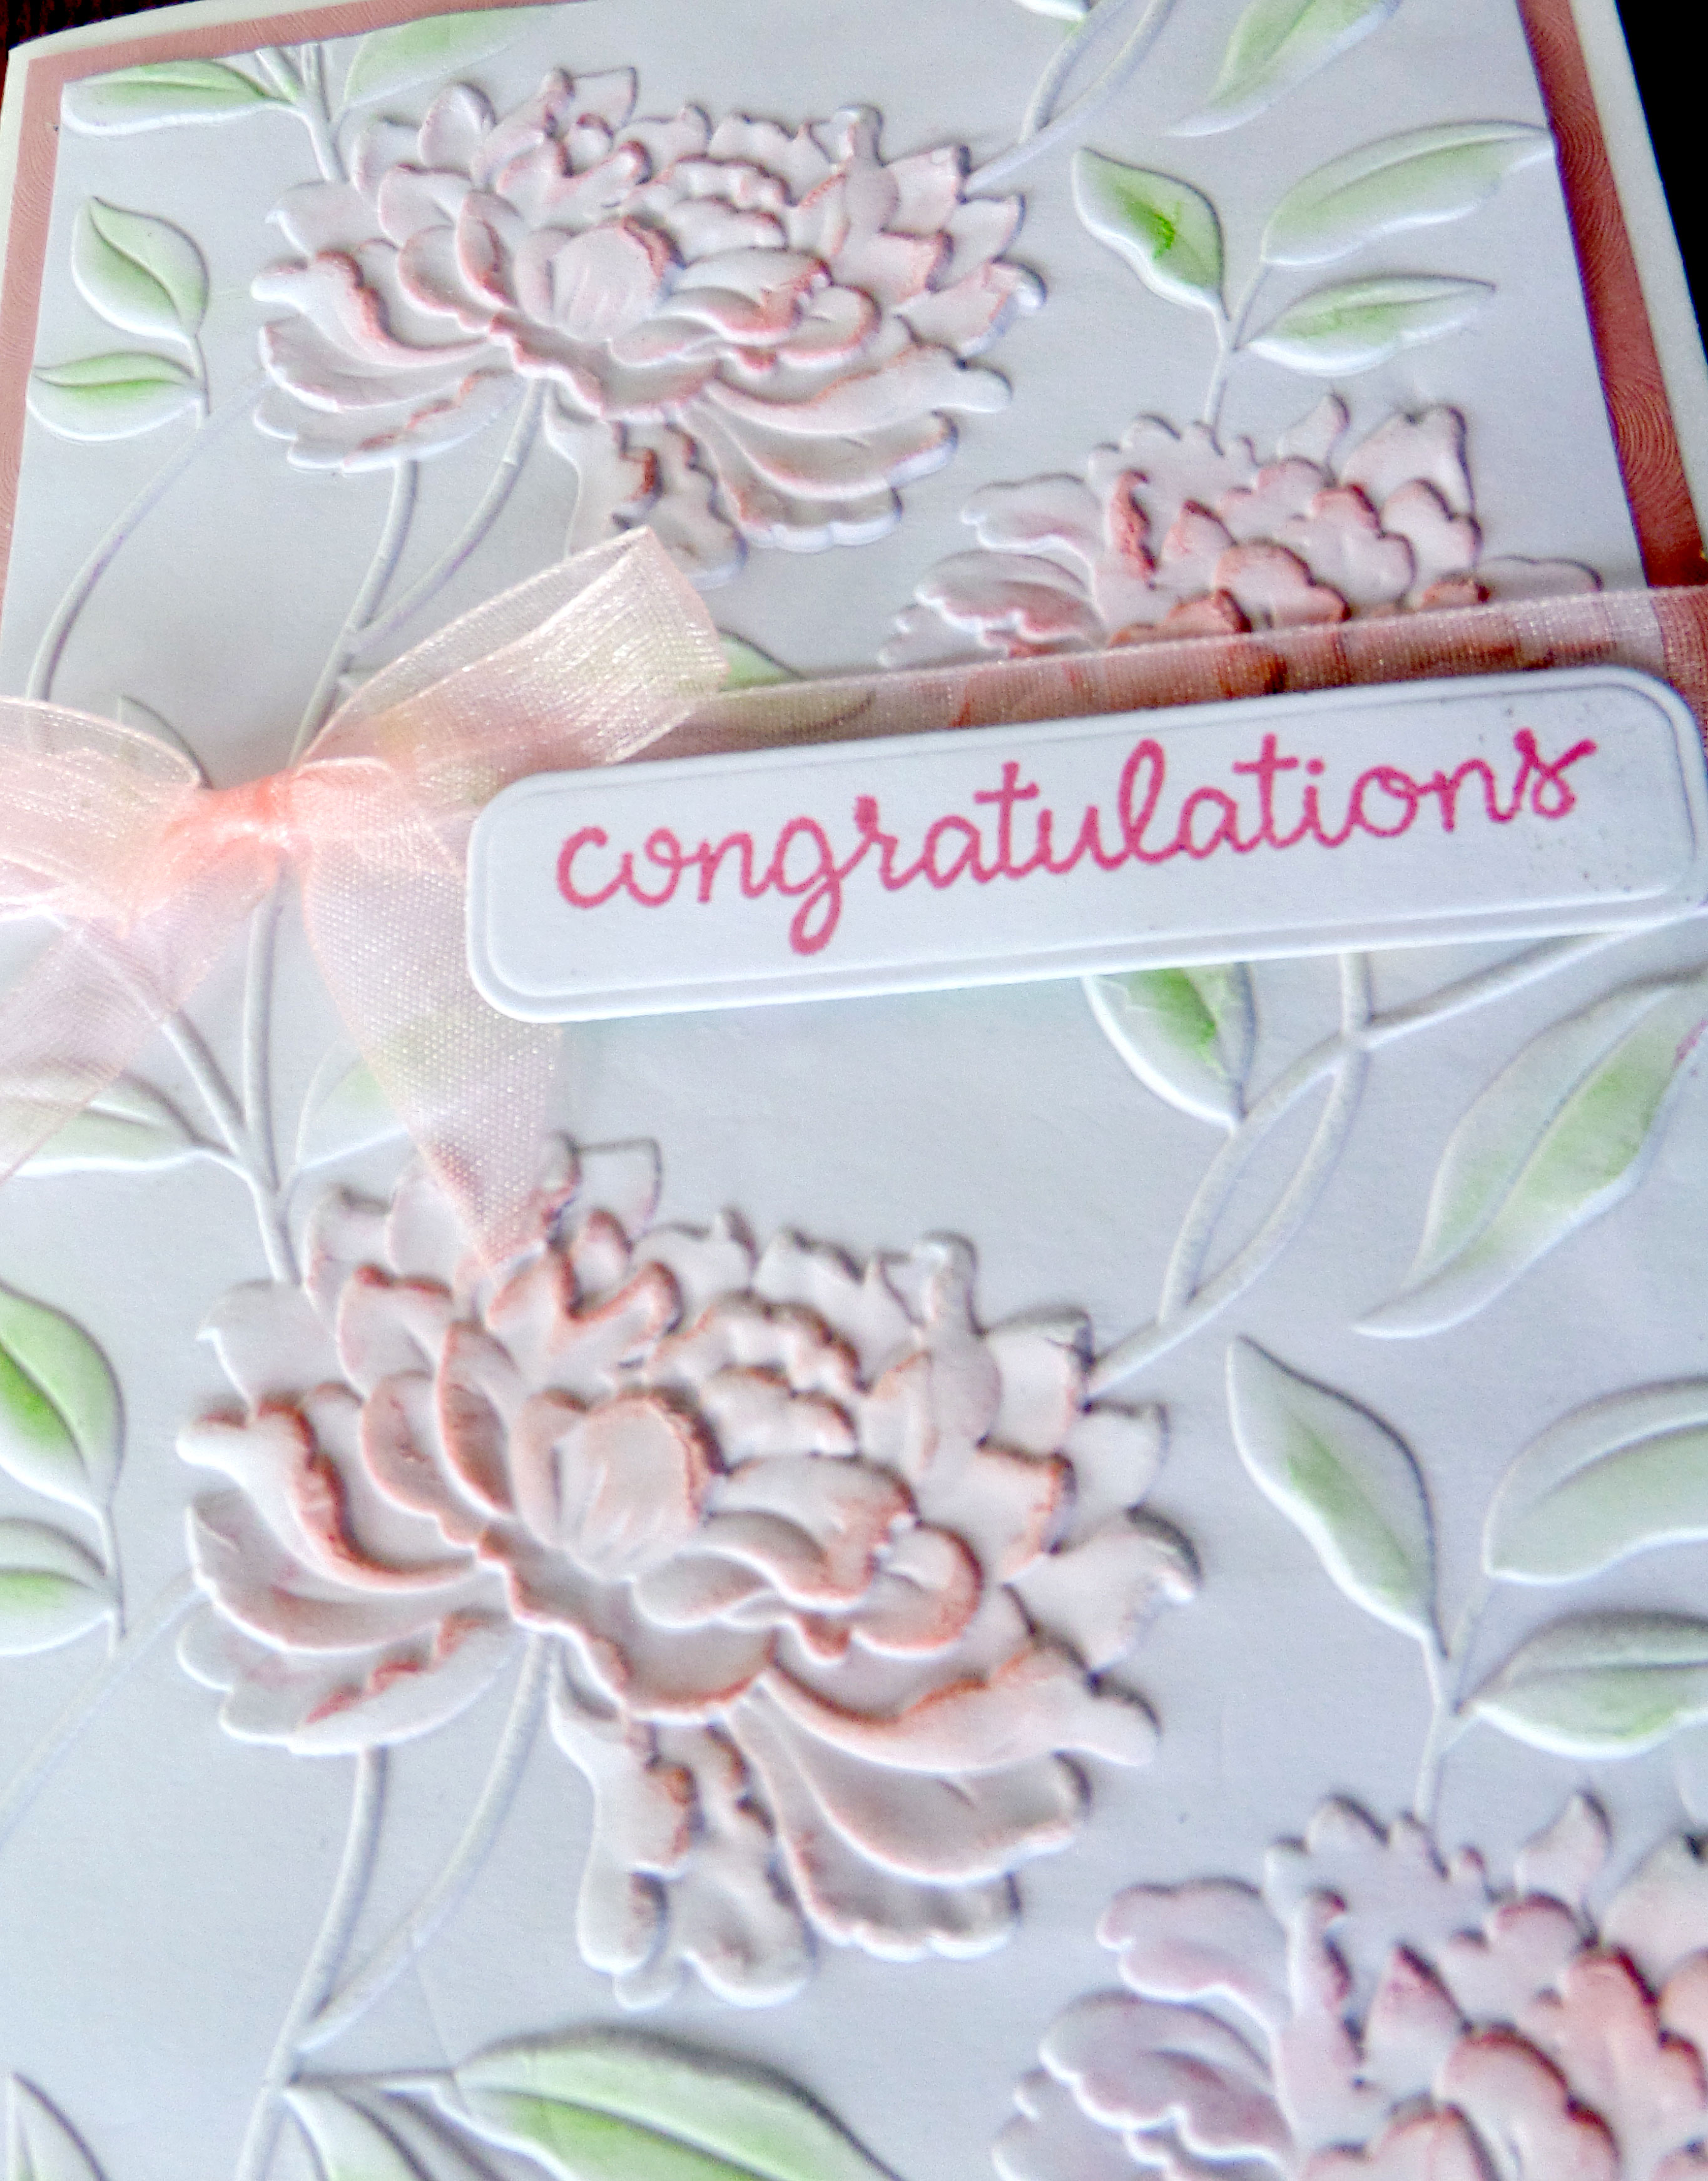
The sentiment was stamped, die-cut and popped up on foam squares. To further embellish the little panel, I added a flower and a few leaves.

Eqach flower has a gem in its center--a pink gem in the white flowers and a clear gem in the pink flowers.


A mat was also added to the inside sentiment panel and another flower embellished the center top.


This card was made in much the same way, but I did not add a mat behind the DSP. The letters for MOM were cut from the dark pink cardstock and glued directly to the DSP.


The sentiment "You are loved" was stamped, die-cut and popped up with foam tape. A single flower was added for embellishment.


This inside sentiment was also stamped (it's actually a combination of two stamps), and two tiny flowers were added for embellishment.

Now it's your turn. I just know you have some flower dies or stamps you could use. It's also possible to make flowers without dies, using punched circles, plain or scalloped. I've even seen cardmakers use small triangles as flower petals. I can't wait to see your creations!

Check out the prize for April and the inspiration projects created by the rest of the Design Team at Let's Craft and Create

Thanks so much for stopping by, and remember to laugh--a little or a lot--every day.

Cheryl

Thursday, April 3, 2025

We were meant to BEE together...


I was asked by an employee at the thrift store where I volunteer to make an anniversry card for him to give to his wife. I actually made five different cards so that he could choose the one he liked best. The rest will be donated to the store. This card is one that I made. 

I wanted to join in Darnell's (djkardkreations) challenge this week to use stencils. She has invited those who participate to post their results here. Sometimes I need a little "encouragement" to get my stencils out and use them, so this was perfect for me.

I began by creating an A2 card base and adding a panel of DSP. Then I cut a hexagon aperture through both layers.


I have a 3-stencil set that creates a shaded honeycomb design that I thought would be perfect. I used it to stencil another hexagon shape that fit the aperture.

My little bees were stamped, colored with markers, die-cut and then popped up on foam squares.

The little foam hearts came from a package of confetti that I have in my stash.


When you open the card, the pop-out section pulls the center hexagon to the inside. I stenciled another piece of cardstock, then cut it into two pieces and added them to my pop-out rectangle,

The sentiments on the front and inside were created with my computer before I glued the hexagon to it.

You can watch a video tutorial for this card, and a top-fold version of it, here.

I had so much fun making this fun-fold, that I actually made a few more cards like this for different occasions. 

Thanks so much for stopping by, and remember to laugh--a little or a lot--every day.

Cheryl

Wednesday, April 2, 2025

Quick and easy Easter cards...


The small cross that you see on this card was a sticker that I found in my stash. I wasn't sure what to do with it, especially since it is so small. 

I pulled out my set of arched rectangle dies to see if one would create a nice-sized cut-out for it. Sure enough, one did. Since the cross was gray, I selected some gray DSP and cut it to size befire cutting the aperture. Then I took a scrap of white and used a pierced sunburst background die to create the pattern you see.


After gluing the pierced design directly to the card front, I used some foam tape to pop up the DSP panel. The photo at left shows some of the shadow and dimension.

The cross had some nice dimension, too with the flowers and aqua beads that were adhered to its front.

"Happy Easter" was stamped, die-cut and then glued directly to the DSP. I decided not to pop it up, because I didn't want the sender to have trouble mailing it without extra postage.


I stamped a white panel with an Easter sentiment for the inside.


I found this polka-dotted card base in my stash, and because it was a nice Spring color, I decided to use it for an Easter card.


The fancy cross was made with a two-die set: one die cuts the cross shape and one die cuts the fancy design. That way I could cut a perfectly-sized plain shape to put behind the fancy one.

I also cut two fern-like branches out of green vellum to anchor the cross.

The sentiment was heat embossed, die-cut and popped up with foam tape.

Finally, I added two aqua gems to finish the front.


The sentiment in the photo at right was printed with my computer, matted and adhered to the inside.

*****

It has been cold and snowy here the last couple of days. I never know what jacket to put on before going outside.  We did have a couple of hours of sunshine yesterday before the clouds, along with rain and snow, set in. It makes me just want to head down to my craft area in the basement and stay there until the temperatures reach the 70s at least!

Thanks so much for stopping by, and remember to laugh--a little or a lot--every day.

Cheryl

Monday, March 31, 2025

Fractured Easter cards...

I have a large die that cuts a "fractured" design for card fronts. I decided to use it for a couple of Easter cards.

After making a couple of card bases in a very light peach color, I cut a fractured frame out of ollive green, which was the leaf color in the DSP I wanted to use. 

Once the frame was cut, I added it to the card base and then cut the coordinating pieces from the floral-pattern DSP.

The center square was cut from white cardstock, stamped with "Happy Easter" and popped up with foam squares.

For a final embellishment, I added a pretty butterfly from a set of stickers I had purchased at Dollar Tree.


I wasn't completely happy with the olive green frame, so I cut a second one out of the deep coral color in the DSP.

I then cut the coordinating pieces and glued them down, just as I had done for the first card.


Once again, the center square was cut from white cardstock, stamped with an Easter sentiment and popped up on foam squares. A pretty butterfly sticker was added for embellishment.

I love using butterflies for Easter cards, since they symbolize new life just as the Easter celebration does.


At left is the computer-generated sentiment I put on the inside of each card.

*****

It was a cold and rainy weekend in Minneapolis...until Sunday. On that day it was still cold, but the rain turned to snow. Ugh! I am so very ready for winter to be over and spring to begin in earnest. 

Our perennial flowers are really trying to poke their heads above ground, but as they do, the poor things get smacked with cold temps and freezing percipitation.

Thanks so much for stopping by, and remember to laugh--a little or a lot--every day.

Cheryl

Friday, March 28, 2025

3D embossing on a wedding card...

I was inspired by a card my friend Lynette shared in this post. Thanks, Lynette! I thought the light inking on her card was so pretty, so I decided to make a couple myself.

Of course I had to use purple ink on one of them!

I should have used a darker purple ink for "congratulations," but once it was done I just decided to go with it.

I actually used green chalk on the leaves; using a Q-tip, it was easier to apply on those small areas.


I also tied a sheer ribbon around the embossed panel after it was adhered to a mat.

The sentiment was popped up on some foam tape.


This card was made exactly the same way.


This time I used a darker ink for the sentiment which made it easier to read.

In case you're wondering what I used to apply ink to the blossoms, it was a small round blending brush. It has short bristles, so it's pretty easy to control where it applies the ink.


Both cards had the same sentiment on the inside, but stamped with the appropriate color of ink.

Both of these cards were donated to the thrift store. I figure that wedding season is coming up very soon, so I'd better start making and donating wedding cards regularly.

The thrift store occasionally gets donated wedding dresses. I enjoy seeing the different styles that people used to wear.  A few decades ago, the puffy, fluffy look (think Princess Diana) was all the rage. Now it looks very dated, but I'm sure it will come back in style again at some point.

Thanks so much for dropping by, and remember to laugh--a little or a lot--every day.

Cheryl