Wish List

Wednesday, June 8, 2016

Pinterest-inspired Converse shoe card...

When I was poking around on Pinterest looking for ideas for "boy" cards for my daughter to keep in her stash, I came across this fun idea.

My photo is a tad out of focus, so please ignore that. I simply made some faux stitch lines on a piece of red CS with a white gel pen. Then I added some evenly spaced grommets (after matting my red onto black CS) and used some narrow twill tape for the laces. The star was cut with a die and centered onto a stitched circle die-cut and a plain circle die cut. I did a little inking (with black ink) on the white parts of my card front so that it didn't look so much like a brand new Converse tennis shoe.

The sentiment on the inside of my card was computer-generated.

This card was so quick and easy, that I made two of them for my daughter. She has two boys, so they can each use one of them when they're next invited to a birthday party for one of their buddies.

I continue to shuffle grandkids to swimming and soccer each day and supervise them at home while their dad is at work and my daughter is in Croatia. Believe me, it keeps me hopping!! I am actually quite shocked that I have found the time to post this.

Thanks so much for stopping by, and remember to laugh--a little or a lot--every day.
Cheryl

Sunday, June 5, 2016

Let's Craft and Create Challenge #114: Hearts and/or Flowers...

I was deeply saddened this past week when I learned of the untimely death of Eileen Dobson, the wonderful leader of our Design Team and owner of Let's Craft and Create Challenge Blog. Eileen has been an inspiration to the entire team with her amazing creativity and her brave fight against breast cancer.

To honor and remember this beautiful person, we will continue the blog and the challenges, as she had wished. Our challenge for the month of June--Hearts and/or Flowers--is dedicated to Eileen, and we truly hope you will join us in this special tribute to her.

As I set about to make my card, I thought about how Eileen would want us to continue to use our creativity to bolster the spirits of someone else who is going through difficulties with their health. In light of that, I was inspired to create a card filled with loving get well wishes.


I had a package of tiny lavender vellum envelope stickers by Sticko (in photo) in my stash. I've had these for a loooooong time, and have been thinking about how I'd like to use them.

I also had a gorgeous lavender paper with pink roses that had come with an issue of Cardmaking & Papercraft magazine. One of the lavender shades in the paper perfectly matched the color of these little envelopes.


With some pink ribbon--again from my stash--and some hearts cut with Darice dies, my card came together. As a finishing touch, I decided to add a few flat-backed gems in shades of pink.


For the inside of my card, I cut a plain lavender mat and used a couple of the die-cut hearts to adorn my sentiment, which was computer-generated.

Please visit Let's Craft and Create to see the outstanding designs from the rest of the Design Team. You will be blown away by what they have created! We would LOVE it if you would join us in this very special challenge and submit your own creation using hearts and/or flowers. You've got until the end of June to submit your card, layout, home décor or other items, and one of you will win this month's special prize (see the challenge blog for details).

Thanks so much for stopping by, and remember to laugh--a little or a lot--every day.
Cheryl

Thursday, June 2, 2016

Your birthday it is, celebrate you must...

One of my daughters asked me to make her a few birthday cards for boys. She has two young boys who go to a lot of birthday parties, and they like to give cards along with their gifts.

This is one of the cards I made for her.


I used my Silhouette Cameo to cut the Star Wars LEGO figures (cut file was a free download from www.iammommahearmeroar.net). I inked around the edges of the Stormtrooper and Yoda figures and popped them all up with foam tape.

The rectangles that back each figure are actually cut from a shimmery gold cardstock. I know you can't see it in the photo, but it truly is gold. And shimmery.

The stars were cut from black glitter CS with one of my smallest star dies, and the sentiment was computer-generated.

I kept the inside pretty simple. Boys don't like lots of fluff or poetry, do they? This Happy Birthday stamp is super old - not sure of the maker. I only added a couple of stars for decoration.

This card was so much fun to make that I actually made two of them. I've got a couple more cards to share that I made for my daughter, but I'll save those for future posts.

Speaking of blog posts, mine may be a little scarce over the next couple of weeks as I am helping to care for three of my grandchildren while their mother (another daughter) is out of the country. She is leading a group of university students in Croatia and teaching classes there, as well. I hope she's having a great trip!


Thanks so much for stopping by, and remember to laugh--a little or a lot--every day.
Cheryl

Friday, May 27, 2016

Special silhouette card...

Today is my brother-in-law's birthday. Happy birthday, Harold!!

He is a very special person - so kind and compassionate, and a wonderful father and husband to my sister. I wanted to make a special card that really reflected him and his life.

He has always raised cattle and horses (he lives on a farm in the northern Great Plains area of the U.S.), so I decided to look for some clip art of a man on a horse. I found a great silhouette, which I imported into my Silhouette software and traced. I then used my Cameo to cut it out from black cardstock.


I created a little scene with some distress inks and a stamp that could pass for prairie grasses, and then adhered my cardstock silhouette to it.


I used the Cuttlebug folder "Bird Call" and a little light sanding of the embossed design to create the "prairie grass" look on the left side of a green matte for my scene. Finally, a couple of small ovals for my sentiment and some twine finished off the front of my card.


I used another foliage-type stamp to dress up the inside of my card and add a little color.

I hope my BIL has a wonderful day and a very special year. I also hope he enjoyed receiving this card made especially for him.


My daughter and her family will arrive this evening to spend the Memorial Day weekend with us. We had planned to go visit them, but, as often happens, plans changed. We're just excited to see them no matter where it happens!

Have a wonderful weekend wherever you are, and if you're in the U.S., I hope you are able to enjoy some special time with family and/or friends remembering those who have lost their lives in service to our country.

Thanks so much for stopping by, and remember to laugh--a little or a lot--every day.
Cheryl


Tuesday, May 24, 2016

Smooth sailing...

I am trying to build up my stash of masculine cards, so when I saw a sailboat card cut file (Design ID #93203) in the Silhouette Online Store, I decided it would be a good addition to my files.

Here's what the card looks like once it is cut and put together:


Isn't that a peaceful image? If you look closely, you'll see that I added a darker color for the water with some navy blue chalk.


Here's another one with a slightly different color card base. Once again, I chalked with a different blue where the water would be. Although you can't really see it in the photo, I added some clear glitter to the moon and to the white lines in the sky.

I created a sentiment for the inside of my card and printed it out with my computer. I also found a simple sailboat stamp in my collection and stamped it beneath my sentiment.

This card was super quick to cut out and put together. Love to have these kinds of card files in my arsenal for those last minute needs.

So...do you have plans for the Memorial Day Weekend? We're planning to take our little RV out for the first time this summer. We'll be heading to North Dakota to visit my daughter and her family (three grandchildren to kiss and hug - yay!). We could stay with them in their home, but we thought it would be a good time to make sure everything is copacetic with the RV.


First though, we've got to get all our supplies loaded and our clothes ready to go.

Thanks so much for stopping by, and remember to laugh--a little or a lot--every day.
Cheryl


Friday, May 20, 2016

A toadally awesome birthday card...

I promised to make my brother a card to give to his grandson on his 6th birthday. I did a little search online and decided to purchase a cutting file for this cute toad and layered sentiment from Miss Kate Cuttables.


Isn't he a cute little toad? He comes compete with his little birthday hat, to which I added a sparkly gold enamel dot at the top. I also added Glossy Accents to his big eyes.

My "Wishing you..." sentiment circle was computer generated.

Notice the cloudy sky behind him? I created that with a piece of torn CS and some sponged ink.

Mr. toad was placed into my framed aperture with some fishing line. In order to sandwich the fishing line between two toads, I simply mirrored the image and cut two of them with my Silhouette.


Instead of cutting out my sentiment words, I used my Silhouette sketch pens to "draw" them on a piece of white CS. Then I had the Silhouette cut the entire sentiment out along with the black mat underneath it. I used markers and gel pens to fill in the letters, since the Silhouette drew the outline of the letters and didn't actually fill them in with color.


 Here's a peek at the inside, where you can see the mirror image of Mr. Toad and how he is suspended in the aperture. You can also see my sponged clouds. I used some Post-It notes to mask off the bottom of my card where I printed my sentiment with the computer.


This was a fun card to make. If you wind the toad a few turns and then carefully place the card in its envelope, it will automatically unwind when the card is first opened. A fun little extra for the birthday boy!

We've had some warm weather for a change and my lettuce seeds have sprouted and are now sporting tiny little leaves. Not big enough to harvest for a salad yet, but it won't be long! I LOVE fresh vegetables from the garden, so I'm keeping a close eye on my lettuce to make sure the many bunnies that live in our neighborhood don't harvest it first!!

Thanks so much for stopping by, and remember to laugh--a little or a lot--every day.
Cheryl

Wednesday, May 18, 2016

A Christmas card in May...

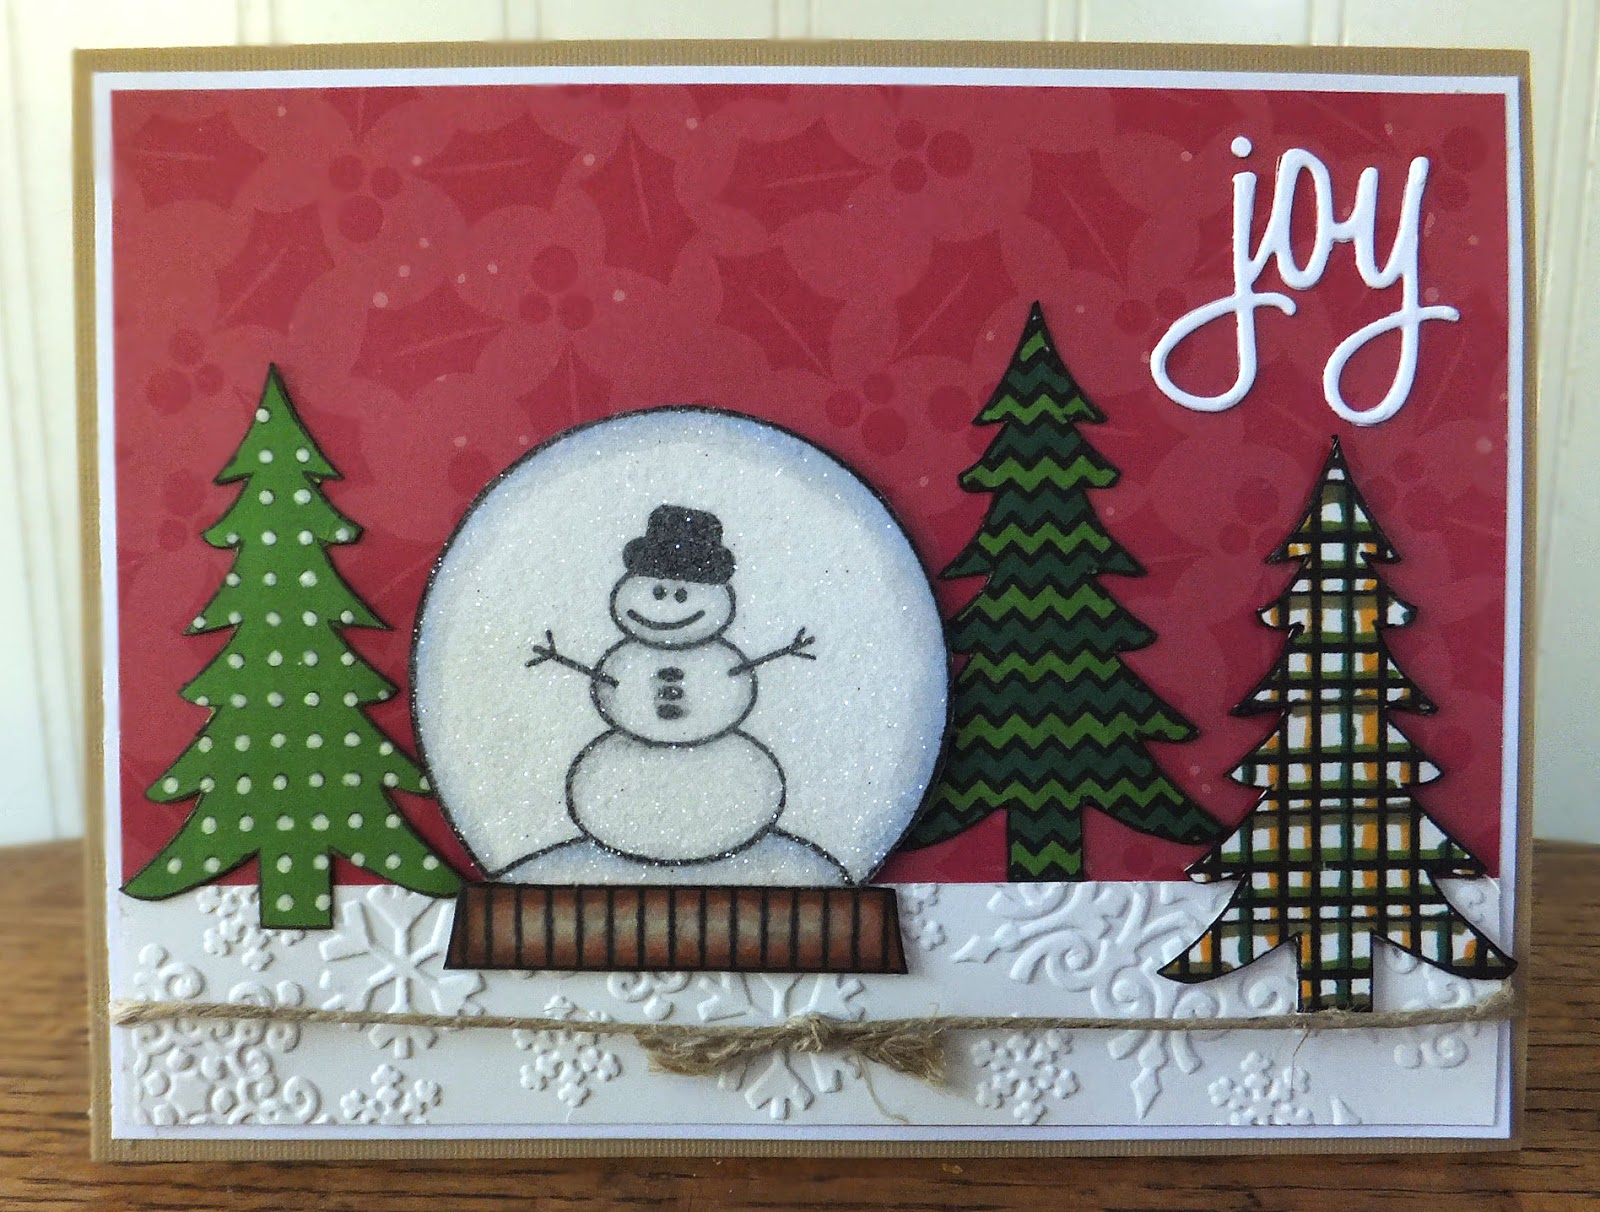
When I saw the challenges at Merry Monday Christmas Card Challenge Blog and Passion for ProMarkers Challenge Blog, I knew I had to make a card to enter both of them. After all, I am WAY behind on making Christmas cards!

The Merry Monday challenge is to use a snowglobe image on your project, and the Passion for ProMarkers challenge is to use spots and/or stripes. In looking through my Christmas supplies box, I found just the right stamps for the job.


I had this cute Sizzix snowglobe stamp and also these fun tree stamps, which are by Hampton Art. I decided to create a little scene using these stamps, along with a Darice embossing folder and a "joy" die-cut by Sizzix/Tim Holtz.

I stamped my little snow globe and colored it with ProMarkers, adding shading with blue and grey markers to the snow and globe and using three different brown markers for the stand. Once it was colored, I covered the globe portion with some double-sided sheet adhesive, sprinkled it with clear glitter and burnished it in. The sparkle really adds a special touch to an otherwise simple stamp.

You may be able to see the sparkle a little better in this photo.

Next, I stamped my trees on white CS and colored them with ProMarkers. The polka dots on the first tree were black since I had stamped with black ink, so I used an opaque marker to make the dots white. Like the snowglobe, the trees were fussy cut. The snowglobe and the plaid tree were adhered with foam tape for a little added dimension.

I added a bit of twine as a finishing touch. I thought it nicely tied in the kraft cardstock that I had used for my card base.


I kept the inside of my card pretty simple, using only the embossing folder that I had used for the front to add a little interest and dimension.

So that's one more Christmas card done and dusted! I definitely need to make a lot more of them in the coming weeks to catch up to my 6-10 cards per month goal. But with the warm weather and brilliant sunshine...that's probably not going to happen. I'll surely be scrambling again in November to get them done.

I hope your week is going splendidly. Thanks so much for stopping by, and remember to laugh--a little or a lot--every day.
Cheryl