Wish List

Sunday, April 5, 2015

Let's Craft and Create, first challenge of 2015!

I am excited to announce that I am now a member of the Design Team for Let's Craft and Create, a challenge blog led by the wonderful and creative Eileen Dobson. I am so looking forward to the monthly challenges and to seeing all the fabulous creations from friends, followers and visitors of LCC.

This month's Challenge #100 - Seasonal Flowers was right up my alley. I LOVE adding flowers to my cards. I especially love making my own flowers, and that's just what I have done for this challenge. I was so excited about it that I actually made two cards!

My first card was inspired by the ornamental crab apple trees that will soon be blooming in my home state of Minnesota. The blossoms range from white to red, with all shades of pink in between.

I cut a piece of white cardstock for my little scene with a Spellbinder's Romantic Rectangle die. Then, I created a branch using a Lifestyle Crafts die and punched numerous little flowers out of vellum with my Martha Stewart Hydrangea punch. I used a ProMarker to color the back of each one, concentrating the color at the center.


I used an embossing tool to shape them and also added some pearly centers with a Viva Décor pen.

Do you see those pretty clouds behind my branch? That was done with a torn piece of  paper and some light blue chalk.

My butterfly was punched with a small Fiskars punch and then outlined and colored on the back with a ProMarker.


On the inside of my card, I used the same deep pink mat as the front and a strip of the DSP across the bottom.


Once again, I added a vellum flower--this time a larger one--as a little added decoration.


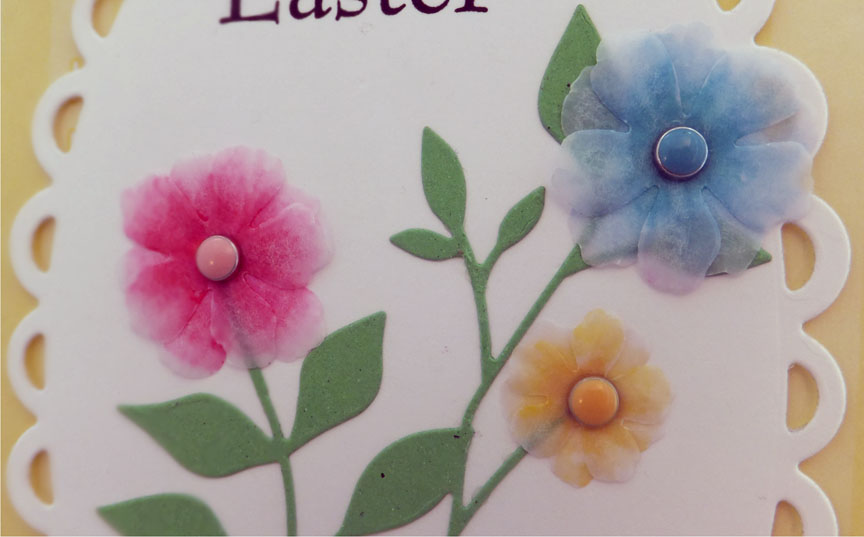
My second card was actually an Easter card that has already been sent to its intended receiver.
More of the larger vellum flowers, but instead of using a Viva Décor pen for the centers, I added some coordinating mini-brads. The foliage is a Memory Box die and the lacy oval was cut with a Lifestyle Crafts die.


I love the soft look of vellum flowers when they are colored on the back. They maintain their transparency and look oh, so delicate.


The inside of this card was another lacy oval on top of a DSP mat. My sentiment was computer generated.

Here is a list of links to the team so that you can visit and be inspired by their awesome creations:

             Karen

             Maryvonne

             Eileen

             Deborah

             Cheryl (that's me!)

             Ursula

             Hazel

             Mary

             Catherine

I hope you've been inspired and will join us by submitting your creation at Let's Craft and Create. There is a wonderful PRIZE up for grabs and you can read all about it here.

I think we all make floral cards from time to time, and I can't wait to see yours!

Thanks so much for stopping by, and remember to laugh--a little or a lot--every day.
Cheryl

Wednesday, April 1, 2015

Easter butterflies...

My lovely friend Nadine in Germany sent me a little box filled with these pretty butterflies. I just HAD to use some of them on an Easter card.

 I first used a Darice embossing folder to add some texture and interest to my white mat. I scored four lines to separate the embossed designed from the bottom section of the mat where I stamped my sentiment. Then I tied a piece of pink and white baker's twine in the center of the scored lines.


These little butterflies are so cute. They are not only punched out, but embossed, too. I think you can easily see the embossing on the aqua one.

I added a tiny to pearl to accent each one and to add a little bling to my card.


My inside was pretty simple: a white mat with four scored lines and baker's twine at the top.  My sentiment was computer generated.

Thank you, Nadine, for these fun butterflies. I am really enjoying using them!

And thank you for stopping by my blog today. Don't forget to laugh--a little or a lot--every. single. day.
Cheryl

Monday, March 30, 2015

Half gate-fold Easter card...

This card came together super quickly. It's a half gate-fold, which means that the top half of the card front has been cut off.

I bought these sweet little flowers at a local store called "ArtScraps." They sell all kinds of stuff including new and used craft supplies. They had a container full of these flowers and you could fill a little bag for just $2.50. They were in my favorite color combo, so I picked up a bag. You can see that some of them have a little glitter on them, but I think this just adds to their charm.

I've added some Viva Décor pearly white centers and a few leaves created with an EK Success punch. The adhesive-backed aqua trim was some that I got in one of the $1.50 bins at Michael's. I got it well before Easter, intending to use it on a number of my Easter cards, but this is only the second one I've used it on. It seems I always start down a particular path when making cards, but take multiple detours along the way.

My sentiment is a little rubber cling stamp, but I could not find the maker for the life of me. It was not on the packaging, as it was sent to me in a plain little Ziploc bag. I should have written the manufacturer on it as soon as I received it, but, of course I didn't!

The lacy ovals were cut with two Lifestyle Crafts nesting dies.


In this picture you can see the half gate-fold a little more clearly. I like this kind of card because I don't feel that I have to add an additional sentiment. I just write a brief personal note and sign my name behind the "gate."

Tomorrow my new bathroom will be fully functional. My brother is coming to install the sink for the second time. We had to pull the first one and re-order it because that first one was scratched. (We didn't see the scratches until after it was installed!)

Now, mind you we still don't have the door back on. I think we're going to have to cut it off a quarter inch or so because we raised the level of the floor with the tile. All these little details are driving me a little bonkers. Add that to my usual bonkers, and I'm pretty much a crazy lady!! I know my children will attest to that. ha ha

Well, thanks so much for stopping by, and remember to laugh--a little or a lot--every day.
Cheryl


Thursday, March 26, 2015

Easter chicks...

I got this little chick stamp from the $1.50 bins at Michael's a couple years ago, but haven't used it much. It was time to pull it out again.
I colored him with several of my ProMarkers, using three different yellows/golds and a couple of browns. I also added a light shadow beneath him with a gray marker. I'm entering this card into I ♥ ProMarkers' Challenge #262 Easter/Springtime.


The border punch is Martha Stewart's Scalloped Teardrop. I added a piece of self-adhesive sparkly trim across the top of it.

My banner was hand-cut after stamping "Happy Easter" with a CraftSmart stamp.

You can see that I've added a few yellow and blue sequins for extra sparkle.


The inside of my card is pretty simple with a computer-generated sentiment. My perfect 1/16" aqua border was created with my Perfect Layers rulers. I LOVE them, especially for shadow-type mats like this one. I can't hang a picture straight to save my life; I could never adhere a piece of paper straight with a border this narrow!


This is another card I made using some purple cardstock this time and a little purple and white baker's twine.

Speaking of chicks...

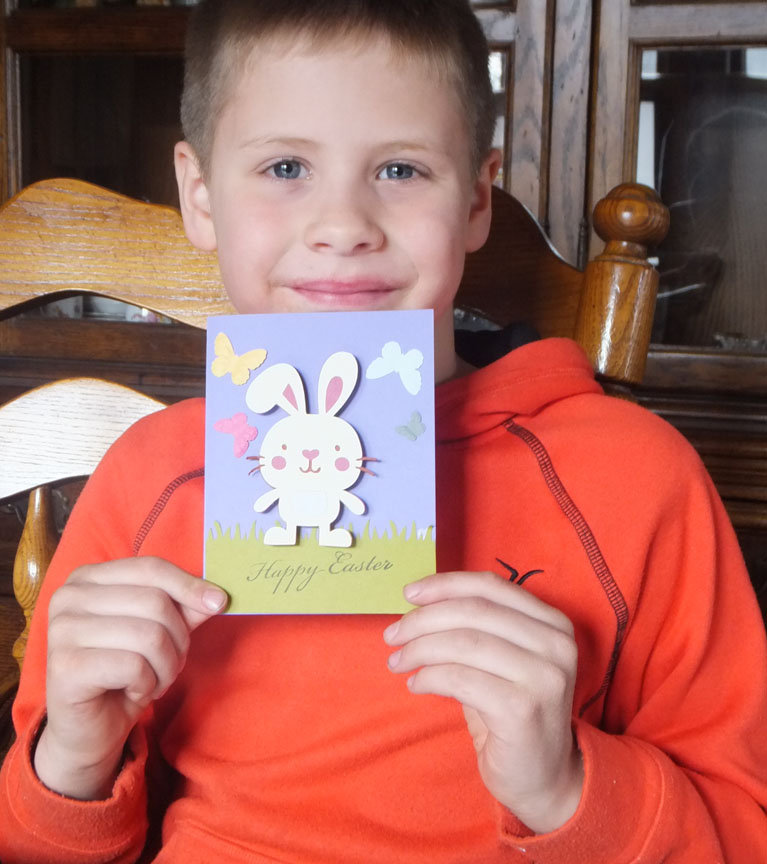
Here's one of my favorite 7-year-old peeps who spent last weekend with us. He wanted to make an Easter card for his paternal grandparents, so we went downstairs to my craft area and went to work.
He loves my Create a Critter cartridge and selected this cute little bunny, which we cut out at 3 1/2".


He created some grass for the bunny to stand on with a Fiskars grass border punch. I had a few extra butterflies on hand so he picked some out to embellish the front of his card.

He even stamped the sentiment  himself (CraftSmart stamp) at the bottom of the card. Pretty good for a novice stamper, don't you think? His centering skills are near perfect!


He decided to handwrite the sentiment on the inside. The wording is his very own. Pretty sweet, isn't it? We mailed it that very day, and I hope his grandparents in Vermont enjoy this sweet Easter card.

Well, that's it for me today. Thanks so much for stopping by, and remember to laugh--a little or a lot--every day.
Cheryl

Monday, March 23, 2015

Sizzix Flip-its is one fun die...

My twin daughters gave me a gift certificate to Michael's for my birthday this year, and I decided to use part of it to buy a Sizzix Flip-its die. I'm really glad I did, because I've had so much fun using it to make some of my Easter cards. Take a look.

This card took just minutes to make. The die set includes the scalloped mats and several sizes of pierced circle and scalloped circle dies. Isn't it fun?

Here's a peek at the inside.
I left the inside circle blank to leave room for a short note and signature.  The flowers are from Petaloo with some added enamel dots for the centers. The pink trim is a Martha Stewart punch called Double Link Trim. The leaves are an EK Success punch.

Here's another card that I made with some free designer papers that came in a card-making magazine. The paper was quite thin, and I would not have been able to use a punch to get the scalloped edge. It worked perfectly with my Flip-its die, though.


For this one I added some gems and a tiny butterfly (Fiskars punch) to help focus attention on the sentiment. The sentiment stamp is a very old foam stamp. I have no idea what brand it is, but I like the font.


Once again, I left my inside circle blank for a handwritten note and signature. Of course I had to add another tiny butterfly for embellishment.


Here's one last card with some slightly different flowers and some tiny rickrack for embellishments. These flowers are also from Petaloo. I simply added a little color to the petals and some stickles to their centers.

This Sizzix die set is quite versatile. I've also used it to help make some standard card shapes, but I'll share those with you in another post.

We got a little over 3.5" of snow last night, and they say there is more on the way later in the week. I'm not too down in the dumps about it, though. I think it will melt away soon, and we can certainly use the moisture here in the Minneapolis area.

Thanks so much for stopping by, and remember to laugh--a little or a lot--every day.
Cheryl

Wednesday, March 18, 2015

Butterflies for Easter...

Richard Buckminster Fuller is quoted as saying,
 
"There is nothing in the caterpillar that tells you it is going to be a butterfly."
 
I love this quote and think of it from time to time. It reminds me that we all have hidden talents and capabilities - some we don't even recognize in ourselves. We need to encourage our friends, children, other family members and each other to spread our wings and fly!
 
Okay, enough of my sermonizing. LOL Now on to my cards for today.
 
 
I made this Easter card using my Marianne Creatables butterfly die (LOVE it!) and a Spellbinder's Fancy Tags 2 die.
 
First I used the butterfly die to cut the shape out of my patterned cardstock so that I would have a white background for my butterfly. I thought it might get lost in the pattern otherwise. Then I cut the butterfly out of the same paper as my teal/aqua mat.
 
I know it's a little hard to see, but I've added a tiny pearl to each antenna on the butterfly and to each flourish on my sentiment tag. I also inked lightly around all the outside edges of my patterned cardstock.
 
Here is the inside of my card. I've added a couple of tiny butterflies cut with a Fiskars punch. The red scalloped border that you see is actually part of the flower-patterned DSP. I thought it looked cute on the inside.
Now...what to do with my butterfly off-cut? Here's how I decided to make use of that, too.


This time, I created a solid background for my patterned butterfly. I've always loved a teal/red color combo, so I was really happy with this card - especially after I put that red flower (EK Success punch) near the sentiment.
 

I added flat-backed gems to the butterfly's body this time, and one to the center of my little red flower, too.
 
 
The inside of my card featured side borders of patterned and red cardstock and another little red flower. My inside sentiment was computer-generated.
 
Thanks so much for stopping by, and remember to laugh--a little or a lot--every day.
Cheryl


Sunday, March 15, 2015

Lucky me...

Where I live, St. Patrick's Day is celebrated with parades and parties, green beer and clogging in the Irish pubs and lots of merriment.  I don't usually send cards for the occasion, but this year, I thought I'd make one for my sister. Here it is:
As you can see in the photo, I also made a matching envelope with my Envelope Punch Board. I've discovered that the perfectly sized envelope for an A2 (5 1/2" X 4 1/4") card begins with an 8" X 8" piece of paper. The first score is made on the punch board at 3 1/2", and the next score is lined up with that one, and so on.

The sentiment banner on the front was cut with one of the dies from the Ribbon Banners-Straight die set by My Craft Spot. I added a wee bit of Washi tape and a green gem to the circular end of it.

My focal point Shamrock was made with some translucent green paper (I think it may have originally been packing paper) and a small heart die. I used a green ProMarker to draw in my stem and added a green gem to the center.

I happened to have some green Washi tape that coordinated nicely with my patterned paper, so I added a little strip of it to create a base for my  Shamrock.

The Shamrock (having only three leaves) is a national symbol of Ireland and is from the clover family of plants. The four-leafed clover is actually a rarity, but is considered to be "lucky" when found.


I ran my plain green mat through my Cuttlebug in my Swiss Dots embossing folder. My white scalloped mat was cut with a Lifestyle Crafts die.


The inside of my card was created with the same DSP and cardstock as the front. I added another little shamrock made with a small heart punch and a small flat-backed gem.

My sentiment is my own and was computer-generated.

I'm entering this card into the Dies R Us Challenge Blog's Challenge #22 - Shades of Green.

I hope you've enjoyed seeing my one and only St. Patrick's Day card. And I hope your St. Patrick's Day is full of merriment and good luck!

Thanks so much for stopping by, and remember to laugh--a little or a lot--every day.
Cheryl