Wish List

Tuesday, July 2, 2013

I love the Elegant Edges cartridge...

This is a thank you card that I made using the Elegant Edges cartridge. While this cartridge does not offer a card feature, I used an image under the "book" feature to create this card. I simply used two copies of the same image, flipped one of them and then welded them together on my Gypsy to make a 4.25" X 5.5" card. I used the same image in a smaller size to cut the patterned cardstock. The CS is some I had printed quite some time ago from a disc of paper designs.


The scalloped oval was cut with a Lifestyle Crafts die. After stamping the sentiment, I inked the edges with some blue ink. Then I threaded some crochet thread through the scallops and tied it in a tiny bow on one side.


I had some deep pink stitched ribbon in my stash. The stitching that ran through the center of the ribbon was the exact same color and thickness as my blue crochet thread, so I tied another little bow and adhered it to the ribbon. IRL, it looks like it is an extension of the stitched thread!


I saved the design for this card on my Gyspy so that I can cut it out again whenever I like. Love that!

Thanks so much for stopping by, and remember to laugh--a little or a lot--every day!
Cheryl

Saturday, June 29, 2013

It's still June, so I thought I should make a wedding card...

No, I don't have a wedding to go to, but I still felt like making a wedding card. I had purchased the Flourish Impressabilities template a few months ago. I immediately embossed a white piece of paper and while it was still in the template, I spritzed it with some Tattered Angels Glimmer Mist in the "Bubbles" color. As soon as I saw the result, a wedding card came to mind, but I set it aside to use later. Well, later is now, and here's the result:

 This is not a good picture (I took it at night) but I think you can see the pretty embossed design with just a hint of the light blue Glimmer Mist.


I cut the label using the "Tie the Knot" cartridge and added a border around it with Liquid Pearls.


I embellished the inside with a little of the same ribbon that I used on the outside.

This was a very simple card to make, but I think the embossing and misting really makes it look special.


Thanks so much for stopping by. Remember to laugh--a little or a lot--every day.
Cheryl

Thursday, June 27, 2013

Happy Birthday, Max!

Today my grandson Max celebrated his 8th birthday. He actually turned 8 last week, but the party was today. He has grown out of the cutesy cards and likes cards that aren't "for babies," as he puts it.

When I was deciding on what kind of card to make him this year, I knew it needed to be more masculine and more grown up. An image on the Father's Day cartridge gave me an idea, and this is what I came up with:
I don't think you can get much more masculine than a monster truck! The image on the cartridge doesn't have as many layers as you see here, but I just cut it out on different pieces of CS until I had what I needed. I thought it turned out pretty cool! I think the truck was cut at  about 3".

I honestly can't remember which cartridge I used for "Wish Big." It could have been Birthday Bash, but I may have even cut each word from a different cartridge. "Wish" was all one word that I layered on top of the letters for "BIG." I inked around the gray letters with some black ink.


I popped the truck up on foam tape to give it a little dimension. The banner was cut from some banner-patterned paper, which is such an easy way to add this embellishment! The "cracked" yellow paper came from the same pad as the banner--the paper stack is called "The Good Life" by Fancy Pants Designs. I love that stack and use it a lot.


The inside is pretty simple - another banner and a fun sentiment that I printed from my computer.

I sure hope Max had a Monster of a party. Hugs to you, Max, from Grammy and Papa! We can hardly believe you are EIGHT years old!!


Thanks for stopping by today. Leave a comment if you have the time. I love hearing from you, and remember to laugh--a little or a lot--every day!
Cheryl

Tuesday, June 25, 2013

Birthday Bash card...

 I used the Birthday Bash cartridge to make this fun birthday card. It was one that I sent to my daughter for her stash of cards. She has a "card drawer," and I love making cards for her to add to the drawer. With three children going to birthday parties, she goes through lots of birthday cards in a year.


I think I cut the kitten-in-a-cake image at 3 inches. I used "hide contours" on my Gypsy to remove the cuts on the face and stamped it, instead, with a Peachy Keen Cute and Cuddly stamp. I inked around the edges of the kitty, added some pink chalk to the cheeks and used a white gel pen on the eyes. Oh, yes, I used a ProMarker on the nose and mouth, too.


I also cut the sentiment from the Birthday Bash cartridge, too, and adhered it to a scalloped rectangle cut with a Lifestyle Crafts die.
 
If you look closely, you can see that I used some clear stickles on the sentiment.


The inside sentiment was also cut from the cartridge and embellished with some stickles. Easy peasy!


Thanks for stopping by, and remember to laugh--a little or a lot--every day!
Cheryl


Friday, June 21, 2013

Purple is one of my favorite colors...

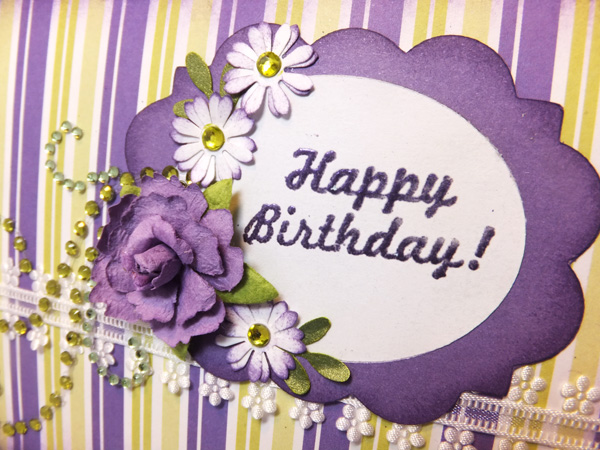
Here's a birthday card I made for my stash that has LOTS of purple in it.  It all started with the pretty Prima purple rose that I had. I simply found some paper to coordinated with it and went from there.

I added a Zva Creative rhinestone flourish in a pale green that I thought would give the card the requisite "bling." Love my bling!

I punched a few more daisy-type flowers using a Recollections punch, inked the edges of the petals and added a green gem to the centers. I also punched some additional leaves with an EK Success punch.


The lacy ribbon was some I had in my stash. It's actually a wired ribbon, but to make it easier to work with, I just pulled the wires out. I did save them, though--these thin wires make great butterfly antennae.

I cut the frame using the Elegant Edges cartridge and inked the edges of it, as well.

I heat embossed the sentiment with some purple embossing powder.


For the inside, I added a purple mat and another shape just like the one on the front. Do you think I should have inked that, as well?

I really love the Elegant Edges cartridge. It has so many interesting frames and shapes. I just got it recently, and I'll be using it a lot in the future!


Thanks for stopping by. I hope you have a FABULOUS weekend - the first truly Summer weekend of the year. Remember to laugh--a little or a lot--every day.
Cheryl

Wednesday, June 19, 2013

Caution! You're about to look at underwear...

I have a brother-in-law (my husband's sibling) who has a great sense of humor. He likes to tease me a lot, so when I get the chance, I tease him back. We have a good time, and it's always all in fun.

Since his birthday was yesterday--June 18--and I love to tease him about being older than me, I decided to make a card with a bit of humor in it.  Here's what I came up with:
My husband and I called him on his birthday and he said he loved his card.  He appreciated that I spent so much time thinking about it and then creating it, just for him.

Here's the inside with the punch line. I didn't make this up--I actually found it online somewhere a long time ago. When I read it, I laughed out loud. I knew I'd find a chance to use this in a card someday.

To make the boxers, I used a pair of boy's pants from the Everyday Paper Dolls cartridge. I used the "real" sizing for the image and cut them to about 3", I believe. I then cut off the legs to the appropriate length and did a little coloring and shading to make them look a little more realistic.

For the briefs, I actually used a pair of girl's pants from the same cartridge. I cut them off so that they had the shape of briefs. Then I took a gray alcohol marker to put in the lines. You should have seen me, using a pair of my husband's briefs as a model!

The faux brads are Card Candi that I colored with a ProMarker to match the blue in the boxers and the cardstock mats.

This card was so much fun to make, and I'm glad my B-I-L enjoyed the humor in it (I just knew he would).

Thanks for stopping by, and remember to laugh--a little or a lot--every day.
Cheryl

Monday, June 17, 2013

The simple life...

 
Today was a gorgeous day in Minnesota. My DH and I went for a bike ride tonight around a nearby lake, and it couldn't have been more pleasurable. Sometimes simple things--like bike rides on a beautiful day--are pure joy!
Doesn't the girl in this image look as though  she lives the simple life? I love her little apron and her straw hat.
This is one of those second-hand stamps I picked up at our local ArtScraps store--a great place where they sell donated crafting items of all ilks. It's so fun to browse through the shelves and imagine how you might use some funky rolls of paper, strange colors of ribbon or little plastic boxes.

Because this image reminded me of a little farm girl who lives a healthy, but simple, life, I decided to keep the card simple, as well, and use some paper with pretty earth tones in it. I also colored her in some of those same earth tones with a few of my ProMarkers.


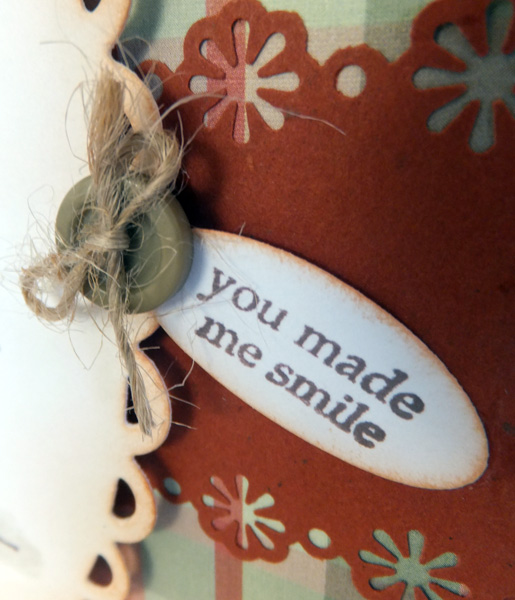
The scalloped oval is a Lifestyle Crafts die and the sentiment oval is a Spellbinders die. I inked around both of them with some Tea Dye distress ink and added a khaki brown button and a little natural twine for embellishment.

The border across the center of the card was created with a Martha Stewart border punch.


The inside was kept simple, too, using the same papers and a scalloped rectangle. The "Thanks a Bunch" stamp was another secondhand stamp I purchased for less than a dollar at ArtScraps.


I hope you've been able to enjoy some simple pleasures today. Thanks for stopping by, and remember to laugh--a little or a lot--every day.
Cheryl