Wish List

Wednesday, April 30, 2025

Graduation card inspired by Donna...

My crafty friend, Donna, shared a terrific graduation card in this post on her blog. I thought it was such a great design, and since I had the same embossing folder she used, I decided to make several of them to donate.

These are two of the four cards that I made. I didn't use quite as many layers as Donna did on hers, but I think they'll still be appreciated. 


The "Congratulations" was die-cut and glued directly to the white strip.


The mortarboards were also cut with dies. They are made up of three pieces. The tassle was cut from silver metallic cardstock and the button in the center was made with a silver Viva Decor pen.


I stamped an image of a diploma and a sentiment on the inside. 

I thought it was a little amusing that the sentiment did not have any capital letters or punctuation. You'd think it would for a graduation card, wouldn't you?

I don't think most graduates will notice, though. They'll be more interested in the gift that goes with it!

Our weather turned out to be a non-story for those of us that live in Minneapolis, but some of the communities south and west of us were hit hard with quite a bit of damage. Thankfully we'll have some nice weather in the coming days.

Thanks so much for stopping by, and remember to laugh--a little or a lot--every day.

Cheryl

Monday, April 28, 2025

Masculine cards in gold plaid...


This shirt die is always fun to use for masculine cards. The gold plaid DSP came from a 4" X 6" paper pad, and I thought it was perfect for man's shirt.


I did a little inking around the collar, the button placket, the pocket and the sleeves.

The buttons were created with Nuvo Drops.

I had the Happy Birthday already stamped and die-cut in my stash, so I just popped it up on foam tape.


I stamped a sentiment on the inside to finish the card.


I used another piece of the gold plaid DSP as a background on this card. Then, I die-cut a frame with lots of gears around the edge, along with a few extra gears.


Happy Birthday was stamped in the center of the frame, but I wish now that I had heat embossed it.


The inside sentiment was printed with my computer, and I added a few more gear die-cuts.

We are bracing for severe thunderstorms today. I just hope they don't do too much damage!

Thanks so much for stopping by, and remember to laugh--a little or a lot--every day.

Cheryl

Saturday, April 26, 2025

Wishing you a beautiful day...


I'm sneaking in with an extra post this week so that I can enter a card creation into Darnell's "E for Embossing" challenge week. I love embossing and don't usually add a lot of color to it, but for this card, I got out my chalks and added some Spring pizzaz.


After using my chalks on the flowers and greenery, I added a few pink gems for a little sparkle.

I also matted the embossed image with some pink cardstock and popped up my stamped and matted sentiment.


I also added a pink mat on the inside and stamped a birthday sentiment.

Now you should head over to DJKardKreations and check out all the other embossed entries.

Thanks so much for stopping by, and remember to laugh--a little or a lot--every day.

Cheryl


Friday, April 25, 2025

You are SEW loved...


This card was super fun to make. The die set (it includes all the special shapes you see) is a great one for feminine cards--especially for those who actually sew.

The thread is actual navy blue thread. The two halves of the scissors (cut from metallic cardstock) were joined together with a silver brad.

The buttons were made by first covering some navy blue cardstock with packing tape and then die-cutting them. This results in shiny buttons, which were glued to the button card. I think their shine causes my camera to blur them a bit. Sorry about that!

The only inking I added was around the edges of the button card before gluing it down.

The needle was cut from the same metallic cardstock as the scissors.

The computer-printed sentiment was popped up on foam tape.


I also used my computer to print the sentiment on the inside. 

Because I had an extra button and a strip of the DSP, I added them to the inside.

I had some car trouble today that was a bit concerning. Several warning lights came on in my dash while I was driving home from volunteering. The speedomoter needle also began acting erratically and the car hesitated when I tried to drive forward from a stop. I made it home (it's about a 10-mile drive), but I will be taking it into the repair shop as soon as possible. I'm glad we have a second car we can drive in the meantime.

Thanks so much for stopping by, and remember to laugh--a little or a lot--every day.

Cheryl


Wednesday, April 23, 2025

Happy birthday with kittens and dragonflies...


The last time I was at Dollar Tree, I picked up a package of dimensional kitten stickers. I thought they'd work well for some quick birthday cards for kids or cat lovers.

The design of these cards is very simple. For this one, I added an aqua oval with a design in its center (it was a punch-out from a sheet of different shapes). I added the layered kitten sticker and popped up the stamped "Meow!" "Birthday wishes" was also stamped and popped up with foam tape.


This photo shows the layers of the kitten a little better. 

I actually added the metallic cardstock bow on the top of her head. That's the nice thing about these stickers--you can add to them if you want to.


For this card, I decided to put a kitten sticker on a long, narrow tag. It's kind of a goofy looking kitten with that big heart on the head and the tiny body, but somebody will like it, I'm sure. Again the sentiments are both popped up with foam tape.


I added a panel on the inside of each card that was stamped with a sentiment and a few paw prints.


This is a bookbinder style card and the image was a free-to-use AI image that I found online. I thought it was so pretty, and I loved its colors.

I used a simple strip of purple cardstock with a die-cut bow in the center on the "binder" part of the card. I added a gem to the knot of the bow for a little dimension and sparkle.


You can see that gem a little clearer in this photo.

I printed the "Happy Birthday" with my computer and cut it out with a die. It has been popped up with foam tape and a small gem added to the right side.


This is the sentiment I created with my computer and printed for the inside.

This was a very quick card to make, and I liked it a lot. I actually made two of them to donate. I just wish I had saved the image so I could make more of them!

We had a beautiful spring day today, and I think my flowers grew three inches! I would have some blooming tulips were it not for some little critter who has been chewing them off. I don't think it is a bunny as we have pretty well bunny-proofed our fenced-in yard, but it could be a possum or a squirrel.

Thanks so much for stopping by, and remember to laugh--a little or a lot--every day.

Cheryl

Monday, April 21, 2025

It's baseball season...

We have a professional baseball team here in Minneapolis--the Minnesota twins. I've been to a few games, but I'm not really a huge baseball fan. I know lots of people in this area are, though, so I made a couple of baseball-themed birthday cards.

The hats, bats and balls were all cut with a set of dies I got a couple of years ago. 

I tried to do a little shading on the hats. Because this hat was navy blue, I used a white Prismacolor pencil and very lightly added some pencil lines and then smoothed them out a bit with some odorless mineral spirits. It looks better IRL.

To add some shading on the red hat, I used a brown Prismacolor pencil and mineral spirits. For the balls, I used a finger dauber and a tiny bit of brown ink around the edge.


The bat and the ball were glued directly to the card front and the hat and the sentiment label were popped up with foam tape.

I think there are some boys out there who would love these cards, don't you?


We had a lovely Easter. I hope you did, too! My daughter and her husband were out of town, but our three granddaughters came over for brunch and my brother also stopped in to visit. Later in the day, it started to rain, which was very welcome. Our trees and plants need it! 

Thanks so much for stopping by, and remember to laugh--a little or a lot--every day.

Cheryl


Friday, April 18, 2025

A final Easter card...


I had so much fun making this card and another one just like it. They are the only two cards I made with this fold, but I will definitely be making more for other occasions.

I started with a piece of cardstock that was 5 1/2" X 11 3/4". I scored it on the long side at  1 5/8" and 3 3/4" from each end. The ends were folded back at the first score and towards the center at the second score.

I cut panels of DSP to fit the areas created by the folds:

Blue floral: 2 @ 1 3/8" X 5 1/4"

Green polka dot: 4 @ 1 7/8" X 5 1/4"

White CS: 1 @ 4" X 5 1/4"

Finally, I cut a scalloped rectangle (it can be any size or shape you want as long as it is smaller than 4 1/4" X 5 1/2"), stamped it with a sentiment and added a translucent flower sticker that was highlighted with a little gold embossing. I put glue under the left side of it and then centered it on the card front.


When the card is fully opened, this is what you see. 


Here's a view from the top where you can clearly see how it is folded to be an A2 size card.

If the cardstock you use for the base is heavy and doesn't fold sharply, you could use a decorative belly band, instead of the scalloped rectangle, to hold it closed. I prefer to use a lighter weight cardstock for fun folds like this.

I hope you have a wonderful Easter, filled with warmth (inside and out) and unending joy.

Thanks so much for stopping by, and remember to laugh--a little or a lot--every day.

Cheryl


Wednesday, April 16, 2025

Two sympathy cards using scraps...


After making numerous Easter cards from different pieces of DSP in shades of lilac, I pulled out some of the scraps I had saved and put them on a card front.


I also had a small scrap of some deep purple cardstock. I die-cut a flower image to use as the focal point on my card. I popped up the blossoms with foam dots, but glued the stem and leaves directly to the card front.

I embellished it with a sheer ribbon bow and added a stamped sentiment, which was also popped up with foam strips.


I added a panel on the inside with a stamped sentiment and one flower bud with a couple of leaves from another die.


I know, I know...more purple and lilac. But at least there's some yellow on this one!

I had two narrow pieces of the yellow striped paper, so I cut them the right length and then glued them down on each side of my card front. The scrap of purple DSP was just wide enough to overlap the yellow a tiny bit on each side, so I matted it with lavendar cardstock and popped it up with foam tape.


The sentiment was stamped, die-cut and glued to the popped up panel. I did add a small piece of foam tape under the end that overhangs the panel.

I added three enamel dots to the upper right and lower left corners for some additional embellishment.


This card has a simple sentiment stamped on the inside panel.

It was very satisfying to use up these scraps...until I turned around and looked at the mountain of scraps that is still left!

Thanks so much for stopping by, and remember to laugh--a little or a lot--every day.

Cheryl

Monday, April 14, 2025

Graphic masculine card + two Easter cards...


I have a stack of perfectly cut 1" squares in four different colors in my stash. They had been donated to the thrift store, and they, in turn, gave them to me. I've had them quite a while because I was unsure how to use them. I finally decided to give this graphic design a try. 


I started with a 4 1/2" X 6" card base. I wanted it to be a little larger than an A2 so I could fit more squares on it.

I cut out the black mat and then figured out the placement of my squares before gluing them down. Once they were all in place, I cut off any portions that extended beyond the edge of the mat before adding it to my card base.

The sentiment was stamped, cut into a banner and popped up on foam tape.


I stamped a sentiment on the inside to finish the card.

I considered whether or not to add any other embellishments, but decided against it. I think men will appreciate the bright colors, their contrast to the black, and the simple design.


I made this simple bunny card with scraps (except for the card base). It's a top-fold card, and I cut off half the front. Then I added the die-cut rectangle with its stamped sentiment and die-cut bunny.


I didn't have a white enamel dot to use for the bunny's tail, so I thought, "Why not a turquoise one to match the card base?" I also blended a little ink behind the bunny to better highlight it.


For the inside, I die-cut another rectangle with a computer-generated sentiment on it and positioned it to line up exactly with the rectangle on the front.


I made several cards like this one for my grandsons. They're simple, and I think they have a masculine look to them. 


I really love this little bunny and his stool. I used a colored pencil to give him a little pink in his ears and on his cheek.

The sentiment and two of the eggs were popped up with foam dots.


I printed sentiments with my computer to put on the inside of each card.

*****

We are finally seeing tiny leaves on some of the trees and bushes here in central Minnesota. Seeing them just makes me happy!

Thanks so much for stopping by, and remember to laugh--a little or a lot--every day.

Cheryl

Friday, April 11, 2025

A blooper and some Easter cards using leftover bits...


This is my blooper card. I had fully intended for the DSP to be on the left side of the card front and the feather to be positioned downward. I adhered the black mat to my card base, and without checking how my card was placed on my work bench, I quickly glued on the DSP and the feather. When I picked the card up and really looked at it, I realized the opening had been facing left. Arrrrrgh! 

Rather than tossing it and starting over, I decided to just go with it. I heat embossed the sentiment, making SURE that my card opened on the right when I did it. 

I decided to share this card over on the NBUS blog. Darnell has invited all of us to share our "blooper" cards there in honor of April Fool's Day. Also, the feather I used on this card is actually NBUS (Never Before Used Schtuff). A couple of feathers like this were given to me, and this is the first time I used one of them.


I stamped a sentiment on the inside and called it done.

This card was donated to the thrift store, so we'll see if it sells.


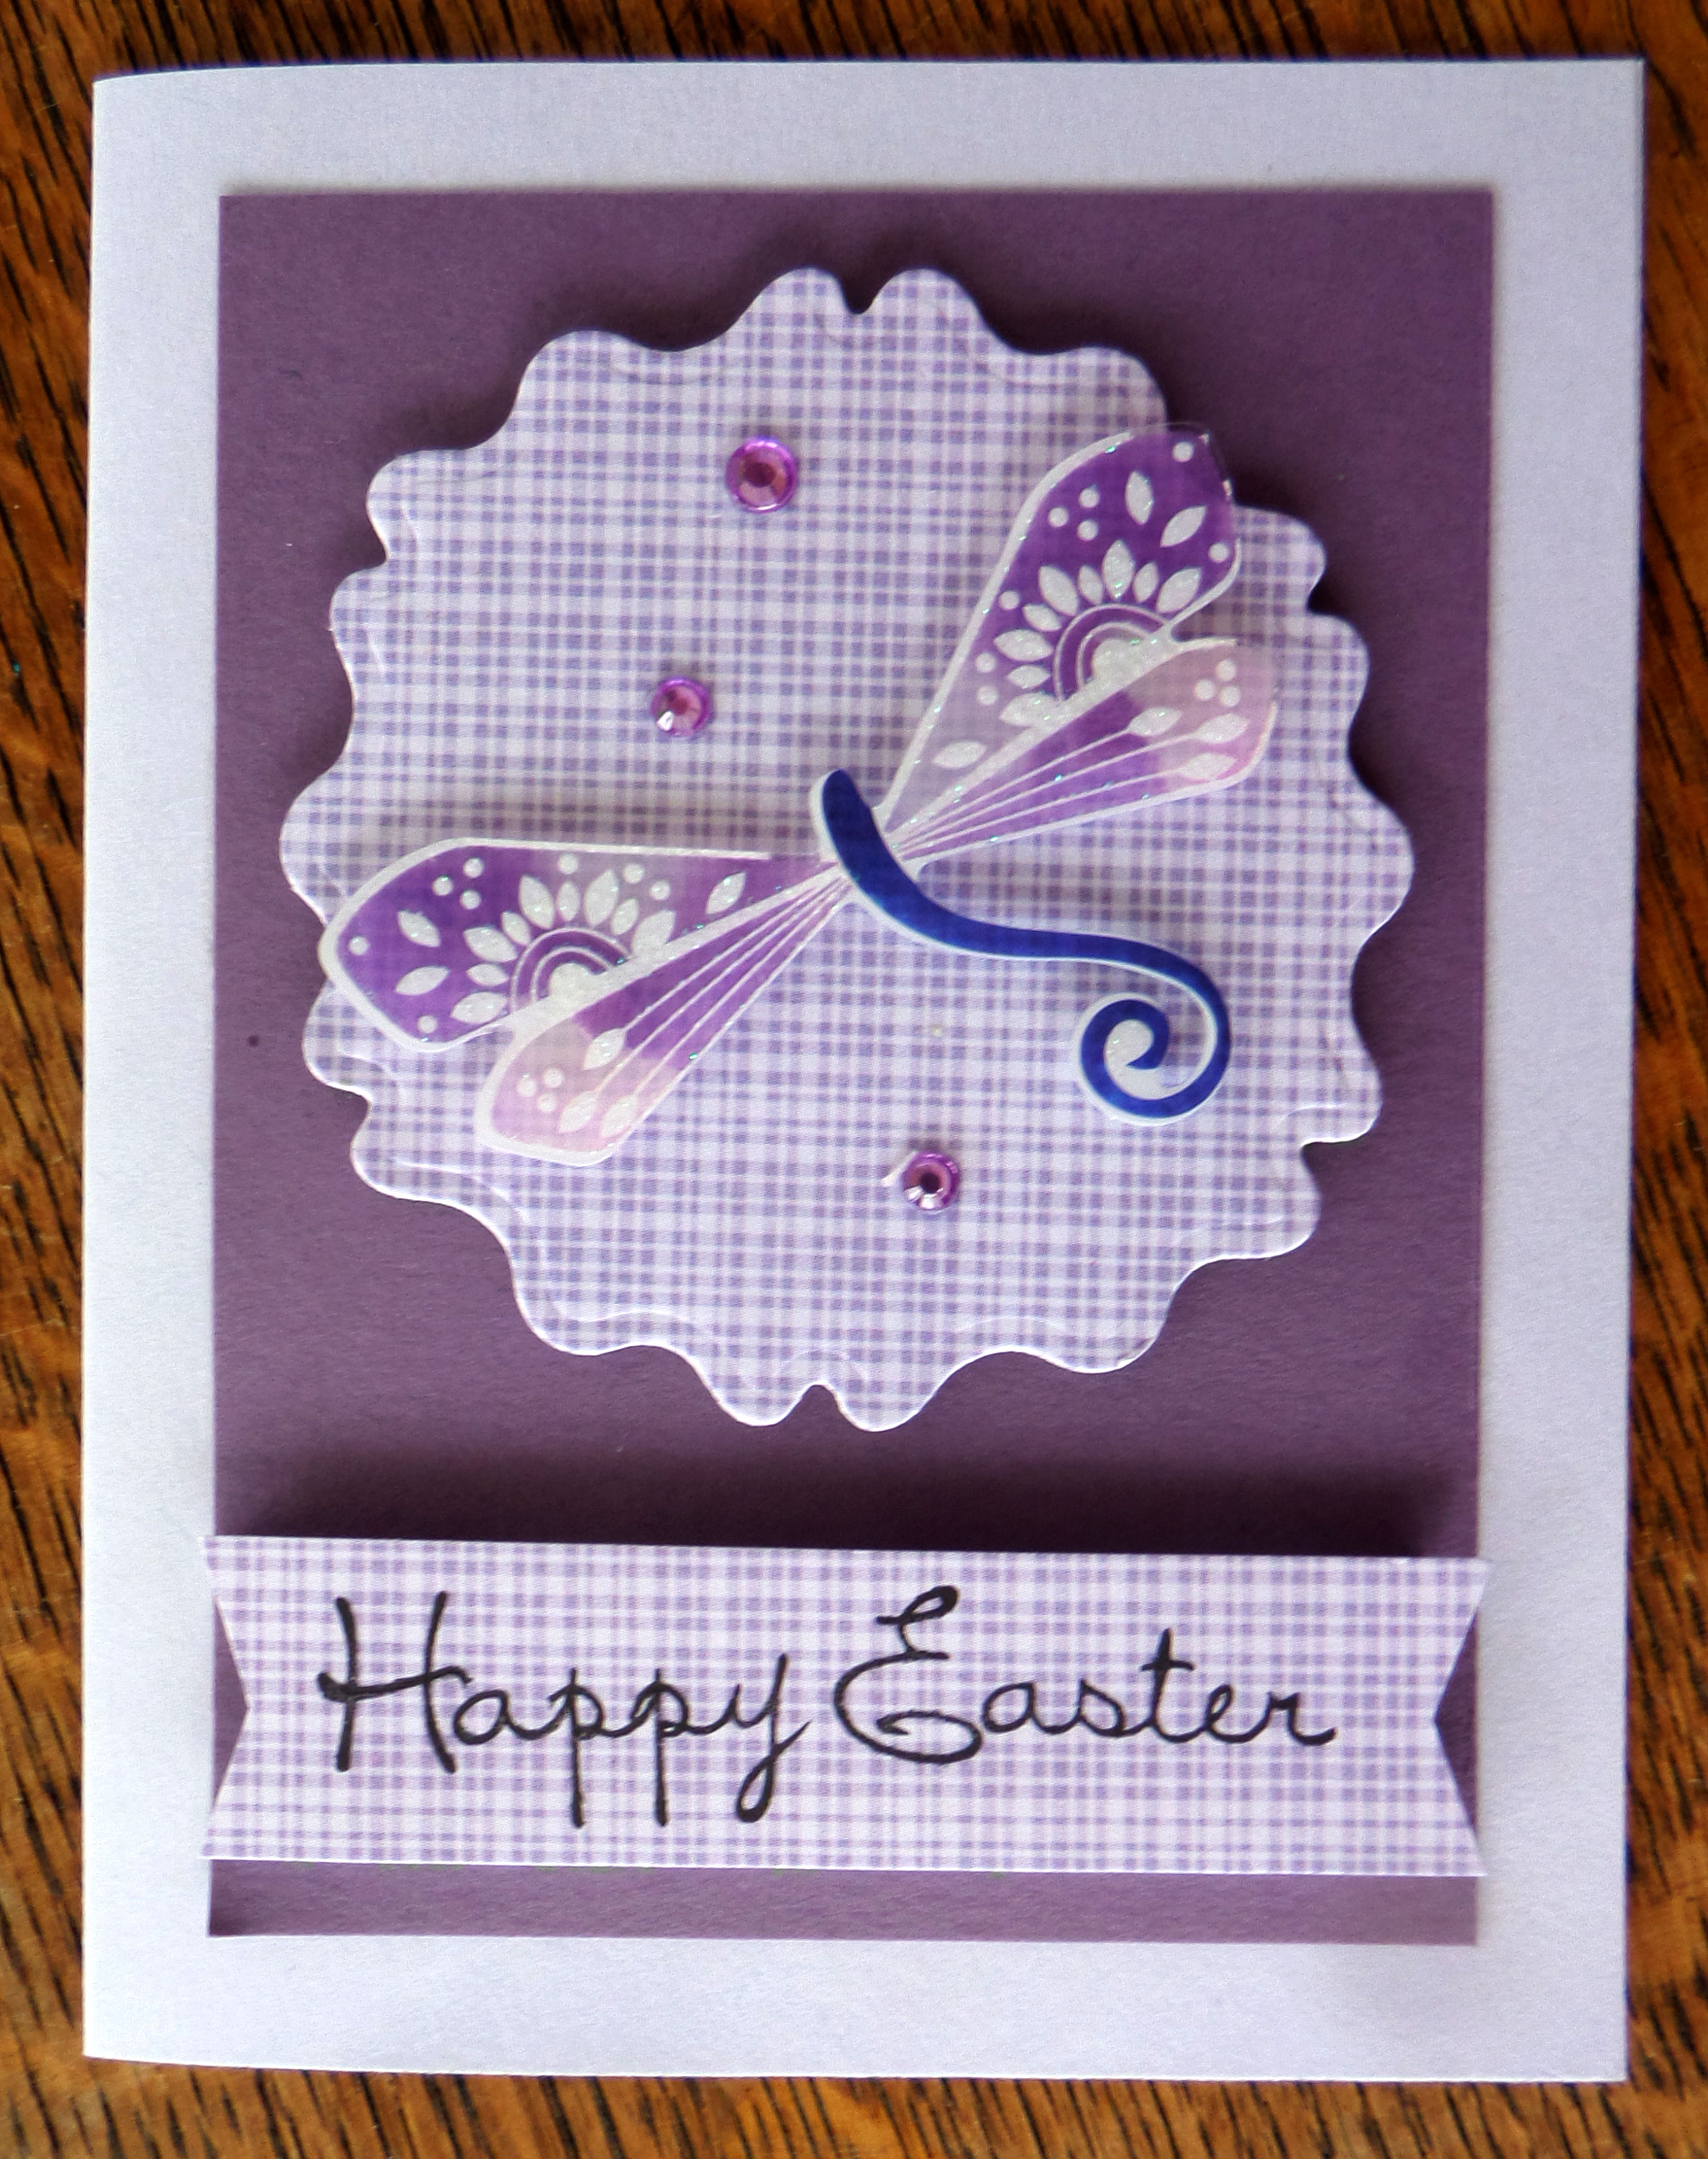
I had made several Easter cards using this nice lavendar plaid DSP. I cut a fancy aperture out of each of them which was not used to finish the card. I decided to use them to make even more Easter cards, and this is one of them.

Happy Easter was stamped with a very old wooden stamp. The banner was popped up with foam tape.


The dragonfly is a pretty sticker from Dollar Tree. It has a couple of different layers, giving it some nice dimension. It is popped up on foam squares (under the wings), as is the plaid die-cut.

A few lavendar gems added some sparkle.


I added a leftover strip of the lavendar plaid to the inside, along with a stamped sentiment.


For this card, I did a bit of inking around the circular die-cut, then added a die-cut bunny and some foliage. I popped up the plaid circle, but glued the sentiment banner directly to the card front.


I used Nuvo drops for the bunny's nose and eyes and a colored pencil to add a little pink to his ears.

The green flower was a random sticker in my stash.


On the inside of this card, I added two stamped sentiments and a tiny plaid bunny.


For this card, I cut a piece of DSP that was 4" X 4" and cut it in half diagonally. Then I applied each half to my card front as you see in the photo above. Once that was done, I added a strip of plain purple cardstock so that it slightly overlapped each triangle.


The butterfly on this one is a really old fabric butterfly that I've had in my stash for years. I ran across a couple packs of them when I was looking for something else. I definitely need to use them up!

The sentiment was glued directly onto the polka-dot circle and a few gems were added.


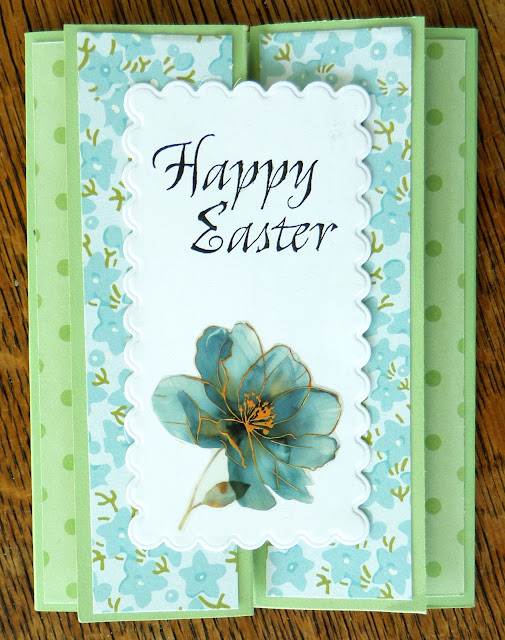
I had an extra computer-generated sentiment panel in my Easter stash, so I used it in this card.

It felt really good to use up these extra die-cut pieces. Now if I could only make a dent in the mountainous pile of bits leftover from making other cards!

Thanks so much for stopping by, and remember to laugh--a little or a lot--every day.

Cheryl